
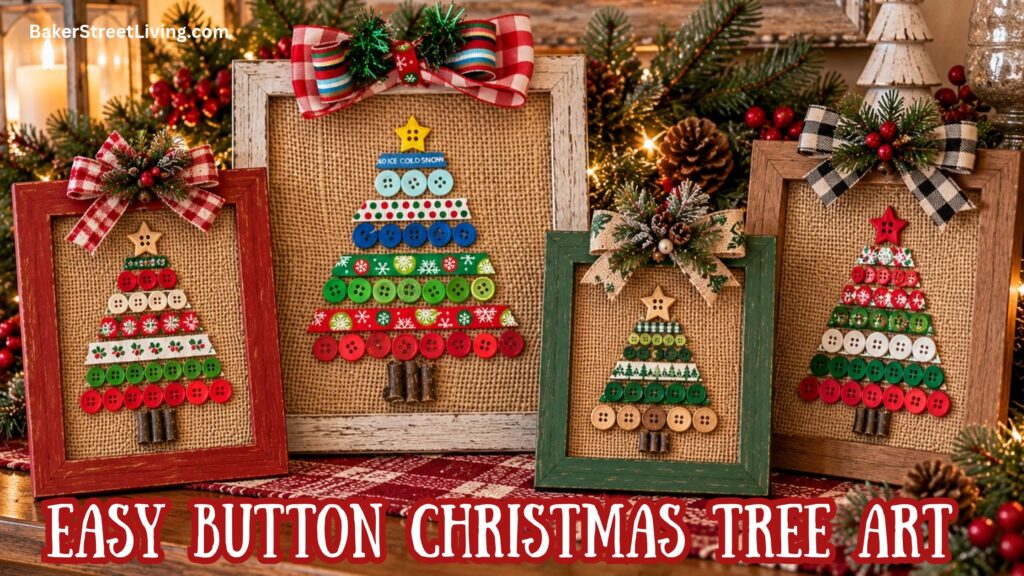
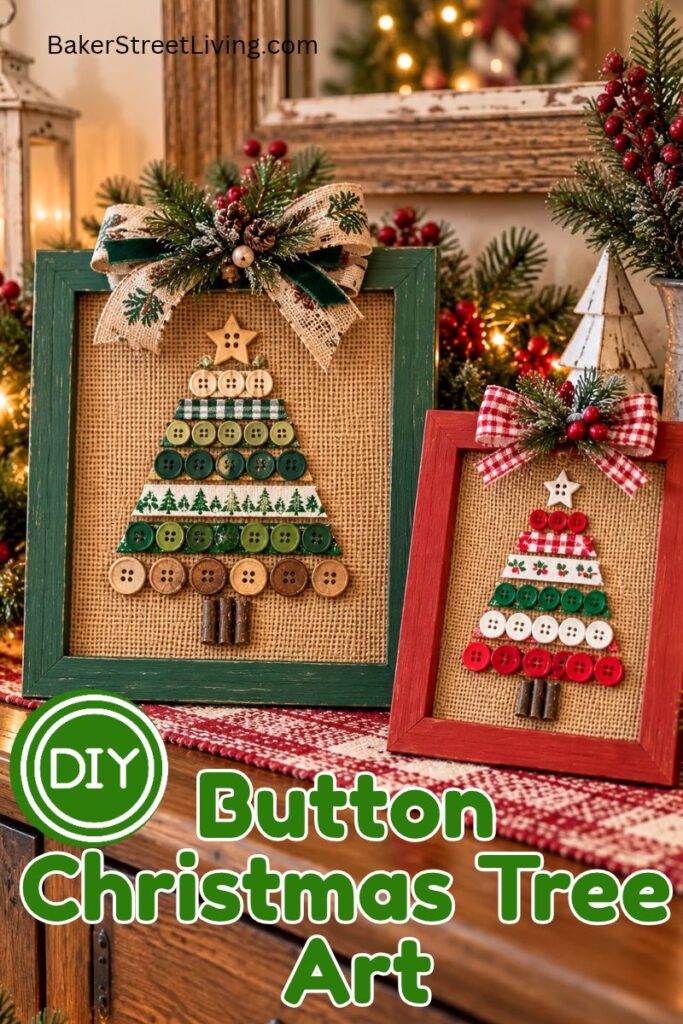
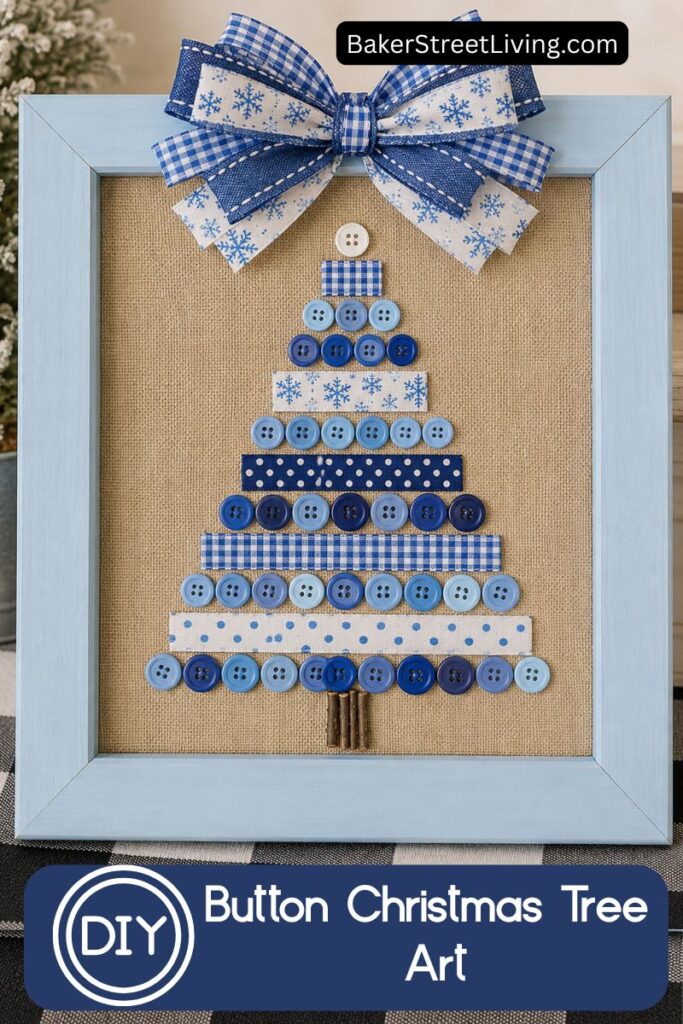
If you’re looking for a creative way to transform a collection of old buttons into festive holiday décor, this DIY Button Christmas Tree Art project is the perfect craft. Using a recycled wood frame, a rustic burlap background, and buttons arranged in the shape of a Christmas tree, you can create a charming handmade decoration that adds warmth and personality to your home. This easy upcycling project blends vintage-inspired style with budget-friendly materials, making it a great choice for holiday crafting, gift-giving, or decorating your mantel for Christmas.

Why You’ll Love this Project
This project combines three materials that complement each other beautifully:
- Recycled wood frame: adds warmth, texture, and a rustic holiday feel.
- Burlap: provides a natural woven background that contrasts with the smooth buttons.
- Buttons: create colour, shine, and dimension. When grouped, they are almost like pixels in a mosaic, forming the silhouette of a Christmas tree.
- This is a great way to use up short pieces of ribbon.
The result is a handmade decoration that feels both vintage and festive.
Supplies List
This website contains affiliate links. As an Amazon affiliate, I earn a small commission from qualifying purchases (at no cost to you).
- Recycled wood frame (any size; the larger the frame, the more buttons you will need)
- Burlap fabric (large enough to cover the frame backing)
- Buttons in shades (greens, reds, whites, metallics, or any palette you like)
- Hot glue gun
- Spray Adhesive
- Scissors
- Chalk for sketching the tree outline (optional)
- Christmas Ribbon or Washi tape
- Larger Christmas Ribbon (for frame accent -Optional)
- Small twig
How to make Button Christmas Tree Art Step-by-Step
1. Prepare the Frame
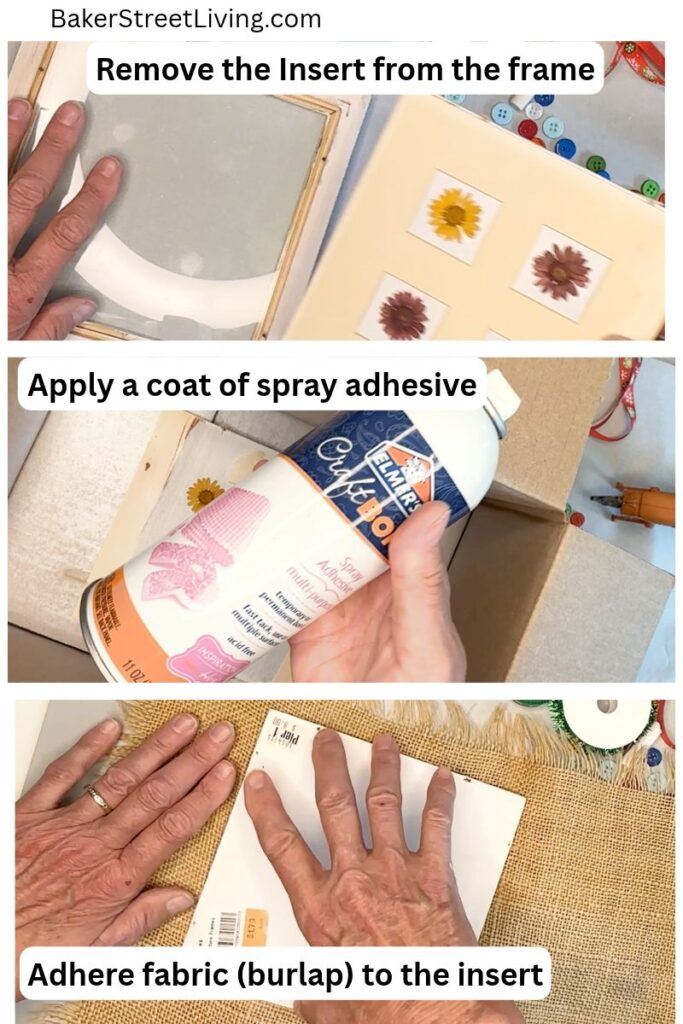
Remove the backing and any existing artwork from the recycled frame. Clean the frame if needed.
If the frame has a distressed or weathered finish, embrace it. If you’d rather, give it a coat of paint in whatever colour you wish. I recommend coordinating the frame colour with the button colour.
2. Add the Burlap Background
Cut the burlap slightly larger than the frame backing.
Apply a coat of spray adhesive to the surface of the frame backer board.
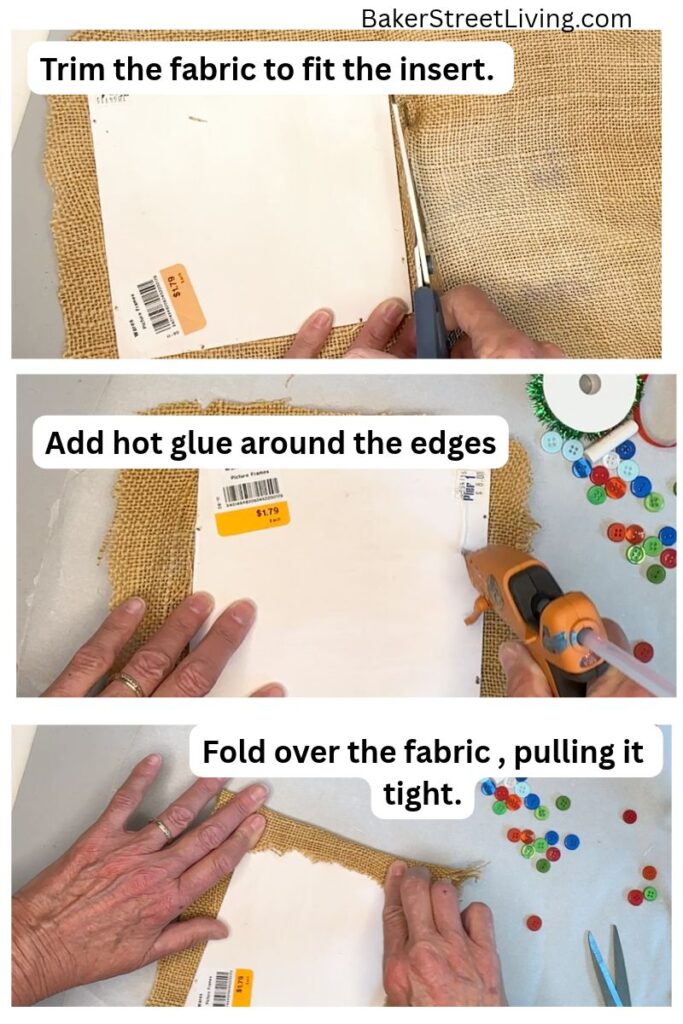
Place the burlap on the surface, pulling it taut. Fold over the edges and glue them to the back.
Think of burlap as the “canvas” for your artwork. Its coarse weave catches light differently than paper, giving the finished piece extra depth.
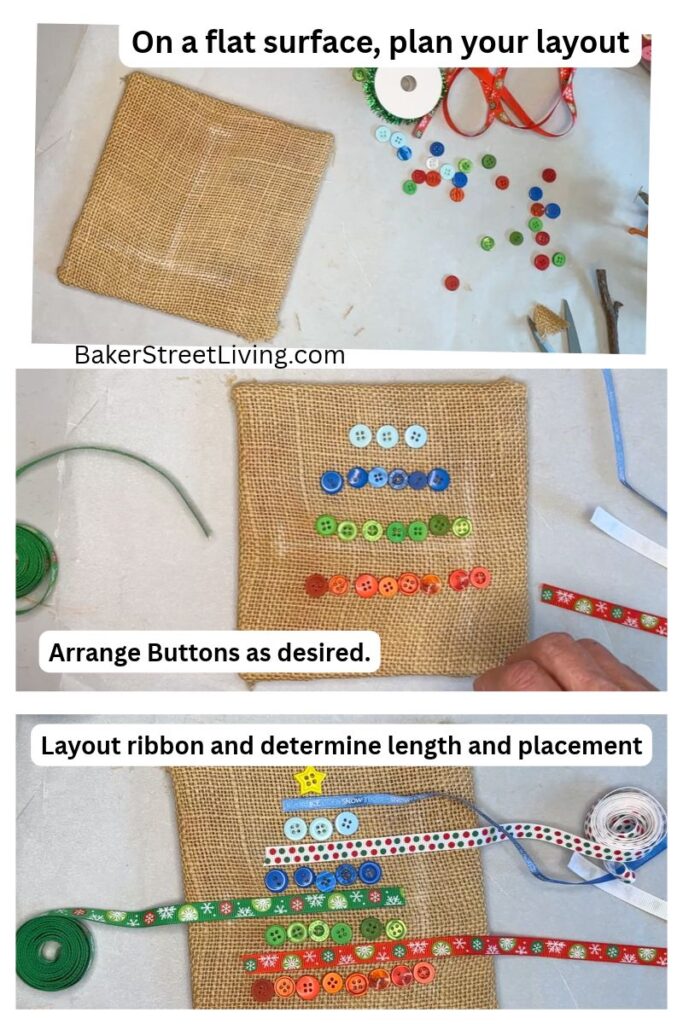
3. Plan the layout Optional)
If you want to ensure a symmetrical tree. layout the design in the center of the burlap using the ribbon and buttons. You can also sketch it lightly with chalk if desired. Remove the chalk with a damp cloth afterward.
A simple guide:
- Start with a narrow point at the top.
- Widen the triangle gradually toward the bottom.
- Leave a small space underneath for a trunk if desired.
The outline does not need to be perfect. The buttons will soften the edges.
This stage is like solving a puzzle: you’re finding the most pleasing balance of colour, size, and spacing.
4. Trim the ribbon and make adjustments
Trim the ribbon to your desired length.
Cutting the ends of the ribbon on an angle helps create the tree shape.
Pro Tip – Take a photo on your phone for a quick reference while gluing.
5. Start Gluing
Working from either the top down or the bottom up, glue the buttons in place.
Add a small amount of hot glue to the back side of the button and press it in place on the burlap.
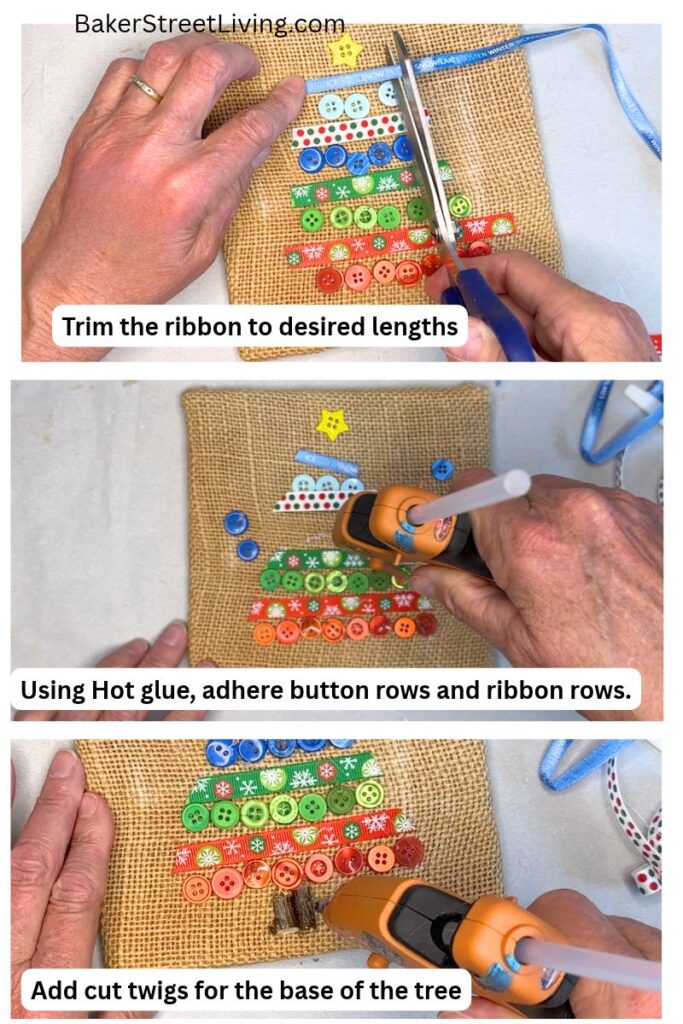
Repeat adding buttons to complete a row.
Leave a 1/2 inch space and add a piece of ribbon a little shorter (or longer) than the row of buttons. For smooth results when gluing ribbon, place it in a cardboard box, upside down, add a thin layer of spray adhesive and then press it in place on the burlap. This results in a nice smooth ribbon with no curled edges.
Add the next row of buttons, leaving 1/2 inch space between the buttons and the ribbon.
Note: There are no rules about layout. Feel free to add two rows of buttons and then ribbon, or even three rows of buttons. Get creative!
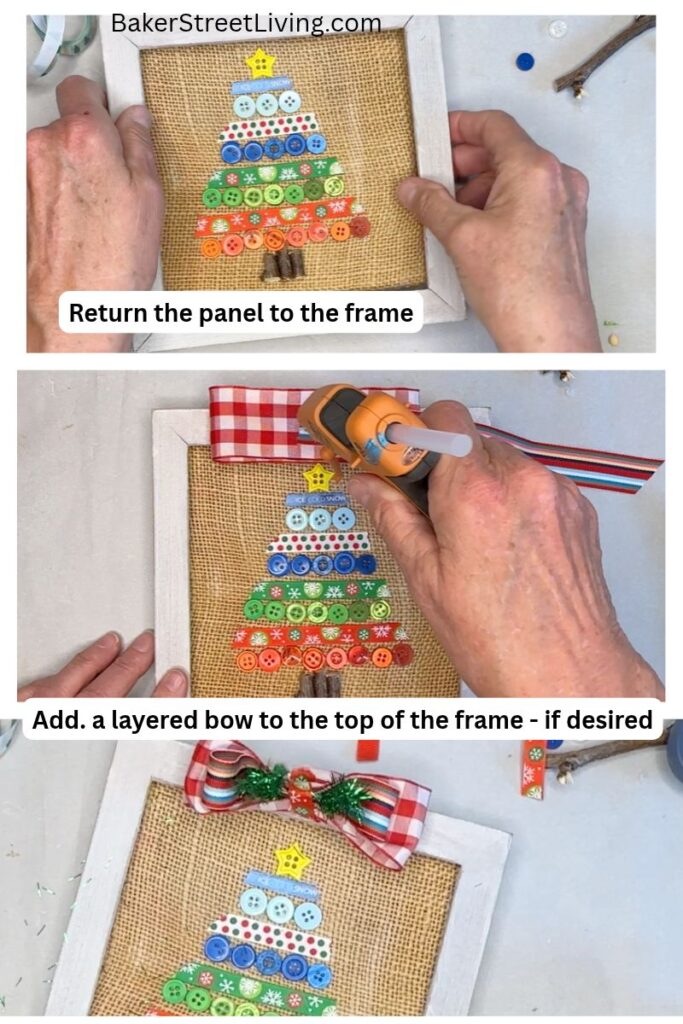
6. Add Tree Base
Cut a small twig into short pieces. Up to 4 pieces will work, depending on the thickness of the twig.
Adhere them side by side as the base of the tree,
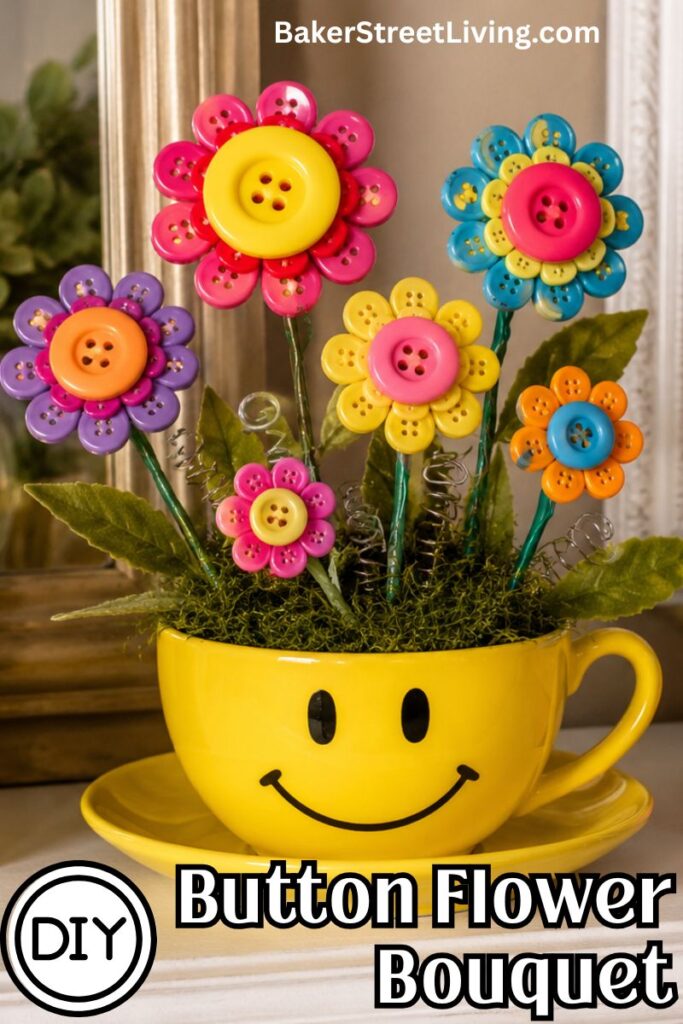
7. Create Accent Bow (Optional)
Using coordinating ribbon, create a layered bow as an accent for the frame. Attach it to the top of the frame, centred or on a corner.
Display and enjoy!

FAQs and Helpful Tips
Alternatives to burlap.
Feel free to substitute burlap for a fabric of your choice. Felt is also a good option.
Non-fabric options include cardstock, wrapping paper, vellum, or 2mm craft foam sheets.
For substitutions that are slightly thicker, check to make sure it fits inside the assembled frame before beginning the project.
Displaying Your Finished Button Christmas Tree Art
This craft works well:
- On a mantel
- Multiples on a gallery wall
- As a holiday centrepiece backdrop on a sideboard
- As a handmade gift
- As part of a rustic Christmas decor collection
This DIY button Christmas tree art project is a wonderful example of turning everyday materials into something festive and personal. The recycled wood frame provides history, the burlap adds texture, and the buttons create a colourful mosaic that catches the eye from across the room.
Best of all, no two trees will ever look the same. Each arrangement of buttons becomes a unique holiday keepsake that can be displayed year after year.
Alternatives for Ribbon
As I previously mentioned, washi tape is an amazing alternative. It is the perfect size and easy to use. Other options include felt strips, cardstock strips, lace, bias tape, or fabric trim.
This DIY button Christmas tree art project is a wonderful example of turning everyday materials into something festive and personal. The recycled wood frame provides history, the burlap adds texture, and the buttons create a colourful mosaic that catches the eye from across the room.
Best of all, no two trees will ever look the same. Each arrangement of buttons becomes a unique holiday keepsake that can be displayed year after year.

This website contains affiliate links. As an Amazon affiliate, I earn a small commission from qualifying purchases (at no cost to you).
