

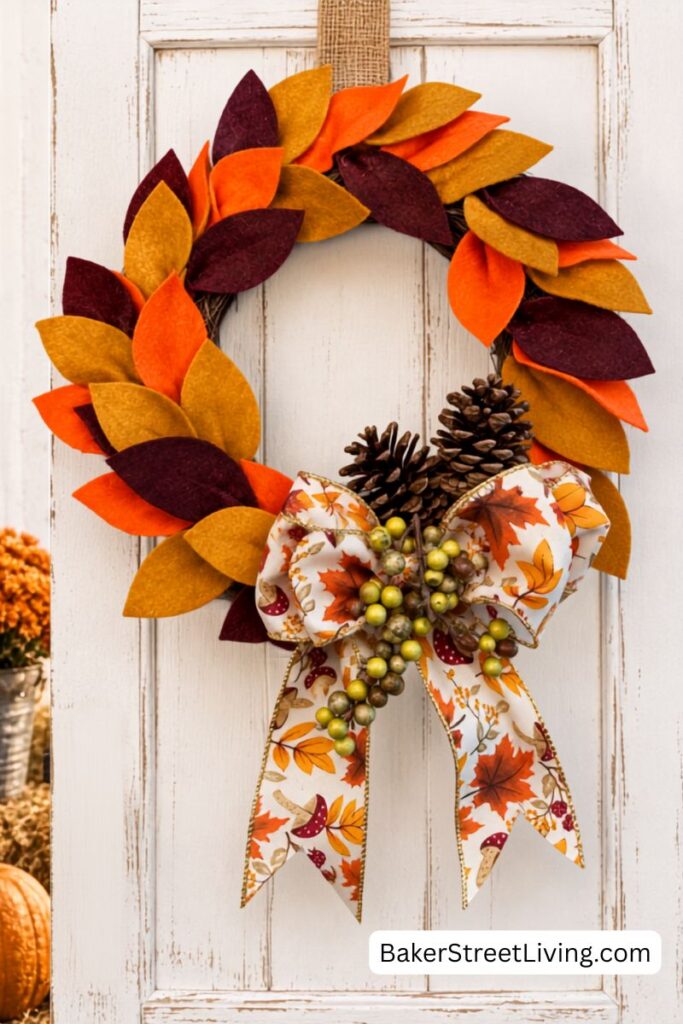
If you’re looking for an inexpensive way to decorate your home for fall, this DIY fall wreath is a great solution. Instead of purchasing an expensive seasonal wreath, you can reuse an old or dollar-store wreath form and give it a completely new look with inexpensive felt. The warm colours of fall will come into your home with this easy felt DIY fall wreath. For this wreath, I used a dollar-store wreath that has been stripped and reused, with craft felt in shades of orange and brown, cut into pointed oval shapes, and gathered at one end to create beautiful, textured leaves and a few embellishments.
There is no sewing required! The felt pieces are cut, pinched, and glued onto a wreath form. You can make the wreath as full or as simple as you like, making it an inexpensive fall decoration for your front door, wall, mantel, or table.
Supplies List
Although I purchased my wreath base at my local Dollar Tree, there are many available elsewhere, including the links below.
This website contains affiliate links. As an Amazon affiliate, I earn a small commission from qualifying purchases (at no cost to you).
- Wreath form – foam, straw, grapevine, or another suitable form
- Felt in several shades of fall colours (oranges, reds, browns and greens)
- Hot glue gun with glue sticks
- Sharp fabric scissors (or cutting machine)
- Cardstock for leaf stencil
- Ribbon (optional)
How to Make a No-Sew DIY Fall Wreath with Felt
Step 1: Prepare Your Wreath Form
Start with the wreath form you want to use. A simple foam wreath works especially well because the felt can be glued directly onto the surface. Whatever you use, make sure that it is compatible with hot glue. Some porous styrofoams melt when using hot glue.
Step 2: Make a Felt Leaf Template (non-cutting machine users)
Draw a simple pointed leaf for use as a template from cardstock or paper.
The shape should look somewhat like an elongated leaf, with a point at one end.
A leaf approximately 2–3 inches long works well, but you can make yours larger or smaller depending on the size of your wreath.
Place a cutting mat under the cardstock.
Using an exacto knife or utility blade, cut the leaf pattern out of the cardstock.
This is the pattern we will be using to cut out multiple leaves.
Step 3: Cut the Felt Pieces
Scissor Users
Place your template onto the felt and trace around it. Tailor’s chalk or soft craft chalk works great on felt, and when you are done, the chalk can easily be removed with a damp cloth.
Keep repeating until you have enough leaves to cover your wreath.
You can always cut more as needed. It is good to have several leaves cut before you start, so you don’t have to stop as often to cut more leaves.
Don’t worry about making every piece perfect. Small variations in shape and size will add texture to the finished wreath.
Cutting Machine Users
Choose a leaf pattern from the available patterns and load it onto your canvas.
Place your felt on a standard grip mat.
For cutting, I chose “Fleece” and used the ” Rotary Tool” with more pressure. There are other options, and I’ve seen other crafters using the fine point blade with success. I have found through my own experience with many craft projects that the fleece and rotary cutting works best. If your cutting machine is not compatible with a rotary blade, use your product’s best options.
To eliminate the fibres on your mat, you can place a piece of MacTac on the back of the felt before adhering it to the mat. This is a great option, but you will have to peel each leaf after cutting.
Once the leaves are cut, trim off anly lose fibers.
Step 4: Pinch the Leaves
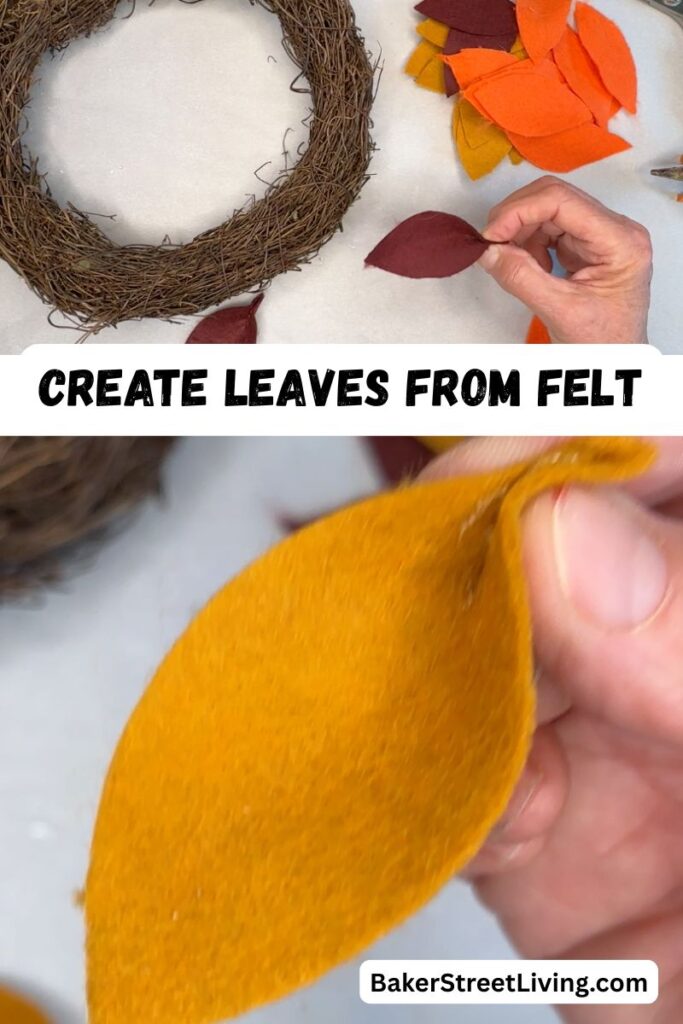
On each leaf, pinch an end together between your fingers.
This creates a little fold and gives the flat piece of felt a more dimensional, leaf-like appearance.
Apply a small amount of hot glue to the pinched section.
Hold it together for a few seconds until the glue sets.
You should now have a slightly cupped or folded felt leaf.
Do this for every leaf.
Step 5: Start Gluing the Felt Leaves to the Wreath
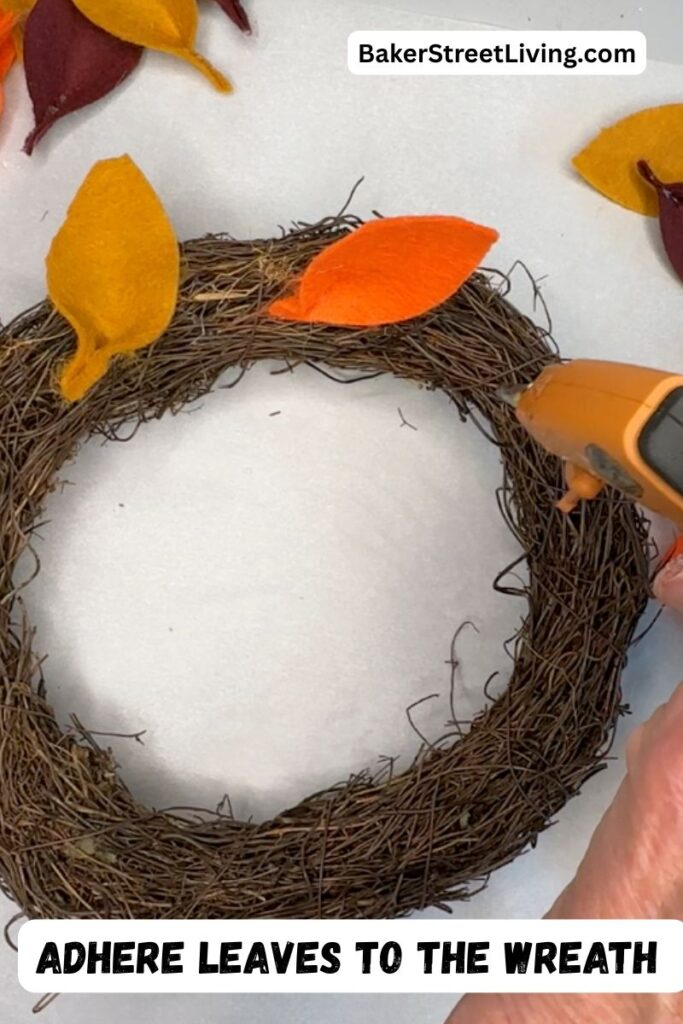
Begin attaching the felt leaves to your wreath form.
Place a small amount of hot glue on the back of the pinched end of the felt piece and press it onto the wreath.
Continue adding leaves around the wreath.
Step 6: Layer the Colours
As you work around the wreath, alternate the felt colours to give a natural leaf pile look.
For example, you could place several rust-coloured leaves beside pumpkin orange, followed by a few brown leaves.
Avoid creating a strict pattern. Randomly mixing the colours will give your wreath a more natural autumn appearance.
Step 7: Fill in Any Gaps
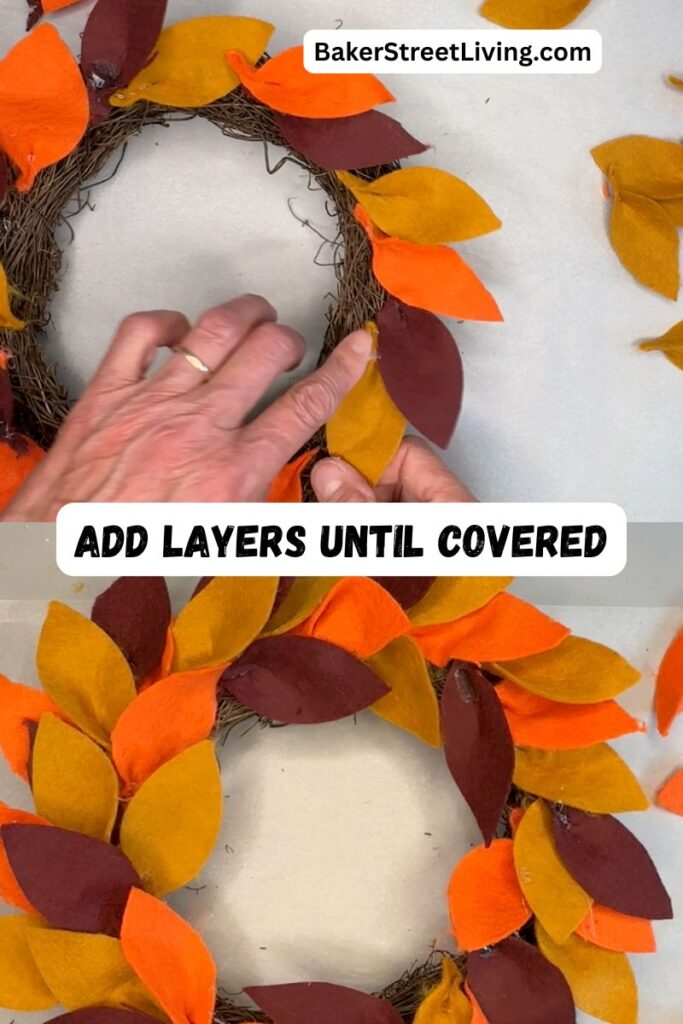
Once you have completed the first layer, look closely at the wreath for any bare spots.
Add more felt leaves wherever you see gaps.
You can also layer some pieces over others to create additional fullness and texture.
Continue until you are happy with the overall appearance.
Step 8: Add Embellishments
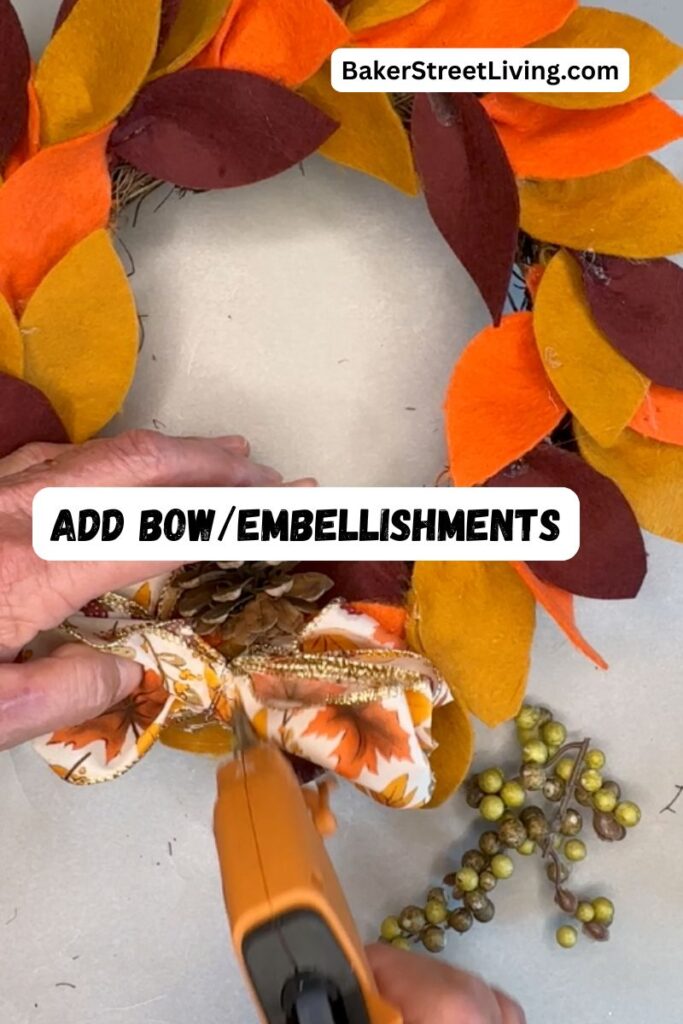
Attach a decorative ribbon, acorns, pinecones or whatever fall embellishments you’d like.
Allow the glue to cool completely before hanging the wreath.
Add a wire or twine for hanging if needed.

Tips and FAQs
How do I use an old wreath for this project?
This is one of the best things about this project. An old wreath that no longer fits your decorating style can be stripped down and reused as the base for your new fall wreath. Even an inexpensive dollar store wreath that needs enhancing works amazingly well.
What type of felt should I use?
Regular “soft” craft felt works well and is inexpensive. Choose several fall colours such as orange, mustard yellow, rust, burgundy, brown, and deep red to create plenty of contrast. The felt needs to be very bendable. The soft felt works the best. I have used stiff felt before, but it is much more difficult to maintain the bent leaf shape.
Do I have to make the leaves all the same size?
No. In fact, using slightly different sizes and shapes can make the wreath look more natural. You can even cut some leaves a little narrower or wider to add variety. Cutting leaves that are oak tree shaped or maple leaves looks great as well, but will require much more cutting.
Can I use something other than felt for the leaves?
Yes. Fabric scraps, faux leather, suede, faux leaves, cardstock, or wool can be used. Felt is especially easy because it doesn’t fray and is simple to cut.
Ways to Customize Your Fall Wreath
Once you have the basic technique down, there are lots of ways to personalize your wreath.
Try adding:
- A large burlap bow
- Plaid ribbon
- A wooden fall sign
- Small faux pumpkins
- Acorns
- Artificial berries
- Pinecones
- Faux fall leaves
- A small wooden “Welcome” sign
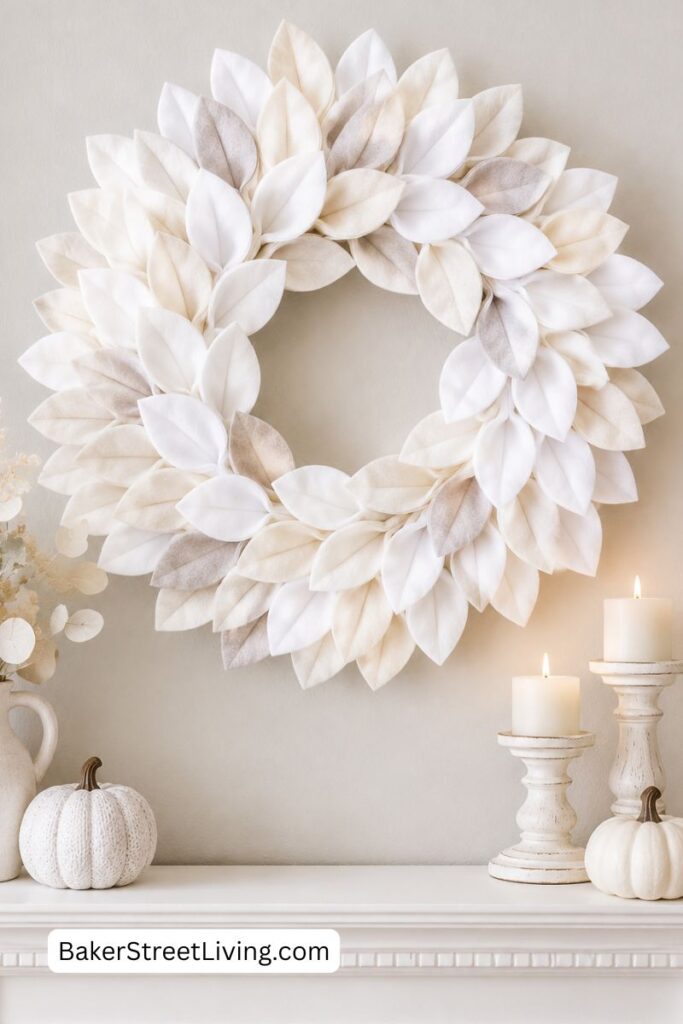
You can also change the colour palette. For a more modern look, try cream, tan, rust, and dark brown. For a brighter autumn wreath, combine orange, mustard yellow, burgundy, and brown. Check out this pretty DIY Fall Wreath made in shades of white!
Display Udeas
This DIY fall wreath looks amazing used in non-traditional ways.
You can also use it as:
- A frame for a wall clock
- A mantel decoration
- A dining room centerpiece
- A bedroom decoration
- A bookcase accent leaning up against some vintage books.
- A seasonal office decoration
For a table centrepiece, place the wreath flat on the table and add a candle, lantern, or small pumpkin in the centre.



Is this a good craft for beginners?
Yes! This is a simple, beginner-friendly project that doesn’t require advanced crafting skills. The leaves don’t have to be perfect, and you can adjust the placement as you go until you like the way the wreath looks. Supervise young crafters when using hot glue.
If you’re looking for an easy DIY fall wreath, this felt leaf wreath is a fun project to add to your autumn decorating. The combination of different shades of orange and brown creates a warm, cozy look, while the simple pointed felt leaves give the wreath plenty of texture.

This website contains affiliate links. As an Amazon affiliate, I earn a small commission from qualifying purchases (at no cost to you).
