

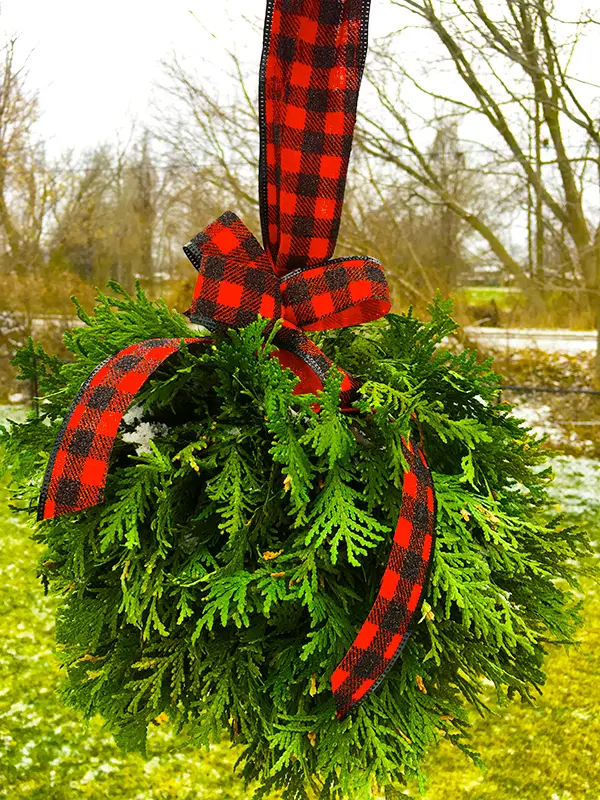
Decorating with cedar and other evergreens has been a long-standing tradition. The Kissing Ball is one of those old-world traditions that date back to the middle ages. The Kissing Ball disappeared and was later replaced with Mistletoe, Recently I have seen the Kissing Ball making a comeback as a decorative piece more than an actual kissing Ball.
After seeing them at a local market, I decided to make my own, with a budget-friendly option in mind. Who doesn’t love budget-friendly Christmas Decor?
Every year I purchase or pick my own greens for my Christmas decorating. I purchase them at a local market if I am not in a position to cut my own. This year I was fortunate enough to have purchased one small bundle and then have a large load delivered for free. With all the extra greenery, I just had to make some of my own Cedar Kissing Balls to hang outside. It also goes nicely with other outdoor Christmas greenery decor.
The floral oasis balls, I found to be price. The cheapest one I found was 17 dollars and most places were out of stock. Since I was trying to keep my project budget-friendly, I opted to construct my own ball. BIG MONEY SAVING HERE!
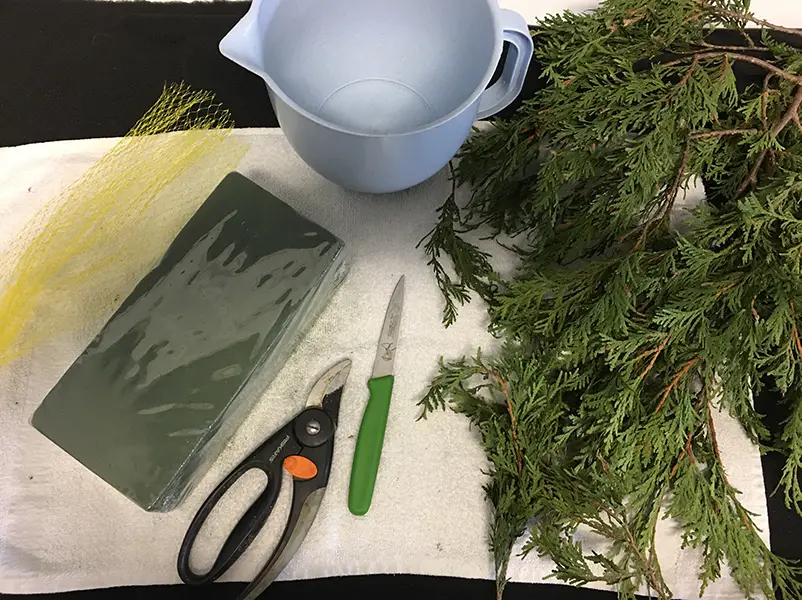
Supplies needed for our DIY cedar Kissing Ball
- Floral foam (Oasis) block
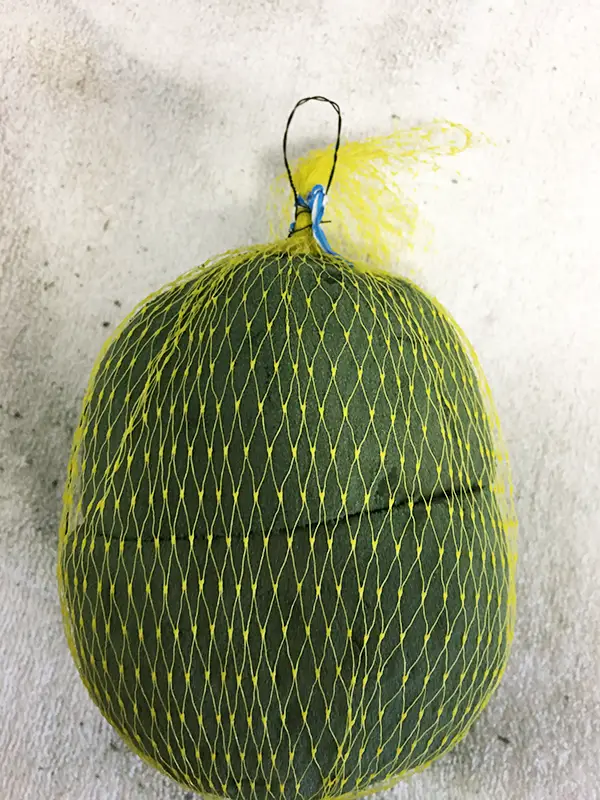
- mesh bag from onions
- ribbon *wired outdoor)
- cedar sprigs
- wire cutters
- floral wire
- small container or bucket
- Floral Foam Ball (if you prefer)
- wire bread tie
MONEY-SAVING TIP
We purchased our floral block from a local dollar store for $1.75. There is a ling above to purchase one but you can save money by going to your local dollar store. If you are going close to Christmas or when there is a high demand, you will probably find it hard to acquire them. But it is worth the effort.
Preparing your work surface

- Make sure you have a large area to work in such as a garage or large table. We chose to work in the garage. It was quite cool but the conditions were ideal for the cedar.
- You will be soaking your oasis and working with the wet ball. Keep in mind that your work surface may get wet.

- If possible, it is best to hang your ball while you are working on it. We hung ours on a cabinet handle with our work are below. The height and the ability to rotate the ball as you work will make it much easier.
- We used a large baking tray under our cedar ball and a pitcher to catch dripping water.
Making the DIY cedar kissing Ball
- Lay a towel on your work surface.
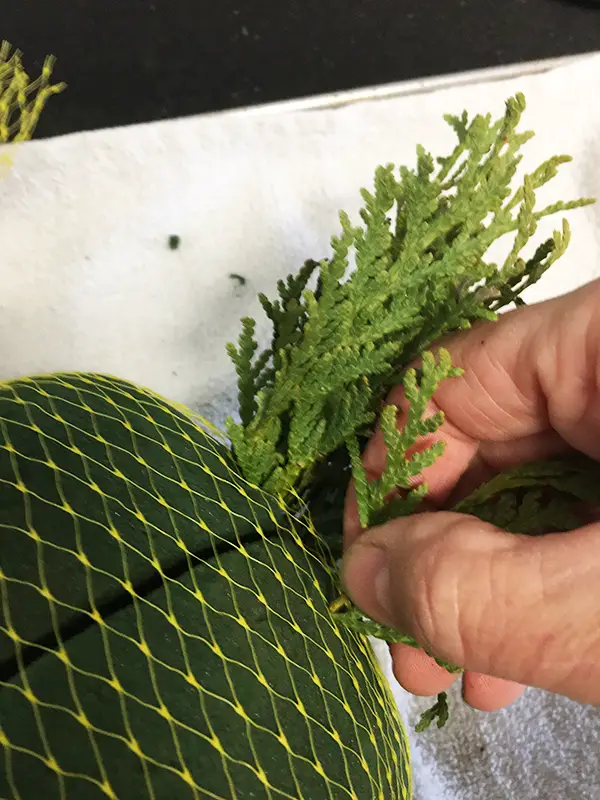
- Using pruning shears, cut the cedar spring into pieces about 5 inches long. Make sure the ends and cut a bit on an angle. This will help them to pierce the foam easier.
- Set your cedar pieces aside.
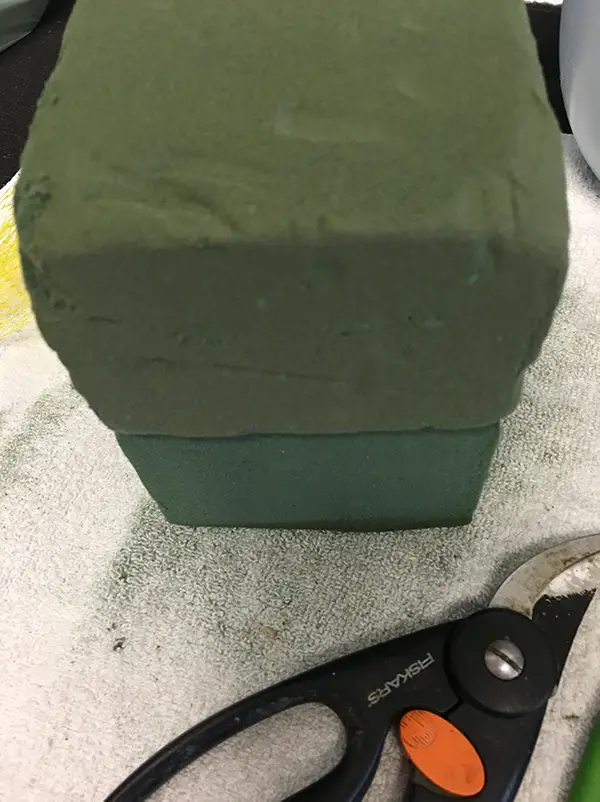
- Cut your floral foam block into two pieces in the center making to same sized smaller blocks.
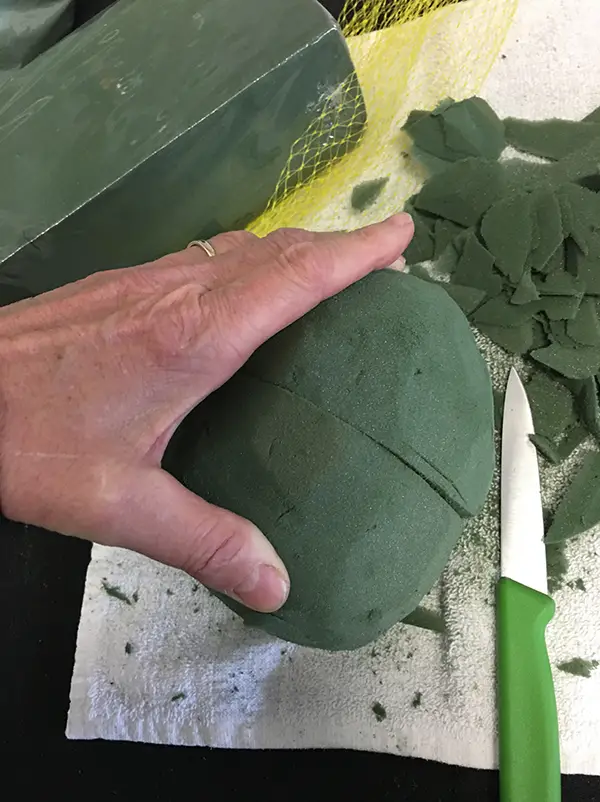
- Hold the two blocks together, cut and shape the sides into a ball. The floral foam cuts exceptionally well. It slices like butter and is super easy to cut into shapes. When done, you should have two half balls the same size.
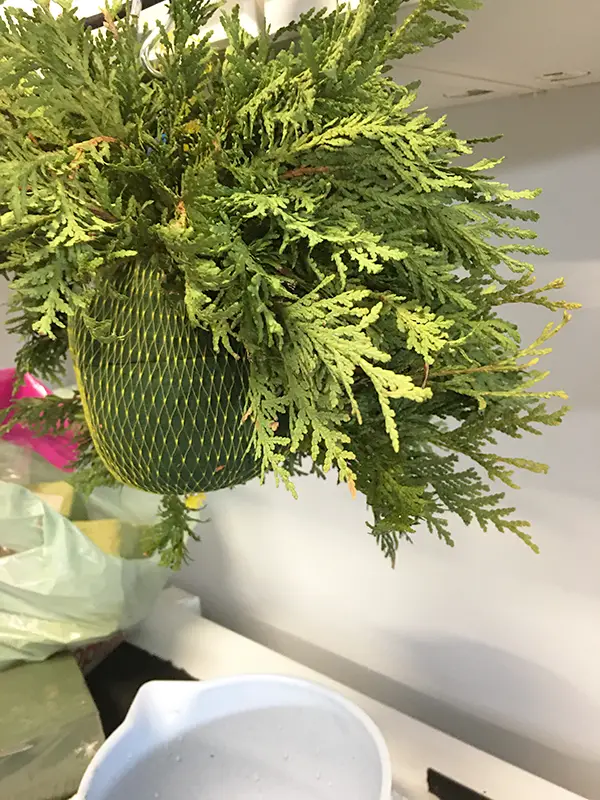
- Holding the ball together, place it in the onion bag and secure the bag around the ball with a plastic tie (wire bread tie)
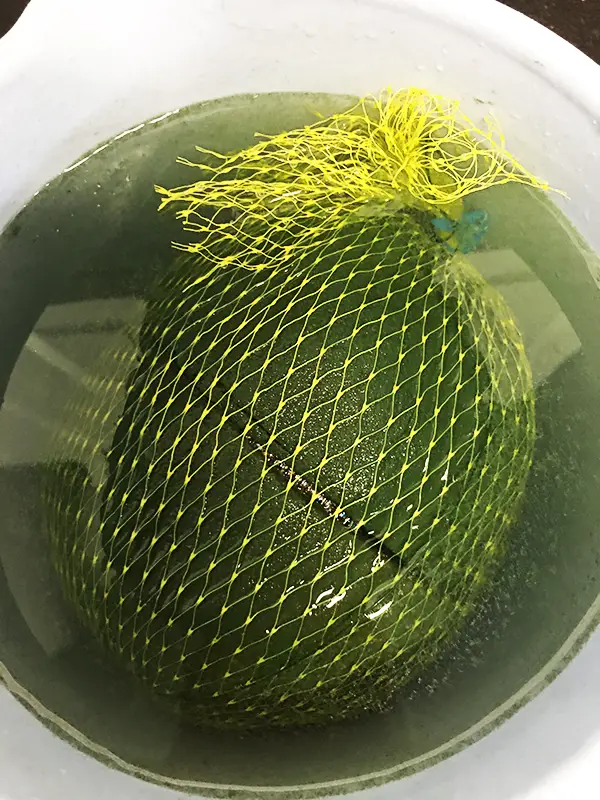
- Using floral wire, wrap it around the ball and secure at the top, leaving excess to form a loop. This will be your hanging loop.
- In a small container or bucket, add warm water and submerge the floral foam ball.
- Remove the ball from the water and let the excess water drain out. The ball soaks up the water very quickly, there is no need to leave it for long.
- Once your ball has no longer dripping, Empty your container.
- Place a towel-lined baking tray onto your work surface.
- Hang the ball over your work surface, placing the container under the ball, to catch drips as you add cedar.
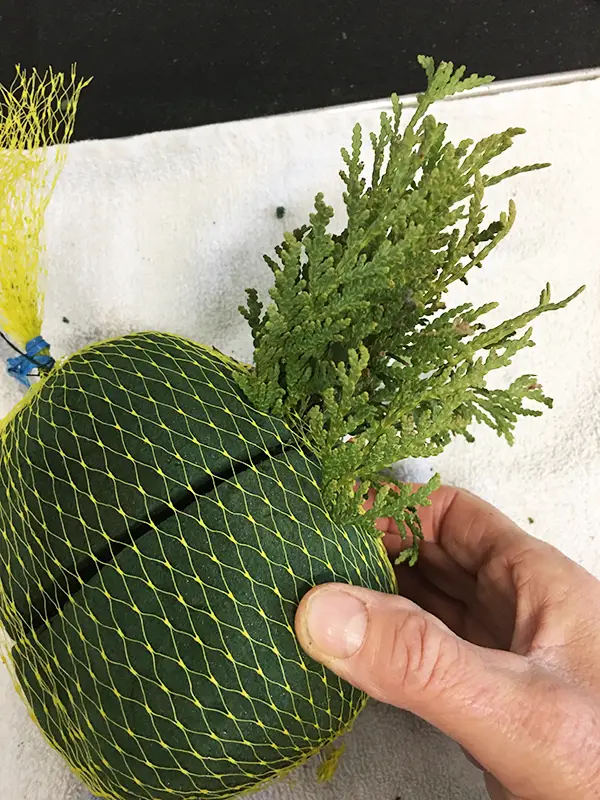
- Start inserting the cedar springs into the floral foam. Keeping them all close together to avoid holes or gaps in your Kissing Ball
- Continue until the ball is dense and there are no holes in the cedar.
- Trim the ball if needed, to remove any long pieces and shaping it into a ball.
- Form the ribbon into a bow for the top.
- Add a strip of ribbon to the wire loop to hang it on.
- Hang and enjoy
Ideas for decorating your cedar Kissing Ball
- If it is hanging under an eave or sheltered, think about adding battery operated led wire lights.
- Add small red berry sprigs, or pinecones (with wire) floral picks for an outdoorsy look
- Add mini ornaments for a Christmas look
- Add spray snow to give it a wintery look.
- Add small birdseed balls and leave them out for the birds to enjoy.
Photo gallery of steps to make the DIY cedar Kissing Ball
Note – To prolong your cedar Kissing Ball, keep it wet throughout the season. a watering can, filled with water, poured slowly into the top, will re-saturate the oasis floral ball.
Don’t forget to follow us on Pinterest for more crafting inspiration https://www.pinterest.ca/BakerStreetLiving/_created/
Check out our previous post on How to make a 5 minute Christmas Shadow Boxhttps://bakerstreetliving.com/how-to-easily-make-5-minute-christmas-shadow-box/
Disclaimer: This post contains affiliate links. We receive a small commission when purchases are made through our links. Thank you for your support.