
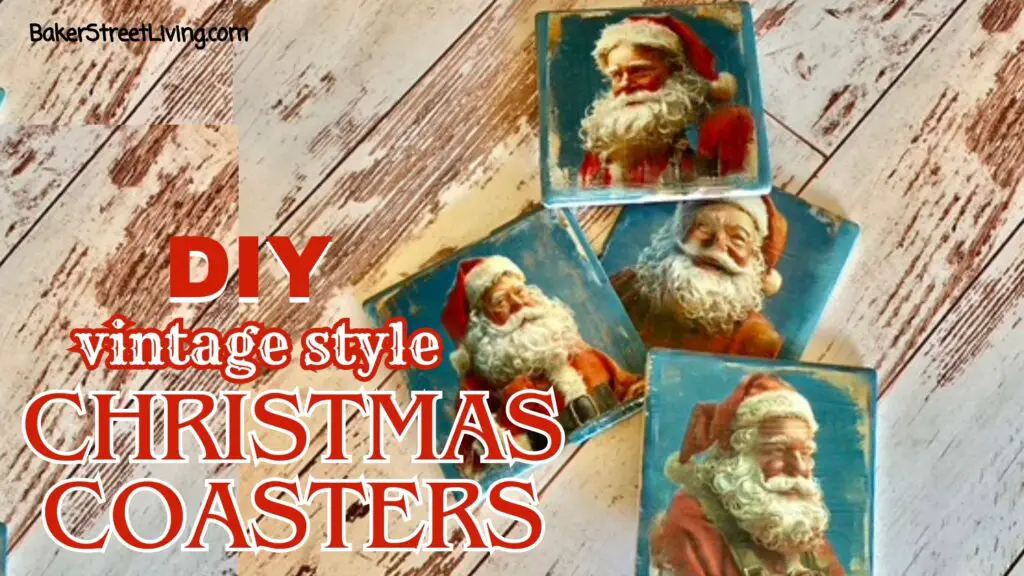
These DIY Christmas Coasters are super easy to make and look stylish on your Christmas table. We made our set by recycling an old set, but you can use new blanks if you wish. They are a great way to create a unique look that blends in with any style of Christmas Decor. The printable patterns that we have created are free for you to download and use (link below)
These fun coasters are an inexpensive way to add a vintage Christmas feel to your holiday table. Instead of buying a new set of holiday coasters, you can recycle an old set or start with inexpensive blank coasters and transform them with vintage Santa designs.
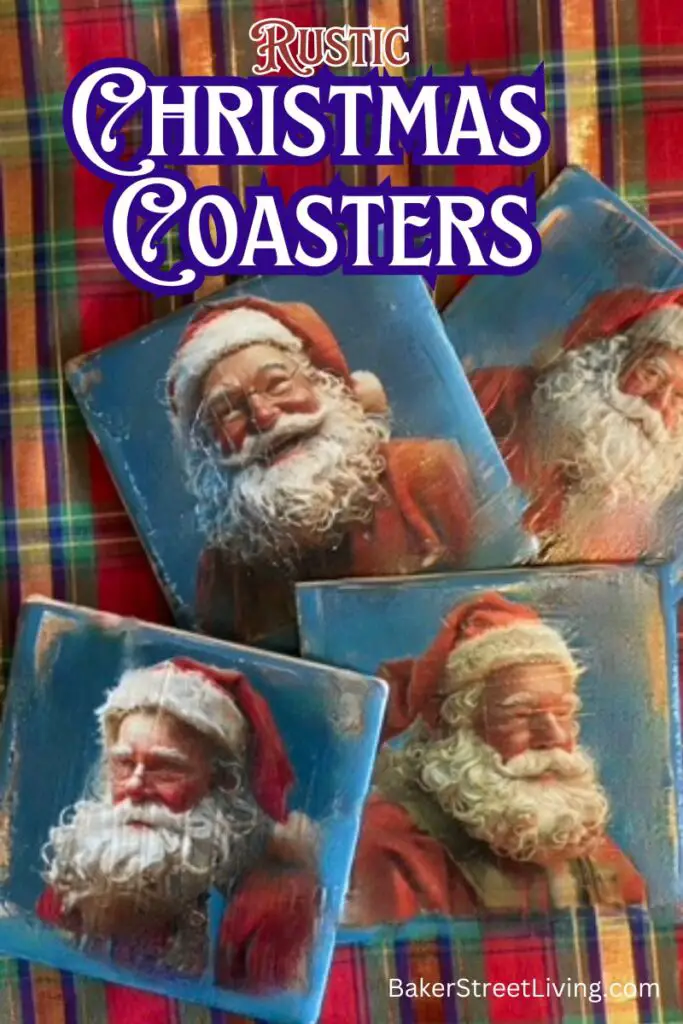
They’re also a great handmade Christmas gift. Make a set of four or six and package them with a Christmas mug, hot chocolate or other small holiday treat. The finished coasters look much more expensive than the materials actually cost
Why Make These DIY Christmas Coasters?
Not only are these diy christmas coasters unique, but they bring back the “good ole days”. They are great conversation starters about memories and things of the past. They also keep those old coasters out of the landfill! Here are a few more reasons:
- Have old coasters that look dated? Reuse them with this updated project.
- Want inexpensive Christmas decor? This uses inexpensive materials.
- Need a handmade Christmas gift? Make a set.
- Love vintage Christmas decor? The Santa images give ordinary coasters a nostalgic appearance.
- Want to try waterslide decals? This is a relatively simple project for learning the technique.
Supplies List
This website contains affiliate links. As an Amazon affiliate, I earn a small commission from qualifying purchases (at no cost to you).
- Waterslide Paper – white
- Mod Podge – Waterproof Gloss Sealant
- Mod Podge Ultra Spray Sealant
- Acrylic Paint – Cobalt Blue
- Clear Acrylic Spray Sealant
- Zots – Adhesive dots (optional)
- Cardboard box ( for use as a paint booth)
- Rubbing Alcohol
Craft Room Tools List
- Dish for soaking
- Inkjet or Laser Printer – Colour
- Scissors
- Paintbrush
DIY Christmas Coasters – Step-by-Step Instructions
Step 1: Prepare the Coasters
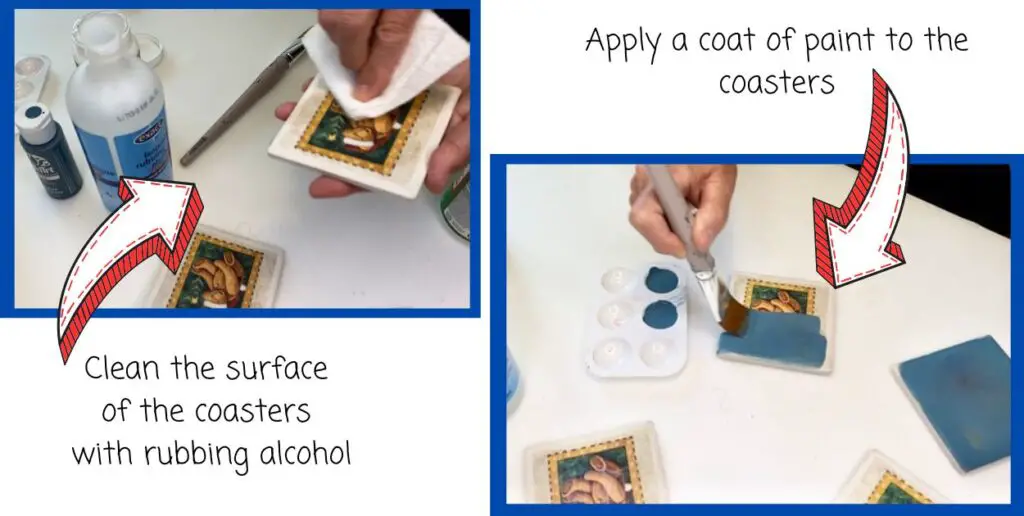
Recycling coasters: Wipe the coasters with rubbing alcohol to remove any grease, dust or marks. If grease/marks do not come off, use Dawn dish soap and a scratch-free scrubber to clean them. After cleaning, wipe them with alcohol and allow them to dry.
New Coasters – Wipe the surface with rubbing alcohol and allow them to dry.
Step 2: Add a Base Coat of paint
Recycling Coasters – Apply a coat of paint over the design on the coasters. I did not paint the sides of mine as I wanted a rustic look. If you choose to paint the sides, make sure you tape off the cork base to avoid seepage.
New Coasters – Apply a base coat of blue acrylic paint to the top of the coaster. Let the coasters dry.
Step 3: Add a layer of Mod Podge
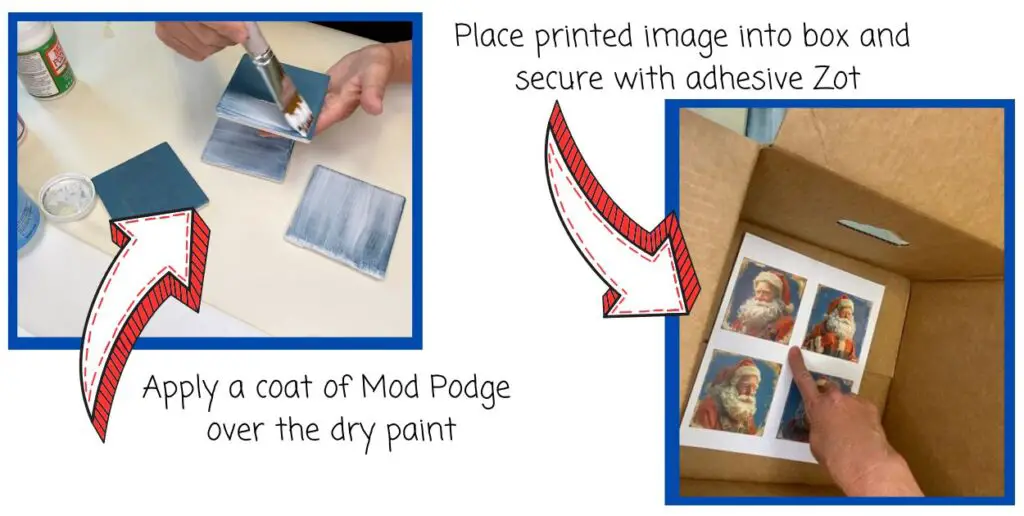
Apply a coat of Mod Podge sealant over the painted surface. If you have porous coasters, apply a second coat. The purpose of the Mod Podge is to give a smooth surface that the waterslide paper can slide onto, so if it gets soaked up by the surface, you will need another coat. To check, apply a drop of water onto the surface (when dry). Your finger should be able to slide smoothly over the surface.
Step 4: Prepare the images
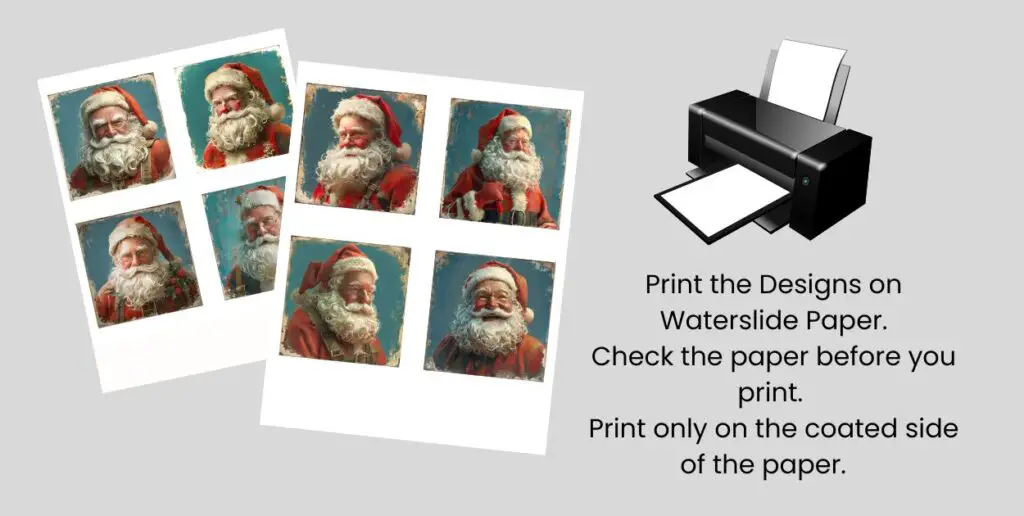
Download our free printable coaster images or create your own.
Each printable coaster image is a 3.5-inch square. You can resize the images in a graphics program such as Canva or, for small changes, on the printer settings page under the “scale” tab.
Print the images on your waterslide paper.
Place the page in the cardboard box and secure the paper with a Zot adhesive dot. Using the adhesive dot is optional, but it helps to keep the page in place when applying the clear spray sealant.
In a well-ventilated area, spray the acrylic clear sealant onto the printed paper. Do not be shy; apply a liberal coat. Follow the package directions. Allow the paper to dry completely before moving on to the next steps.
Step 5: Apply the image to the coaster.
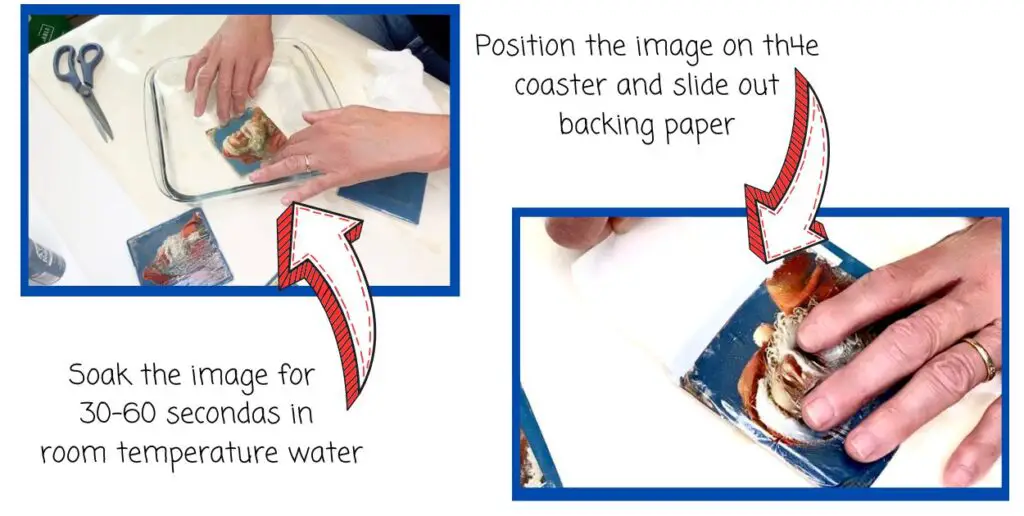
Cut the image to fit the coasters, making sure not to cut into the coloured area of the image.
Add enough room-temperature water to a dish that is big enough to submerge the decal.
Put a few drops of water onto a coaster and move it around with your fingers.
Place the waterslide decal into the water and gently hold it under the water. It tends to curl, so pushing it gently down with your fingers will ensure even soaking. Follow the time indicated on the product you are using. (usually 30 – 60 seconds or thereabouts)
Remove the decal from the water and check the corner to see if the image slides easily. If not, put it back in the water for a few seconds.
When the decal slides easily, drain off excess water and gently (very gently!) slide the back paper off, while pushing it onto the surface of the coaster. Position the decal as you go. Repositioning it after it is on the surface will cause cracks and tears. If this happens, slowly push the design back together.
Repeat the process with each coaster and then allow them to dry completely. This usually takes at least 3 hours. It can be longer for porous materials, such as stone. Keep them out of the sun while drying.
Step 6: Seal before using
Seal ceramic or stone coasters in the oven. Follow the recommendations, which are usually around 235 degrees F for 15 minutes.
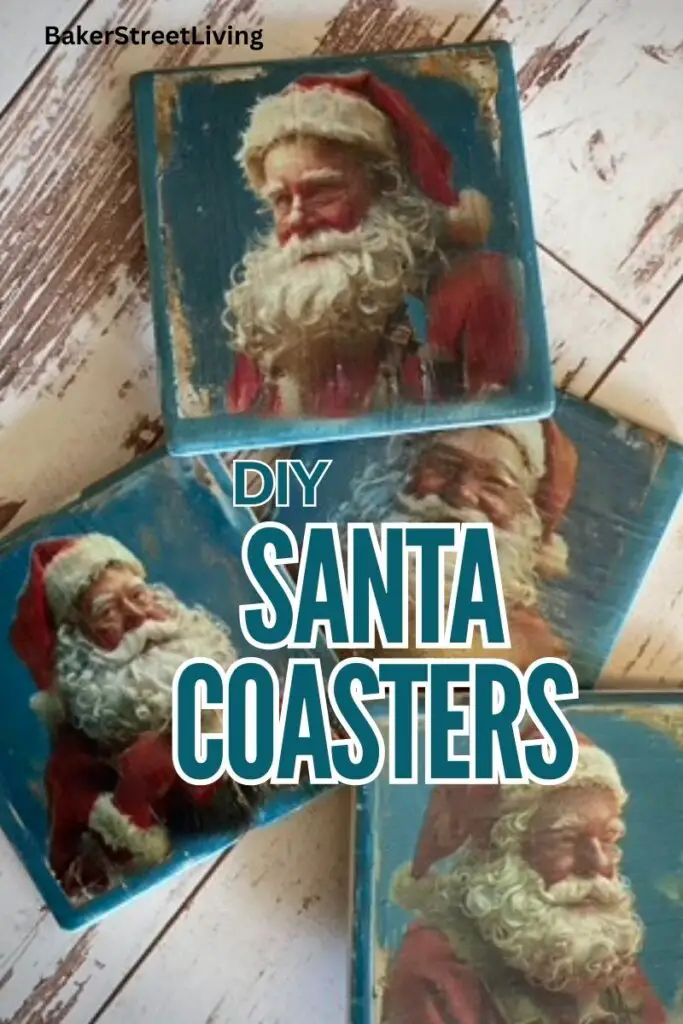
Apply a thick coat of Mod Podge Gloss sealant over the finished coaster. For extra protection or alternative coatings, you could apply a layer of clear epoxy or resin.
These DIY Christmas Coasters are not dishwasher safe. Wipe clean with a damp cloth. Do not submerge in water.

Troubleshooting and FAQs
Fixing Waterslide Paper Cracks
Cracking can be caused by improper sealing before soaking. It is important to allow the decals to completely dry before applying.
If you have cracks, the project can be fixed in many cases. Waterslide paper is a fantastic product, but it easily tears or wrinkles during the application. The more you use it, the easier it will become to apply. For tears or cracks, push the design back together with your fingers. Add a few extra drops of water to the surface if the paper is hard to move.
For large cracks or to prepare a crackled finish, grab some acrylic paint the same colour as the design or a Sharpie marker the same colour and apply tiny dots to the crack. The colour must be an exact match, and this will not work on every surface.
Water Temperature Matters
Use room temperature water. Water that is too cold will not activate the glue well and will be difficult to apply to the surface. Water that is too hot will activate the glue faster, and I have found it makes the decal feel slimy, meaning the glue is spreading out too much.
What causes Runny Ink on the Image?
Using incompatible paper with your printer can cause ink to run, as well as failing to seal the image correctly.
Waterslide Paper comes in both laser and inkjet paper. Double-check to make sure you have the right paper.
Not sealing the edges of your design can allow water to seep in and cause the ink to run. I recommend cutting each coaster image out before sealing to ensure proper sealing.
Why is my decal lifting after I have applied it?
The surface of the coaster must be waterproof. Many stone, plaster, wood or even ceramic coasters can soak up water. We apply at least one coat of Modge Podge over the coasters before adding the design. If your design has lifted, remove it and clean the surface, reseal it and try reapplying a fresh design.
The Backer paper is not releasing.
If you cut the images before sealing them, the sealant spray can get onto the side of the paper. This can make sliding the backer paper off difficult. If you have time, quickly cut a sliver of paper off the edge that is sticking. It is critical that you work fast, and every second you wait means the decal is drying out. It is preferred to cut the images out after sealing as opposed to before.
Tips for Making DIY Christmas Coasters
Here are a few brief tips for getting the best results.
- Use smooth, nonporous coasters whenever possible.
- Make sure the printed image is completely sealed before soaking.
- Don’t rush the soaking process.
- Avoid repositioning the decal once it has started adhering.
- Allow the coaster to dry completely before applying the final seal.
- Make a test coaster before making the entire set.
These DIY Christmas Coasters make fantastic gifts. I hope you have lots of fun making some for yourself or as gifts.

This website contains affiliate links. As an Amazon affiliate, I earn a small commission from qualifying purchases (at no cost to you).
