
Content Created by Tracey of Baker Street Living 
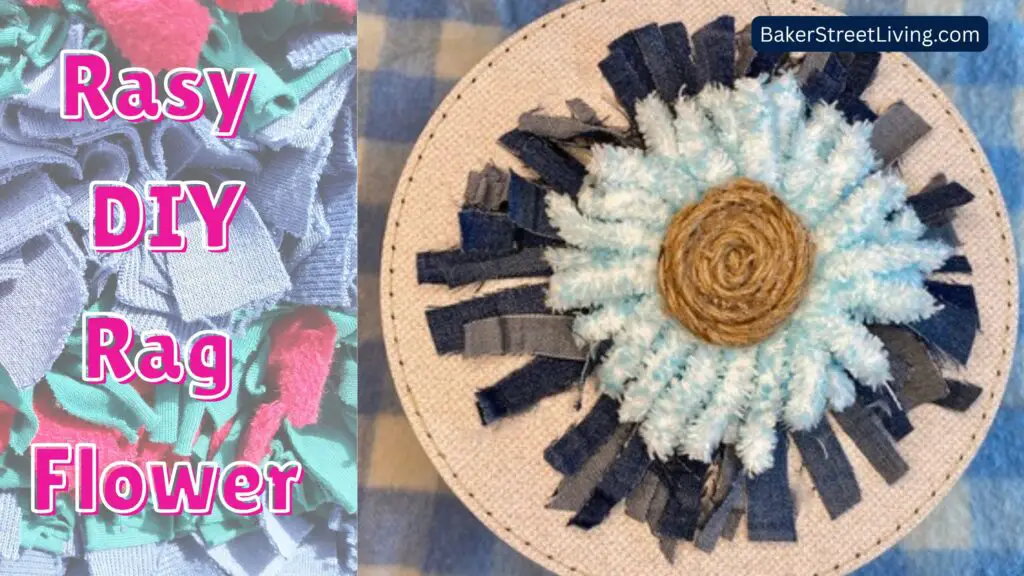
! If you love upcycling fabric scraps into charming, one-of-a-kind crafts, you’ll adore these DIY Rag Flowers! They’re perfect for adding a touch of shabby chic style to wreaths, gift wrap, hair accessories, or home décor. Best of all, they’re simple to make with just a few basic supplies — and you probably have most of them on hand already!
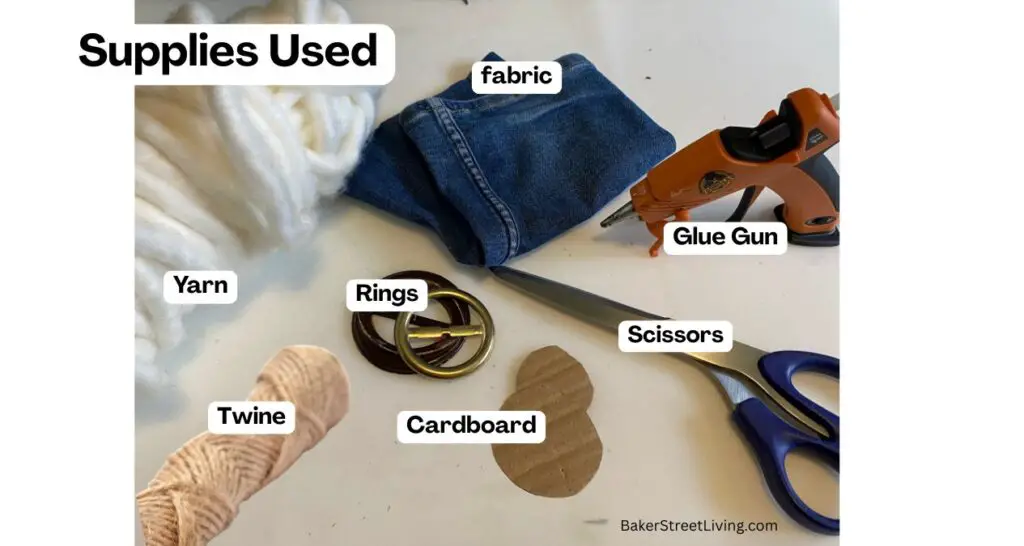
Supplies List
This website contains affiliate links. As an Amazon affiliate, I earn a small commission from qualifying purchases (at no cost to you).
- Scrap Fabric – Your choice
- Small hoop – see notes below
- Fluffy yarn
- Hot Glue Gun
- Scissors
- Cardboard
How to Make DIY Rag Flowers
Cut the Fabric
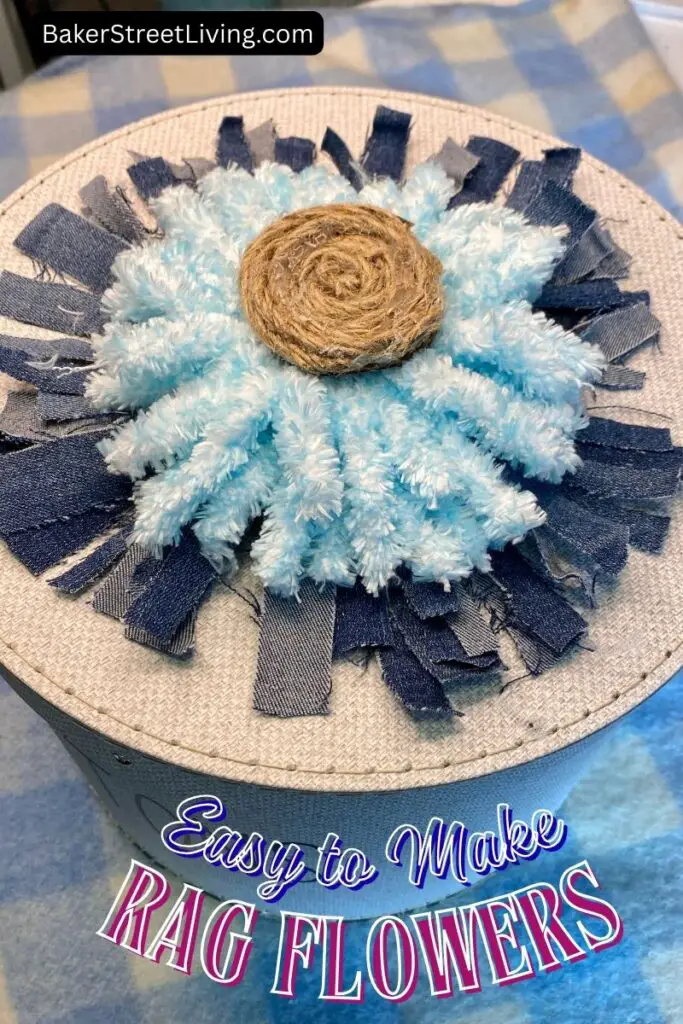
Using scissors or pinking shears, cut your fabric scraps into strips that are approximately ½ inch to 1 inch wide and 6 to 8 inches long. Don’t worry about being too precise — the charm of rag flowers is in their imperfect, homespun look! You will need a lot of rag strips, so cut lots ahead of time.
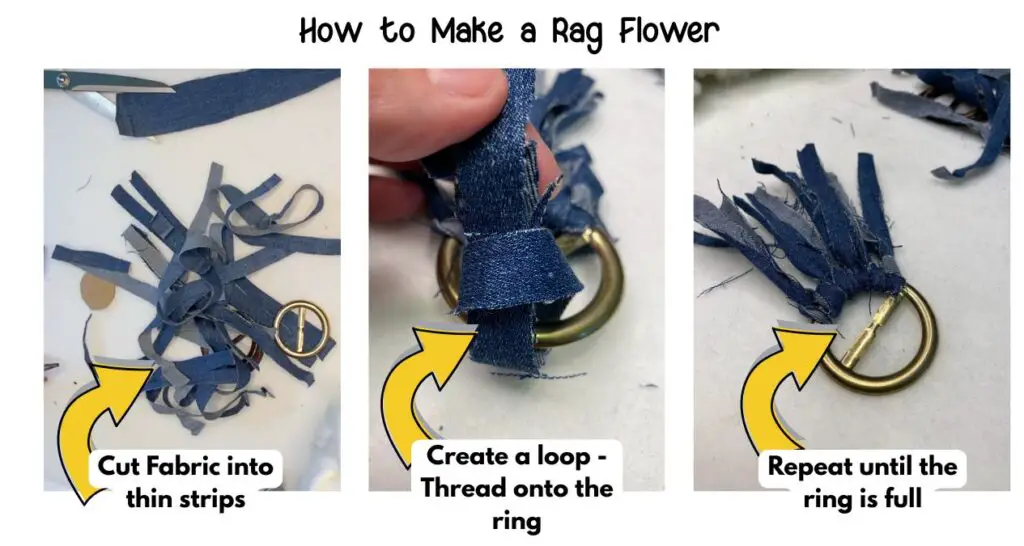
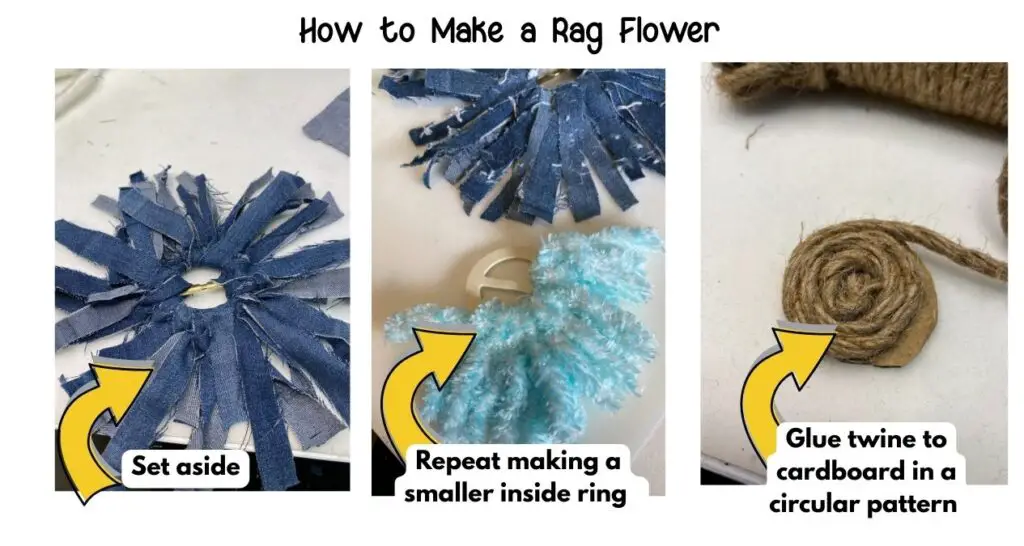
Tie the Fabric Around the Ring
Take a fabric strip and fold it in half. Place the folded end behind the ring, then pull the loose ends over the ring and through the loop to create a lark’s head knot. Pull tight.
Repeat this process around the ring, pushing the strips close together so they fluff up nicely. Keep adding strips until the whole ring is covered.
The 2nd Ring
Repeat the process for the first ring, making the second one slightly smaller. Making the second ring smaller adds dimension and fullness to the flower
Fluff and Trim
Once the ring is full, gently fluff and adjust the fabric knots so they look even. If any strips stick out too long, give them a little trim.
Make the Center
Measure the center and cut a small cardboard circle to fit. Add a bead of glue to the center and adhere twine (or yarn). Wrap the twine in a circle, adding hot glue as you go. When you have completely covered the cardboard, ensure the end is glued down and trim the twine
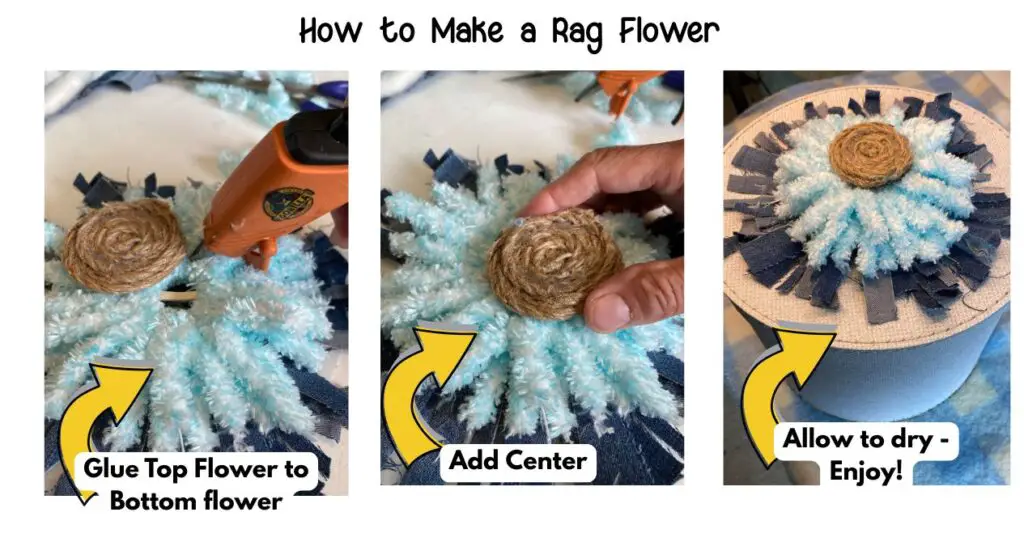
Attach the Center
To finish off your rag flower, hot glue the yarn center. This hides the knots and adds a sweet finishing touch. For extra shine, add a bit of glitter or dimensional fabric paint dots to the venter.
Allow the glue to dry!
Enjoy!!
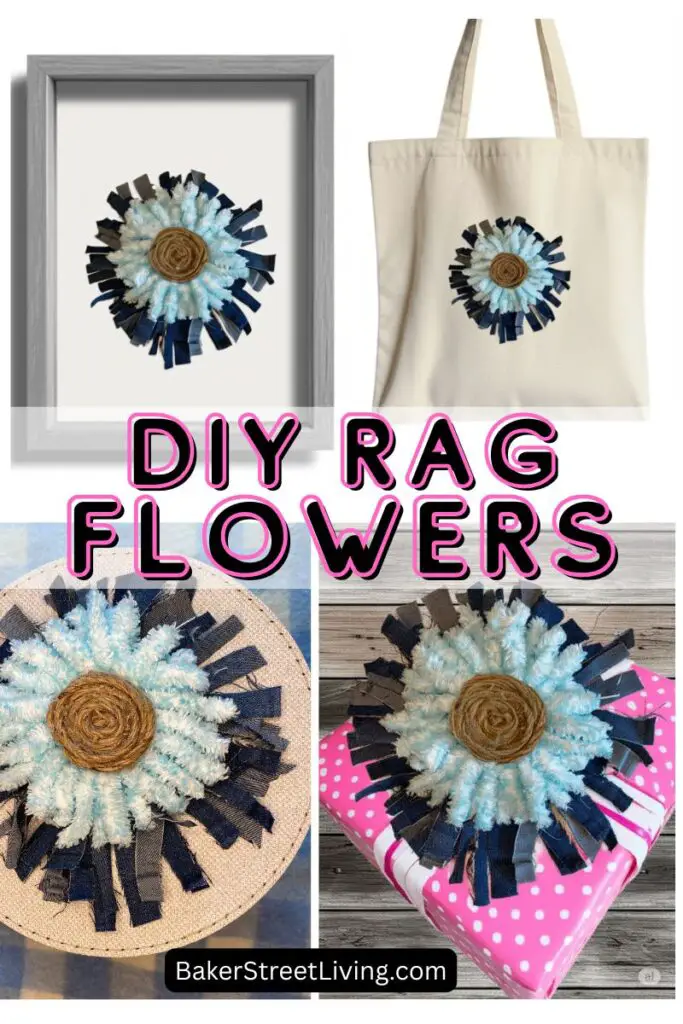
Ways to Use Your Rag Flowers
Your DIY rag flowers are so versatile! Here are a few fun ideas:
- Glue a pin back or a hair clip to make a shabby chic accessory.
- Attach to a wreath for rustic farmhouse décor.
- Use as a reusable gift topper.
- Add to a tote bag, purse or pillow for a fun fabric embellishment.
- Make a bunch and string them into a garland
- Use Christmas fabric and make rustic Christmas tree ornaments
- Attach them to fabric-covered pots
- Embellish a sweater or pair of jeans


FAQs and Helpful Tips
Alternatives to the Small Hoop
I have seen many people make these diy rag flowers using small embroidery hoops, mason jar lids or rubber sealer rings. Those ideas are great, but I wanted to make something with a smaller center. In my video, I am using recycled belt buckles, but there are other off-the-shelf items you can use. Old curtain rings, ket rings, O-Rings and washers are great. They come in many different sizes, are lightweight and are thin, so the flowers are not bulky. Round belt buckles (of course) or old hoop earrings. Just be sure to glue down anything that is not stable, such as the hoop closure of an earring. Just think outside the box. Walk the hardware or plumbing aisle and see what you find.
Alternative to yarn
Feel free to get creative with the center of your DIY rag flowers. You can use large buttons, bottle caps, broaches or fabric-covered cardstock. The options you have are only restricted by the size of the center of the flower.
Choosing Fabric
I like denim because it can fray and is the right weight, but just about any fabric will work. Quilting cotton with edges cut by pinking shears or strips from an old sweater are great options. Even fabric with bits of yarn and fur mixed in can make great flowers, especially if you are using them for gift wrapping.
Making rag flowers with small rings is a delightful way to use up scraps and give your crafts a touch of handmade charm. Once you make one, you’ll be hooked — they’re quick, easy, and addictive

This website contains affiliate links. As an Amazon affiliate, I earn a small commission from qualifying purchases (at no cost to you).