
Content Created by Tracey of Baker Street Living 
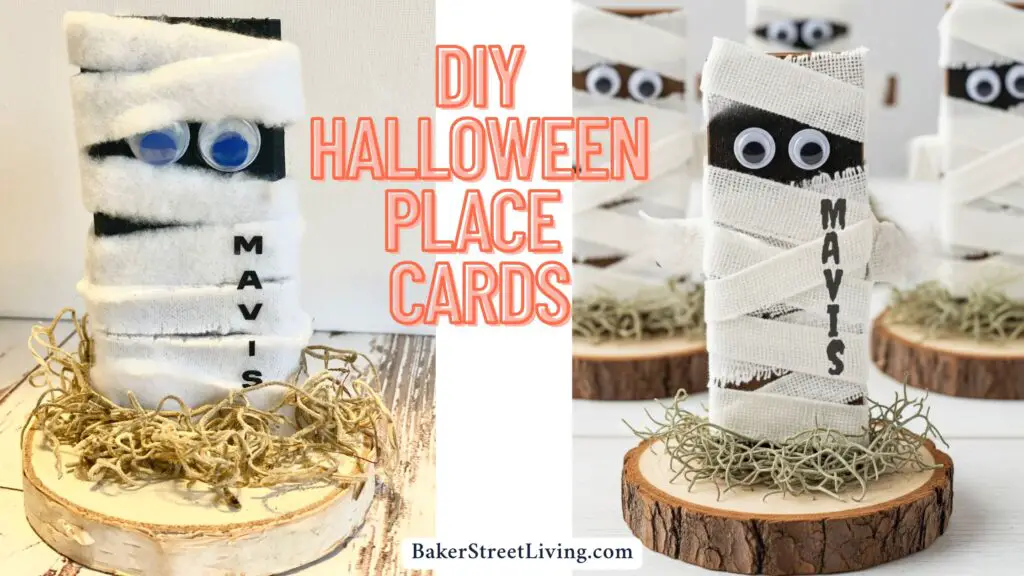
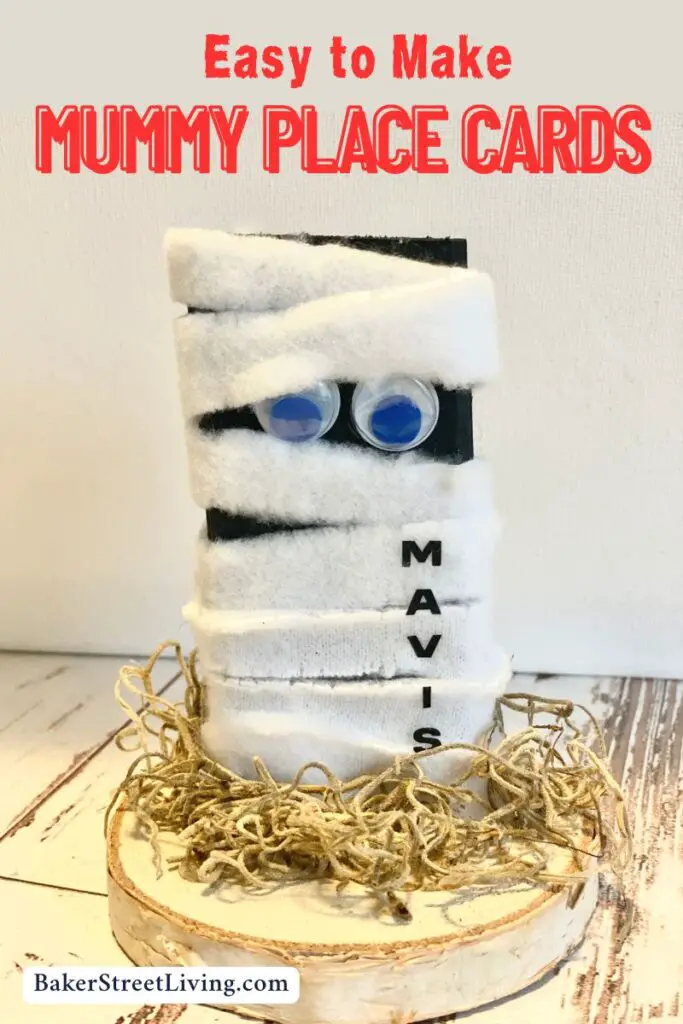
Looking for a frightfully fun way to dress up your Halloween table? These Halloween Place Cards are the perfect blend of creepy and cute! Made from simple wood craft sticks and a few easy-to-find supplies, they’re a creative way to help guests find their seats—and they double as adorable party favours, too.
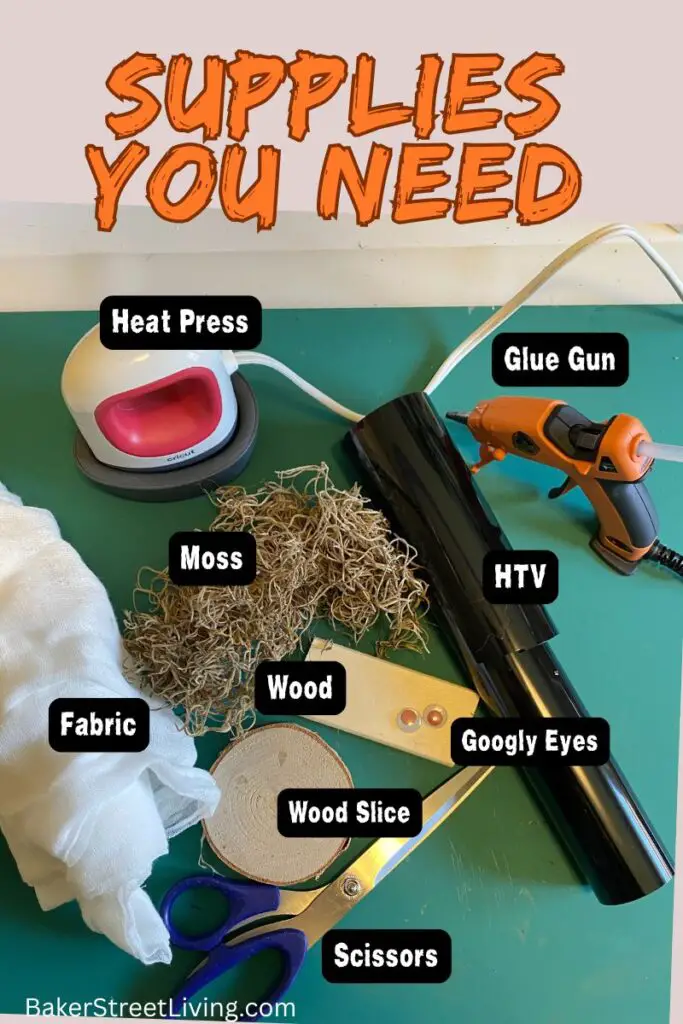
Supplies List
This website contains affiliate links. As an Amazon affiliate, I earn a small commission from qualifying purchases (at no cost to you).
- Jumbo Craft Sticks
- Black Acrylic paint
- Wood Slice. (3-4 inch size)
- Hot Glue
- Old T-Shirt or White Cotton Muslin Fabric
- Googly Eyes
- Spanish Moss
- HTV Vinyl
If you do not have a cutting machine, we offer instructions below the step-by-step cutting machine instructions for making the name portion of the place cards without a cutting machine.
Craft Tools
- Glue Gun
- Craft paintbrush
- Scissors
- Heat Press (Mini)
- Cutting machine – with mat and tools
- Parchment Paper
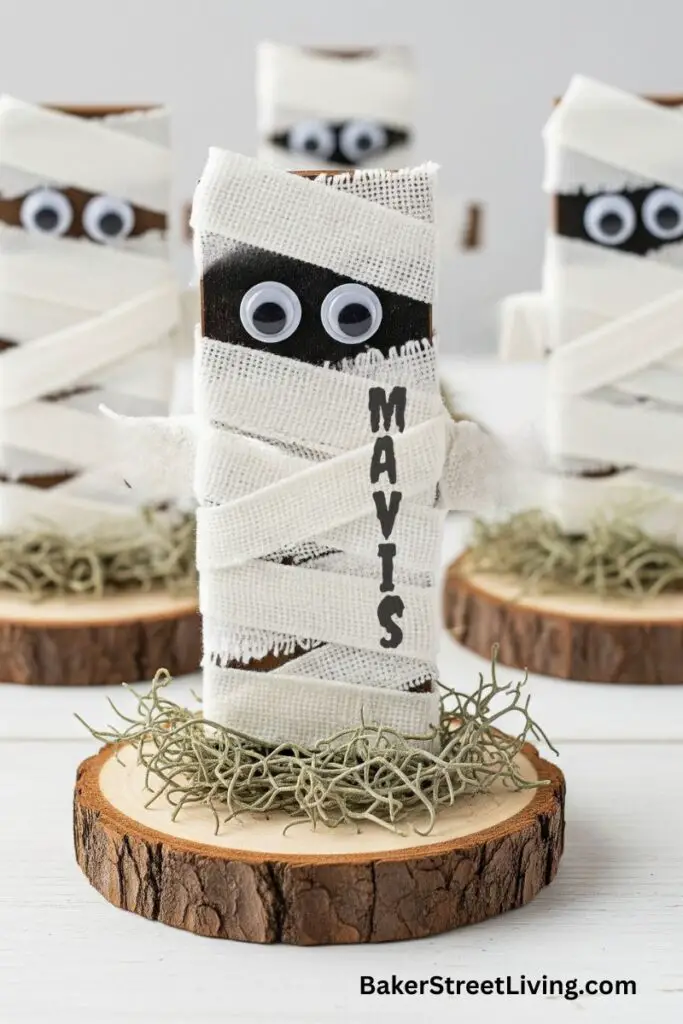
How to Make Mummy Halloween Place Cards
1. Prep the Wood
Cut the wood sticks into 4-inch lengths. If you are purchasing wood at a home reno store, they often have a cutting service that is either free or has a minimal cost.
Lightly sand the ends, just to remove any sharp pieces.
Use a damp cloth or a tack cloth to remove any dust.
Give the wood a coat of black paint. This doesn’t have to be perfect; we just don’t want any wood showing through. If you’d rather use a different colour, customize to personal preferences.
Allow drying time.
2. Make the Mummy
Cut an old white t-shirt into thin strips. The fewer the strips, the better.
Start at the top by adding a bead of glue onto the surface of the wood and begin wrapping the fabric around the wood, alternating directions and adding more glue as you go. Overlap the fabric slightly as you go, just like you would wrap a bandage. Do not cover the bottom of the stick. We will need this open for gluing to the base.
Leave an opening for the eyes. Make the opening small so that you can peel back the edge and glue in the eyes and then allow the fabric to cover the edge of the eyes.
Glue on the eyes by peeling back the fabric slightly, where you left the opening. Allow the fabric to cover the edge of the eyes slightly.
You can leave small gaps in the fabric to give it the bandaged look. As long as your stick is painted, it will blend well.
3. Add the Name
Make sure the glue on the stick has fully dried.
On your cutting machine, choose a font and cut and weed the name you wish to add to your mummy.
Apply the HTV according to package directions, covering with a piece of parchment paper.
4. Glue to Base.
Apply hot glue to the bottom of the mummy and press onto the wood slice base. Hold for a few seconds until the glue is set.
5. Add the Moss
Add some hot glue to the base and adhere some moss around the base of the mummy.
6. Making the Halloween Place cards without a Cutting machine
If you don’t have a cutting machine (like a Cricut or Silhouette), you can still iron a name onto fabric using a few easy alternatives. Here are your best options:
Fabric Markers – Choose a dark colour and make sure that the fabric is securely glued before trying to write on it. If the fabric is loose, it may smudge or be crooked.
Fabric paint – Use a 3-dimensional fabric paint to add the name. You can do the letters in dots (this is a cool effect) or write continuous letters.
Stencils – Use stencils and a sponge brush to add the letters.
Iron On Sheets – Print iron-on sheets and just press them on with a household iron.
Iron-on Letters – It can be hard to find small letters, but I have used 1/2 inch glitter iron-on letters before. Check them out HERE.
Add a small embellishment with the name on it. A small foam pumpkin or a chalkboard sticker can work well.
Helpful Tips and FAQs
Fabric Options
White or Off-White Fabric: Old t-shirts, sheets, muslin, cheesecloth, or even gauze bandages are ideal for the mummy wrapping. You’ll want something that tears or cuts easily into strips.
Aged Look: Before wrapping, you can dye your white fabric in weak tea or coffee to give it an “aged” or “dirty” look, making your mummy seem old
Distressed Fabric: After the glue dries, you can gently fray some of the fabric edges or pull apart a few threads to make the mummy look more ancient and ragged.
Wood Alternatives
Paint sticks are a grteat substitute. If you want a non wood substiturwe poster board , corrogated plastic or thick EVA foam are good options.
Making this a Kid-Friendly DIY
White school glue (PVA glue), tacky glue or fabric glue works best for little hands and prevents the chance of burning.
Put a small dot of glue on one end of a fabric strip and attach it to the top of your paint stick (or near where you want the head to be).
Begin wrapping the fabric strip around the paint stick. Overlap the fabric slightly as you go, just like you would wrap a bandage.
Apply small dots of glue periodically as you wrap to secure the fabric. This will prevent it from unravelling later.
When adhering the mummy to the wood base, use tacky glue and allow it to sit in place to dry.
Use stick-on letters in place of the HTV or iron-on.

These mummy Halloween Place Cards are not only functional for seating arrangements but also serve as charming Halloween decorations your guests will adore!

This website contains affiliate links. As an Amazon affiliate, I earn a small commission from qualifying purchases (at no cost to you).