
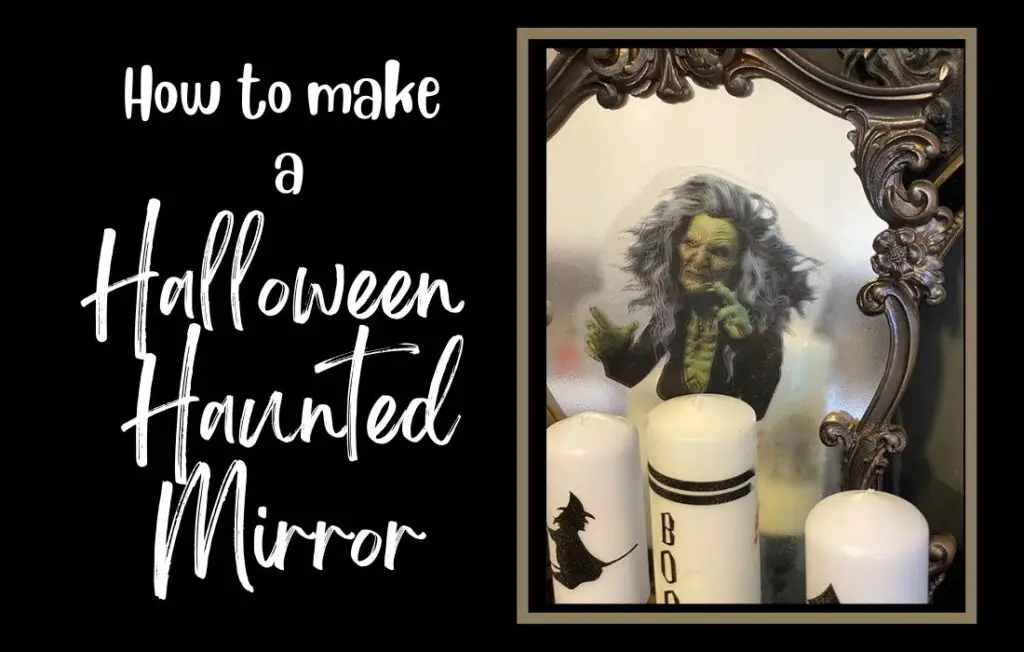
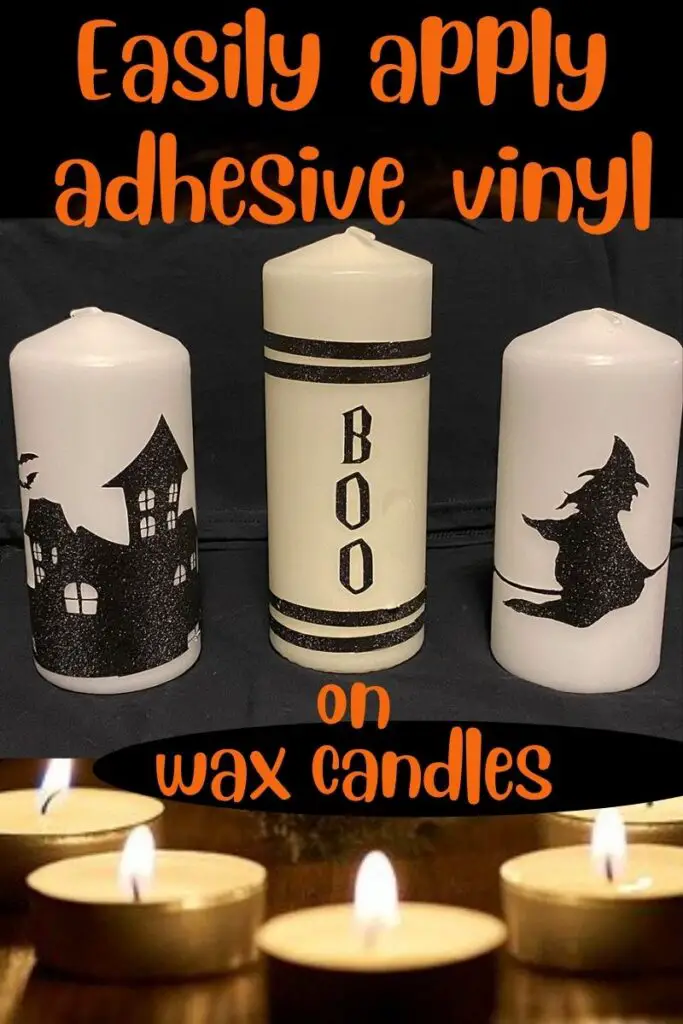
Decorating for Halloween can be super fun, and it’s even more fun to make your own decor pieces, which you can show off and use over and over again. In our post that demonstrated how to use vinyl on wax candles, we could have easily added our Halloween Haunted mirror into our Halloween decor.
This tutorial uses waterslide paper as our image transfer method onto the mirror. We love waterslide paper and have used it over and over on many surfaces. One of the great things about using waterslide paper is that it doesn’t have to be permanent. It can be easily removed after you are finished with it or after Halloween, as long as it isn’t sealed.
Supplies List
This website contains affiliate links. As an Amazon affiliate, I earn a small commission from qualifying purchases (at no cost to you).
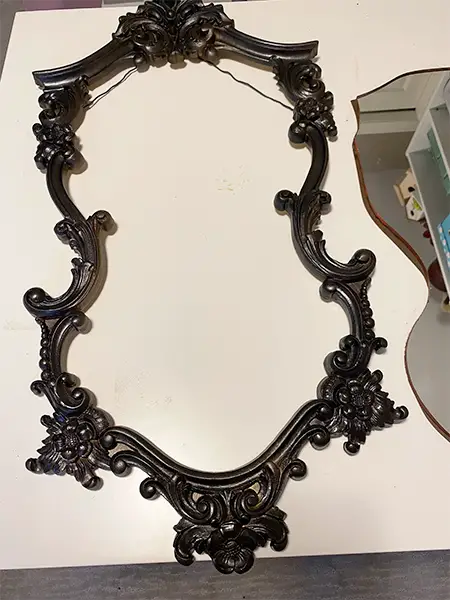
- mirror with a decorative frame ( ours came from a thrift store)
- Rustoleum oil-rubbed bronze spray paint
- Rustoleum black spray paint ( I used a matte finish)
- waterslide paper – must be the transparent one (not white)
- glass cleaner
- aerosol hairspray (no pumps – must be aerosol)
- Krylon clear acrylic sealer
- lint-free cloth or paper towel
How to make a Halloween Haunted mirror – with waterslide paper.
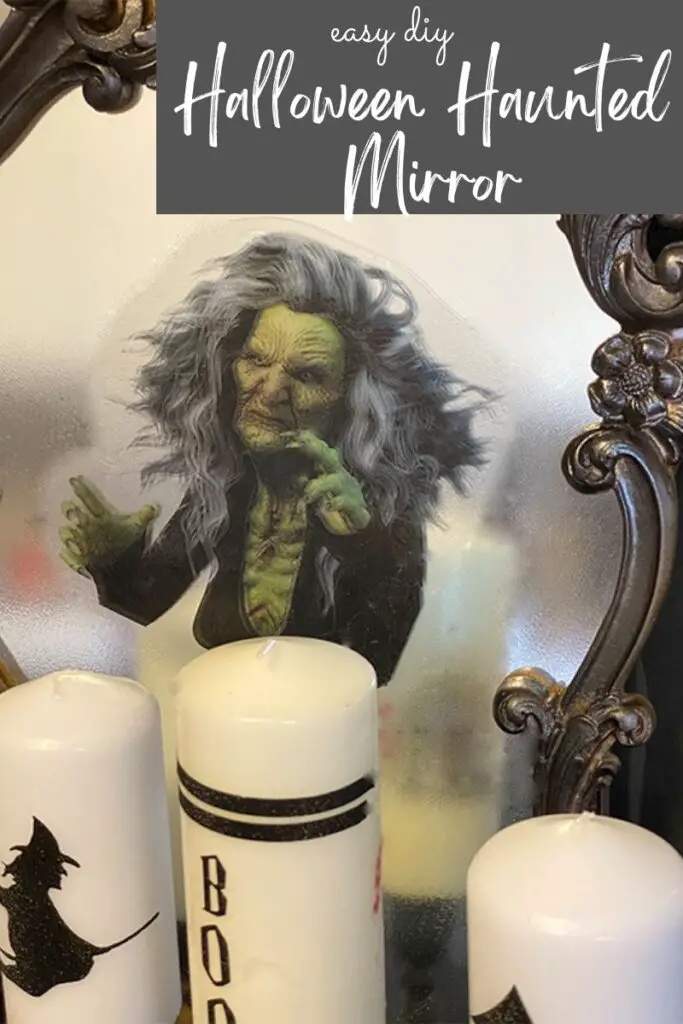
Download the witch image to make a Halloween Haunted Mirror
Tips on buying a mirror for this project at the thrift store.
The following are things to watch for when buying a mirror for this project
Which is better, a Glass or a plastic-coated mirror?
- Coated plastic or glass? – Make sure that the mirror is glass and not acrylic or any other type of plastic. Many cheap mirrors are not made of glass. They are lightweight, and some are even flexible.
- This is especially important if you plan to clean and reuse the mirror after you are finished with this decor piece. Some plastic mirror finishes can have an adverse reaction with the hairspray, causing damage (pitting pr bubbling) to the surface of the plastic. (Yep- I learned that the hard way!). If you are not planning on keeping the piece after Halloween is over, and you want to try the plastic mirror version, just be aware that you may not get the results you desire.
I used a coated acrylic mirror for a similar project, and when the hairspray hit the mirror, it pitted the surface of the plastic. It looked ok in the end, but had to be thrown out after I was done with it.
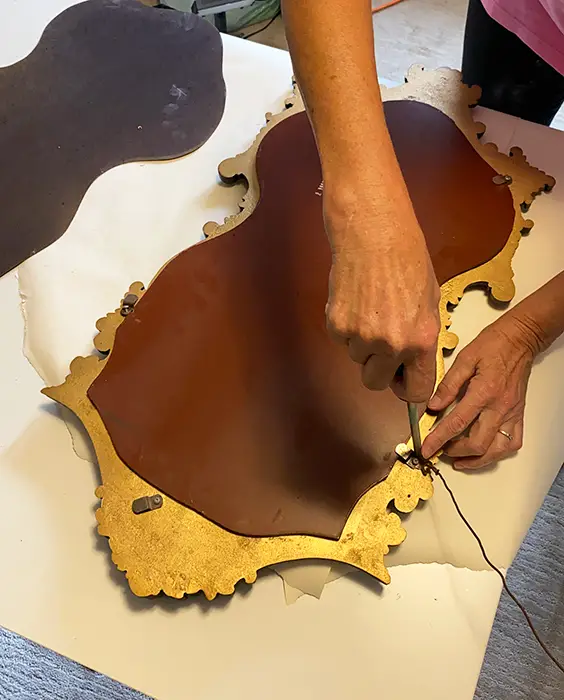
Can the mirror be removed from the frame?
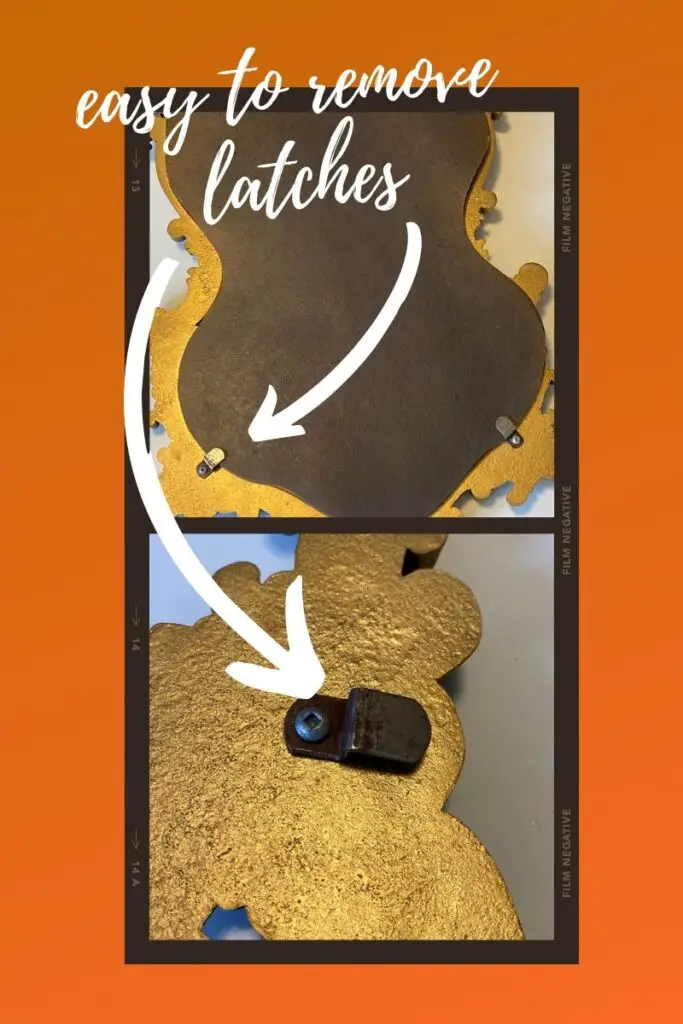
- Many mirrors are glued into the frame or have a paper covering over them. This makes removing the mirror from the frame to do the painting step extremely difficult, and you run the risk of breaking the mirror or, worse, injuring yourself. If you are shopping in thrift stores for mirrors to use, look for the ones that have easy-to-remove latches on the back of the mirror, like the one pictured below. The small metal tacks or nails are also good, as they can easily be removed or rotated and put back into place when putting the mirror back into the frame.
If you have no option but to buy a mirror that is glued into the frame, tape it off (using painter’s tape) and cover the mirror with paper when painting the frame. A good brand of painter’s tape, which I have used many times, is Scotch Brand painter’s tape.
Cracks or crackling in the mirror finish
When shopping at thrift stores, sometimes you will come across old mirrors that have a crackled look. This is called Desilvering.
Mirrors can get discoloured over time, causing those black smudges around the edges. This commonly occurs from moisture getting into the mirror and lifting the finish off the glass. When you want to make a Halloween haunted mirror, these are perfect. They already have an antiqued look, which will blend nicely into the Halloween haunted mirror look.
How to Make a Halloween Haunted Mirror
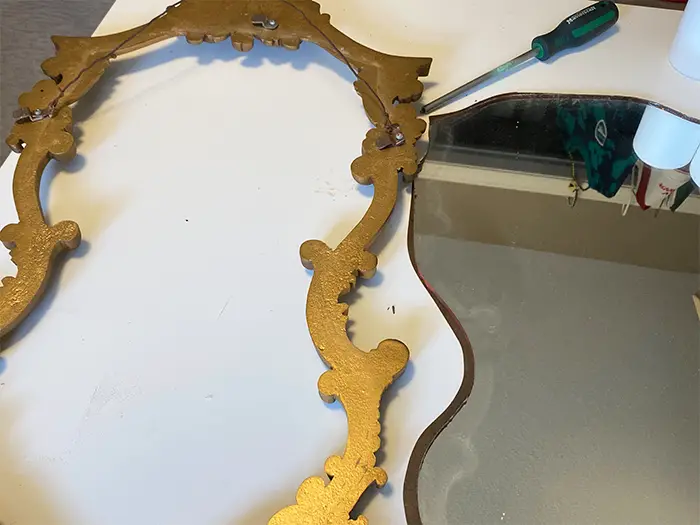
Remove the mirror from the frame
Hopefully, you were able to get a mirror as mentioned above, which is easy to remove from the frame.
Paint the mirror frame
Clean the frame and make sure that you have removed any dirt, dust, or oils from the surface.
In a well-ventilated area, apply one coat of Rustoleum oil rubbed bronze spray paint (follow the directions on the can) and let it dry. (I did mine outside in a shaded area on clean newsprint paper)

Once the first coat of paint is dry, apply a light coat of the Rustoleum Black spray paint. Do not apply a heavy coat, you want some of the bronze sheen to show through on the finished colour. The two colours will provide a deep dimensional finish.
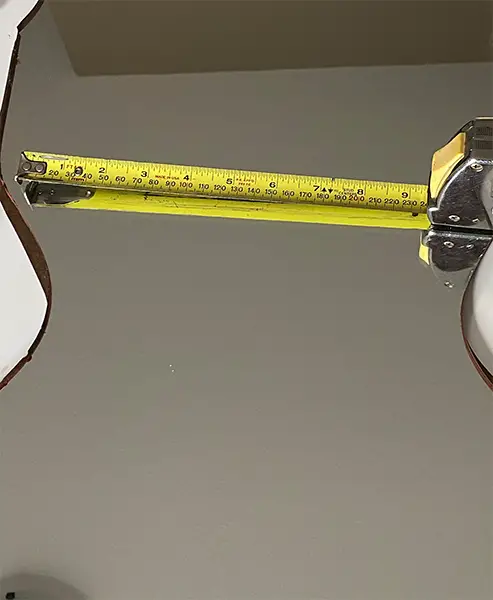
Measure the mirror
Measure the area on the mirror where your design will be placed. You will need to measure the area for the design because this determines the size of your printed image.
Print the image.
For this part of the project, we are using Waterslide paper. If you have never used waterslide paper before or don’t know what to is, here are a few quick need-to-know bits about waterslide paper.

Learn all you need to know about Waterslide Paper and all the surfaces you can use it on.
Waterslide Paper Information
- Waterslide Paper is an image transfer product.
- Waterslide paper is available for both Inkjet printers and laser printers.
- You print the image on the paper, seal the paper and then soak the image, and finally, you apply the image to your surface.
- The backing slides out from behind the paper during application (that’s why it is called Waterslide)
- It can be used on many surfaces, including our mirror.
- It can be sealed and made permanent or left unsealed and soaked, and removed later.
For further information on how to use waterslide paper, or how to use waterslide paper on wax candles or even how to use waterslide paper on wood, check out our other tutorials.
Follow the steps below to transfer the image onto the mirror.
Using your inkjet printer and Clear Waterslide paper, be sure that you have the paper inserted the proper way. The printing must be on the side of the paper with the film on it. Usually, the side with the film is the glossy side.
Make sure to resize your image before printing, according to the measurements of the mirror surface that you took earlier.
If you are using a cutting machine, you will be limited to the Cricut design space allowable size. There will need to be a bounding box around the image, that allows your cutting machine to read before cutting.
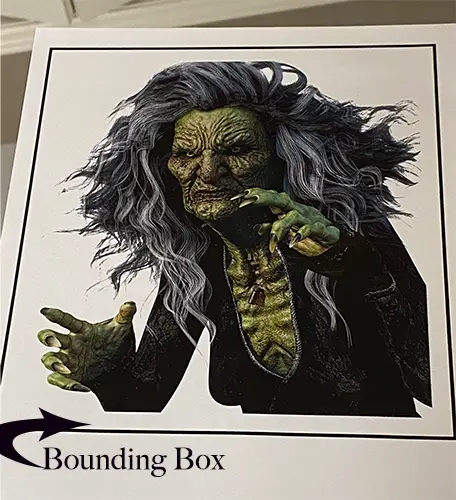
If using a cutting machine, turn off the bleed before cutting, and add an offset to ensure you have a border around the image (this makes removing the backer paper easier). Cutting too close to the edge of this image can result in tearing and ripping when sliding off the backer paper when it is wet. The witch’s hair has a lot of intricate cuts around the edges. Be sure to add a decent offset to avoid any problems.
If you need an image larger than is allowed in the Cricut design space canvas, consider printing and cutting with scissors.

Trim around your design
Cut around your design to remove any unused paper and save it for another project.
If you are using a cutting machine, this is when you need to cut away any excess paper and save it for another project.
Seal the Waterslide design
Place your design into a cardboard box (serves as a spray booth). Secure it using Zot adhesive dots or the removable adhesive of your choice. Using the adhesive keeps your paper in place when applying the spray sealer.
Spray with clear acrylic sealer and allow to dry.
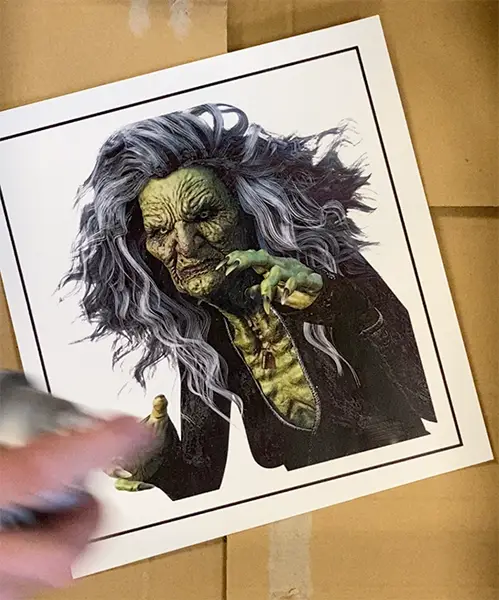
Repeat until you have 3 coats of sealer on the waterslide paper design. (Follow your package instructions if they differ.
Apply the Waterslide paper
Clean your mirror with a glass cleaner or wipe it with rubbing alcohol.
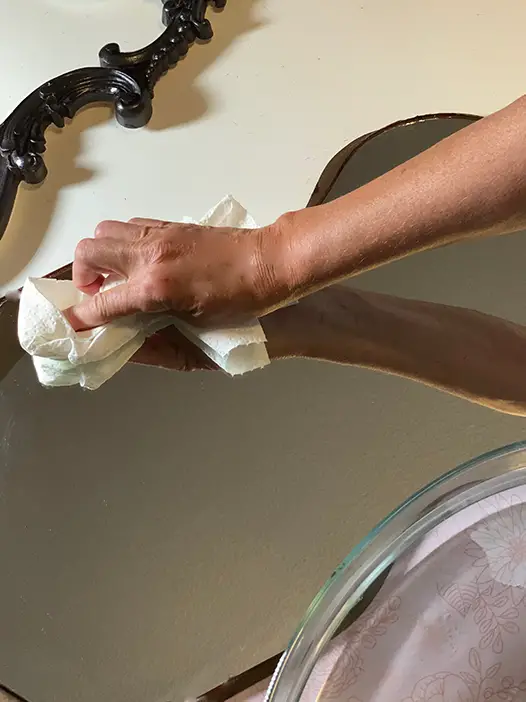
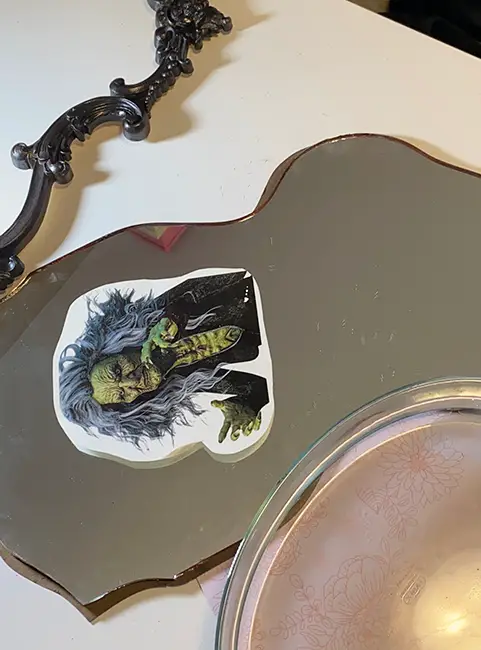
Position the image
Position the image on your mirror before you soak it. This will allow you to double-check the size of the cut image and make sure you like how it will look before you soak and apply the image.
Fill a shallow dish, large enough to hold your design, with warm water.
Make sure the water is neither hot nor cold. The water will activate the layer on the paper and loosen the backing.
Soak the image for approximately 30 to 60 seconds. This will activate the top layer and loosen the backing. (Follow package instructions if your package differs)
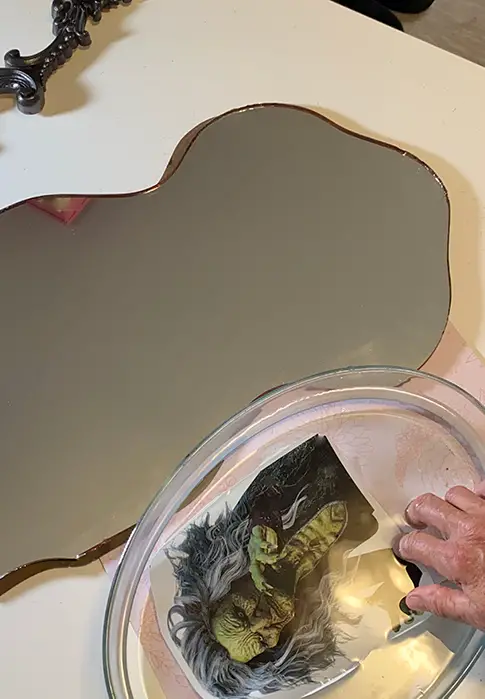
Check the paper by sliding a corner between your fingers to see if the backing is beginning to slide off. When you can feel the paper come off the backing, it is ready to apply to the mirror.
Remove the waterslide paper design from the water.
Position your design on the mirror.
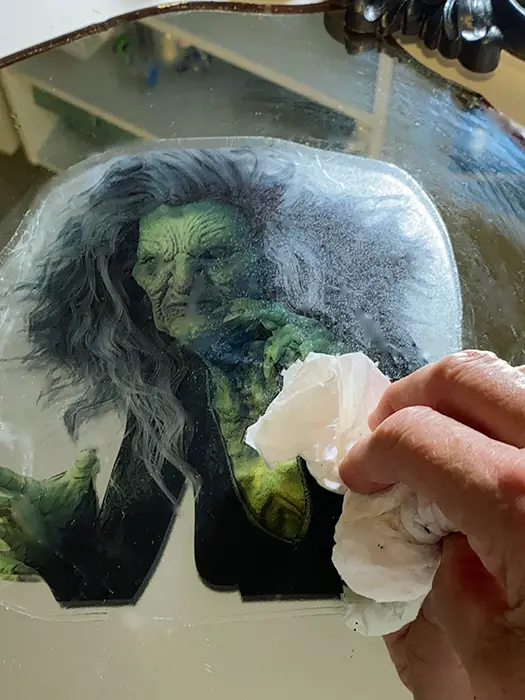
Once you have the design where you want it, slowly hold the top layer of the design while you carefully and slowly slide the paper backing out from behind the image.

Smooth out the design and remove any bubbles (carefully with your fingers)
Blot with a dry lint-free cloth or paper towel to remove any excess water.
Let dry.

To make the Frankenstein mirror (above), follow all of the same steps as the witch mirror, except, before you start, paint the mirror black. Use a matte finish paint and get the surface wet before applying the decal.
Seal – If desired
If you want the design to be permanent, curing is recommended.
To Cure: Use a hair dryer or heat gun to apply heat to the decal. be careful not to burn it. Some waterslide papers can also be cured in an oven. Check your product instructions. (Keep in mind, if you have a plastic mirror, heat curing should be avoided) You could also apply a coat of epoxy; however, for this project, I wouldn’t recommend it. I don’t like the effect that epoxy leaves on the mirror, but it is a matter of personal choice and it may work for you.
Apply cloudy mist
For temporary use
Do this step in a well-ventilated area, away from any flames.
On a covered surface, lightly mist the mirror with the aerosol hairspray. Go lightly, waving the spray back and forth over the surface. Let dry.
For multiple coats, cover the witch’s face so it doesn’t become too opaque.
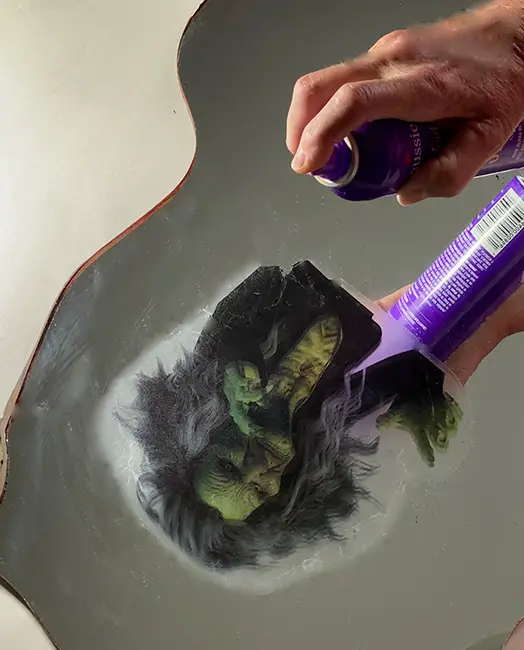
Check your results after the first coat. If you like the effect, move on to the next step. If you think it needs a cloudier look, repeat this step until you have the desired effect.
For Permanent use
Make sure you are in a well-ventilated area (no source of flames)
The mirror should be sitting on a covered surface. Lightly mist the mirror and design with Spray Glass frosting. For multiple coats, cover the witch’s face so it doesn’t become too opaque. (A piece of wax paper works well)
Once you have the desired look, let it dry and then move on to reframing the mirror.
Reframe the mirror.
Place the mirror back into the frame, and use it in your Halloween decor.
Want to learn more about Paterslide Paper? Check out our “How to use Waterslide Paper – The Ultimate Guide”
Ideas to display your Halloween Haunted Mirror
Once you have learned how to make a Halloween Haunted mirror and you have your finished project, it’s time to show it off.
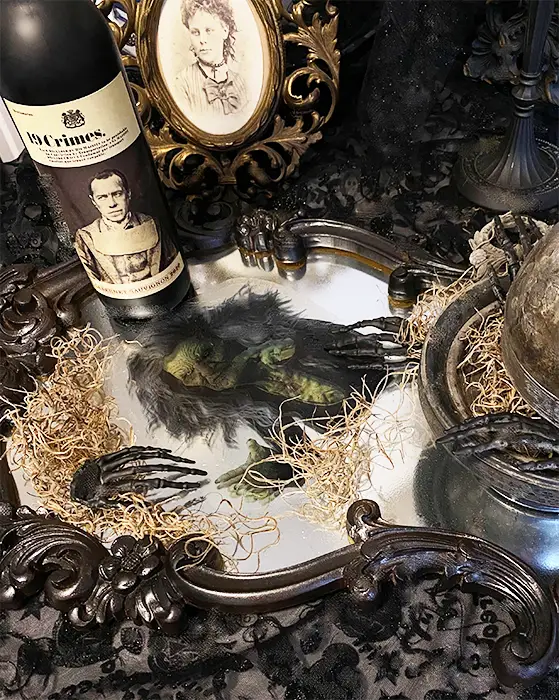
We like to use our Haunted mirror as a tray. We add a painted candelabra, our wax candles, customized with adhesive vinyl, heavily tarnished silver, some Spanish moss and mini skeleton hands. These are all great additions to your Haunted Halloween decor pieces.
How to remove the temporary Waterslide paper design after use
If you’d like to remove your waterslide paper design after using it in your decor, it is easy to remove, as long as it has not been sealed or cured.
To remove the waterslide paper, soak the paper with a warm, wet cloth. You may need to use hot water on it, (depending on how much hairspray is on it).
It will take a few minutes to remove, but with the hot water, you will be able to peel it off. It may not come off in one piece, but rather in several pieces. You can also use a non-scratching scrubber to remove it.
The hot water will also help remove any hairspray residue.
Once you have it removed, use glass cleaner to remove any leftover residue.

I hope you enjoyed this project and had as much fun as we did making it.

This website contains affiliate links. As an Amazon affiliate, I earn a small commission from qualifying purchases (at no cost to you).