
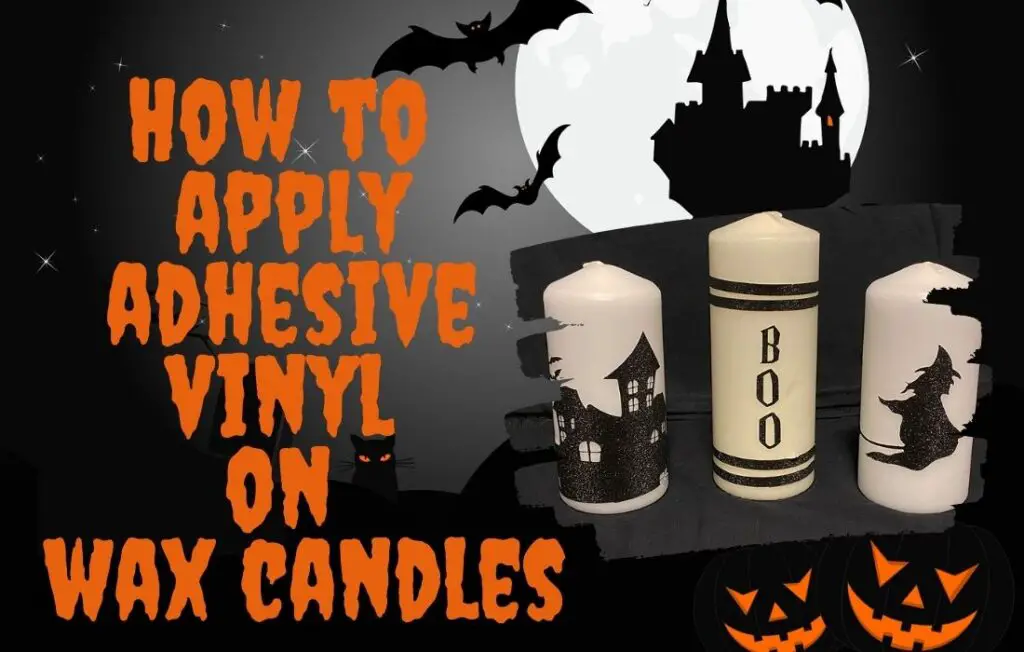
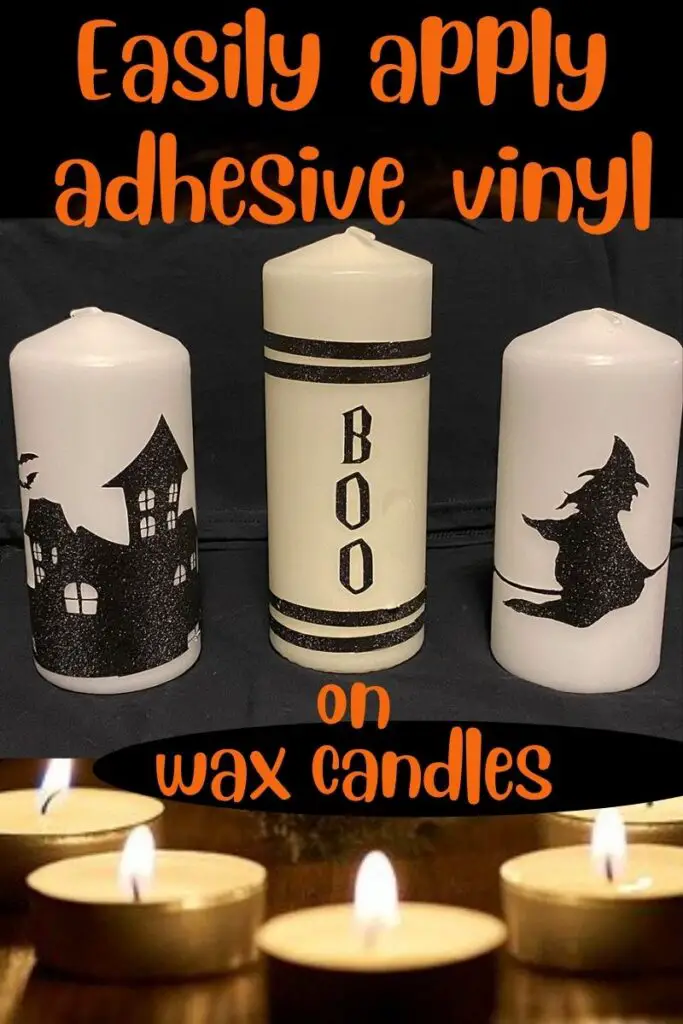
When Halloween comes around, I just love to decorate the table and the rest of the house. Every table or buffet needs a centrepiece, and every centrepiece needs candles. It is easy to apply adhesive vinyl on wax candles, giving them a custom decor look.
If you don’t have a Cricut cutting machine, you could use Waterslide Paper to make Halloween candles. Check out the post on How to use waterslide paper on wax candles.
Perhaps you are contemplating purchasing a Cricut Cutting machine. Check out our post on the different cutting machines and how to choose the right Cricut cutting machine.
About this project
These candles are for decorative purposes only!
If you wish to burn your candles after applying vinyl, you must remove the vinyl first. It is a fire hazard to light these candles while there is vinyl adhered to them. (to remove the vinyl, soak the design with a wet cloth or in water, then carefully peel it off- be gentle, so as not to gouge the wax.)
If you want candles that are lit without removing the vinyl design, I suggest using battery-operated LED candles. These designs can easily be applied to battery-operated candles.
Supplies List
This website contains affiliate links. As an Amazon affiliate, I earn a small commission from qualifying purchases (at no cost to you).
- Cricut cutting machine (or your personal brand favourite)
- Black glitter adhesive vinyl. or black Cricut Shimmer vinyl
- standard grip-cutting mat
- transfer tape ( I used contact paper)
- small scraper/smoother tool.
- Cricut spatula
- Cricut weeding tools
- 3 wax pillar candles
- rubbing alcohol
- paper towel or lint-free cloth
Supplies needed to complete the Halloween display.
- Halloween table runner or Halloween tablecloth
- recycled mirror or black tray or
- vintage picture in a frame (preferably a black frame)
- old book
- Spanish moss
- small plastic mini-bones or small plastic bone hands
- black wine bottle – the brand shown in the image is called “19 Crimes”, that’s the real name. Perfect or what?
- black candelabra
Choosing candles
The surface of the candle is super important when you want to apply adhesive vinyl onwax candles. You need to have a smooth surface. Candles that have any kind of textured surface or ridges will not work for this project.
Any candle that has a smooth surface is perfect. It doesn’t matter if it is shiny or matte as long as it is smooth.
Prepare your candle before applying adhesive
I always wipe down any surface before I apply adhesive vinyl on wax candles. Applying adhesive vinyl on wax candles can be tricky, so removing any surface debris first will help the vinyl to adhere better.
Use a lint-free cloth and rubbing alcohol to wipe the candle. Set the candle aside and let it dry while you prepare your design.
The transfer tape to use for this project.
It is important to use low-tack transfer tape. I used Con-Tact brand adhesive paper in this tutorial, and I always find that it gives me pretty good results.
How to make Halloween candles with Adhesive vinyl on wax candles
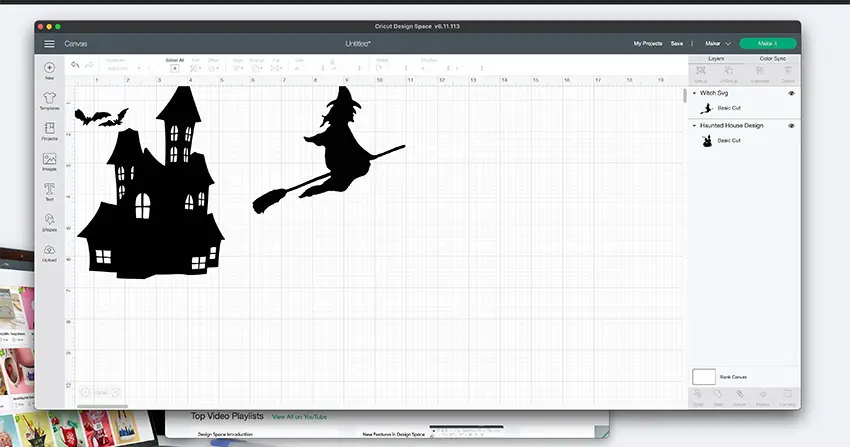
Download the free SVG from our free resource library
These designs are free for you to download and enjoy. No strings attached. You can use your own designs as well. The instructions are the same, no matter what SVG you are using.
Open Cricut Design Space
Upload the Halloween project into Cricut Design Space
A note about the “BOO” candle design
For the “BOO’ candle, I used theHarry Potter font from Dafont.com
Dafont.com is a website that contains a library of fonts that are free for you to download and use. Make sure that when you download them and use them, you read the usage guidelines. Most are free for personal use only, but you must check first if you plan on using them for other uses.
See the instructions below to make the vertical design that was used on the BOO candle
NOTE: I often change the black design to light grey on the Cricut Design Space canvas, so that it is easier to see before I start cutting. it just makes it easier to see when it comes to checking out the final “make it” screen.
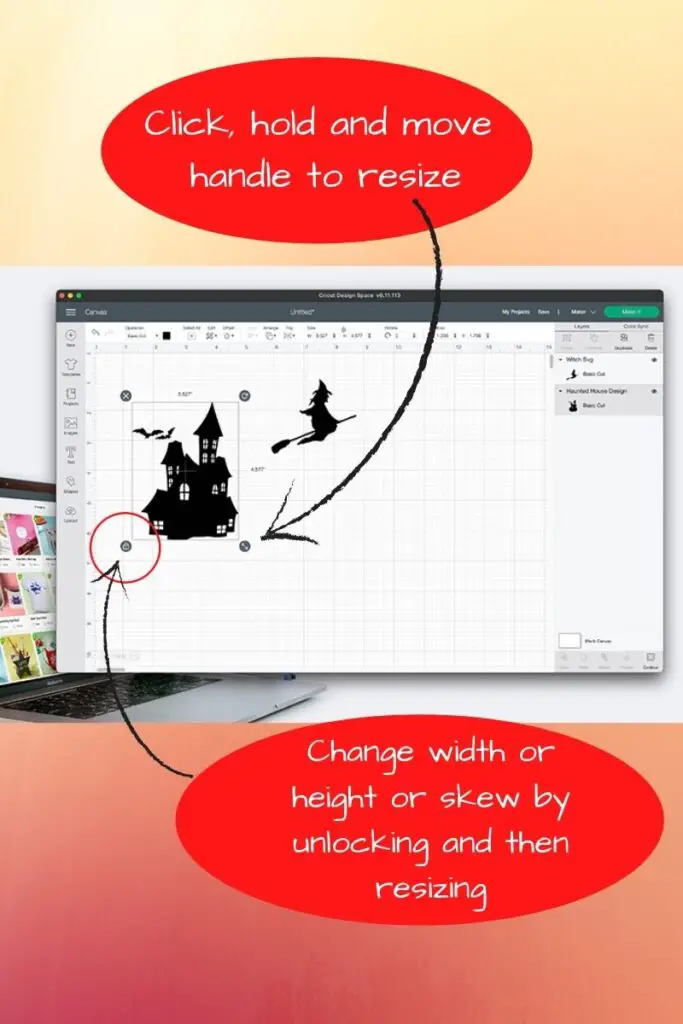
Resize the designs to fit your candles.
Measure the candle
When re-sizing – measure the circumference of your candle and make sure that when you “Make It” it will fit the candle.
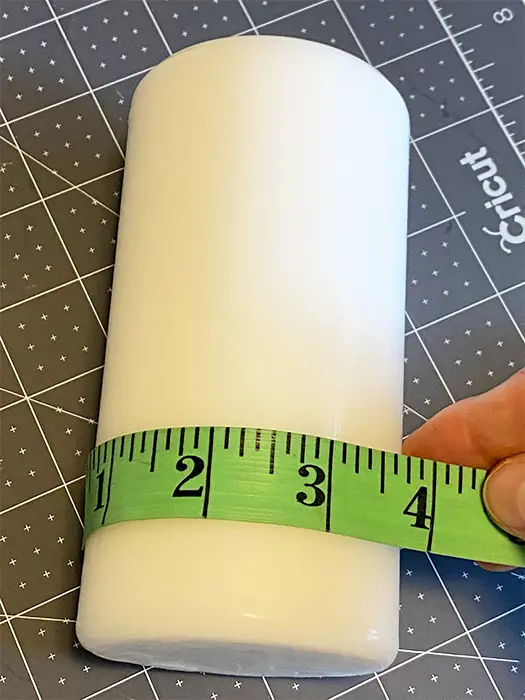
In Cricut Design Space, adjust your design to fit your measurements.
Select “MAKE “
After you select “Make it” the “Make it screen” will appear.
Select your materials from the drop-down menu
Select the product that you have chosen – I am using Vinyl – Premium Shimmer – Black

Note about “Cricut Shimmer Vinyl” – If you have difficulty cutting this design, select “premium vinyl-textured holographic” and use more pressure
Cut the project
Continue to apply adhesive vinyl on wax candles
How to make the “BOO” design
The Boo design candle is simply text and a shape from Cricut Design Space.
The text is HARRY POTTER, downloaded from Dafont.com.
In Cricut Design Space, select TEXT
if you are using a downloaded font, the font will be found under SYSTEM fonts ( if you can’t find it make sure that you have installed the font onto your computer)
If you have downloaded the font while working in Cricut Design Space, you will need to save your project, close the program and then re-open it.
Ungroup the word BOO, either by using ungroup in the top-right menu or under “advanced” located on the top menu. You can also just use your carriage return when typing out the word and then align and center horizontally.
Move the letters so that they line up vertically. Drag a bounding box over all three letters, group and then weld. Weld will put the word into a single-cut file for the word.
The horizontal lines are made by:
- Select shapes from the left side menu.
- Select the Square
- Select the lock on the bottom left corner of the square to unlock the shape
- resize to make a thin line.
- When you have the desired width and length, relock the shape.
- Duplicate
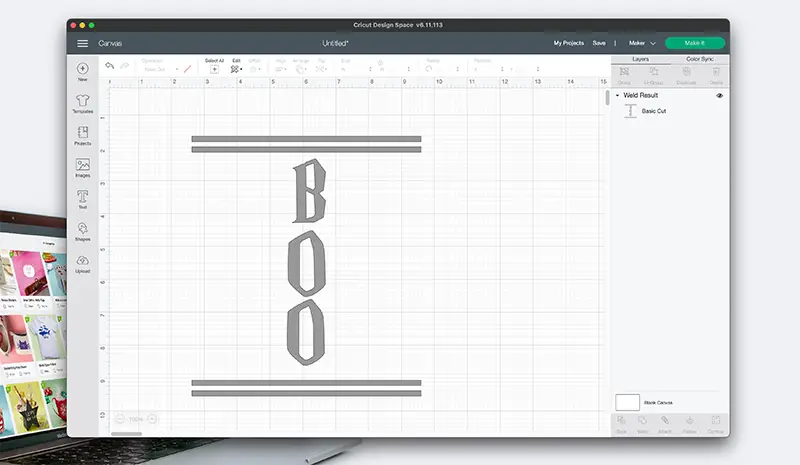
Align – Center the design (horizontally)
- Drag a bounding box around everything and select Align” from the top menu.
- Select Align Horizontally – this will center the design.
- Drag a bounding box over the entire design and weld. This will load onto the cutting screen in the proper placement
- If you select Make and the parts are cutting separately and not in the desired layout, that just means that the items are not welded.
- Cancel the cut and weld, and then continue.
- Choose your material from the drop-down materials menu. ( I am using Cricut Shimmer vinyl)
- Choose “MORE” for pressure ( this will ensure a smooth, clean cut edge)
- Press the flashing cut, light on your Cricut machine
Weed all vinyl designs
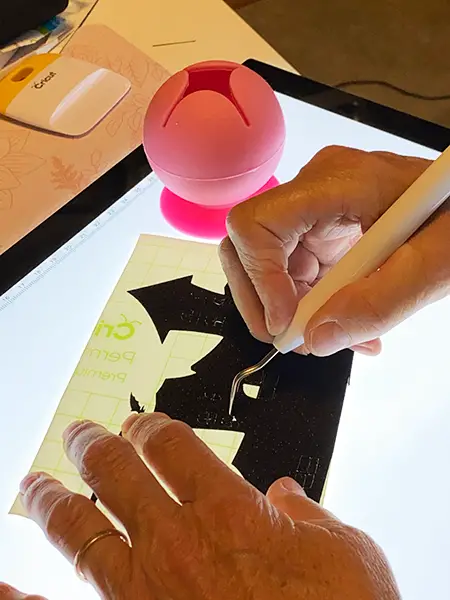
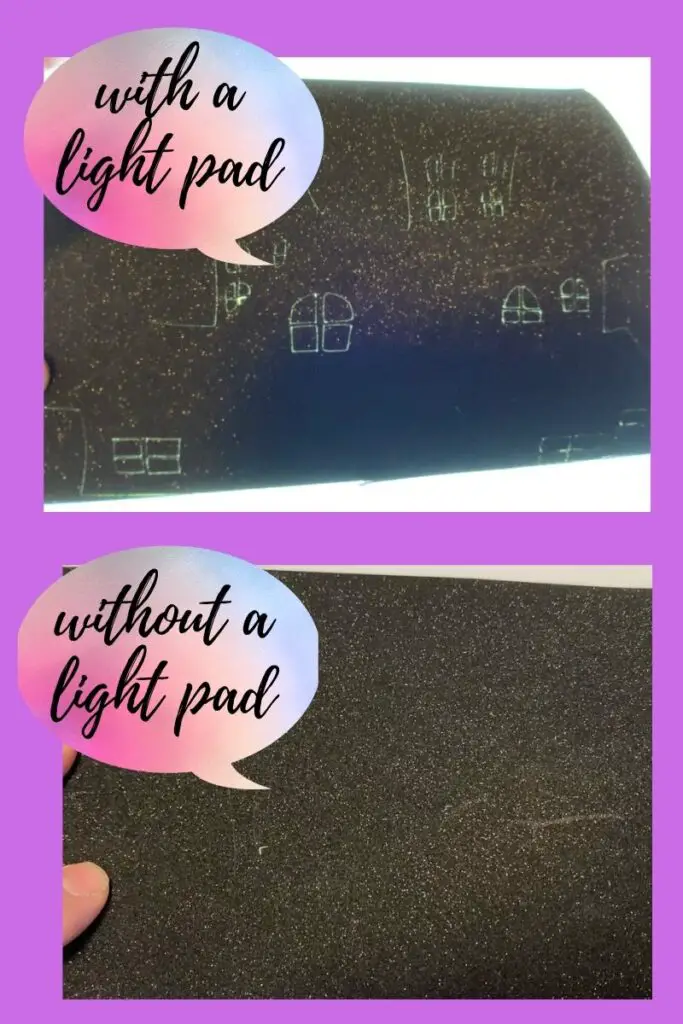
I don’t usually have any issues weeding, but I find the Cricut shimmer vinyl in black more difficult. I opt to use a light pad as it helps to define the liners and makes the weeding easier, for this particular material.
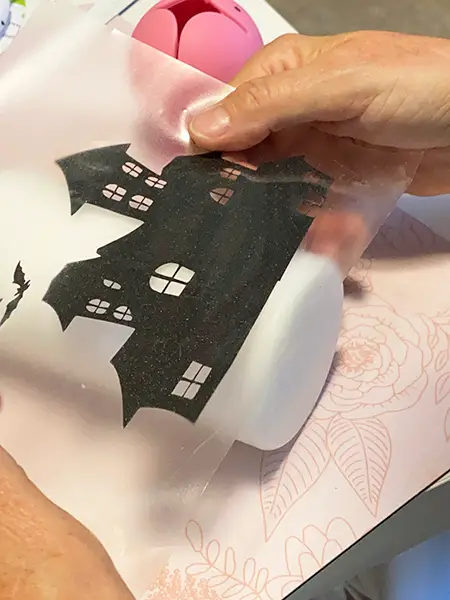
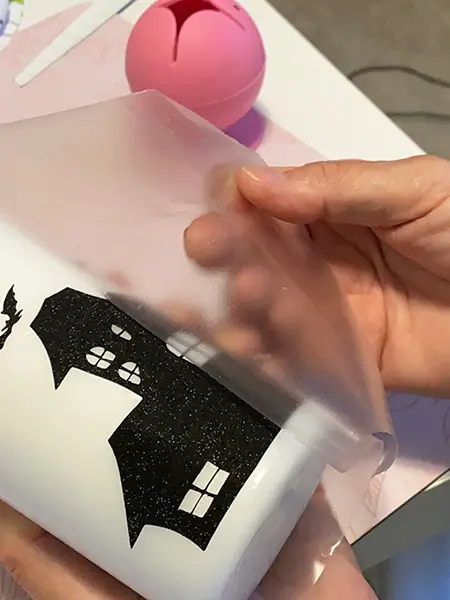
Apply transfer tape onto the design.
I used a low-tack transfer tape (Con-tact paper) when making this design. The low-tack Con-Tact paper allows the design to be removed from the backing. The strong grip tape is difficult when applying adhesive vinyl on wax candles, as the candle surface has a wax finish.
Using your scraper, adhere the cut design to the transfer tape.
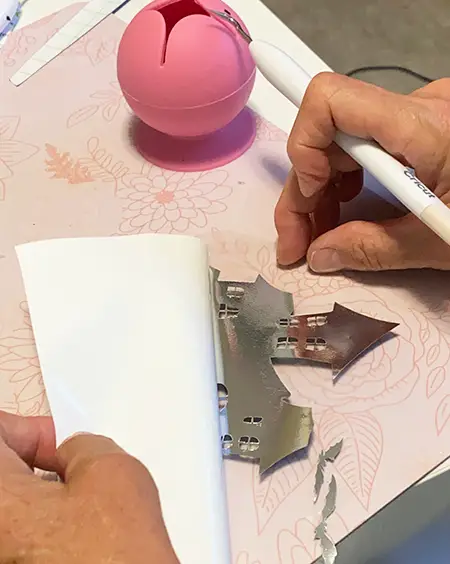
Carefully remove the vinyl design from the backer paper.
How to apply adhesive vinyl on wax candles
Keeping the candle lying flat, position your cut design over the top of the candle. Reposition until you have the design in the desired location.
Using the small scraper/smoother, push the design onto the candle surface.
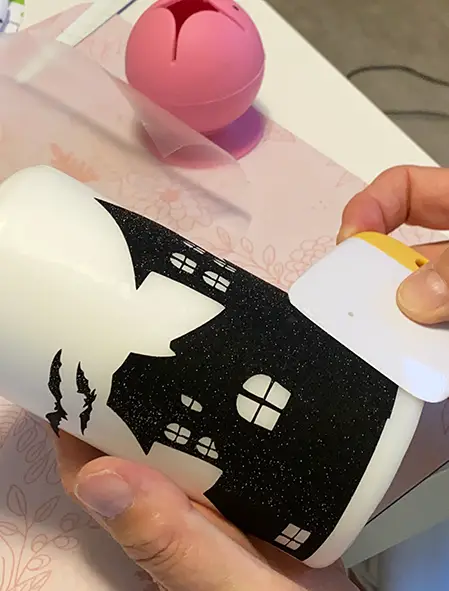
Carefully remove the transfer tape.
Check and hold, press down any bits that did not fully stick.
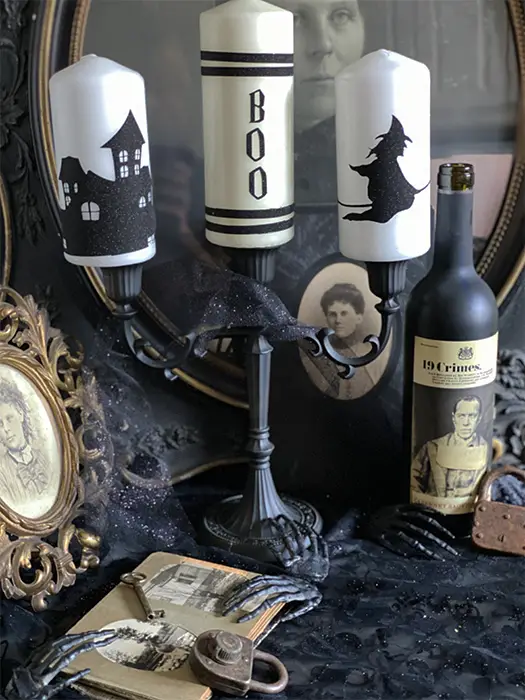
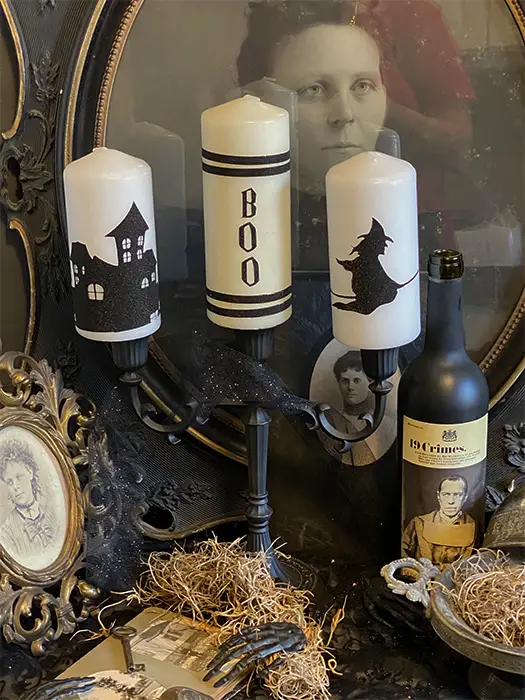
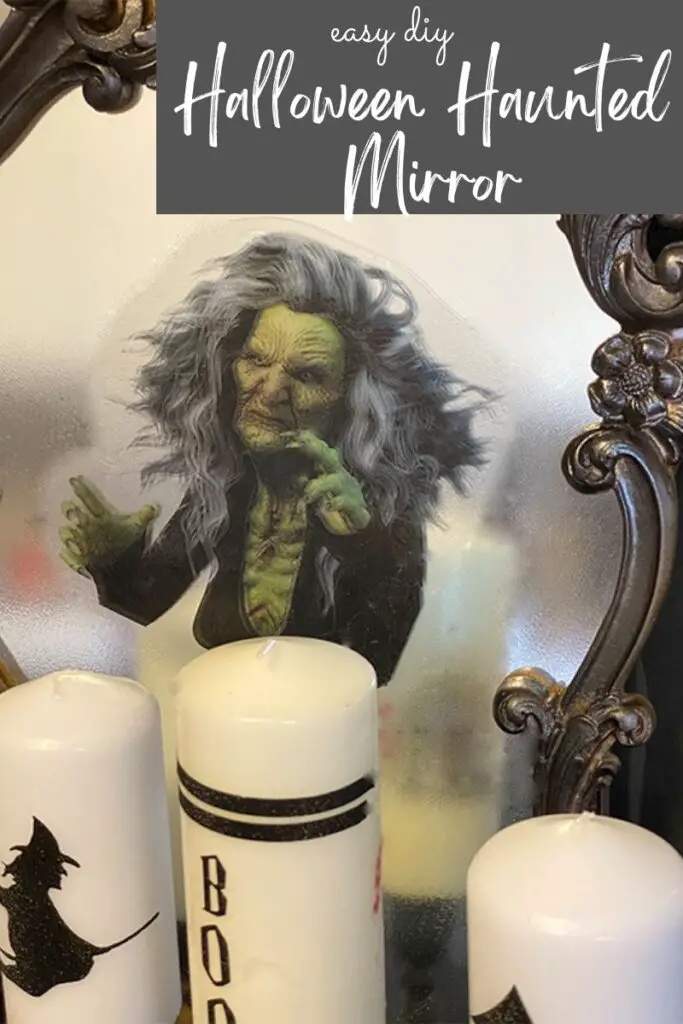
Assemble the Halloween Display
My display is made from vintage items. The large framed picture and the small framed picture are both from the 1920s. If you have access to old family collectables, this is a perfect place to use them.
The candelabra is a thrift store find (4$). It was faux silver, and I sprayed it with 2 coats of black spray paint.
The tablecloth is a Halloween fabric, hemmed to fit the table. The spider is from a local retail outlet.
Place the finished candles on the candelabra or on a mirror with some Spanish moss around them in the desired position. Sprinkle the mini bones pr small bone hands around the moss. Place the old book ( preferably with old black and white photos), open with bones or a bone hand on the pages. Mine also has a couple of rusty old locks included.
Add a black wine bottle and some tarnished silver to complete the look
If you wish to use your candles in a centrepiece, this is another great place to use tarnished silver. It has the perfect dark appearance, which is just perfect for Halloween.
Time to throw a party and show off your beautifully decorated Halloween display.
We hope you enjoy this tutorial and are inspired to apply adhesive vinyl on wax candles to make your own spooky Halloween display.


This website contains affiliate links. As an Amazon affiliate, I earn a small commission from qualifying purchases (at no cost to you).