
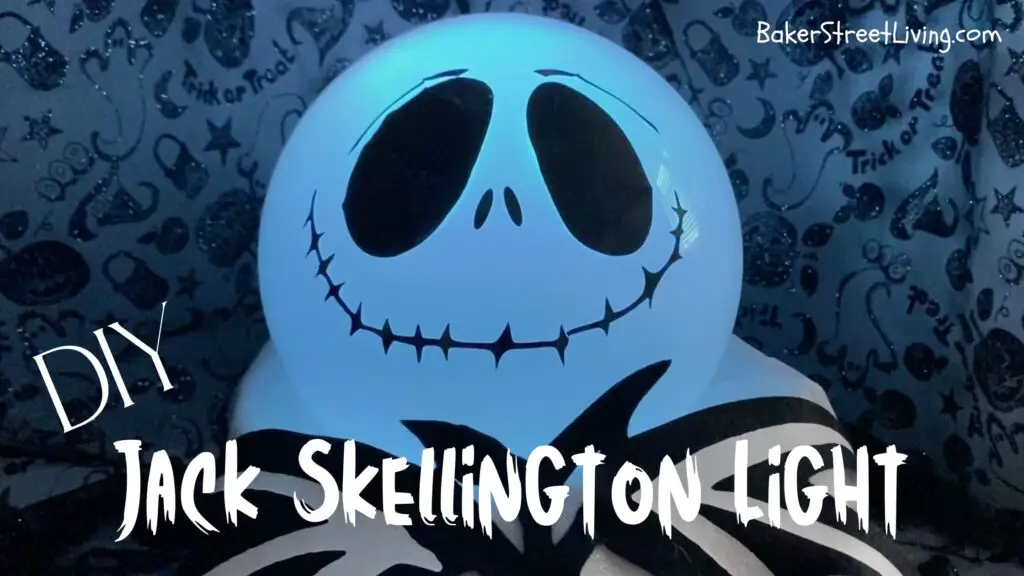
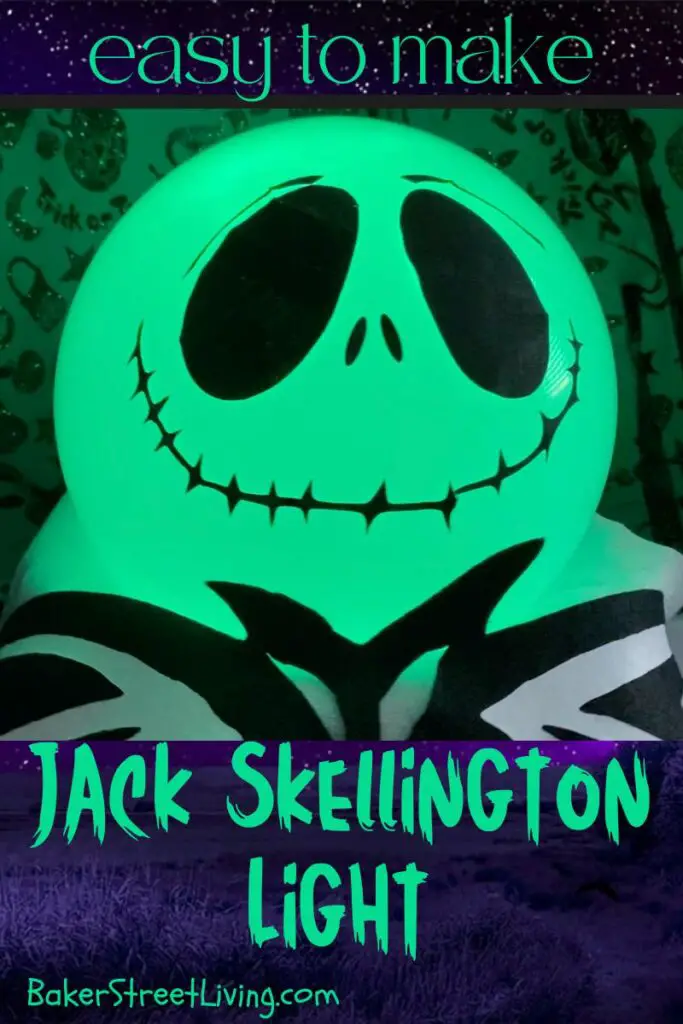
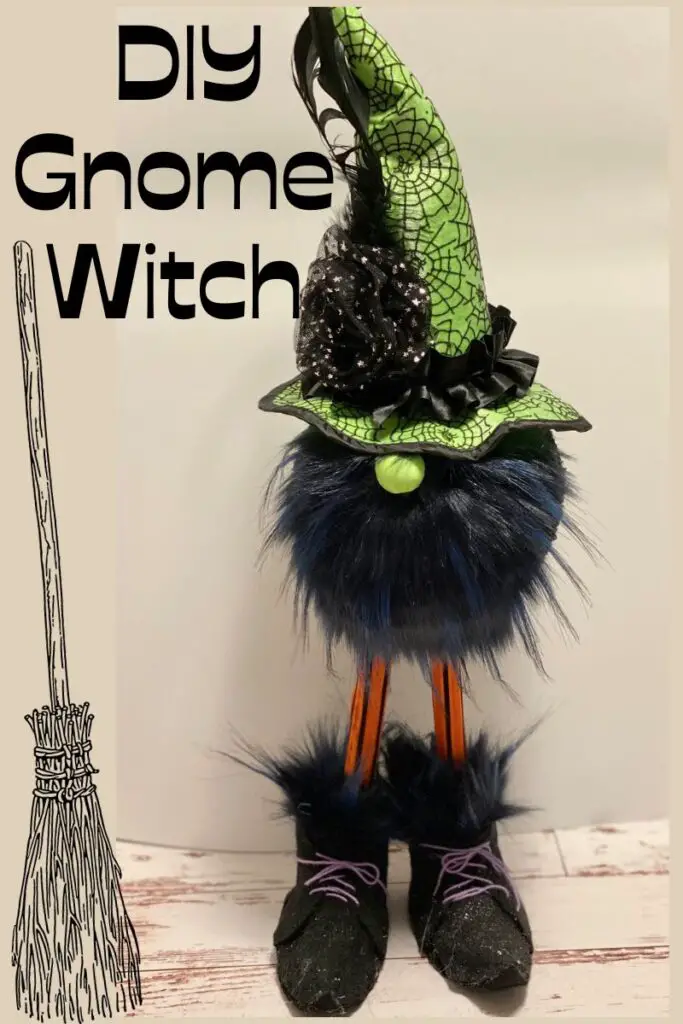
Many years ago, I got a great deal on a Halloween Jack Skellington tombstone, and I have found myself hooked on Nightmare Before Christmas Halloween decor ever since. This super-easy DIY Jack Skellington Light is a great addition to your Halloween decor. This is an awesome pattern and would look fabulous used on wax candles for Halloween.
Easy DIY Gnome Easter Eggs (Free printable and SVG)
In our DIY Jack Skellington light project, we are recycling an older-style light shade. These are commonly found in thrift stores. If you are not able to find one, you can also order one here. But, it doesn’t have to be the light that we use; you can use this on any surface you want, even mason jars with tea lights in them, or push fairly inexpensive lights.
Our pattern, available in our free resource library, can be easily resized and used on multiple surfaces or projects.
What You’ll Need
This website contains affiliate links. As an Amazon affiliate, I earn a small commission from qualifying purchases (at no cost to you).
- white glass globe light shade. (6 or 8-inch diameter)
- Black felt (we used an 8-by-16-inch piece
- White HTV Vinyl (glitter recommended)
- black adhesive shimmer vinyl
- remote-controlled LED light (colour changing)
- small pedestal stand (optional)
- black or white Halloween fabric (if using a pedestal dish)
NOTE ** You can easily make the collar out of heavy cardstock if fabric is not an option for you. Replace the black felt with heavy black cardstock and the white HTV with white adhesive vinyl or a white cardstock and glue it on)
Craft Room tools list
- Cricut Cutting Machine (A Cricut Maker or Maker3 is needed if cutting fabric)
- Cricut fine point cutting tool
- Cricut Rotary cutter tool (for fabric)
- standard grip mat
- Fabric grip mat (12 by 24)
- weeding tools
- transfer tape
- heat press
- parchment paper
Note – If you are unable to cut fabric on your Cricut cutting machine, cut the fabric pieces from cardstock and use the piece as a pattern to cut the fabric collar.
How to Make a DIY Jack Skellington Light – The Video


Instructions for DIY Jack Skellington Light
Instructions for Cutting the Face Pieces.
- Measure your light and decide the size of the face you want for your light. (Mine is an 8-inch diameter glass globe )
2. Upload the DIY Jack Skellington light design into Cricut Design Space.
3. Select Ungroup
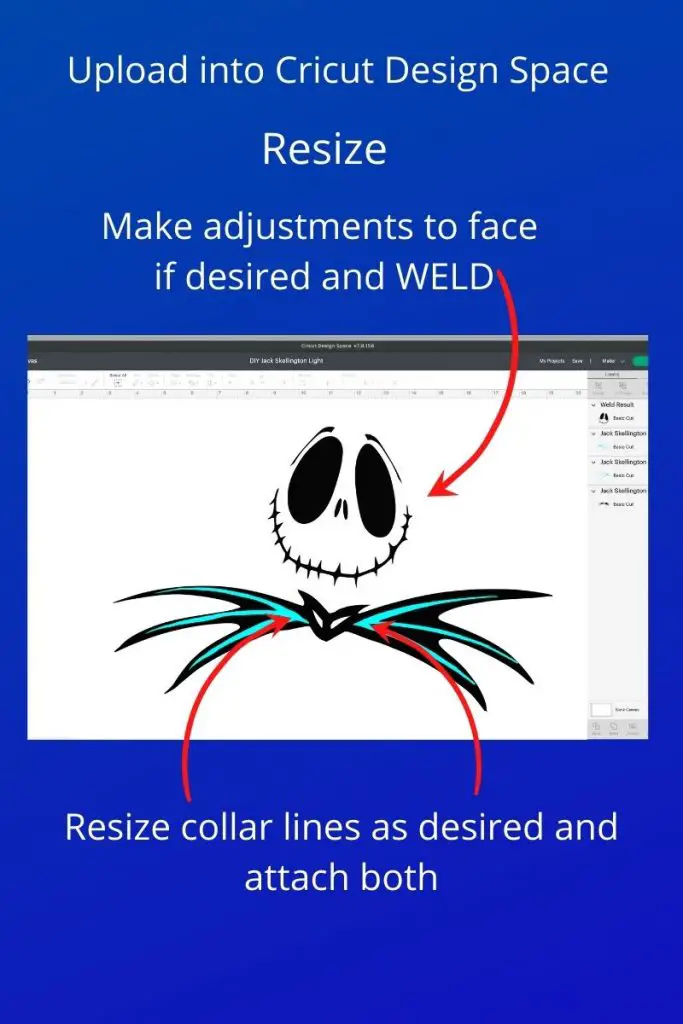
Note: Each component of the Jack Skellington face is resizable or can be deleted. Once you have each component as you like, be sure to weld.
4. Adhere Black Shimmer adhesive vinyl to a standard grip cutting mat.
5. Load the mat into your Cricut cutting machine.
6. Select “Make it” from Cricut Design Space
7. Follow the prompts on the Cricut Design Space screen.
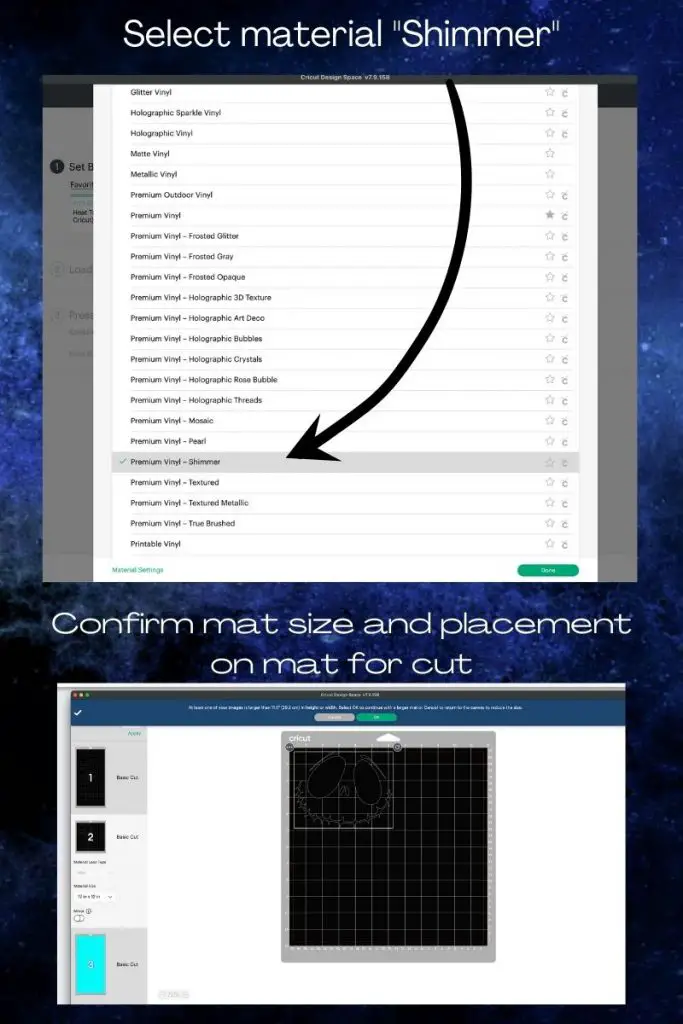
Choose “Cricut Shimmer Adhesive Vinyl and more pressure.
NOTE – Before unloading your mat, check to make sure that the cuts are complete. If not, push the “C’ again to prompt the cutting machine to make another pass. If you unload the mat and need to recut, there are no guarantees that the cuts will be in the same spot.
8. Once cut, remove the vinyl from the mat. The best way to do this is to turn the mat upside down and remove the mat from the vinyl. This will prevent the vinyl from curling, which makes weeding much easier.
9. Weed vinyl and discard the weeded portions.
10. Apply transfer tape onto the shimmer vinyl. Shimmer vinyl can be difficult to remove from the paper backing. I find that the Cricut brand regular grip transfer tape works best. I have heard from others that it doesn’t work for them, and they prefer strong grip transfer tape. It’s trial and error, so use the product that works best for you.
Carefully remove the vinyl from its backer paper. A weeding tool can help get smaller pieces to release from the backer paper, but use caution and go slow.
11. Cut slits around the edges of the transfer tape. This gives the transfer tape a little more flexibility when applying vinyl to a rounded surface.
Instructions for Cutting Collar Pieces.
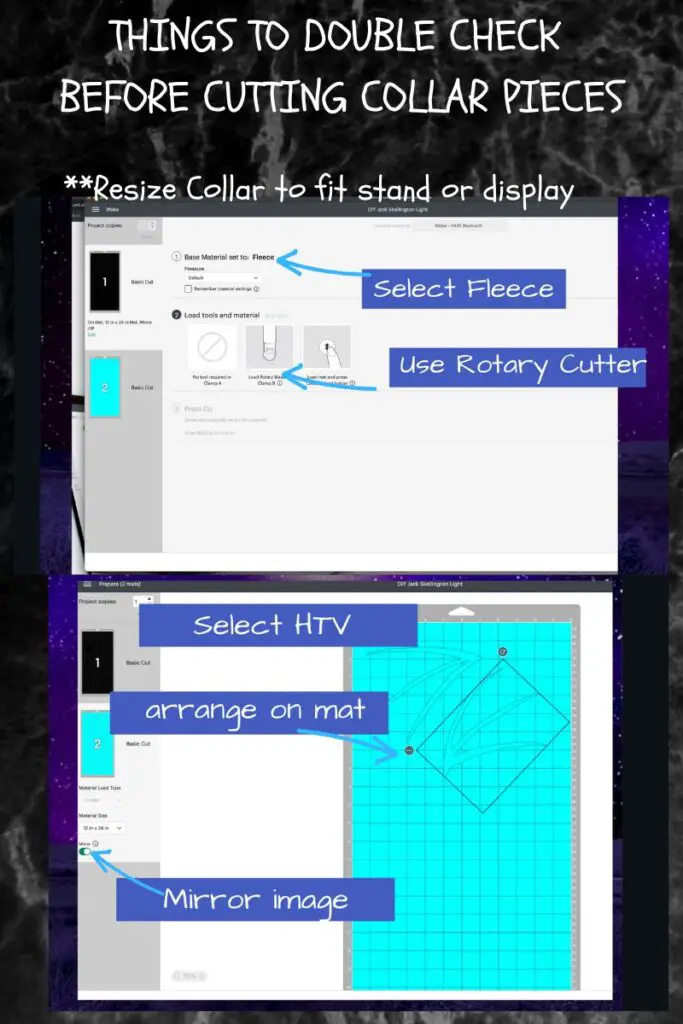
- Continue in Cricut Design Space on the collar. When making it, choose the fleece setting. (I find this cuts better on felt, but you will need a Cricut maker. If you do not have a Cricut Maker, you may need to apply a backer to the felt to keep it from ripping.)
2. Use a fabric Grip Mat or a standard grip mat that you dedicate to using fabric with (this is what I do) and secure the black Felt into place.
Note – You may need to use a 24-inch mat, depending on the length of the collar or cut it into 2 separate pieces.
3. Once the pieces are cut, carefully remove the felt from the mat, taking care not to rip or stretch the felt.
4. On a standard grip mat, secure the white (or colour of choice) HTV vinyl onto the mast according to package instructions (shiny side down)
5. Cut the design and weed the design by removing the mat from the vinyl (as shown when making face pieces)
6. Place the HTV pieces in place on the collar and secure in place with heat-resistant tape (if desired)
7. Following your product instructions, apply the HTV using a heat press along with a pressing cloth or parchment paper.
8. Cool Peel or Warm peel accordingly.
Assemble the DIY Jack Skellington Light
Drape your Halloween fabric over the pedestal stand or bowl
Center the collar over the dish
Place the LED light in the center of the collar
Place the Jack Skellington Head over the light.
Using your remote control, turn on the light and enjoy!
A cool display idea is to place a rotating platform underneath your stand. You can place it in a window, turn on the light and have the head rotate in various directions. It is a very cool effect, especially when nestled in amongst other Halloween decor.
I hope you have fun making this DIY Jack Skellington Light.

This website contains affiliate links. As an Amazon affiliate, I earn a small commission from qualifying purchases (at no cost to you).