
Needle felting is a fun, versatile craft suitable for just about anyone. From making ornaments, small animals or large portraits. Needle felting can be as easy or as difficult as you choose to make it. Learning how to needle felt is simple and inexpensive, compared to many other crafts.
How To Needle Felt – A Beginner Project
What is Needle Felting?
Felting falls into two categories, wet felting and needle felting. In this post, I will provide a guide for learning how to needle felt, which is a perfect reference guide and an ideal introduction for beginners who want to learn how to needle felt.
Needle felting is a process using a needle that has barbs on it to poke all-natural wool fibres (wool roving) to form a shape. The barbs on the needle catch the fibres from the wool and lock them together. You work the wool into a desired shape or pattern until you have completed your project.
Using felting needles and different types of wool, you are easily able to produce three-dimensional shapes and artwork.
When needle felting, you can use a single needle for adding small intricate details, or you can use tools that hold multiple needles to cover a later area at once. The benefit of the tools that hold multiple needles is that you can speed up your felting time and then complete your project using single needles. This is particularly beneficial if you sell your handmade items.
This website contains affiliate links. As an Amazon affiliate, I earn a small commission from qualifying purchases (at no cost to you).
Is Needle felting easy to learn?
Needle felting is simple to learn. If you can hold and poke a needle into a piece of wool, then you can learn to needle felt. As you practice and do more needle felting projects, you will learn different techniques and how to add different textures.
I would not recommend this craft for children, as the needles you are using are extremely sharp and accidents can happen easily.
The crafts you make while needle Felting can be as basic or as complex as you choose. A great place to start is to purchase a Needle felting Kit. Needle felting kits usually include one needle, a small felting pad, the wool needed, instructions and any embellishments needed for your completed project. Most needle felting kits are for making small animals, figures or shapes that are for ornaments, key chains or displays.
Is Needle Felting expensive?
When you are first learning how to needle felt, you will need to purchase the basic tools. Once you have the basic tools for needle felting, you will only need to purchase the wool roving. The wool comes at various prices depending on its origins and fibre length. (see below – types of wool)
Felting needles come in 3 gauges (sizes) and shapes. A basic beginner set of needles can be purchased for around 15$ USD. (Further pricing and information are below in the supplies list)
Other items needed to get started are a felting pad, a finger cot, which is a protective soft thimble-like cover for your fingertips, and a punch tool (holds multiple needles)
When you are starting needle felting, your initial tools (not including wool) run approximately 30-35$ USD. (Prices vary by manufacturer)
Supplies Needed for Needle Felting.
These are individual supplies needed, along with any notes that we think are relevant.
- Felting Needles – A variety pack is a great way to start, and then add or replace as you go.
- Felting Pad – If you start needle felting as a regular hobby, get a good-quality pad that doesn’t break down. I use a WoolBuddy felting pad and have had the same pad for 3 years, and it is still like new. I have also used the needle felting foam blocks, but they break down fairly quickly. A better investment is a WoolBuddy felting pad.
- Finger Cots – these are a must-have for beginners. I admit that I don’t often use them anymore, but as you are learning, it is wise to protect your fingers. The needles are extremely sharp and are painful if you jab them into your finger. Make sure that you get the proper finger protectors. A set made of thick leather is very good for protecting your fingers. There are silicone ones available as well; make sure they are designed for needle felting, as some needles will pierce right through the thin silicone.
- Needle Pen Tool – This is optional. The pen holds the needle and feels like a pen. This is good if you have difficulty holding the small needle or suffer from arthritis or other hand/finger issues. The Clover needle felting pen allows up to three needles at once. I have some Clover brand craft tools and have found them to be of good quality and a reputable brand.
- Needle felting punch tool – This tool holds up to eight needles at once. This allows you to felt a large surface quicker than using one or two needles at once. I use this when making murals or picture-style art. I use it to lay down my base colours quickly. It can also be used to tighten an already felted surface. There are needle punch tools that hold 3 needles up to 8 needles, to meet your felting needs.
- Storage Container – This is extremely important. Keep your sharp needles stowed away where no one can be injured. If you have children or pets, this is a must-have! If you have small children, I recommend one with a locking/latch lid.
- Wool Storage – If you have pets, I recommend a storage box for storing wool. When I am felting, I have often seen my cat bolt from my craft room with a ball of wool. Cats are attracted to the smell of wool. I use clear plastic storage bins, so I can easily see the colours and pull out the bins I want when making a project.
- Scissors – Many kits come with snips (small scissors). You don’t need special scissors. I use a small pair of fabric scissors from my sewing box. As long as they are good-quality, sharp scissors, they’ll be fine.
Wool – For beginners, I recommend a variety pack that contains about 6 or so neutral colours and then a multi-pack that contains a variety of additional colours. This will give you a decent selection to get started on a project. It may seem like you don’t have much wool, but a little goes a long way.
Wooden Skewer – Whenever you are making animals or figures with arms, legs or long pieces like branches or sticks, a wooden skewer will help you get a nice, straight and even piece. Wrap the wool around the skewer at the desired length. Do a little poking while it is still on the skewer, making sure to avoid poking the wood. (It will break your needle) and then slide out the skewer.
Using a skewer also helps when making little balls. You can easily make multiple ones of the same size.
Types of needles
When learning to needle felt, knowing a bit about needles is essential. Needles used for needle felting typically come in four styles: Star, Triangular, Spiral and Reverse.
All three types of felting needles have small barbs on the end, which catch the wool fibres, causing them to be pushed and locked together.
All felting needles come in a variety of gauges, which are identified by numbers. Medium gauge needles (36 to 38) are ideal for beginners and everyday felting projects
Star-Shaped Fleting Needles: These needles usually have four sides with barbs on all sides. This means that the felting process will go faster
Spiral or Twisted Needles: The shaft of these needles is a spiral, which is slightly twisted with barbs spread out over the surface. Since there are barbs over a wider area, these needles felt quickly.
Triangular Needles: The triangular needles are the most commonly shaped and are good needles for everyday felting. Many small kits to make animals and charms come with a triangular needle.
Reverse barb Needles: – On a reverse felting needle, the barbs go in the opposite direction of the barbs on the other 3 styles of needles. Reverse Needles create a fuzzy or hairy finish and are ideal for adding fluff or tufts.
Can I use other types of needles for needle felting?
No, needle felting needles are specially made with barbs on them that make the fibres lock together when punched. Straight needles, like sewing and upholstery needles, will not create anything except frustration.
Types of wool used in Needle Felting.
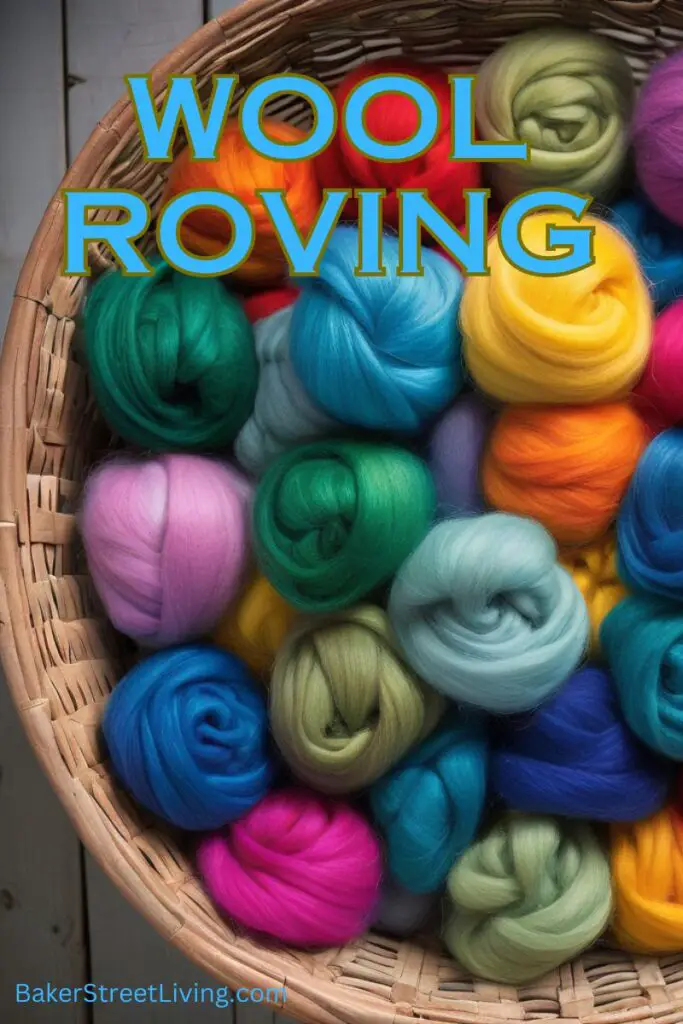
The fibres used in needle felting should be 100 percent animal fibre. When purchasing products, make sure they are not combined with silk, polyester or other non-animal fibres. The wool used in Needle felting is usually referred to as Wool Roving (or Tops). Wool roving is wool that has been washed, dried, dyed (unless natural) and carded. When you purchase Wool Roving, all of the fibres will be lying in the same direction and usually rolled up or tied. Wool roving is what you would use to spin into yarn.
Wool Roving is measured in “Microns”. Micron is a measurement of fibre length. The lower the micron, the finer the fibre, and the higher the micron, the coarser the fibre is.
Wool roving also comes from many different breeds of animals. For example, Merino wool, which is a very common wool for wool roving, is fairly inexpensive (in comparison to other wools) and is fairly sturdy, with fibres being up to 3-4 inches long. Merino wool roving comes in a multitude of colours as it takes well to the dying process.
What is wool “Crimp”?
Crimp refers to the amount of wave or springiness in the wool. The crimp varies, depending on the breed of sheep. Wool that has little to no crimp takes longer to needle felt as it is straight. Wool that has a relatively good crimp will felt well and quickly as the wave in the wool helps the fibres lock together when using your felting needles,
What is wool “Staple“?
Staple refers to the length of the fibre (wool or hair) when shorn. Some breeds naturally have wool with a long staple, such as the wool from an Angora Goat, known as mohair is usually around 4-6 inches long, while the wool from an Alpaca is usually around 2-4 inches in length. It also depends on how often the animals are shorn.
Wool with a longer staple is good when making murals, where longer strands can create more texture, such as the leaves or bark of a tree and is perfect for adding fine details such as lines and dots.
Some types of wool and their textures are:
- Merino wool – moderate price point – commonly used in needle felting and wet felting. Has little to no crimp – has a fluffier finish and is great when used as a top coat on projects such as snowmen and animals. It is a bit coarser and can take longer to needle felt, but is ideal for wet felting.
- Corriedale – less expensive – this is probably the most common felting wool – has a soft crimp and medium coarseness. Some say that this is the best wool roving for felting. Corriedale is also available with curly locks, which adds texture and dimension to art projects.
- Shetland Wool Roving – has a longer staple (length) than many. It has a medium crimp and felts very well. It is soft and felts very well.
Blue-Faced Leicester Wool (BFL)- This is excellent felting wool. It has a well-defined crimp, which means it felts well. It has a moderate staple, usually around 3 to 6 inches. I haven’t found it in a wide variety of colours, but it absorbs dye fairly well.
There are many types of wool that are suitable for needle felting, such as mohair, alpaca and other breeds of sheep. Those listed above are the most commonly found in felting kits and shops.
Can you use non-wool fibres in Needle Felting?
Man-made fibres don’t work very well, as the fibres don’t bind together. Most silk and polyester blends do not have the crimp that is needed to lock the fibres together.
What is a Needle Felting Pad?
Needle felting pads are the pads that you place under your project that act as a protective layer between your project and you or table, etc. Needle felting pads come at various price points. Some are sponge-like and are fairly inexpensive, but they are not long-lasting. As I mentioned, I have had my wool buddy for 3 years, and I won’t need to replace it anytime soon.
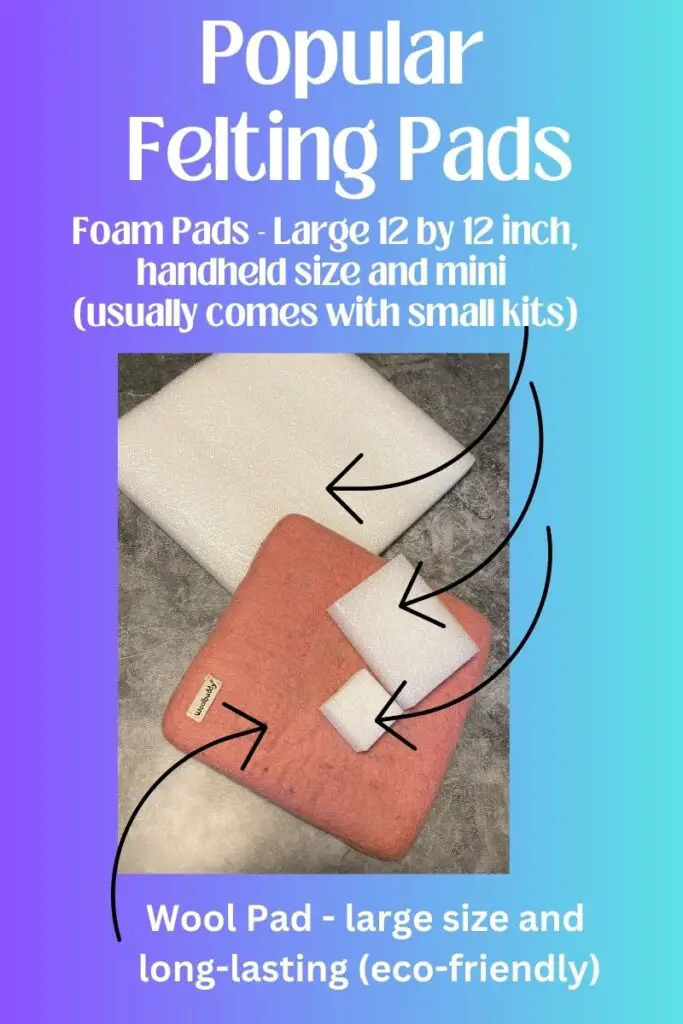
I recommend a long-lasting WoolBuddy brand felting pad. It is very sturdy and can be used over and over. It is made of wool and is not harsh on your needles. They are available in many colours and a couple of different sizes. The 6 by 6-inch square WoolBuddy pad is perfect if you make small projects, such as ornaments and jewellery. I use a 10-inch by 10-inch square WoplBuddy felting pad. I do a lot of larger projects, such as artwork for framing and portraits, and the XL size is a perfect fit for my projects.
High-density foam needle felting pads are also used. They are also good for needle felting, but I find they don’t last as long as a Woolbuddy. The foam pads are made from high-density foam and are usually 1.5 to 2 inches thick. They are available in various sizes and are usually white or black. These are great if you teach needle felting, as you can purchase a large foam pad and cut it into smaller pads for small projects. I have various sizes on hand and use them for teaching as they are more budget-friendly.
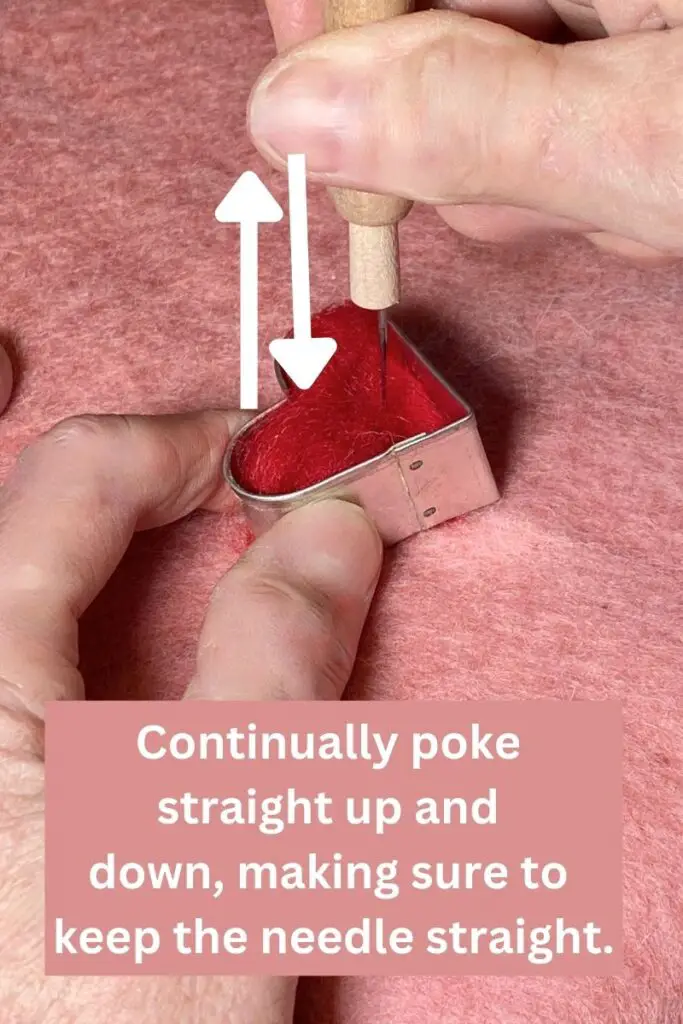
How to poke/punch when needle felting.
When needle felting, it is important to poke the needle in a straight up and down motion. If you are poking at an angle or turning by mistake, you run the risk of breaking your needles. If you are applying sideways pressure, it can cause your needle to bend and snap. You can felt on an angle, but the needle needs to be kept straight. Always have extra needles on hand. (Everyone breaks one, now and then)
Using yarn to add embellishments and detail.
When you are needle felting a project that requires some fine detail, such as outlines and edges, wool yarn is a great option. It needs to be 100% wool fibre, or it will be difficult to get it to stay in place on your project. The benefit of using wool yarn is that it is available in just about any colour. The key is that it is 100% wool. Wool yarn is just spun wool roving.

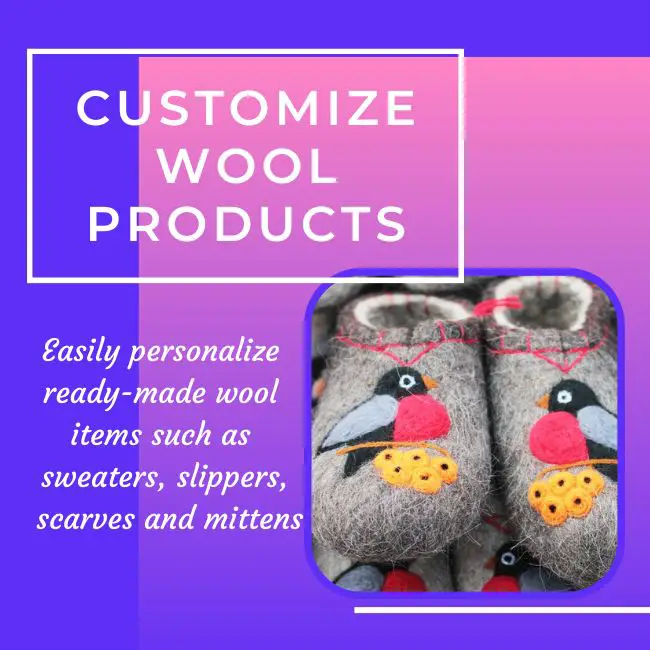
Needle Felting onto already-made products.
This is an amazing way to personalize gifts, apparel and decor and even recycle old wool items. I have done this often on scarves and sweaters. Adding a custom design to a scarf creates a one-of-a-kind item.
The main rule is that the item that you want to add a design to must be 100 % wool and is either knitted, crocheted or wet felted. If it is a wool blend or acrylic, the added design will not last very long, as the design will not lock into place.
Ideas for adding designs to wool items are: adding hearts or stars to 100 % felted slippers, adding snowflakes or words to 100 % wool scarves, and adding Christmas designs to sweaters. The options are endless as long as the base item is 100 % wool.
Storing unused wool.
It is best to store unused wool in a dry space. If you think you may get moths, then it is important to store wool in an airtight container. If you have a lot of wool stored in labelled, clear bins with like colours, finding the colours you want is much easier.
Note to Cat Owners! – Cats will go after your raw wool. We have a cat, and she almost always jumps up on the table, grabs a ball and is off like a shot. Make sure you have it in a closed container or sealed Ziploc bag.
Apply hairspray over the finished artwork.
As a rule, I do not use hairspray to finish my project. I do have a friend who does, quite often. She finds that it seems to hold the fibres better in place when making artwork that will be hanging. Always remember when applying any finish, the wool is 100 percent natural fibres, and you don’t want to apply anything that might damage the fibres.
Make wool roving from raw wool.
If you have access to raw wool, then you can make your wool roving. My brother has a sheep farm, so I was not only able to make my own, I was also able to choose the colour, and he sheared the sheep for me and gave me the entire fleece. This is labour-intensive, but if you have the opportunity, it is a fun experience.
The fleece needs multiple washes to remove any oils and dirt. The fleece needs to be dried completely. The fleece/wool then needs to be carded. Carding uses wool carders to flatten and detangle fibres. Get a good quality set of wool carders. I have seen people use curved dog brushes in a pinch. It seems to work, but for the best results, use carders.
Displaying your finished pieces and artwork.
Like any artwork, you will want to keep your finished artwork out of direct sunlight. The dyes can fade over time from the sunlight, shortening the life of your finished product.
If you have pets, specifically cats, I recommend you keep your finished pieces out of their reach. Cats can not resist the wool and will get hold of it if they can. I speak from experience!
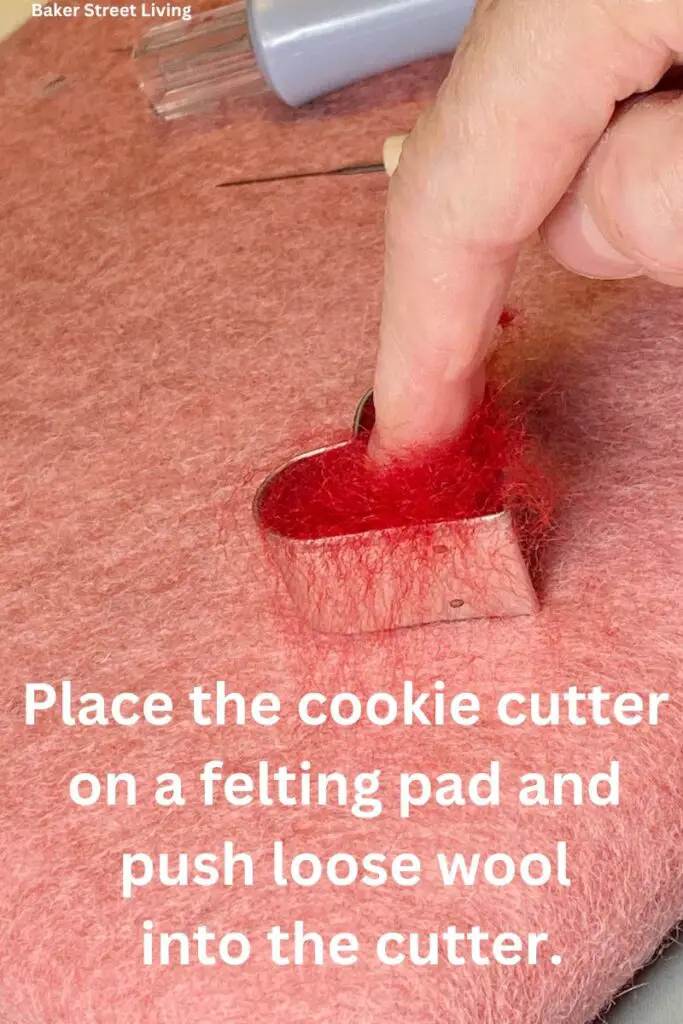
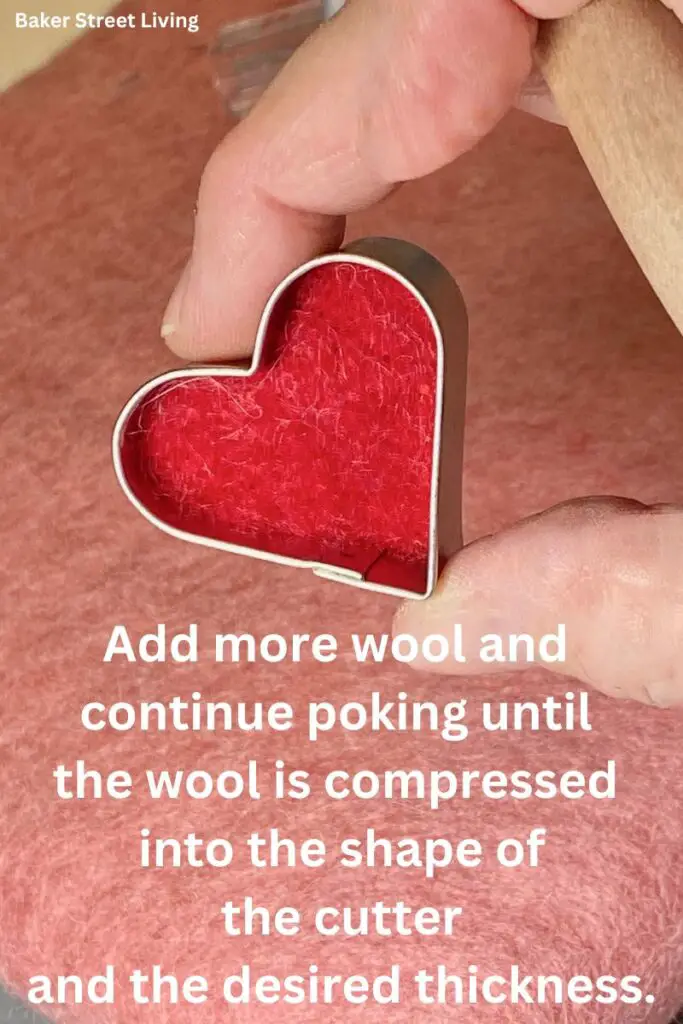
How to make a simple needle-felted heart – a great beginner’s project using a cookie cutter.
Cookie cutters work great for beginners, as they allow you to keep a uniform shape. This quick and easy heart can be used to make a pendant (shown above), a keychain, or even make multiples and string them together and use them as Valentine’s Day garlands.


This website contains affiliate links. As an Amazon affiliate, I earn a small commission from qualifying purchases (at no cost to you).