
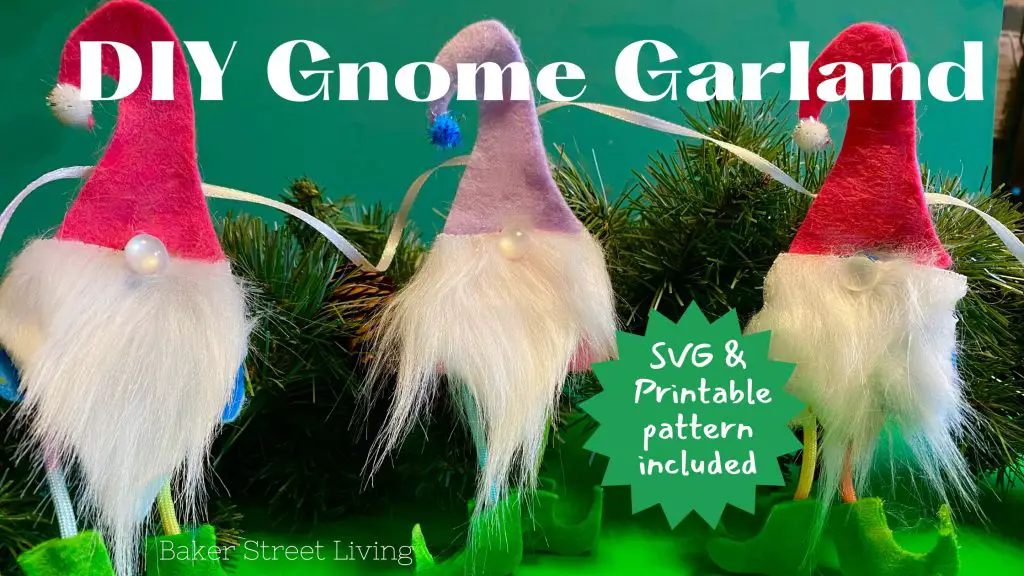
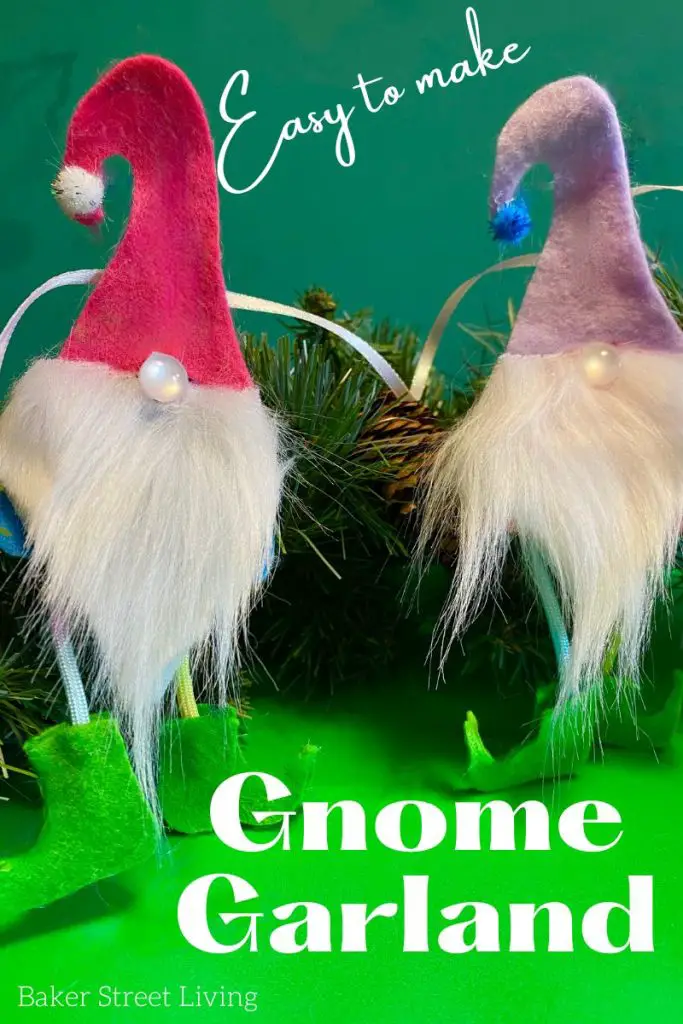
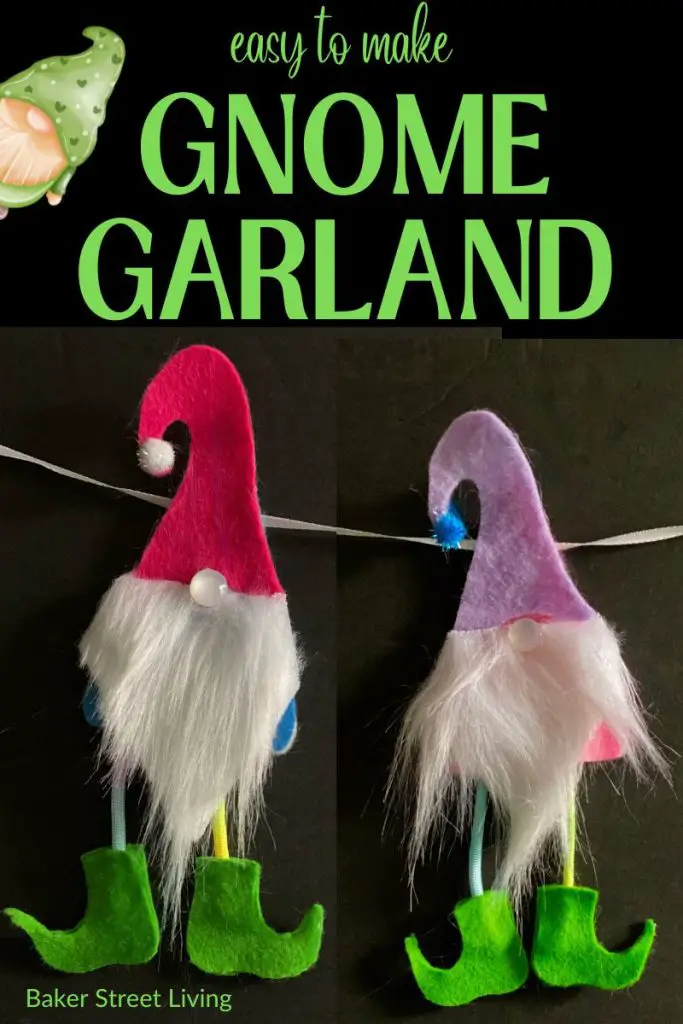
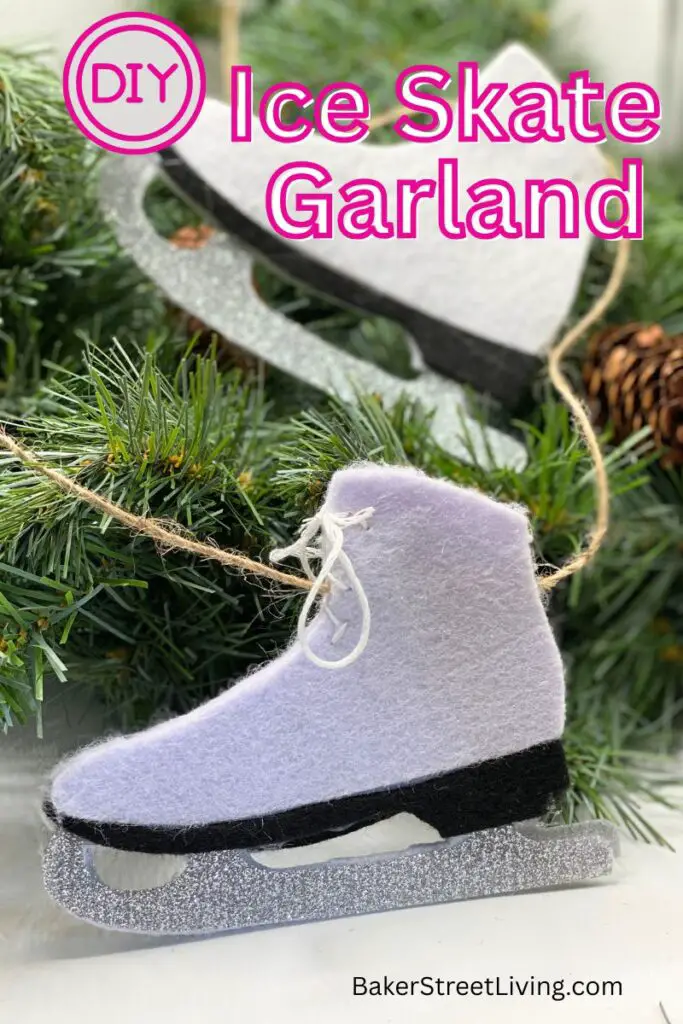
Add a touch of whimsy to your home with this DIY gnome garland made from colourful felt! This super easy Garland is a great family project, classroom project or just a fun way to add some cute Gnomes to your Christmas Tree or Christmas decor.
Using the free pattern and SVG included in this project, you can easily cut the gnome pieces by hand or with a cutting machine for perfectly shaped hats, beards, and bodies. Simply assemble the felt pieces with glue or a few stitches, then string the finished gnomes together to create a charming garland.
Craft Room Tools For this Project
This website contains affiliate links. As an Amazon affiliate, I earn a small commission from qualifying purchases (at no cost to you).
- Cricut Cutting machine (optional)
- Scissors
- Hot Glue Gun, or Aleene’s Fabric Fusion – felt Glue
Tools needed if using a Cricut Cutting Machine
- Fabric Grip mat
- Spatula tool
- Brayer
- Rotary tool (can use a fine point tip if you don’t have a Cricut Maker)
Supplies List
The list below is for one Gnome – Multiply by the number of gnomes you want in your DIY Gnome Garland
- Stiff felt – Red
- Stiff felt – Green
- Stiff felt – your colour of choice for the body
- Small Pom Pom
- Small button or wood ball – Nose (I used 1/2 inch mother of pearl half dome buttons)
- 6-inch length of parachute cord
- 3-inch wide triangle of faux fur
- thin ribbon for garland ( I used 1/4 inch satin ribbon)
Helpful Tips and FAQs
How do I weatherproof my Gnome Garland so I can put it outside?
The Gnome – If you decide that you would like to make the Gnomes in our DIY Gnome garland and use them on an outdoor wreath or outdoor pot, substitute the stiff felt for a weather-friendly option. I recommend craft EVA foam sheets. They will not sag if they get wet from rain or melting snow. They are available in 12 by 17-inch sheets, which are better for making multiples on a Cricut cutting mat.
Use a weather-friendly Glue – Gorilla Waterproof Glue is a good option.
Hot Glue or Felt Glue?
In the craft room supplies list, I have given you the option of using a hot glue gun or Fabric Fusion felt glue. If the Gnome garland is being made by adults or there are time restraints, hot glue will be the better option. If the project is being made by children or you have substituted the felt with fleece or other fabric, then fabric glue or felt glue will likely give you a better result.
Using hot glue on some fabrics can cause bleeding through the fibres. If you aren’t sure, do a test on a couple of scrap pieces of fabric before constructing your gnomes for the garland.
Ideas for using the gnomes as other decor pieces.
I have also used these Gnomes on flower picks and wreaths.
For the flower pick – glue a wood skewer in between the layers of felt. Allow them to dry and stick them into the floral foam of your arrangement.
For Wreaths – Cut 2 small slits in the bottom layer of felt, instead of attaching the ribbon. Run a wire through the slits and then proceed with the rest of the steps in “Putting your Gnome Garland together”. You can now use the wire to attach the gnome to your wreath.
Alternative Supplies
Felt
Foam – Replace the felt with EVA craft foam sheets. The sheets have a nice vibrant colour and will maintain the strength of the Gnome Body
Fleece – Replace the felt pieces with fleece. If using fleece and making floral picks, use an iron-on stabilizer to keep it from being saggy.
Nose
You can easily replace the small button with a bead or a small wooden ball.
Cording
I like the parachute cord because it is the perfect size. If you want an alternative, you could easily use ribbon, braided yarn or even a thin piece of fabric cut flat or sewn into a tube.
To make bendable legs, sew a thin tube of fabric and insert a heavy gauge wire or pipe cleaner into the tube. Be sure to fold over the ends of the wire and make sure there are no sharp edges.
Pom Pom
There are many great substitutions for the pom poms. A jingle bell is super cute and is perfect for DIY Gnome Garlands being added to Christmas trees. A small tassel made from embroidery floss is another good option. Charms, beads, buttons and many paper crafting accessories are also great options.
Ribbon
If you don’t have ribbon, you can use yarn that you have braided to make a thicker string, cut fabric strips or cording. Feel free to use whatever material works best for you.
Tips for cutting felt with my Cricut Cutting machine.
Felt leaves a lot of small fibres on the cutting mat after you have finished cutting. If you wish to avoid the messy fibres, consider adhering a piece of Mac Tac to the back of the felt and then sticking it to your cutting mat. Once you have completed your cutting, discard the Mac Tac.
A fun afternoon craft project for the kids.
For a fun, budget-friendly, kid-friendly project, use construction paper instead of felt. Replace the hot glue with school glue and use cotton balls for the beard, and tear a cotton ball up for the pom pom. Use strips of construction paper for the legs instead of the cord. This is a great, inexpensive craft for kids in the classroom or at home.
How to make a DIY Gnome Garland
Get the free DIY Gnome Garland Pattern
The DIY Gnome Garland patterns can be found in the resource library under “CHRISTMAS PROJECTS.”
Using a Cricut Cutting machine.
To use your Cricut Cutting Machine, follow the following steps. Change the order to best suit your own crafting habits.
1 – Download our DIY Gnome Garland SVG cut file
2 – Upload the design into Cricut Design Space and add the file to your canvas.
3 – Resize the design to suit your application.
4 – Duplicate each piece for every Gnome you want to make. Each Gnome will require 2 body pieces, 1 hat piece and 4 boot pieces. You can also cut faux fur on your maker, but I find it a mess.
5 – Select “Make”
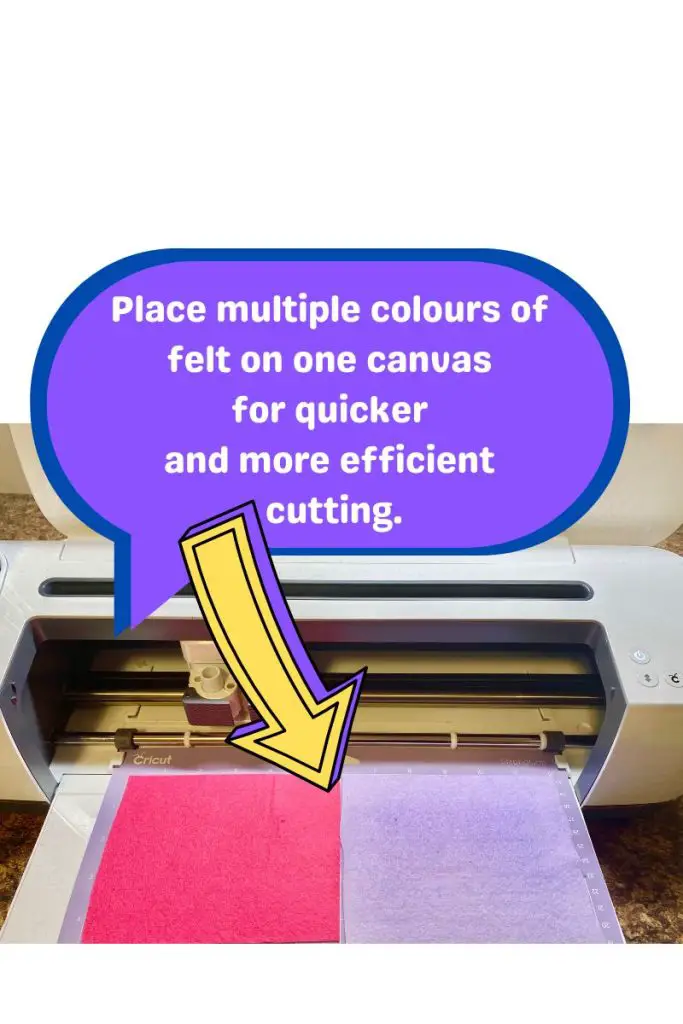
6 – Double-check the placement of the pieces on your mat before cutting. This is especially important if your felt fabric is smaller than your mat or you have used multiple colours of felt on your mat
The fleece setting works best (for me) using the rotary cutter. If you do not have a Cricut Maker, you can use a fine-point blade. Take extra care and make sure that the felt is secured onto the mat. If there are pieces that are uncut, finish with an X-Acto knife.
7 -Choose your material and select “more” pressure
8 – Cut your pieces.
9 – Using scissors, cut a triangular piece of faux fur the width of the Gnome’s body.
10 – Proceed to putting your DIY Gnome Garland together.
Using the printable pattern.
1 -Download the printable DIY Gnome Garland pieces from our resource library.
2 – Print the pattern sheet. You may or may not be able to make the pieces larger on your document. If you are able and want to adjust sizing, do this before you print.
3 – Cut the pieces out or the pattern sheet.
4 – Pin or tack each pattern piece onto your felt.
5 – Cut 2 Gnome body pieces, 1 Gnome hat piece, 4 Gnome shoes and one triangular piece of faux fur as wide as the Gnome body.
6 – Proceed to put your DIY Gnome Garland together.


Putting your DIY Gnome Garland together.
For each Gnome on your garland, you should have the following pieces
- 2 felt body pieces
- 1 faux fur beard
- 2. 3-inch cord pieces – legs
- 4 felt shoes
- 1 hat
- 1 pom pom
- 1 button-nose
- Thin ribbon for the length of the garland (or yarn, cording)
Step-by-Step Instructions
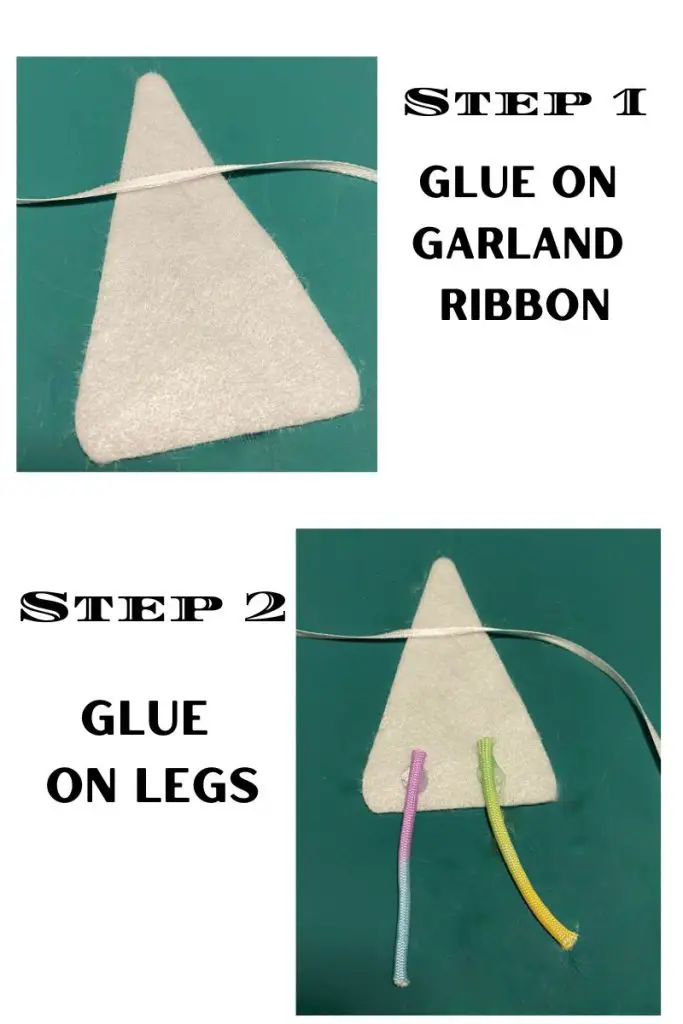
1- Glue on the garland ribbon, cord or yarn to the back gnome body piece.
2 – Glue on the leg cords to the gnome’s body.
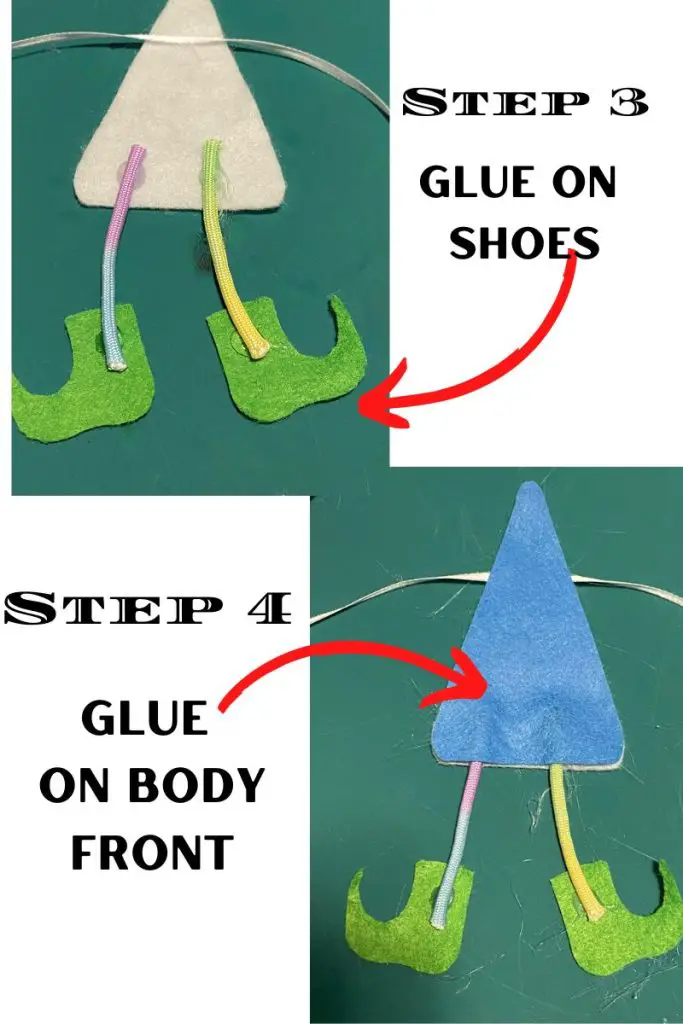
3 – Glue cords to shoe pieces
4 – Glue on the front Gnome body piece
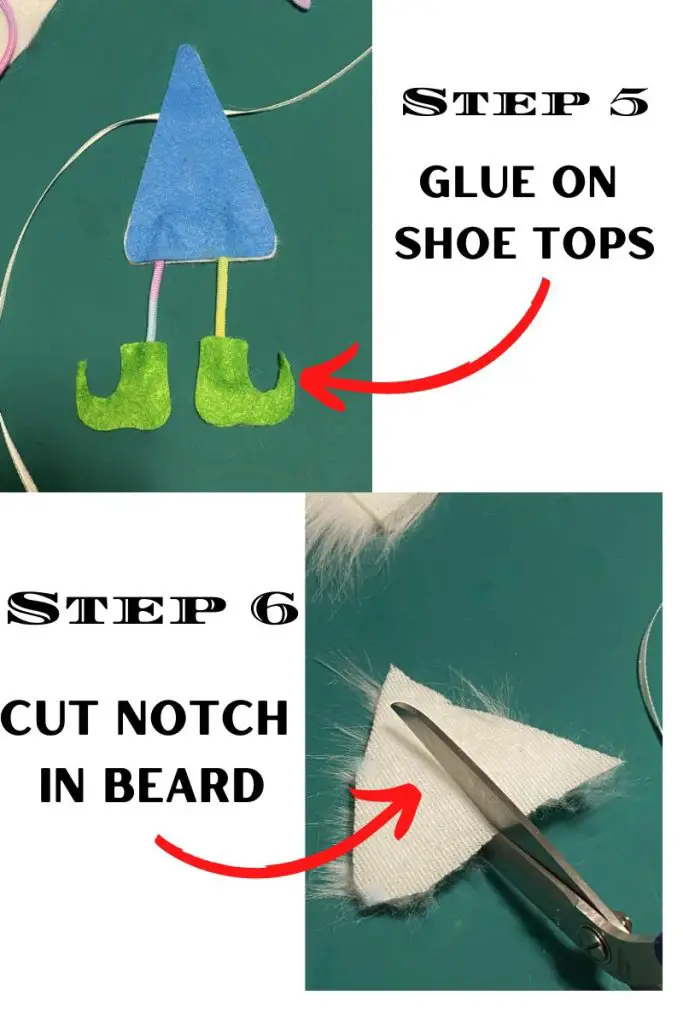
5 – Glue on the second shoe cutout on, covering the cord on both shoes. You should now have two shoes with a piece of cord glued in between the layers.
6 – Cut a small notch on one side of the faux fur beard triangle. This is a slit where the nose will fit into.
7 – Glue on the gnome hat.
8 – Glue on the beard, pulling the slit open slightly when gluing.
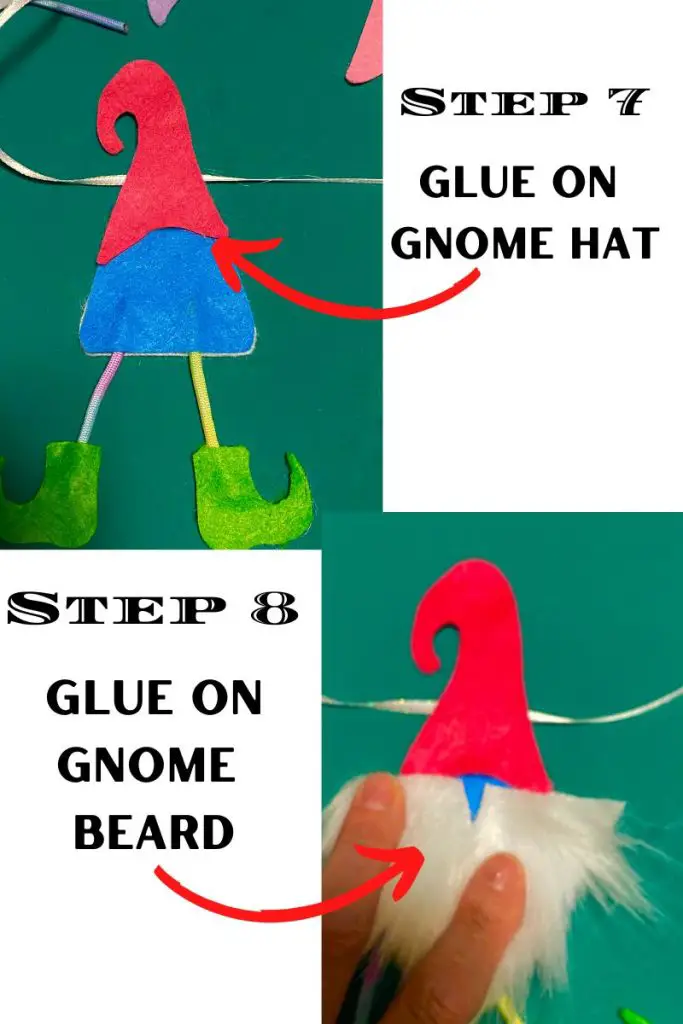
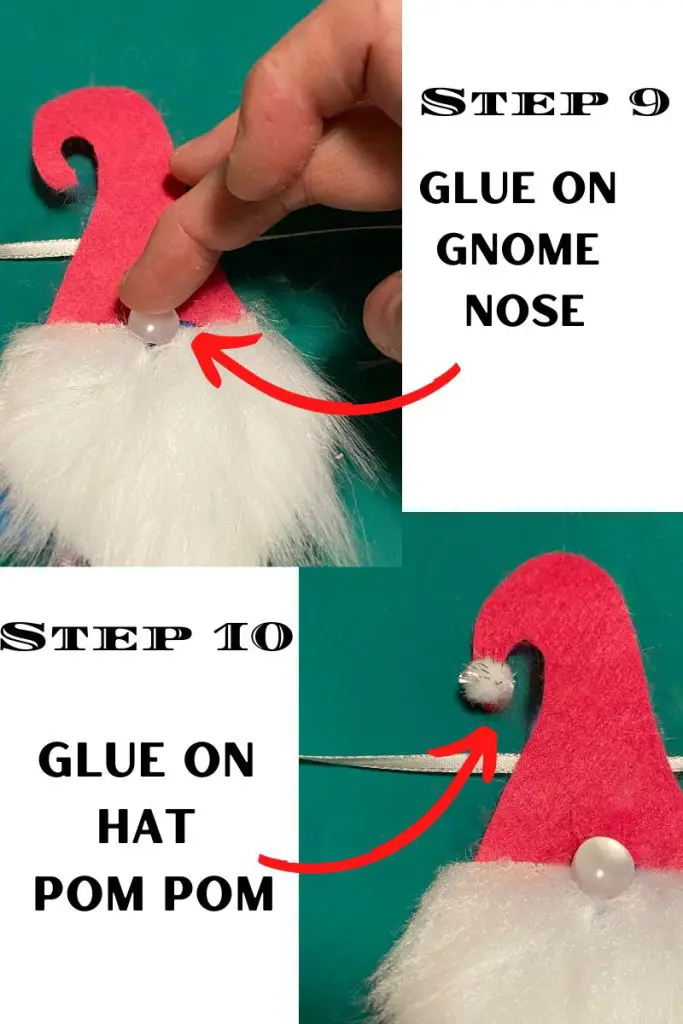
9 – Pull away the corners of the slit and glue the button into the slit. Once glued, push the fur against the button. Add more glue if necessary.
10 – Glue on hat pom pom.
11 – Set aside to dry.
12 – Repeat for all Gnomes on your garland.
14 – Allow everything to dry fully before hanging.
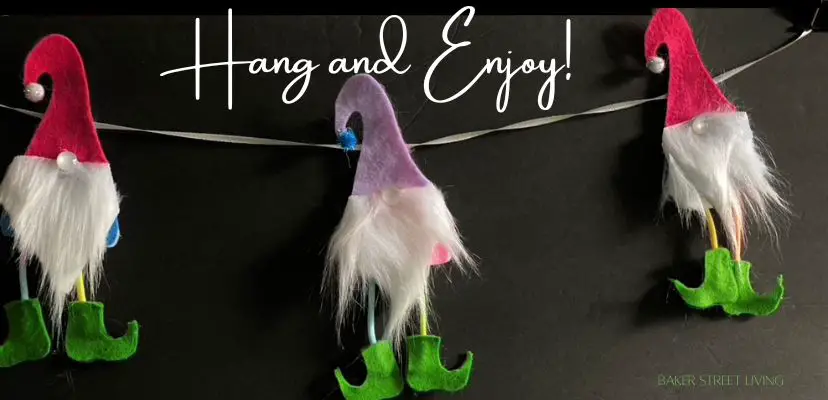
I hope you enjoy our simple DIY Gnome Garland Project. Just another simple craft for every day!

This website contains affiliate links. As an Amazon affiliate, I earn a small commission from qualifying purchases (at no cost to you).