
Like all of us, Cricut cutting machine users know, these machines are not cheap. Looking after our accessories, such as cutting mats, will make the user experience much more enjoyable and save time and money on wasted materials. Learning how to clean Cricut cutting mats is simple, takes very little time and will extend the life of your mats.
Different types of Cricut cutting mats that need cleaning
This website contains affiliate links. As an Amazon affiliate, I earn a small commission from qualifying purchases (at no cost to you).
At the current time, there are four types of Cricut cutting mats that are compatible with Cricut cutting machines: one stand-alone Cricut self-healing cutting mat and one Cricut cake cutting machine cutting mat. The difference between the standard cutting machine mats is the strength of the adhesive. They are differentiated by colour, as well as being written on every mat.
The standard grip mat is the Green Cricut cutting mat. This mat is the one I use most of the time. It is used for vinyl, waterslide paper, medium to heavyweight cardstock, and even some fabrics.
The light blue mat is the Cricut Light Grip Cutting mat. It is ideal for lighter-weight materials such as light to medium-weight cardstock, foil transfer paper, crepe papers, tissue papers and so on.
The purple cutting mat is the Cricut Strong grip cutting mat. It is used for heavier materials, such as chipboard, leather, wood, acrylic and metals. The stronger adhesive is designed to hold heavier materials in place for cutting, embossing and engraving.
The pink Cricut cutting mat is the Cricut fabric grip cutting mat. This is only used for fabric. Sometimes I switch out other mats and use fabric with them, such as using a strong grip mat when cutting denim, but I never use the fabric mat on anything other than fabric.
The Cricut self-healing mat is not used in a cutting machine. Occasionally, if you cut too deeply, threads and debris can get stuck in the cutting mat. This mat is used with rotary cutters and the true control knife or X-Acto knives.
The last type of Cricut mat is the Cricut Cake Machine Cutting Mat. This mat is only used with the Cricut Cake machine. This is the one machine I have never used. This mat is used for cutting frosting sheets, gum paste and fondant, which are used as decor on cakes and cupcakes. This machine uses old-style cartridges, and the mats are designed to be food-safe and only used in the cake machine.
What types of debris need cleaning off the cutting mats?
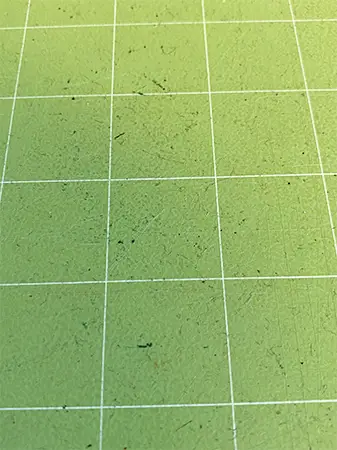
Everything that is left on the surface after using your cutting mat needs to be cleaned off. As the bits and fibres add up, they block the effectiveness of the adhesive, causing uneven cuts or your materials to move during cutting. Some Cricut mats will need cleaning less often than others. It depends on what materials are being used.
When engraving with the Cricut Maker, the tiny bits that are cut remain behind. It is best to wipe your blade and machine as well, to ensure that there are no bits of metal or acrylic around the machine, not just on the mat.
When using cardstock, you can usually get five or six uses before having to clean the mat. The fabric grip mat seems to be the one (in my opinion) that I need to clean the most often. Fibres from the fabric stick to the mat, causing it to lose its stickiness fairly quickly.
For example, I made some fleece-covered sewing/craft weights and some fleece boat bumper covers. The fleece left so many fibres on the mat that I had to clean it after the second cut. It is good to have extra mats to use when making multiple cuts with things like fleece or felt, so you can allow your dirty mats to be cleaned and dry while you continue to work.
How to clean Cricut cutting mats. (4 methods)
There are four methods to clean your Cricut cutting mats. Which one you choose will depend on how dirty the mat is. The steps below are listed in order of light dirt to heavy dirt.
How to clean Cricut cutting mats using a scraper or spatula
For cleaning off paper bits or bits of vinyl or foil transfer paper, I always use a Cricut XL scraper and a Cricut spatula. You can also use a credit card or a flat plastic card. Make sure if you are not using a Cricut scraper or spatula, the item you are using has a smooth edge. For example, a credit card that has blemishes or cracks along the edges can mark or gouge into the adhesive.
Start using the spatula, removing the easy bits from the mat. After you have all of the pieces lifted, use the scraper to remove any tiny bits. Be sure to wipe off the scraper in between swipes to keep the bits from falling back onto the mat.
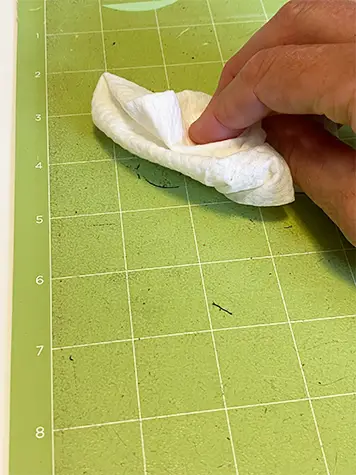
How to clean Cricut cutting mats using disposable Baby wipes
After removing any bits of paper, vinyl or other products, gently wipe the cutting mat with an alcohol-free disposable baby wipe. Make sure the wipes that you are using are ALCOHOL-FREE. Any alcohol in the wipes can damage the adhesive or remove the adhesive, shortening the life of your mat.
Let dry completely before using or covering with the protective sheet.
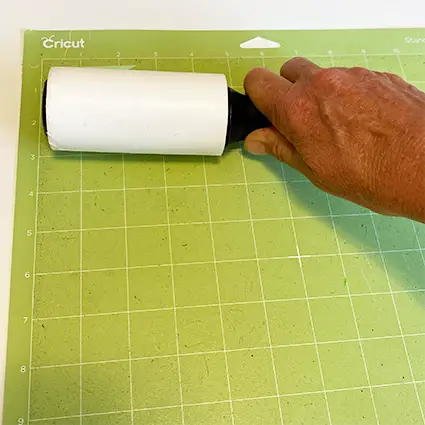
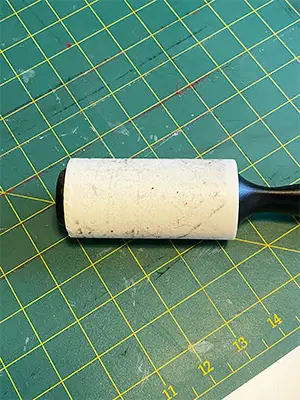
How to clean Cricut cutting mats with a lint roller.
Remove any semi-loose bits from the cutting mat, using a clean adhesive lint roller, roll back and forth across the mat. Remove debris-covered lint roller sheets and continue rolling until the mat is clean.
How to clean Cricut cutting mats using Dawn Powerwash
This is my favourite way to clean my cutting mats. It is very satisfying because they always come out so nice and clean. Dawn Powerwash is by far the best product to use. It comes in an easy-to-handle spray bottle and sprays on as a foam, and removes all the unwanted debris from your mats.
PINK fabric cutting mats – Some people say that you should never use water or soap on these mats. I do, regularly and have not had any issues to date. I always use a very soft-bristled brush and scrub gently. I always use a lint roller first if there are light fibres. I can usually solve the problem without washing, unless the mat was used for something like fleece. Follow the same steps noted below for washing your mat.
How to clean a Cricut self-healing cutting Mat
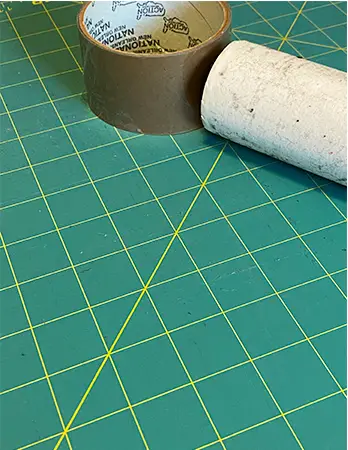
The Cricut self-healing mat rarely needs cleaning. If you find that you have made some deep cuts and there are fibres stuck in the cut line, an adhesive lint roller or a loop of packing tape or duct tape around your hand works well at pulling out the fibres. Wipe both sides of the mat with an alcohol-free baby wipe for everyday cleaning.
This method also works on any self-healing cutting mats, such as quilter’s mats. (shown below)
In this image, the self-healing mat had a lot of threads and glue bits on it. After wiping, using a lint roller and a packing tape loop, followed by a vigorous scrubbing, the mat is finally clean. The time it took was about 1/2 hour. UGG!
How to clean the Cricut Cake Mat
The Cricut cake mat must be cleaned using food-safe products. Not only do you need to remove the bits of the frosting sheet, fondant or whatever product you have cut, but you also need to degrease the mat surface. Remove the shortening layer off the mat, using Dawn Powerwash to keep your next cutting project from sliding around the mat.
Clean your Cricut Cake mat after every cut.
The first step is to scrape off the bits, being careful not to gouge the mat. Once you have the bits scraped off, rinse the mat and then lay it on a flat surface.
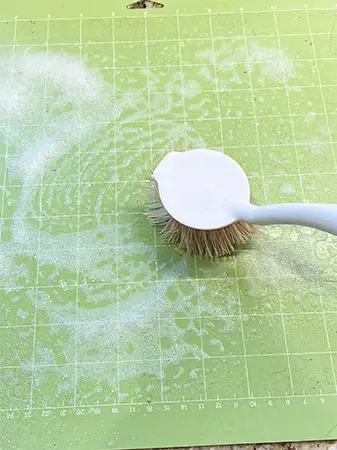
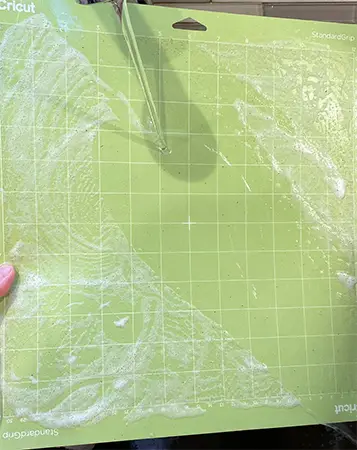
Spray with Dawn Powerwash.
Using a soft-bristled brush, gently scrub the mat. Rinse the mat
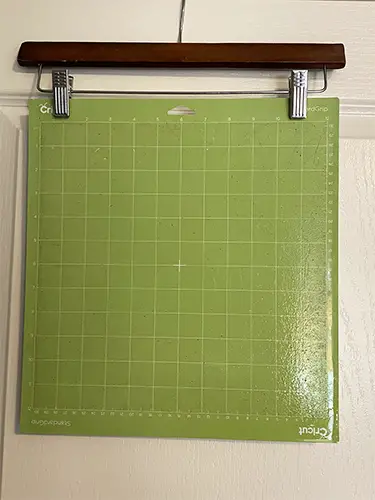
Hang to dry, using a pant hanger with clips.
Never dry with a towel, as this will leave lint deposits on the surface of the mat. (You don’t want these getting onto your fondant or gum paste.
What not to use when cleaning Cricut cutting mats.
if your cutting mat still has a fair amount of adhesive left on it and just needs the debris removed, try the three methods listed above. Do not use alcohol-based or acetone cleaners on your mat. They can remove some of the adhesive, which shortens the life of your mat.
Never use hot water when cleaning your cutting mats. Always use cool to lukewarm water.
Never use hard-bristled brushes or pot scrubbers.
If your mat has lost most of its stickiness, see below on how to make your mats sticky again.
Do not use any type of scraper that could put grooves or gouges into the adhesive layer. Do not use putty knives.
How long does it take to clean a cutting mat?
Typically, it takes about 5 or up to 10 minutes to wipe down, use a lint roller or scraper to clean a cutting mat. If you are washing your mat, expect to spend 15 to 20 minutes from start to finish per mat.
It will, of course, depend on how dirty your mats are. This is an average time to clean them. For cake mats and self-healing mats, expect the process to take longer.
How to dry your cutting mats.
You can dry your mats two ways: laying them flat to dry or hanging them up. I prefer to hang my mats to dry. Hanging your mats prevents any water from lying or beading on them and keeps them from bending or becoming damaged. Hanging them keeps them out of the way as well.

It could be in my imagination, but my mats dry faster when hung.
Do not dry your mats outside or anywhere where they might get covered with dust.
Do not dry your mats in the sun.
Do not use a hairdryer or heat gun to dry your mats.
Hang your mats using a pant hanger with clips or add clips to a hanger that you already have. If you don’t have a pant hanger, and you don’t want to buy one, you can ask at any retail store that sells clothing for one. Often, they will give you one of the disposable ones for free.
How do you know when you need to buy a new cutting mat?
If you have tried all the cleaning methods and you can’t get your materials to stick, then it’s time to re-stick your mat or purchase a new one. Don’t throw out your old mat. You can always use it to tape down materials to be cut, such as transfer foil or acrylic for engraving.
If you have tried all the steps for re-sticking your mat and you are getting poor results, it’s time for a new mat.
If your mat becomes damaged or bent, it is time to replace it. Do not try to use a damaged mat in your cutting machine. It could get caught and damage the machine.
How to make your Cricut cutting mats sticky again.
Cricut mats are said to last up to 40 uses, but your mat can be given new life if you take a few steps to add new adhesive to the surface. ( I have gotten more than 40 cuts out of all of my mats before having to re-stick any)
To re-stick your cutting mat, follow these steps.
- Clean the mat thoroughly.
- With an adhesive remover, remove any leftover adhesive from the worn mat. (This ensures a more even application of adhesive when applying the adhesive spray)
- Let the mat dry.
- Tape off around the edges of the mat with painter’s tape. (This covers the area that should not be sticky)
- In a well-ventilated area, on a protected flat surface, apply a light coat (or 2) of a removable/repositionable adhesive spray.
- Remove the painter’s tape and check for overspray or bleeding outside of the grid.
- Let the surface dry before using it for at least 5 minutes.
- Cover with the protective sheet.
Adhesives that work well when re-sticking cutting mats
I have tried and found that the following products do a nice job of re-sticking your Cricut cutting mats.
If you accidentally get adhesive on the outer border (outside of the grid) or on the back of the mat, remove it before using it. Use an adhesive remover such as Goo Gone and make sure that you get it all. Getting adhesive on the rollers of your cutting machine can cause damage to the machine, as well as interfere with future cuts.
Important information about re-sticking mats
NOTE ** – Resticking your mat can void the warranty on your Cricut machine. Make sure that the roller wheels on your Cricut cutting machine do not get adhesive on them when using re-stuck mats. Clean the rollers with a Q-tip and rubbing alcohol.
Some adhesives are not good to use with mats that will be used for cutting cardstock. I recommend you do a test cut and remove the cardstock to evaluate the adhesive. If you have applied too much adhesive, you will see a sticky residue on your cardstock.
If there is a residue that is left on your cardstock, consider using a newer mat or removing some of the adhesives with a soft, lint-free cloth.
How often should you clean your cutting mats?
How often you clean your cutting mat will depend on the materials you are cutting. When cutting fabric, I clean my mats after every couple of uses. If cutting fabric like fleece or felt, clean it after every use or every couple of uses.
When cutting materials such as vinyl, foil and cardstock, I clean my mats after about every 12 uses. Foil can be especially hard to get off. It is best to try a lint roller first when removing foil bits.
When cleaning mats used for cutting cardstock, lightly clean with a lint roller and don’t wash until you see that the adhesiveness is no longer sticking.
How to properly store your cutting mats.
Cutting mats should be stored hanging or flat. Do not store your mats in any position that could cause them to bend or become damaged.
I store my mats hanging on hooks. Cricut makes a specific mat hook designed for hanging mats. It is the best option if you can dedicate a small amount of space to the side of a cabinet or wall.
Do not store your mats in direct sunlight.
If you have your mats in a location that gets direct sunlight and have no other option, turn them around so they are not facing the sun directly. The heat from the sun can cause the adhesive to heat up, and it can also cause warping of the mats.
How long do Cricut cutting mats last?
The estimated uses of a new Cricut cutting mat are 30 to 40 uses. If you keep your mats clean and store them properly with the protective cover on them, the number of uses may be extended. (Mine have lasted longer)
Using the proper mat with the materials you are cutting will make them last longer. For example, using delicate cardstock on the wrong mat, such as a strong grip mat, will leave a mess and cause you to have to do a harsh cleaning, and cause you to throw out the cardstock.
Uses for older Cricut cutting mats.
If your mat can no longer be re-stuck or has some damage, it can still be used to cut on with rotary cutters or X-Acto knives. I often use an old mat as a cutting surface when I am working on a flat surface.
I also use old mats with repositionable adhesive for cutting messy fabrics, such as fleece and felt. Fleece and felt fabrics leave a lot of fibres and I can prolong the life of my other mats by using an old one when cutting these types of fabrics.
What to use if your protective cover is damaged or lost.
The plastic protective cover that comes on your cutting mat is made of acetate. As a regular crafter, when the craft room gets messy, I always seem to lose my plastic mat cover. If you have lost yours or it has become damaged, you can easily replace it with acetate sheets. I keep a few on hand, for those “just in case” moments.
Cricut acetate sheets are used in projects such as window boxes, ornaments and card making. These sheets come in 12-by-12-inch packs, which makes them perfect to re-cover a mat when you’ve damaged or misplaced your mat cover.


We hope that you learned all you need to know about how to clean Cricut cutting mats. These tips and tricks can be used on other brands of cutting mats as well.

Disclaimer: This post contains affiliate links. We receive a small commission when purchases are made through our links. Thank you for your support.