
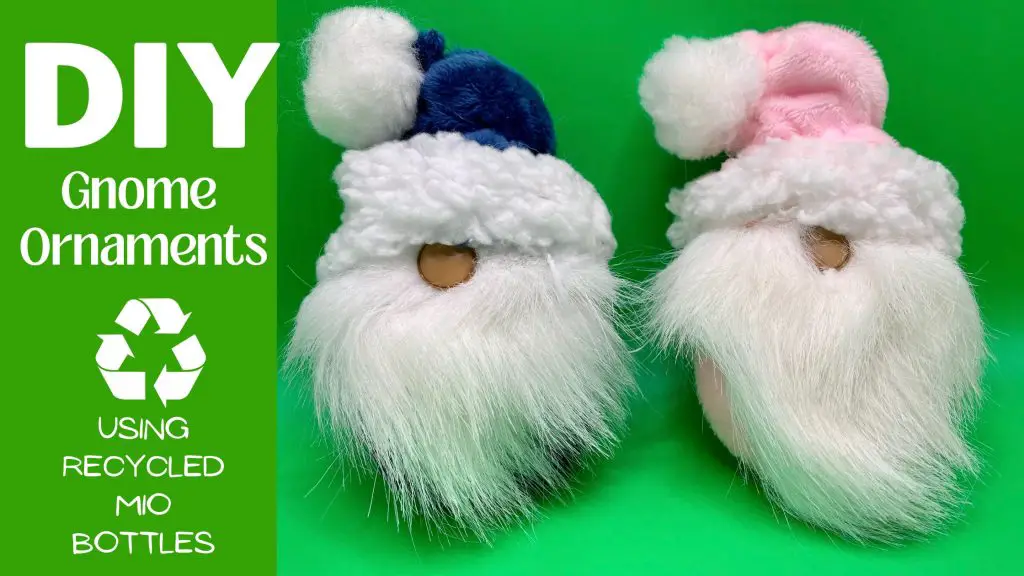
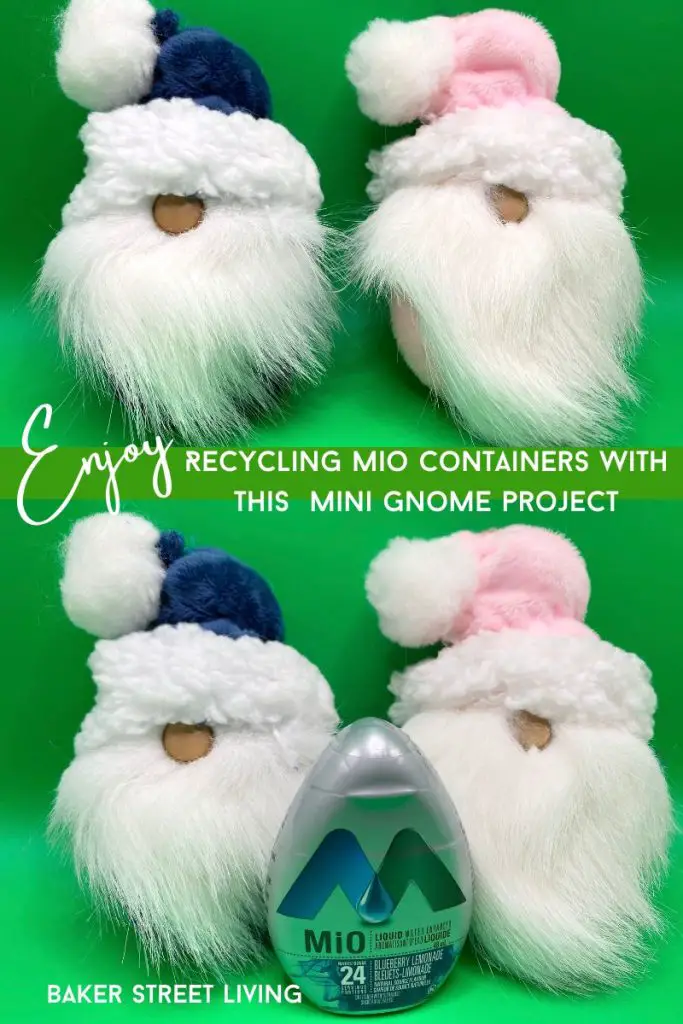
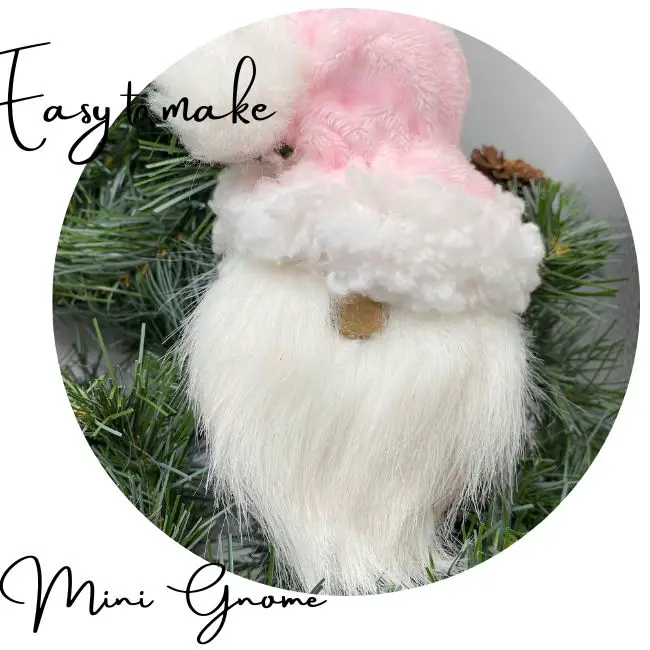
This cute DIY Gnome Ornament is a great recycling project. These cute little gnomes are made from Mio water-enhancer containers. They are the perfect size for our miniature gnomes. One of the great things about these little gnomes is that since they are a recycling project, they are cheap to make too.

How to Make a DIY Gnome Ornament Video
Craft Tools List
This website contains affiliate links. As an Amazon affiliate, I earn a small commission from qualifying purchases (at no cost to you).
Supplies List
- Baby mittens – fleece lined (one pair for each gnome)
- mini pom pom
- Mio water enhancer container (empty)
- faux fur (3-inch wide triangle – large enough to go across the bottle)
- small button or wood ball (for the nose)
- wire or ribbon for hanging. (optional)
- Pinch of poly-fil or cotton ball.
- Short piece of yarn or string
**Links below to purchase supplies online.


Helpful Tips and FAQs
What can I use if I don’t have Mio containers?
The Mio water flavour enhancer containers are a perfect shape and size, but you can use another brand of a similar shape and size, such as Nestea, Tang, Country Time, etc.
Picking the right mittens
The best mittens are stretchy and fleece-lined. Baby mittens are perfect because they do not have thumbs. A solid colour or pattern that covers the entire mitten is best. If using mittens with patterns, keep in mind that the pattern will need to look straight on the Mio container.
If making more than one gnome ornament, add some cuteness by switching around the patterns between the different ornaments.
Substitutes for Baby Mittens
Baby mittens are the optimum size, but there are alternatives. Baby socks and even stretchy dog booties. This is a great opportunity to use up those mismatched pairs of socks.
Add a pick for flower arrangements instead of an ornament hanger.
If you like the DIY Gnome Ornament but would like to use it in other Christmas decor pieces, you can make it without adding the hanger. To make a flower pick, poke a hole in the bottom of the container and insert a wooden skewer of the desired length, secured with hot glue. When adding the mitten, you can easily poke the pointy end of the skewer through the knitted bottom. Add a little glue or Dritz Fray Check around the skewer to keep it from running.
Adding other embellishments
Add any other embellishments that you like. Buttons, sequins or snowflakes are all cute ideas to dress up your gnome.
How to make a DIY Gnome Ornament – Step by Step
1- Make sure that the container is empty and the inside is dry. Any drops of water enhancer may stain your fabric.
2 – Optional Step. – Open the lid and add some glue around the hole, and close the lid. Wipe any excess glue off of the outside of the container. This just keeps it from opening later if handled by admirers.
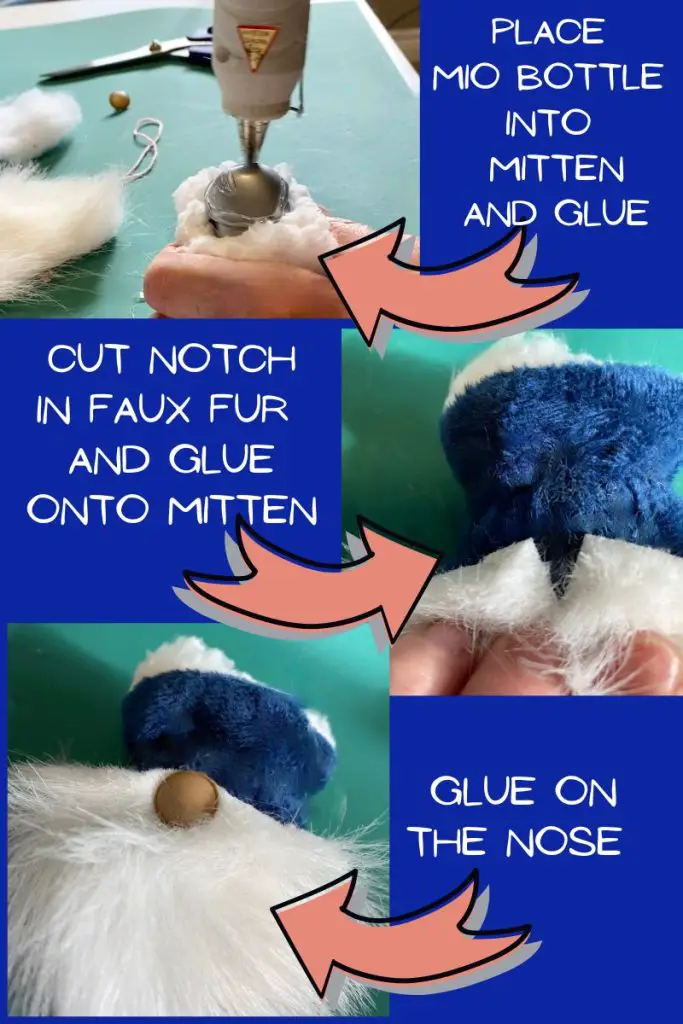
3 – Insert the container into the baby mitten and secure it with hot glue. (An elastic can help keep it secure while the glue is drying) Trim around the top, where the hat will go, making sure it is not loose and secured around the point of the container.
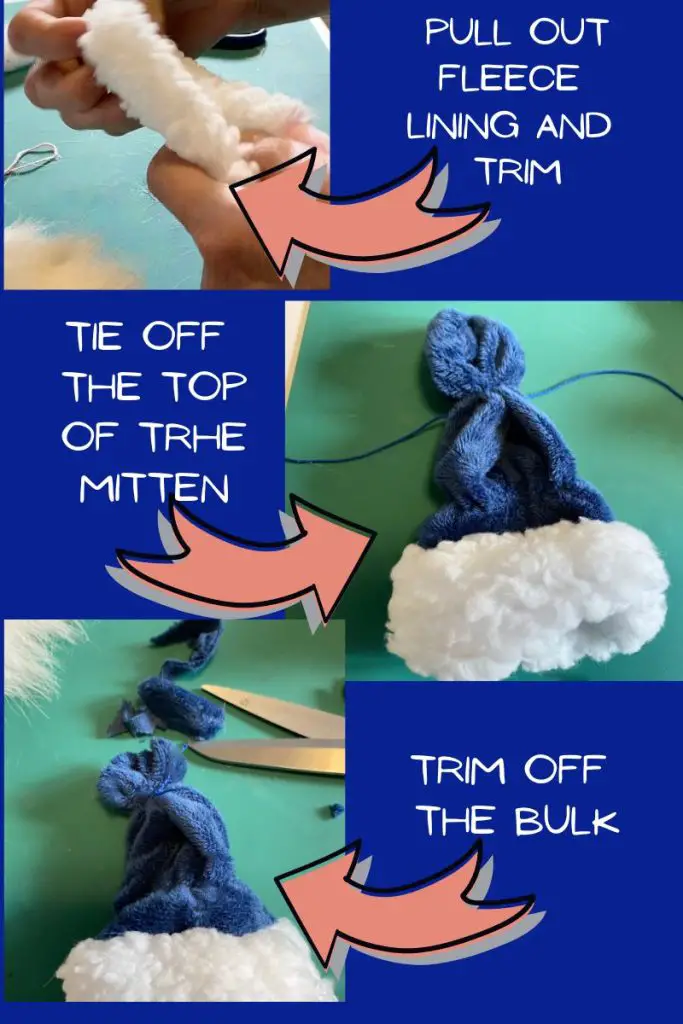
4 – Pull the fleece lining out of the second mitten. Cut some of it off, leaving enough for the hat brim. Tie the mitten just above the center with a piece of embroidery floss, string or yarn. (as in the image) to make a mini toque.
5 – Cut the top of the hat off (above where you tied the string). Trim the bulk of it off.
6 – Sew a small jump ring to the top of the hat where the ornament hanger will be.
7 – Place a bit of poly-fil or cotton ball into the tongue to make the hat shape.
8 – Place the hat piece onto the container to determine the beard’s location.
8 – The beard should be a triangle shape (as pictured) with a notch on one side. (for the nose)
9 – Glue the faux fur beard into place, making sure the small notch is where the nose will be.
10 – Glue on the button or wood ball above the fur in the area of the notch, making the gnome’s nose. Adjust the fur around the nose, making sure it sits snugly in the fur.
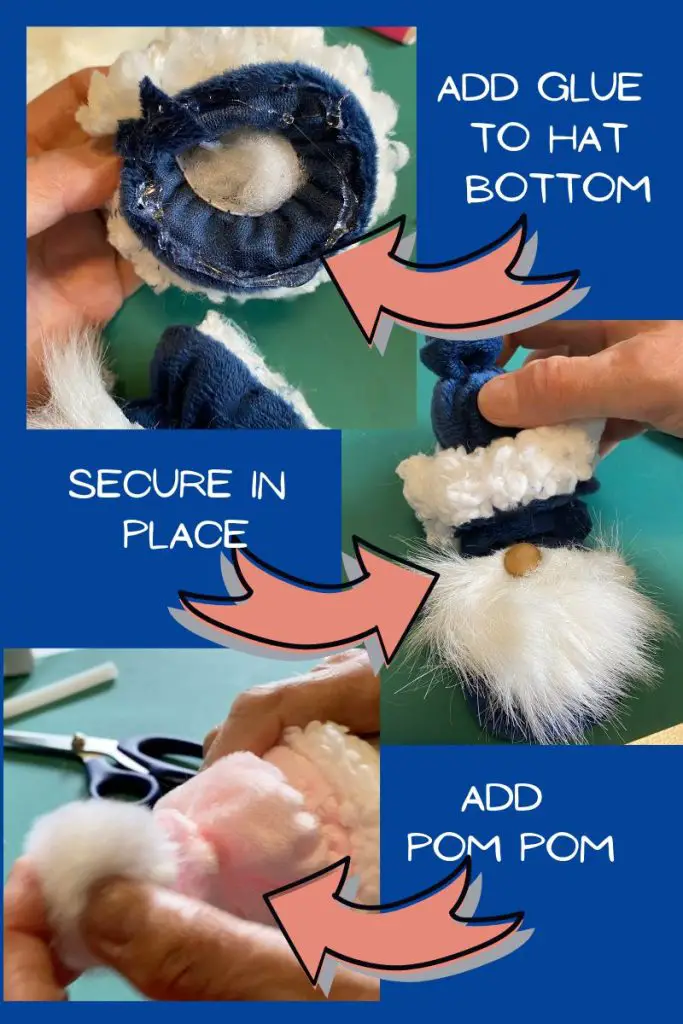
11 – Glue the hat in place.
12 – Add the mini pom-pom onto the hat, using hot glue or a needle and thread.
13 – Fold the hat down slightly, and secure it with glue, so it looks like the hat is slightly folded over.
14 – Let the glue dry thoroughly before hanging.
15 – Show off your DIY Gnome Ornament.
Making the Gnome Body
Making the Hat
Putting the Gnome Together
Where to buy DIY Gnome Ornament supplies.
Many, if not all, of these supplies can be found in your local dollar store. If you plan on making multiples, it may be cheaper to order bulk online. Except for the mittens, my DIY Gnome Ornaments are all made using leftover bits from other craft projects.
Baby-sized mittens can often be found in thrift stores for less than one dollar per pair.
Printable DIY Gnome Ornament instructions

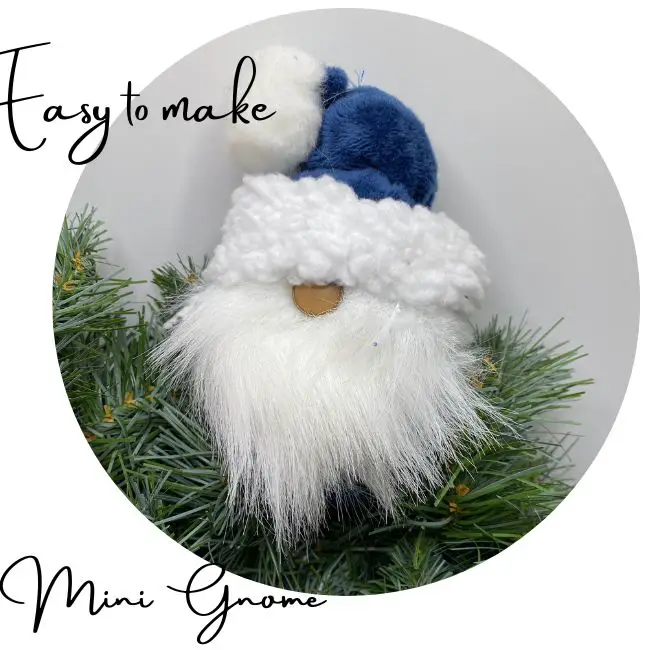
DIY Mini Gnome Ornament
Equipment
- Hot Glue Gun
- Scissors
- Sewing Needle and Thread
Materials
- 1 Mio Water enhancer container (clean and empty)
- 1 pair Baby Mittens
- 1 mini pom-pom
- 3 inch wide triangle of faux fur
- 1 small wood ball or mini button
- 1 small Jump ring
Instructions
- Open the lid and add some glue around the hole and close the lid. Wipe any excess glue off of the outside of the container.
- Place the container in one of the mittens and secure it with hot glue, making sure the mitten fits snuggly onto the container.
- Trim around the top, where the hat will go, making sure it is not loose and secured around the point of the container.
Making the hat
- Pull out the fleece lining and cut off about half (leaving enough to be the brim) portion.
- Tie the mitten just above the middle with a piece of string. This will form the shape of the hat. Check it for size and then trim off any bulk.
- Sew on a small jump ring near the top of the hat, where the ornament hanger will go.
- Place a bit of poly-fil or cotton ball into the togue to make the hat shape.
- Place the hat piece onto the container to determine the beard’s location.
- Cut a notch in the triangle shape of faux fur (as pictured)
- Glue the faux fur beard into place, making sure the small notch is where the nose will be.
- Glue on the button nose above the fur in the area of the notch, making sure it sits snuggly in the fur.
- Glue the hat in place.
- Add the mini pom-pom onto the hat, using hot glue or a needle and thread.
- Fold the hat over slightly and secure it with hot glue.
- Let the glue dry thoroughly before hanging
- Add ribbon, thread or an ornament hook through the jump ring and hang up.
These cute DIY ornaments are a great project for older kids. They are also fantastic craft sale items that are inexpensive to make and are popular with all ages.
I hope you enjoy making these easy DIY Gnome ornaments. They are just the cutest!

This website contains affiliate links. As an Amazon affiliate, I earn a small commission from qualifying purchases (at no cost to you).