

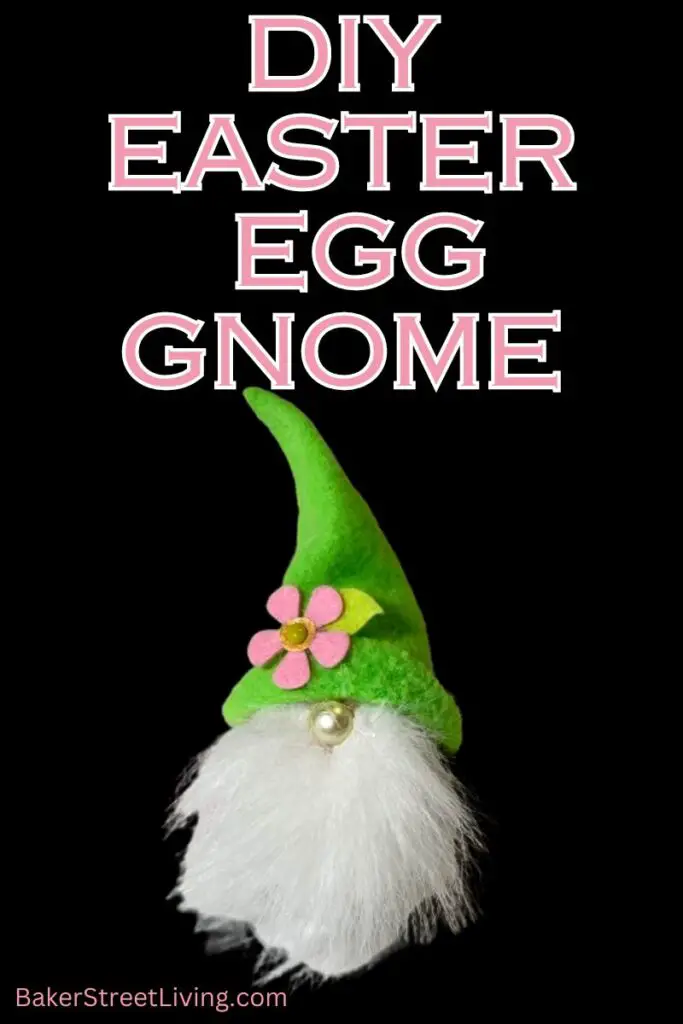
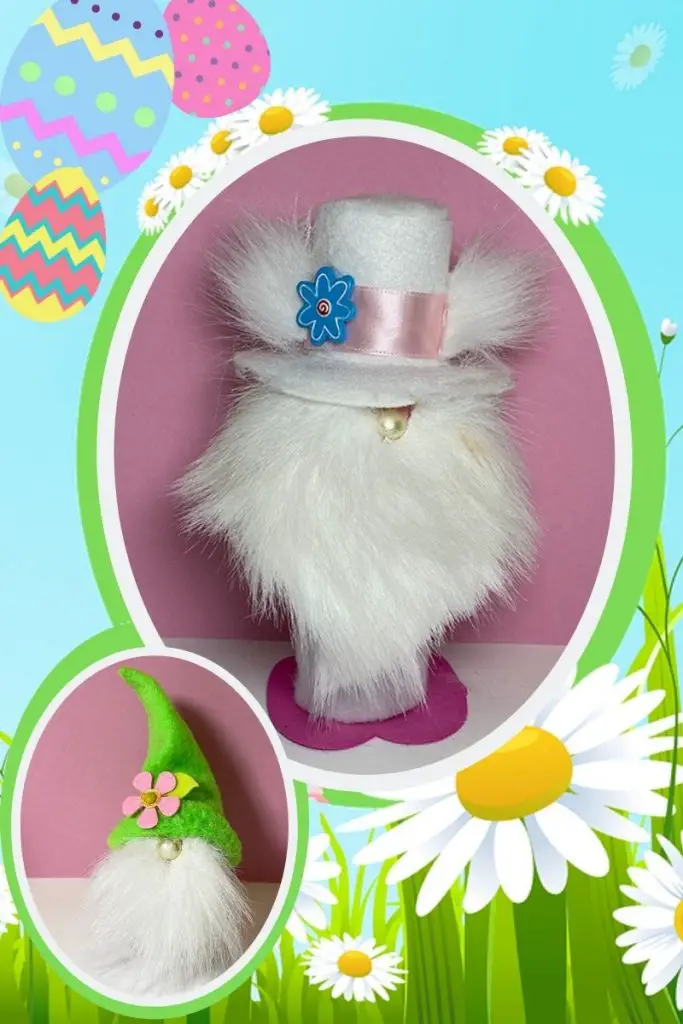
I just love Gnomes, as you probably know, if you have checked out any of our other Gnome projects ( our Long-Legged Gnome and our Leprechaun Gnome). These little DIY Gnome Easter Eggs are so cute and can be added to flower arrangements, tablescapes, or added to a base and displayed on their own. They are a great addition to any Easter decor.
Supplies List
This website contains affiliate links. As an Amazon affiliate, I earn a small commission from qualifying purchases (at no cost to you).
- eggs (real or craft plastic eggs)
- Faux fur– 4-inch square for each egg (if using a larger egg, please add more fur)
- small pearl button– for the nose
- felt or fleece for a hat
- felt for ears (optional) (or use faux fur)
- trim (approximately 6 inches in length)
- embellishments for hat (buttons)
- leftover cardboard tubes (optional for stand)
- Thin foam (optional if making cardboard tube stand with feet)
- drinking straw (if blowing eggs)
Craft Room Tools
- paint or egg dye (optional)
- Scissors -or-
- Cricut cutting machine (Maker or Maker3 if cutting fabric)
- fabric grip mat (if using Cricut cutting machine)
- hot glue gun (and glue)
- small bowl (if blowing out eggs)
How to Make Gnome easter Eggs
Prepare the Egg
I am using both a blown-out egg and a larger plastic craft egg in this project.
If using Plastic Craft eggs, skip this step and move on to the instructions to make DIY Gnome Easter Eggs.
For real eggs – follow these steps
Place a small bowl on the countertop.
Pierce each end of the egg with a darning needle or metal skewer. Work the skewer or needle around the hole to make it 1/8 to 1/4 inch in diameter.
Insert the skewer or darning needle far enough to pierce the yolk.
There are two ways to blow the egg out once you have the holes in each end.
The first (and safest) way is to insert a drinking straw into the end of the egg and blow through the straw while holding the egg over the bowl.
The second way is to place the egg against your lips, make a seal around the hole and blow the insides of the egg into the bowl. If you have concerns about coming into contact with the raw egg, the first way is the safest.
Once the egg is blown out, hold it over warm running water, allowing water to get inside the egg.
Let the water drain out or blow it out and set it on a towel, and allow it to dry completely before starting to make our DIY Gnome Easter eggs.

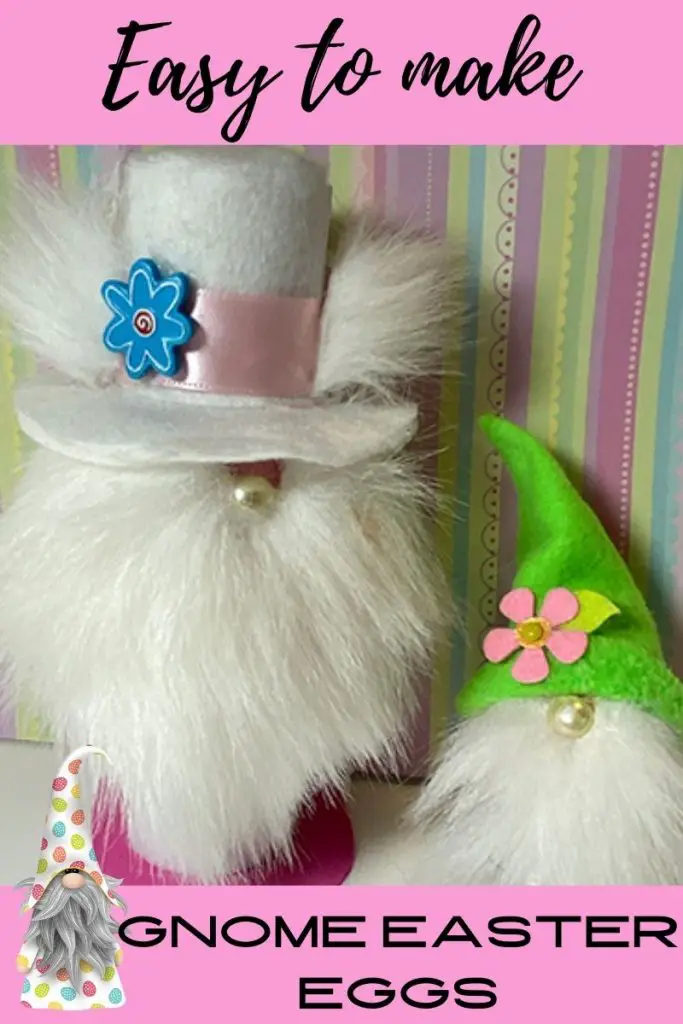
These Cardboard Tube Top Hats make a cute Gnome Easter Egg hat.
Paint or dye your egg if desired. We chose to paint our eggs with acrylic paint. If using a purchased egg dye kit, follow the instructions on the packaging and allow your eggs to dry before moving on.
Printable and SVG Patterns for DIY Gnome Easter Eggs – Pattern pieces.
Download either the printable or the Cricut cutting SVG pattern here.
Cut Pattern Pieces
You will need the following pieces:
- Hat -One triangular hat piece, cut from felt or fleece. (or use the top hat from our Top Hat tutorial)
- One set of feet, cut from thin craft foam.
- One triangular beard, cut from faux fur
- One piece of trim or fabric -long enough to go around the cardboard tube (measure for size)
- ears – cut from felt, fleece or leftover faux fur pieces.
Make the Hat
To make the pointed hat
Download and resize the hat pattern to fit your egg.
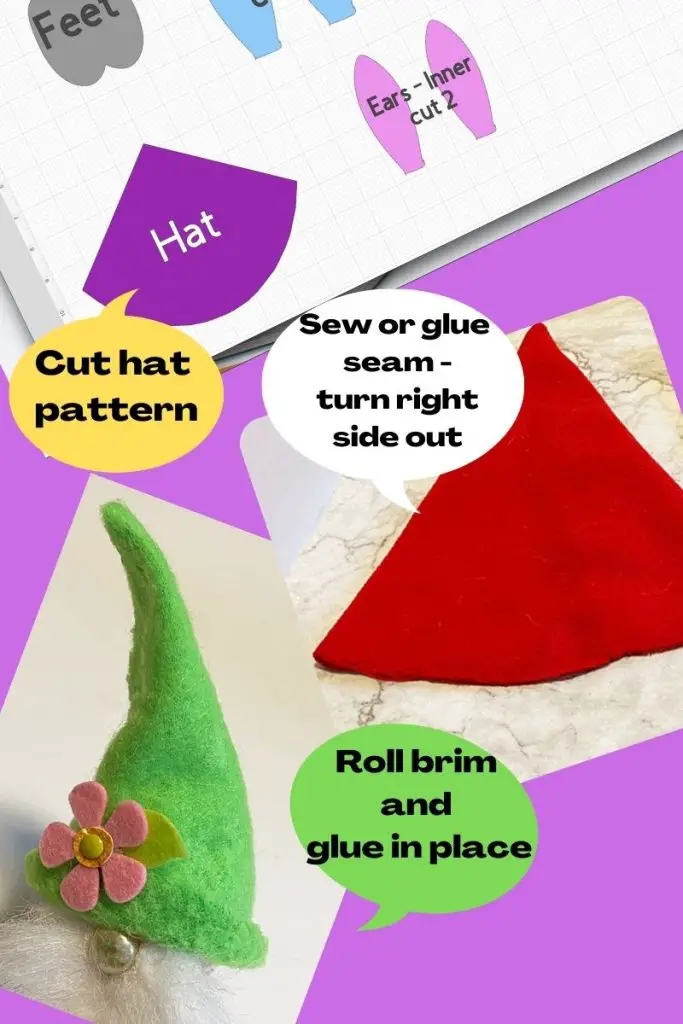
With the right sides together, sew along the seam of the hat. Turn the right side out and roll up the brim, and apply some glue to keep the brim in place.
Add buttons or embellishments if desired (we used a foam flower cutout)
If you are unable to sew, apply glue to the seam, overlapping and then allow it to dry before rolling the brim and applying glue to the brim.
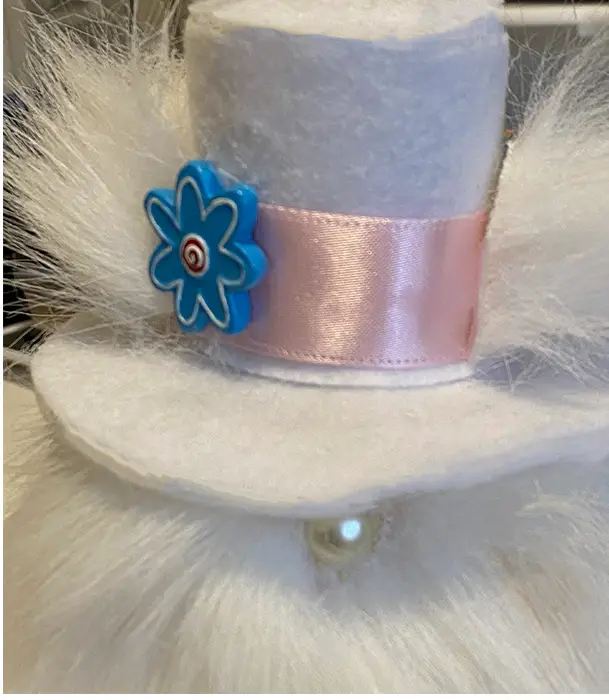
To make the Top Hat
The top hat is made from a recycled cardboard tube. Get the instructions HERE
Ad the Ears
Cut ears (from fleece, felt or fur) and apply with hot glue to the sides of the top hat or the pointed hat. Ears are optional! When adding ears to the rolled point hat, tuck the ears into the rolled brim and apply glue.
If you wish to cut ears from faux fur, use the printable pattern or cut in a tall, thin, triangular shape. The faux fur is fluffy enough that the shape doesn’t have to be perfect.
Cut the beard
The beard size is dependent on the size of your egg. I am using plastic craft eggs (large gnome with white tophat), as well as a real egg (small gnome with green hat). There is a fair amount of size difference between the two eggs. It is best to measure and cut a small triangle out of paper and try it for size before cutting your faux fur. That will make sure you don’t end up cutting the fur too small.
Measure halfway around your egg at the widest part.
Measure how long you would like your beard to be.
Cut a triangular piece of faux fur according to your measurements.
Cut a notch on the top of the beard. The notch will surround the nose when attached. (see image below)
If using a Cricut cutting machine
Download the free SVG pattern from our Free Resource Library.
Upload the project into Cricut Design Space.
Ungroup and then resize the pattern pieces to fit your egg.
Measure the circumference of the egg to make sure the hat brim fits over the size of the egg, before cutting.

Measure the cardboard tube circumference and make sure that the cut-out feet will fit under the cardboard tube.
If Using Scissors
Download the printable pattern from our Free Resource Library.
Print the pattern and resize it to fit the egg, if needed.
Making a Display Stand
If you choose to make the feet and stand, we use leftover cardboard tubes for the legs. See recycling ideas below for other options.Using a cardboard tube
Cut the feet pattern from thin foam or stiff felt.
Apply fabric or decorative cardstock to your cardboard tube with glue. Measure around the tube and the height and cut a rectangle to fit. Apply with hot glue or tacky glue.
Run a bead of glue around the base of the cardboard tube and adhere it to the cut foam feet.
Attach the nose
Add a bead of hot glue to the egg about one-third of the way down from the top of the egg. (see placement below)
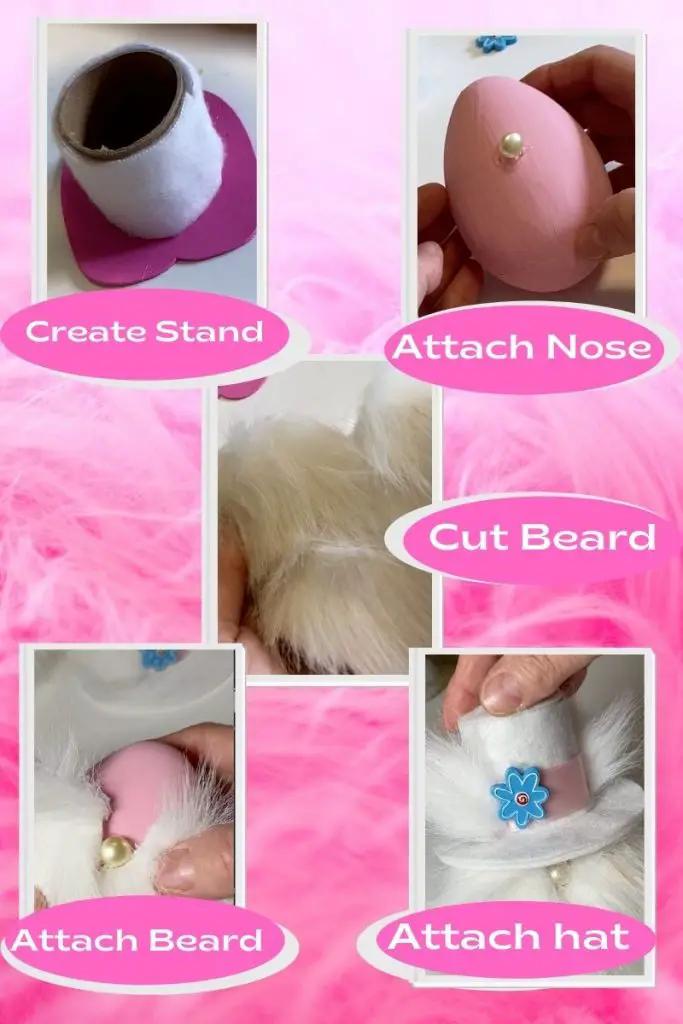
Attach the beard
Apply a bead of glue on both sides and below the nose. Place the beard under the nose, making sure the notch surrounds the sides of the nose. . Apply more glue to secure the beard as needed.
Attach the hat
Apply a bead of glue around the top of the egg and place the hat onto the glue.
Attach the stand (legs and feet)
Run a bead of glue around the top of the stand that you have already made. Place the egg onto the stand in the desired position.
Allow your DIY Gnome easter egg to dry completely before using.
Recycling Ideas when making DIY Gnome Easter Eggs
This is a great opportunity to use leftover felt, fabric, embellishments such as buttons and even faux fur from other projects. Since the eggs are small, they don’t require a lot of supplies.
Our stands are made from Cricut cardboard tubes, covered in fabric, which was leftover from other vinyl projects.
If you don’t have cardboard tubes, you can use a napkin ring, egg cup, or a pill bottle, covered in fabric. Any small cylinder will work fine.
FAQs and Tips
Using Plastic Eggs
Yes, you can use any egg-shaped object that you like. Wooden eggs, plastic craft eggs and even the dollar store eggs that open for candy are all fine.
If using the eggs that open, be sure to run a bead of glue around the opening and secure it before adding your pattern pieces.
To make this project a child-friendly craft, use the hard-shell plastic eggs that have been sealed shut. They are much easier for little hands.
Storing Gnome Easter Eggs.
I recommend storing them in a hard-sided storage box, in easter grass or something to keep them from cracking or breaking.
I hope you enjoy making your own DIY Gnome Easter Eggs.

This website contains affiliate links. As an Amazon affiliate, I earn a small commission from qualifying purchases (at no cost to you).