
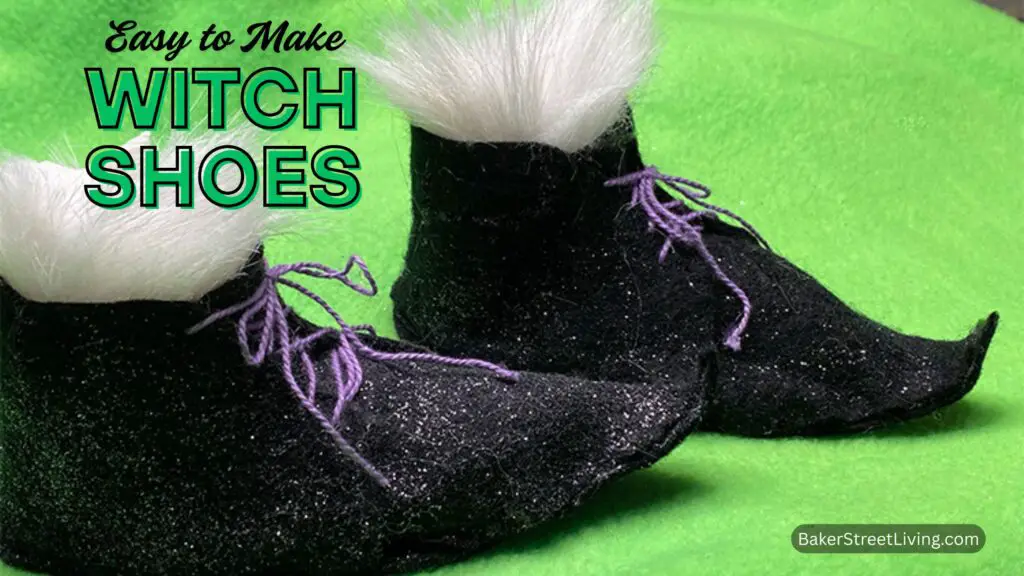
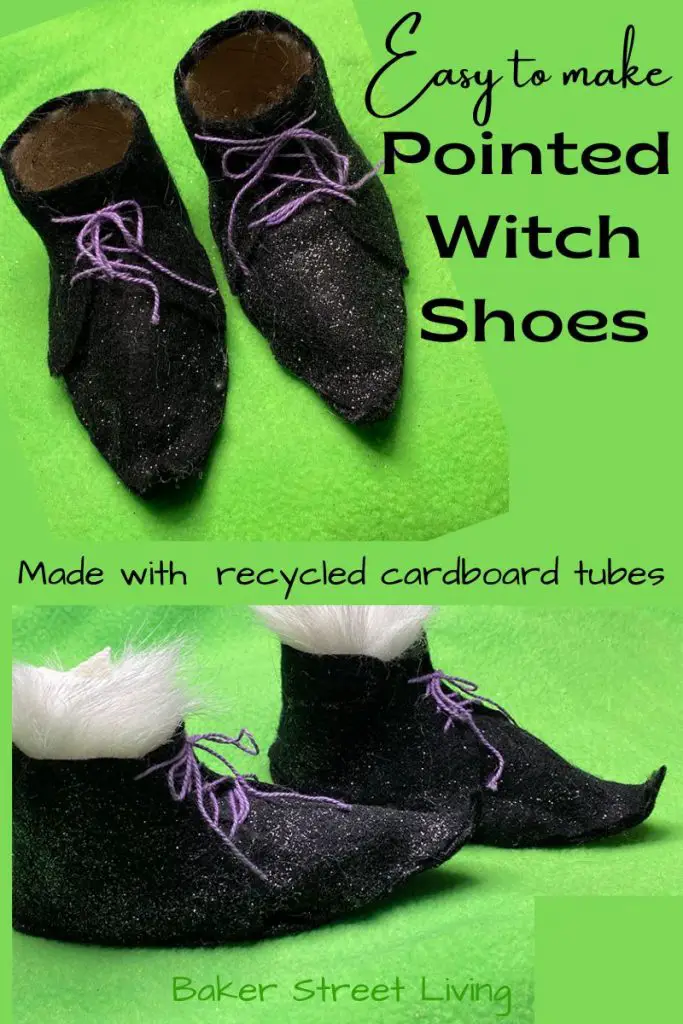
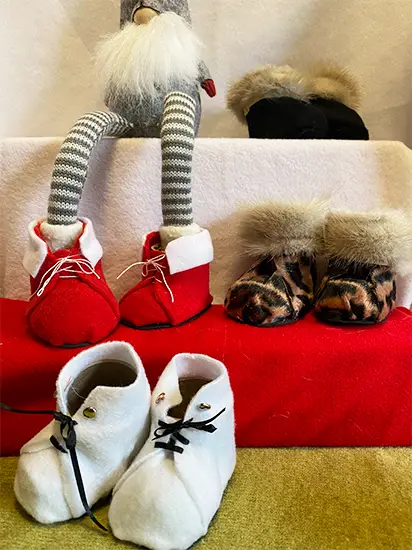
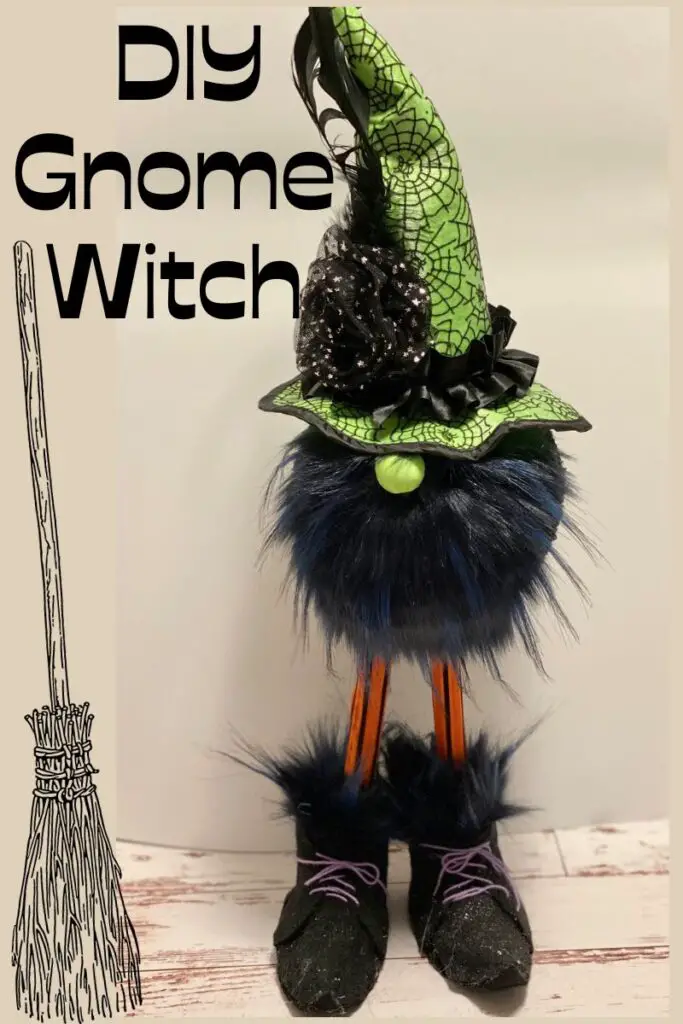
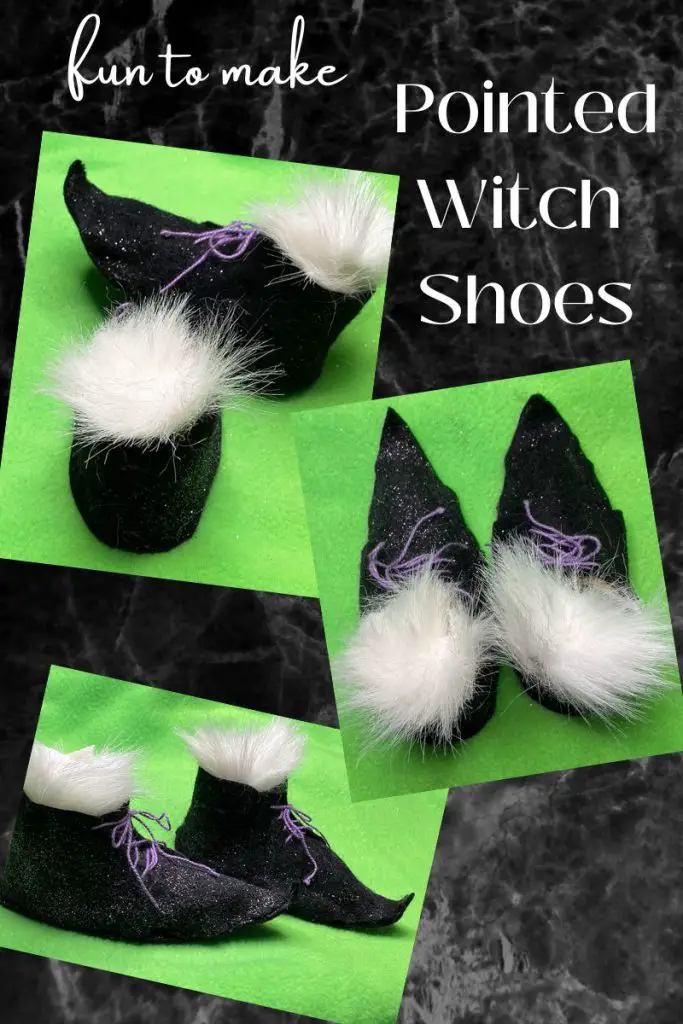
This cute witch shoe pattern can be used on a DIY witch Gnome, as decor items or even in flower arrangements and cake toppers. They are easily constructed following our step-by-step tutorial. These are similar to our popular DIY Gnome shoes, but we have made a few changes to accommodate a point, which is a must for all witchy shoes.
This easy-to-make witch shoe pattern uses Cricut vinyl cardboard tubes, but you can use any cardboard tube, such as paper towel tubes, toilet paper tubes or poster tubes. If you use cutting machine vinyl, you’ll appreciate how the leftover cardboard tubes add up. Anytime we can recycle the cardboard tubes is a win for us!
How to Make Witch Shoes – The Video
What You’ll Need
This website contains affiliate links. As an Amazon affiliate, I earn a small commission from qualifying purchases (at no cost to you).
- Cardboard tubes ( I used cutting machine vinyl tubes)
- black felt (plain or glitter, both provided good results)
- clear packing tape
- heavy black cardstock (8.5 by 11)
- embellishments (optional)
- aluminum foil
- poly-fil stuffing
- embroidery floss (optional for laces)
Craft Room Tools
- Scissors – or-
- cutting machine (must cut fabric such as Cricut Maker or Maker 3)
- Hot glue gun and hot glue sticks
- utility knife or small saw to cut thick cardboard tubes)
- darning needle (optional for adding laces)
Tools List if using a cutting machine
- cutting machine
- fabric grip cutting mat
- rotary cutting tool. (comes with Maker or Maker 3)
- spatula tool
- Cricut Brayer
If you are using this witch shoe pattern with felt or fleece, you will need a Cricut Maker or Cricut Maker 3. If you have a cutting machine that doesn’t cut fabric, either cut the pattern pieces out of cardstock with your machine and use them as a pattern or opt for compatible materials for your cutting machine.


How to make Witch Shoes using our Witch Shoe Pattern
Download the free Printable or SVG cut file pattern from our free resource library. (below)
CUT THE WITCH SHOE PATTERN PIECES
For cutting machine users:
Upload your Witch Shoe Pattern into Cricut Design Space.
Ungroup.
Resize your pattern to accommodate the desired size of your shoe. (If you are using Cricut Vinyl tubes to frame your witch shoe pattern, see the measurements below)
Duplicate each pattern piece for each shoe that you are making.

Adhere the felt to the fabric grip mat. (see mat saving tip below)
TIP FOR CUTTING FELT – Felt can be hard on cutting mats because it has a lot of fibres. To reduce the amount of cleanup and preserve your cutting mat, try adhering the felt onto a piece of sticky contact paper. Place the contact paper onto a standard grip mat and cut using the rotary cutting tool. This is a great tip[ from our Beginner Tips for Cricut)
Once you have the size you want, select Make it! (cut 2 soles, 1 side and back panel and one toe/tongue piece, for each witch shoe you are making)
If Using Scissors and the printable pattern
Download the printable pattern from our free resource library.
If you have legal-size paper (8.5 by 14), choose this size for printing. If you don’t have the option of the larger paper, the pattern will print on two sheets of paper.
Once printed, cut the witch shoe pattern pieces out. (Resizing tip below)
If you need to resize the pattern, use the pieces as a guide for making each witch shoe pattern piece larger or smaller as desired. This can be tricky, and it may take a couple of tries until you get the sizing correct. To avoid waste, I recommend you do the resizing on scrap paper and when you have the desired size, then cut your fabric. If using Cricut vinyl tubes, use the sizes listed above.
CUT THE CARDBOARD TUBE
Cut a cardboard tube into two -2 inch lengths for the back of the boots and one piece of cardboard tube into a 1-inch length. (see image below for reference on cut cardboard tubes)
Cut the short 1-inch length cardboard tube in half, so that you have two U-shaped pieces of equal size.
Attach the tubes
Using hot glue, glue the cardboard tube pieces onto one of the sole pieces (as shown in the image below)
Form the Pointy Toes
While the glue is drying, fold an 8-inch square of aluminum foil into a triangle. Keep folding it into a triangle until it is small enough to be inserted into the toe of the shoe.
Wrap a small piece of poly-fil batting around the point and insert it into the toe. Make sure it fits snugly and doesn’t move. If needed, add more foil or fill. Work the toe into a point after it has been inserted.

Add a small amount of glue under the toe, adhering it to the sole.
Attach Pointed Toe
Apply a small bead of glue to the top of the cardboard tube toe. Position the fabric on top of the toe and centre it in place. Once you have it centred in place, continue adding glue to the sides and toe areas.
Use clear packing tape or masking tape and wrap it around the sole and side of the shoe. Make sure to press the tape to ensure that it adheres to all sides and maintains the point.
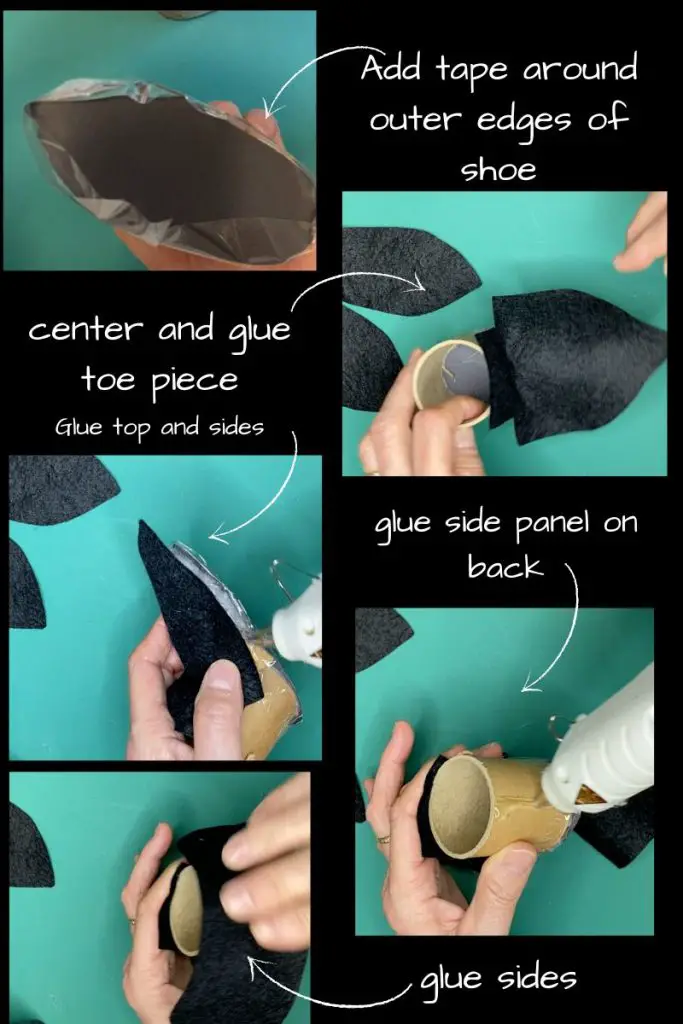
Attach Side Panel
Fold the side panel in half to find the center.
Run a bead of glue up the center of the back of the shoe.
Attach the side panel, matching the center of the panel to the centre back of the shoe.
Once you have it centred, continue gluing the sides of the shoe and up onto the toe.
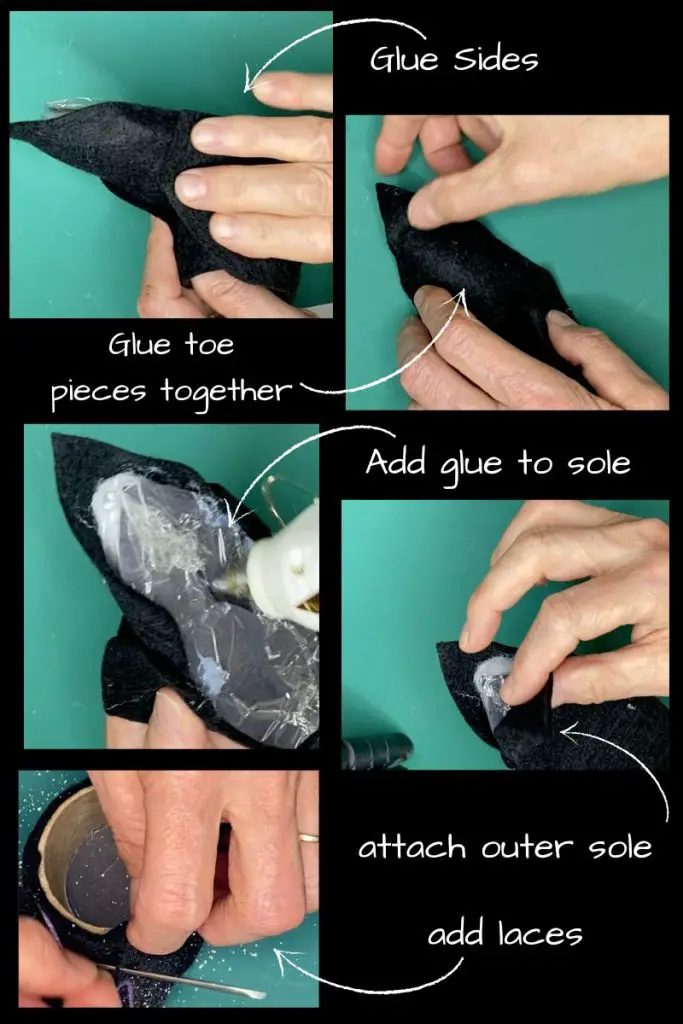
Attach Outer Sole
Glue on the outer sole, matching the toe points and heel.
Add Laces and Embellishments.
For laces, use embroidery floss or a small ribbon and a large darning needle.
For embellishments, apply hot glue to the embellishment and adhere it to the desired spot on your shoe.
How to use our Witch shoe patterns to make picks for flowers or wreaths
Once you have e constructed your witch shoes using our witch shoe pattern, apply some hot glue inside the shoe and adhere a small piece of floral foam to the shoe base. Using a metal skewer or X-Acto knife, cut a small hole in the bottom of the shoe, into the sole and foam.
Add some glue to the hole and insert a wooden or plastic skewer into the hole. Allow drying completely before using.
Insert into a floral or wreath arrangement.
For use outside, remember to use moisture-friendly craft supplies. The cardboard tubes will quickly fall apart if they get wet. Choose water-safe products, such as pieces of PVC pipe or plastic containers, such as YOP drink bottles (or similarly sized bottles) or even water bottles.
For fabric substitutions that are weather-friendly, opt for craft foam sheets, faux leather or thin plastic craft sheets. Even though felt will withstand getting wet, it can wrinkle or sag with the weight of moisture.

This website contains affiliate links. As an Amazon affiliate, I earn a small commission from qualifying purchases (at no cost to you).