
Content Created by Tracey of Baker Street Living 
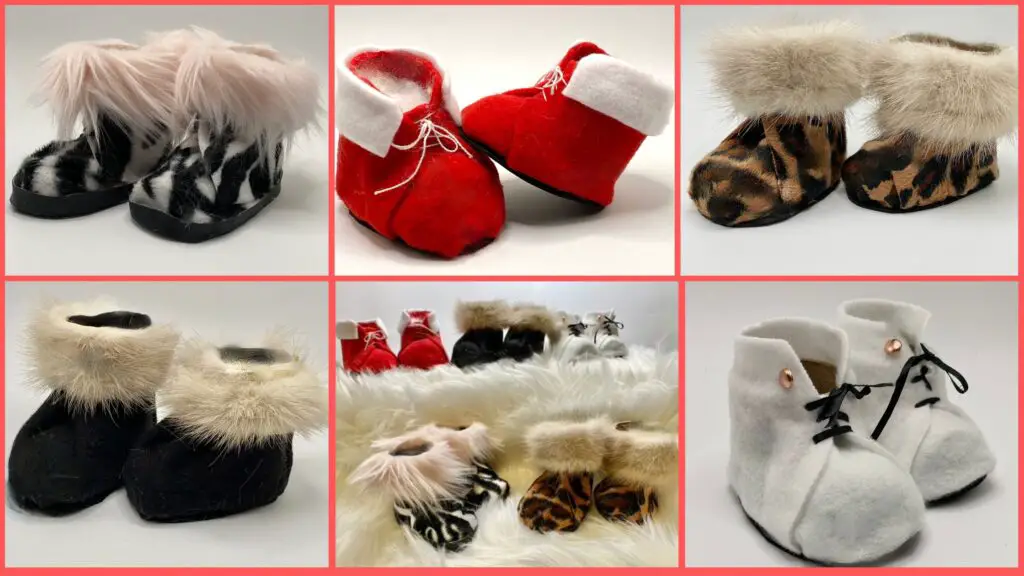
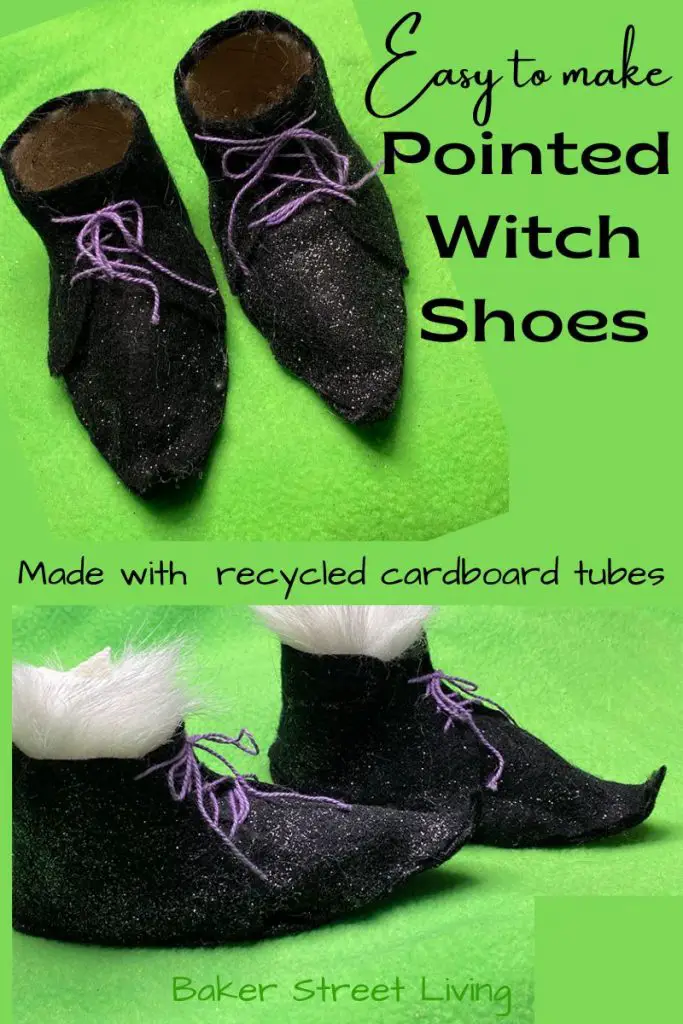
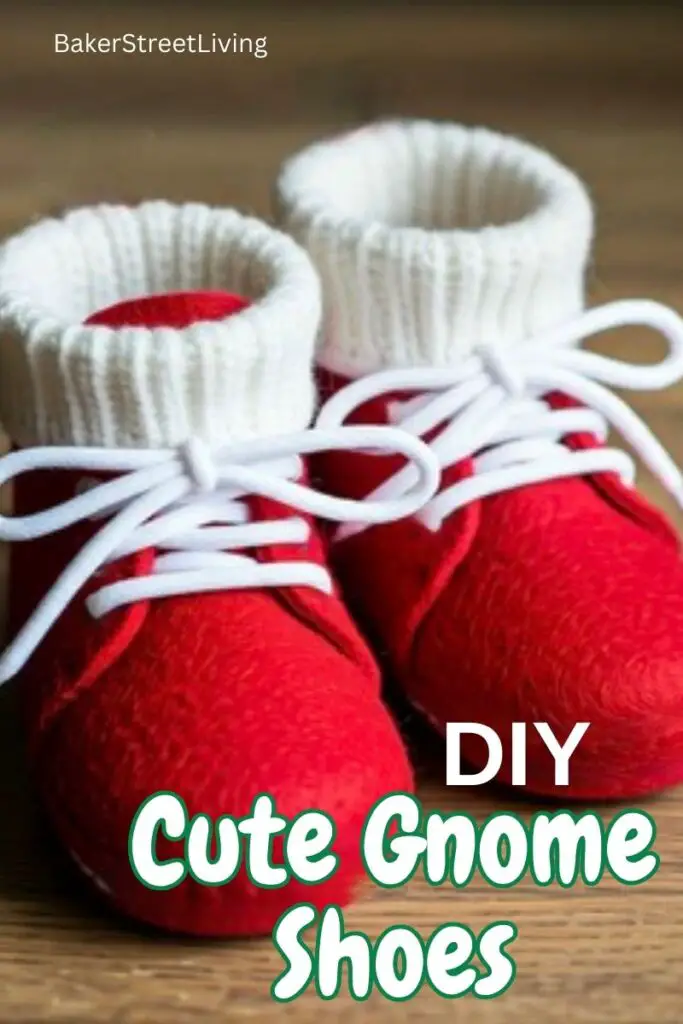
If you are making gnomes or other decorative characters, the shoes and boots can be the hardest to find. Having a reliable easy-to-use pattern will help you add the finishing touches to your project. Once you know how to make Gnome Shoes and Boots you can use our free pattern to match your characters and colours.
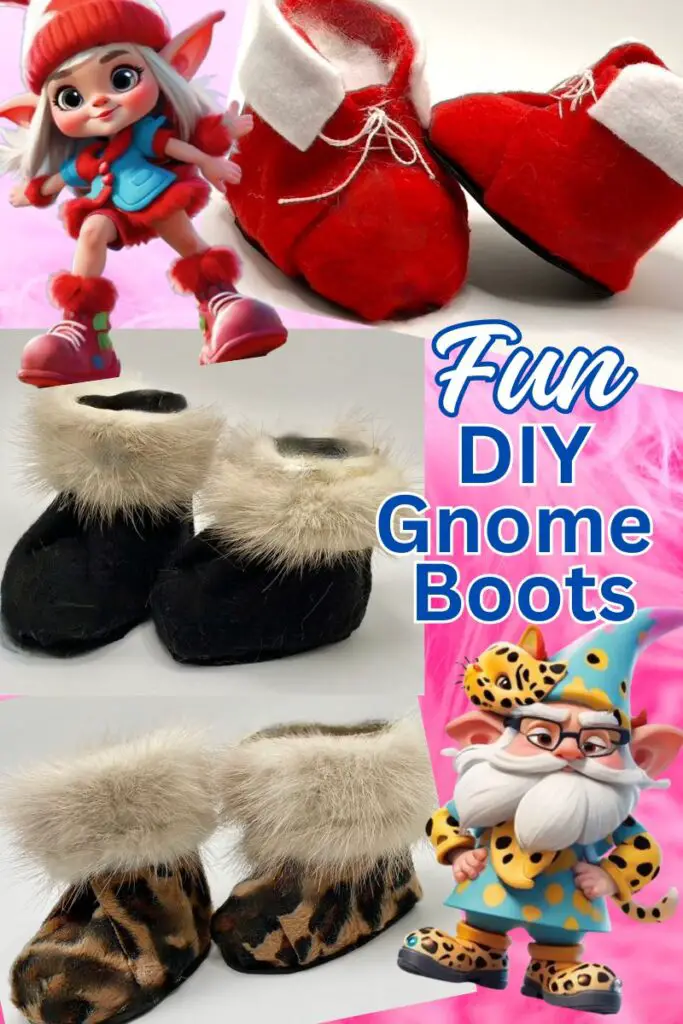
These cute Gnome Shoes and Boots can be used on Christmas Gnomes, in any colour you want, or even use them on a stand-up snowman, St. Patrick’s Day leprechaun Gnome or whatever cool character you are making. Check out our long-legged standing Gnome project. It is perfect for these Gnome shoes.
How To Make Gnome Shoes and Boots with Cardboard Tubes
Supplies List
This website contains affiliate links. As an Amazon affiliate, I earn a small commission from qualifying purchases (at no cost to you).
- Cardboard tubes (I used Cricut vinyl tubes that were leftover from other projects)
- EVA foam sheet (colour of your choice – U used black)
- cardstock (heavyweight)
- fabric (your choice – I used polar fleece)
- hot glue gun and hot glue
- Poly-fil stuffing
- Embroidery floss or fine ribbon
- small beads or mini buttons
- darning needle or embroidery needle
- masking tape, or packing tape
Helpful Tips and FAQs
Using Recycled items in this project
In this tutorial, we used Cricut vinyl tubes, which I cut down and used as the frame of the boots. The Cricut tubes are perfect because they are heavy-duty cardboard and will last for seasons to come, even after being packed away.
You could also modify this and use paper towel tubes, gift wrapping tubes or toilet paper tubes. Paper towel tubes and toilet paper rolls are much easier to cut, but will need to be wrapped when storing after the holidays, to prevent damage.
This is a perfect craft project to recycle other leftover crafting bits, too. Our fur comes from an old mink coat. The fabric and embroidery floss are leftover pieces from other projects. It is always great to rescue leftover bits whenever possible.
The only out-of-pocket expenses I had in making these Gnome Shoes and boots were for the hot glue, the cardstock and the foam sheet.
I used a Cricut Maker to cut the soles of my Gnome boots. I love using my Cricut, as it means I get a flawless, perfect cut every time. The sole pattern is available for you to download for both Cricut and anyone looking for the printable version. You can find the SVG and the printable pattern in my free resource library. If you need a password, sign up for free access, and one will be sent to you.
Cutting the cardboard tubes
For cutting cardboard, paper towel tubes, wrapping paper tubes and toilet paper tubes, use scissors. The cardboard is thin enough that no special tools are needed.
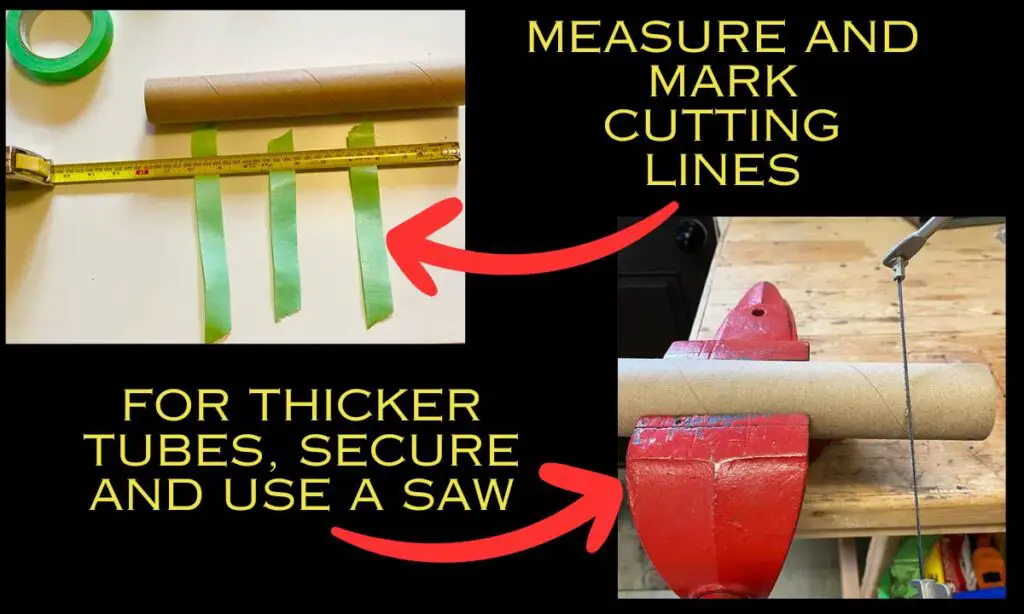
When cutting Cardboard tubes from Cricut vinyl or other tubes from other brands of vinyl, or Poster mailer tubes, you will need to use more power. I used a coping saw and a vice for some, and then had the rest cut on a chop saw. A vice isn’t required, but you will need to make sure that when you are cutting the tube, you can stabilize it when sawing through it. You can use clamps or even tape to secure the tube when cutting. Make sure that your table or surface is stable to prevent wobbly cuts.
For less heavy cardboard tubes, a Canary cardboard cutter works great. The Canary cardboard cutter is handheld and slices easily through a medium-to-light-weight tube.
Tools that are good for cutting the thick cardboard tubes.
You can use a hack saw, pipe saw, coping saw, a good quality utility knife or even a chop saw. Be sure to make safety a priority by wearing safety glasses and following all safety guidelines for your tools. Cutting thick cardboard tubes can be tricky, and we don’t want any injuries.


How to make Gnome Shoes and Boots – Step-by-Step Instructions
Download the Free SVG or Printable Pattern Here
Measure and cut the cardboard tube pieces
Mark with a sharpie or masking tape, where you want to cut the tube. My boots will be 3 inches tall. You can make shorter or taller boots and shoes; just remember to adjust the pattern pieces when cutting the tongue and sides of the shoes from fabric.
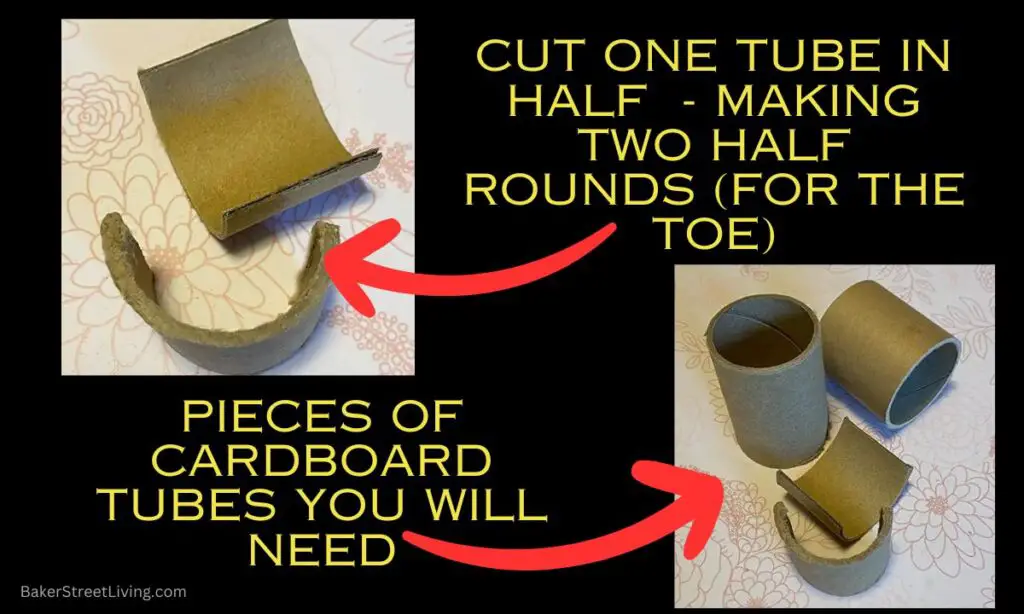
Cut the Cardboard tube into two 3-inch lengths and one 1.5-inch length.
Take the short piece of cardboard tube (1.5-inch tube) and cut it vertically.
These patterns and fabric pieces can be cut on a cutting machine with our SVG, or download the printable pattern from our library.
How to make Gnome Shoes and Boots with a cutting machine
Use of free SVG to cut the pattern pieces for the gnome shoes or boots.
Supplies needed to make Gnome shoes and boots
- Cricut Maker, Maker 3 or a cutting machine (must cut fabric)
- fine point blade
- rotary cutter tool
- fabric grip mat
- standard grip mat
- spatula tool
For each pair of Gnome shoes or boots, you need the following pattern pieces and materials
- 2 soles from cardstock (inner sole)
- 2 soles from EVA foam (outer sole)
- 2 toe pieces -coordinating fabric, leather or vinyl fabric (optional – if making running shoes)
- 2 tongue/toe pieces – fabric
- 2 side and back pieces – fabric
- 2 band pieces (optional), coordinating fabric, leather or vinyl.
Download the project onto your computer from our resource library.
Upload the project into Cricut Design Space.
Choose the pieces you wish to use
Resize to fit your tubes ( pattern should load the proper size for a 3-inch high show, but make sure that it is the proper size before cutting.
Gnome Shoe and Boot Pattern pieces to be cut on a cutting machine
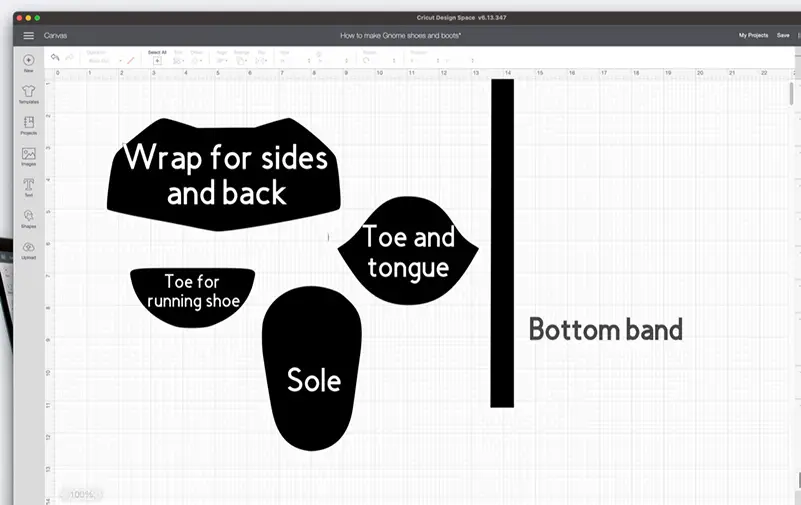
How to make Gnome shoes and boots using scissors.
Download and print off the shoe pattern pieces and print them.
You may need to adjust the size of each fabric piece, depending on the size of the cardboard tube you have.
Cut the following pieces to make Gnome boots.
- Cut cardboard tubes, as instructed above
- 2 soles from cardstock
- 2 soles from a black foam sheet
- Cut 2 side pieces from the fabric
- Cut 2 tongue pieces from the fabric
- 2 bottom band pieces (optional) from coordinating fabric, leather or vinyl.
- 2 toe pieces in coordinating fabric, leather or vinyl.
How to make Gnome shoes and boots – Assembly instructions
Glue the Cardboard tubes onto the cut soles
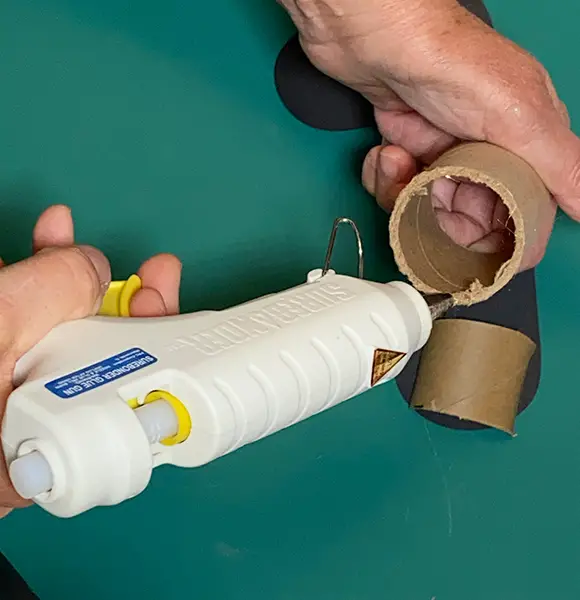
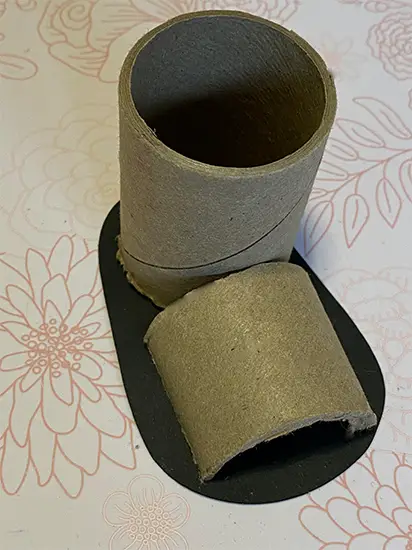
Step 1 – Run a bead of hot glue around the edge of the cardboard tube and adhere it to the sole piece.
Step 2 – Run a bead of hot glue on the side cuts of the short tubes and adhere to the sole. (See the picture above of how they should look after gluing)
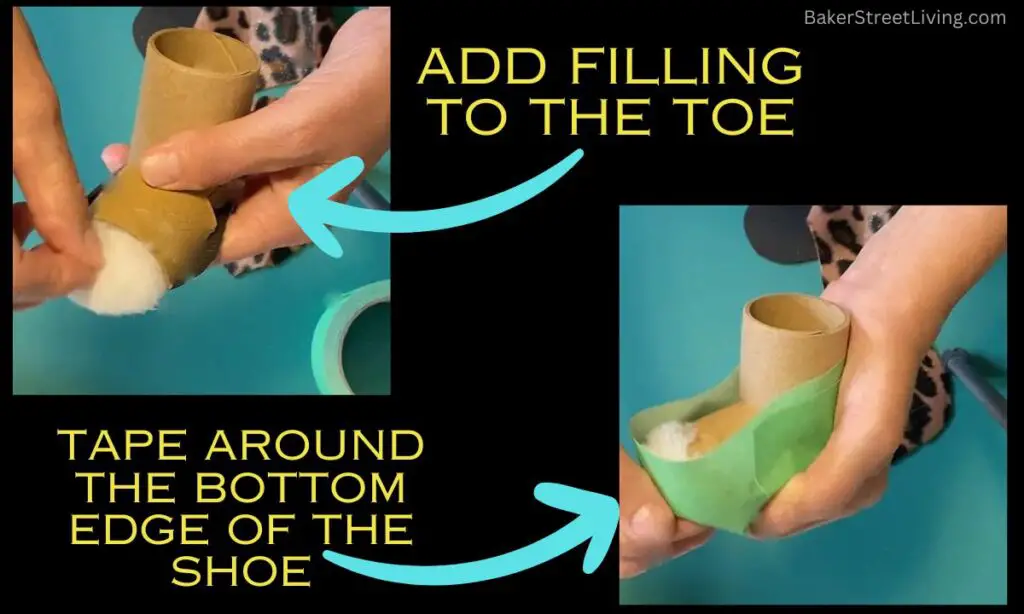
Add filler to toe (Optional)
If you like the toe to have a rounded look, fill it with Poly-fil stuffing. This is not required, but it will give the toe of the shoe a bit of a more natural look.
Adhere tape
Wrap masking tape or packing tape around the entire show. This will pull in any cardstock sticking out or fill any gaps you may have.
Apply Tongue Piece
Place some hot glue in the middle of the cardboard where the tongue will be. Center the tongue and glue it in place.
Adhere Side Pieces
Run a bead of glue up the center of the back of the boot. Center the fabric and stick it in place.
Apply glue to the sides and wrap the side piece around until it overlaps the tongue piece.
Let everything dry before moving on.

Apply trim.
Faux Fur makes a perfect trim on the top of our Gnome shoes and boots. You could use Ric-Rac, a contrasting colour of fleece, or even feather trim; there are no rules for the trim. Apply a bead of glue around the top and secure your trim in place.
If you don’t wish to add trim, apply some glue to the inside of the boot around the top opening and fold in your fabric.
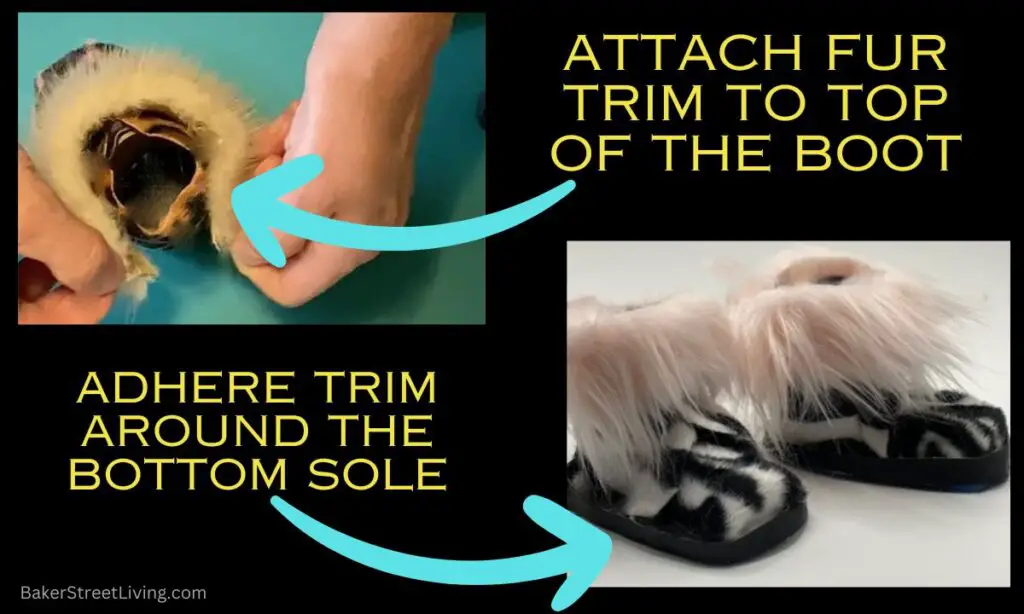
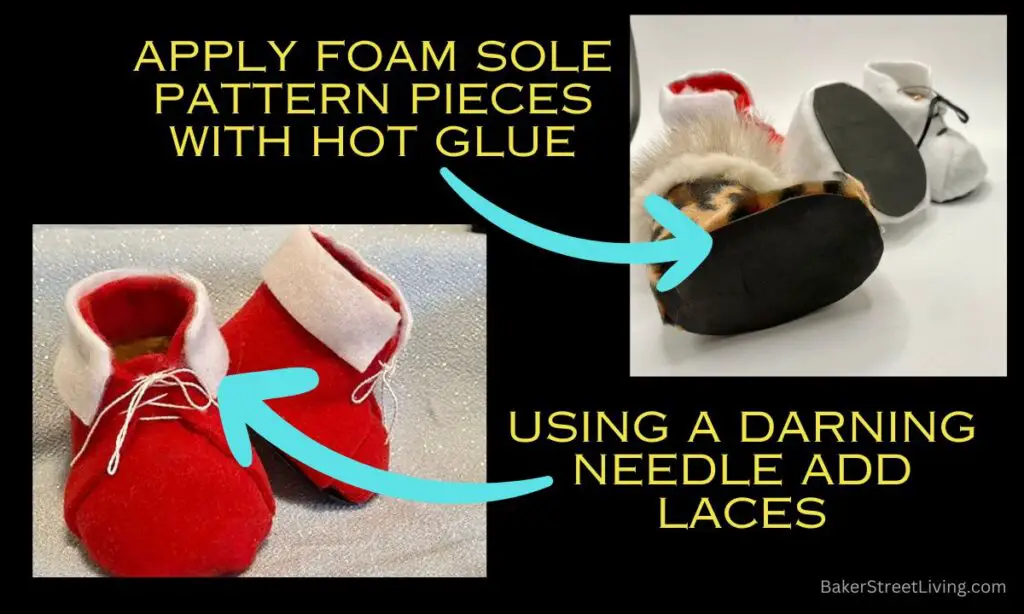
Add sole
Apply hot glue to the bottom of the boot and secure the sole in place.
Trim any spot on the sole that may be sticking out.
Add Laces. ( Optional)
Using a darning needle and embroidery floss, stitch on the laces.
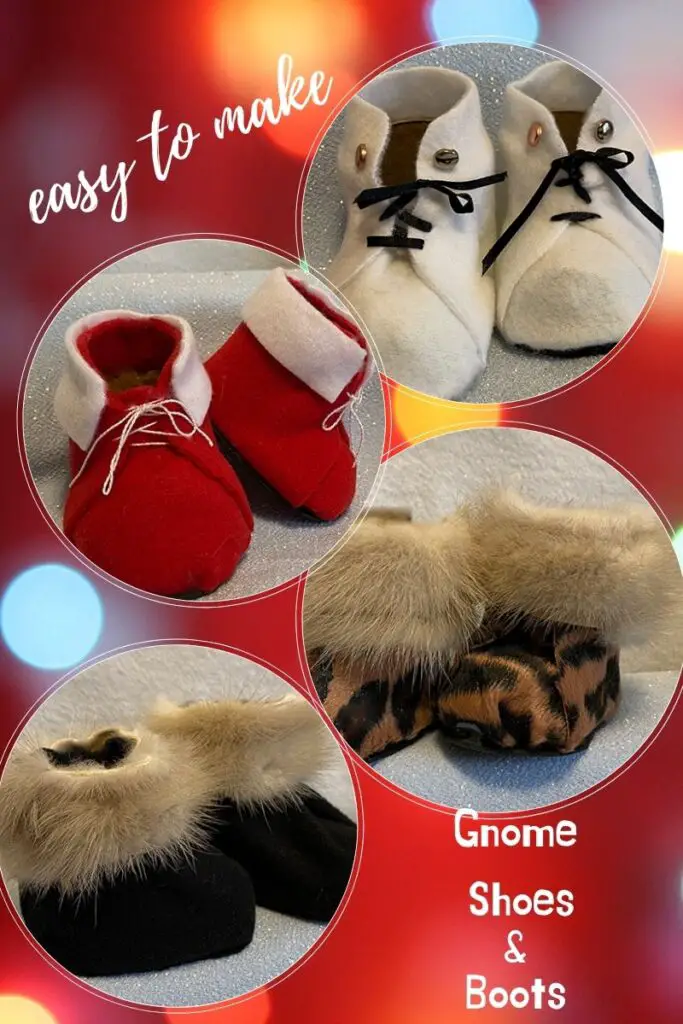
On the red fleece shoes below, I used embroidery thread. On the white booties, I used a fine ribbon. Both were applied using a large darning needle.
To make the shoes pictured above, replace the trim around the top of the shoe. Use the rubbed cuff from an infant-size sweater. Glue it in place and fold it over, and then secure it in place with a little more glue. Use laces from a pair of baby shoes instead of embroidery floss or ribbon. Eliminate the bottom band and make the sole out of the same coloured fleece.
Add Embellishments (Optional)
Add any other embellishments you wish to finish off your Gnome boots.
Add miniature buttons, metal meads, or type pieces or sole bands. This is where you can add personalization to your gnome shoes or boots.
Use your Gnome shoes and boots on homemade stand-up gnomes.

This website contains affiliate links. As an Amazon affiliate, I earn a small commission from qualifying purchases (at no cost to you).