
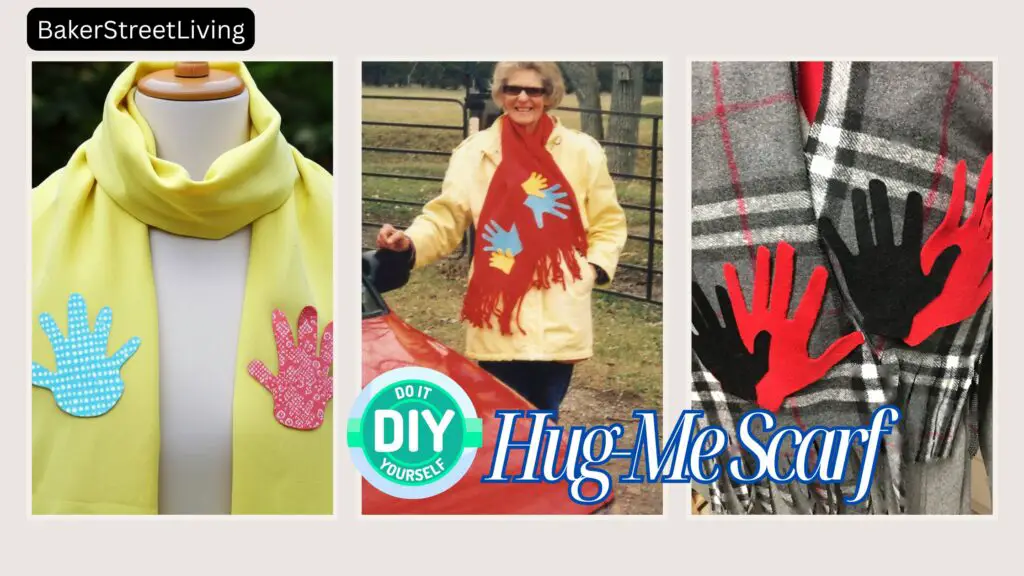
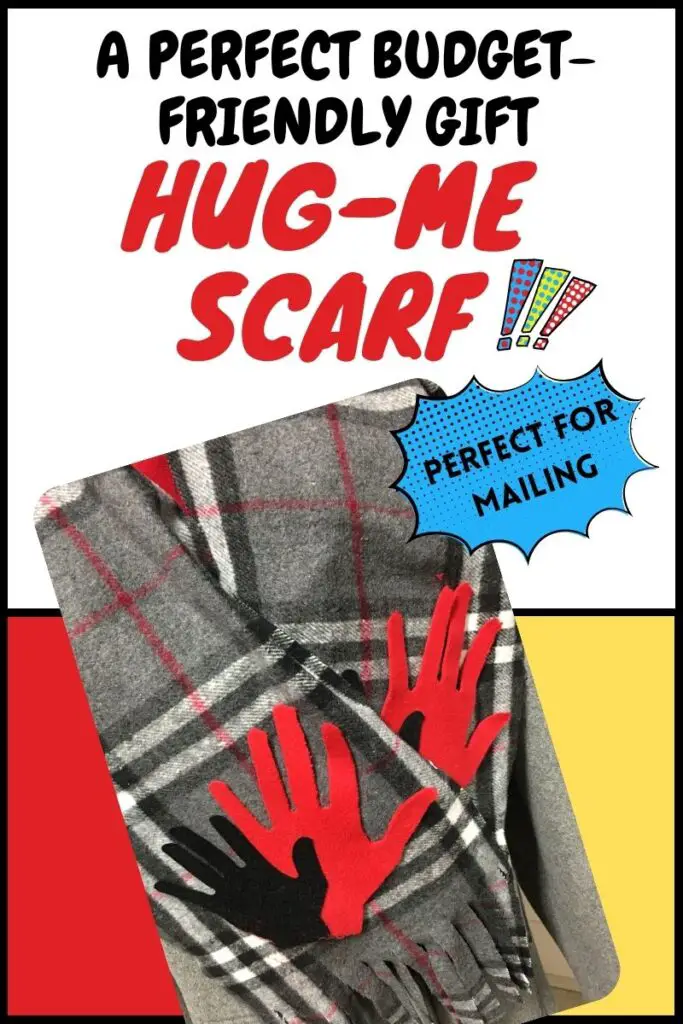
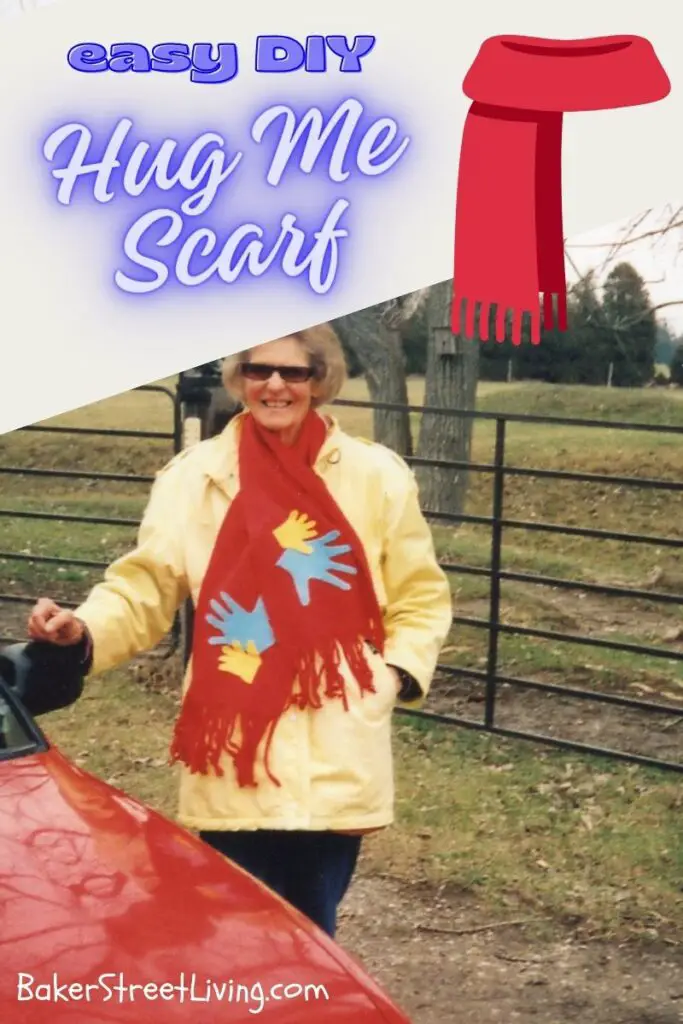
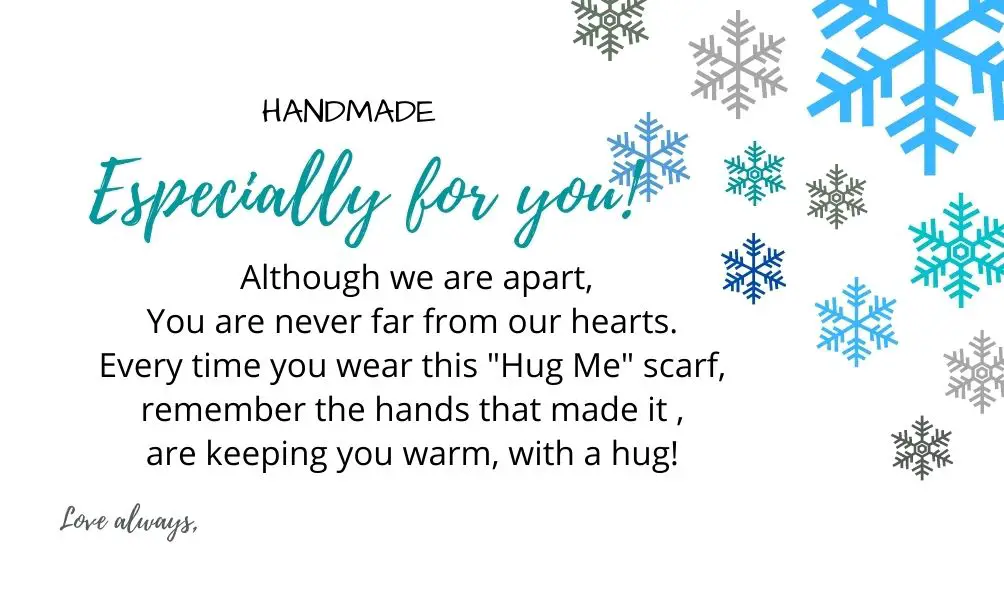
Why make a Hug Me scarf? Because someone you know needs a hug! It’s certainly been a long year. We’ve missed get-togethers, family celebrations, weddings, graduations, hanging out with friends, visiting sick friends in the hospital and not to mention the funerals. It’s been hard on everyone, without a doubt.
Christmas is always an expensive time of the year. Anytime we can create great gift ideas and decor that are budget-friendly it is a big bonus. Think about up-cycling opportunities too. Get creative and enjoy the holidays!
This scarf tutorial is a reminder that your loved ones are thinking of you and are sending a hug to you. This Hug Me scarf could be sent from a child to a grandparent or relative or even sent from a grandparent to a child. There are no restrictions.
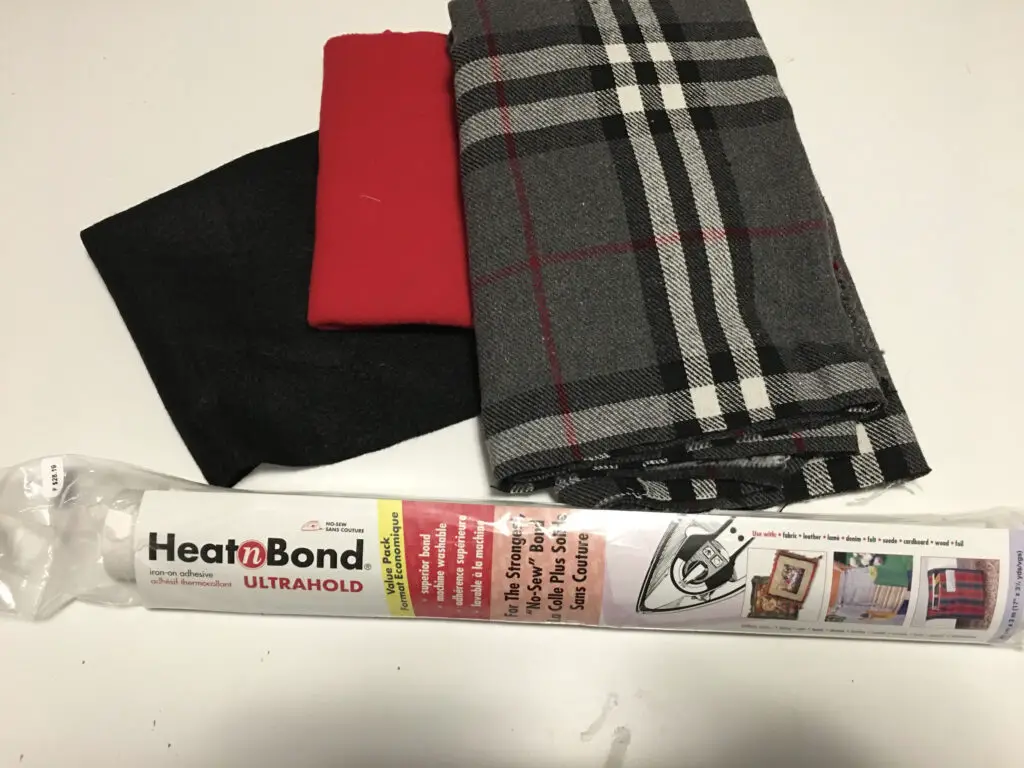
Hug Me Scarf Supplies List
This website contains affiliate links. As an Amazon affiliate, I earn a small commission from qualifying purchases (at no cost to you).
- Fabric for the scarf – we used a wool blend in ours (see below for a list of suitable fabrics for both summer and winter)
- coordinating fabric – one for each person’s handprints
- scissors
- Hean N bond – Ultra hold (for heavier fabrics)
- Heat N Bond Lite – if making a summer scarf
- piece of paper or cardstock
- pen or pencil
- painter’s tape – if adding fringe
- Iron or heat press
- Fray Check – if needed for loose weave fabrics
Choosing suitable fabrics for your Hug Me scarf
These are a few things to consider when choosing the fabric
- Allergies and skin sensitivities – Does the person receiving your Hug Me scarf have any conditions where the type of fabric would cause skin irritation, such as wool or polyester allergy, contact dermatitis or sensitive skin? Many fabrics are treated with dyes and chemicals during processing, which can cause skin irritations. If this is a concern, you can choose dye-free, all-natural fabrics.
- Weave – If you choose a loosely woven fabric, you may need to hem or sew a zig-zag stitch across the end to prevent fraying (Not always attractive), or use a product to stop the fabric from fraying, such as “fray check” or “Alene’s stop fraying.”
- Warmth – Some of the best fabrics for scarves that provide warmth contain wool, wool blends, polar fleece, polyester blends and faux fur.
- Online or in-person shopping – If ordering online, be sure to read reviews, sometimes (many) the colours aren’t exactly what you think. Some greens may appear blue, and red may look orange, etc. If there are no reviews and there is an option to ask a question, then take the opportunity to clarify the colour.
- Heat sensitivity – Some fabrics burn easily. You will be adhering to the handprints with HeatNbond, and if the fabric is or contains low-temperature fabrics such as nylon, melting could occur.

How to make the Hug Me scarf
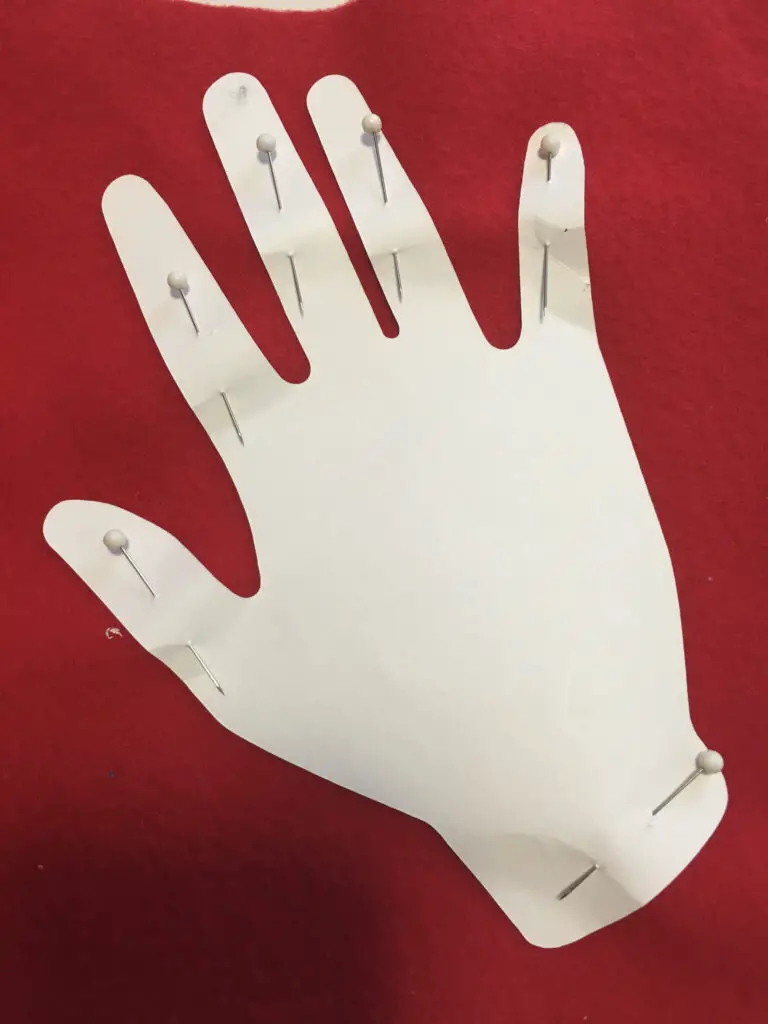
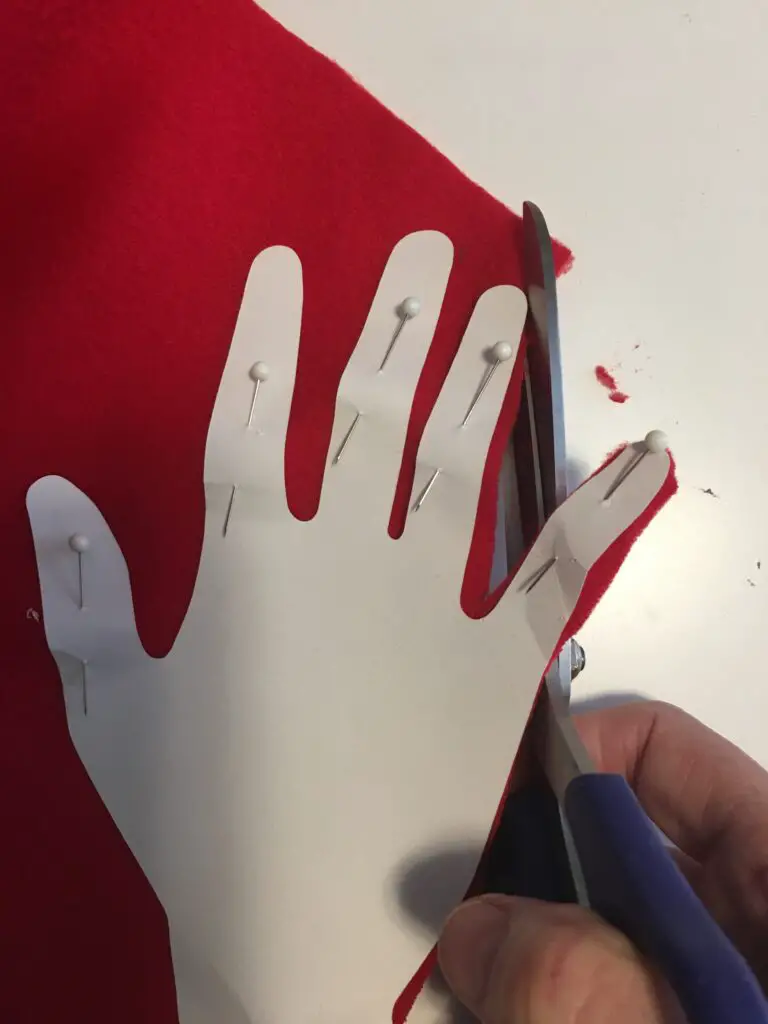
- On a piece of paper or cardstock, trace around your hand ( or the hand that is going to be used on the scarf)
- Trace one hand of each person that you want to add to the scarf.
- Using scissors, cut out the hand pattern.
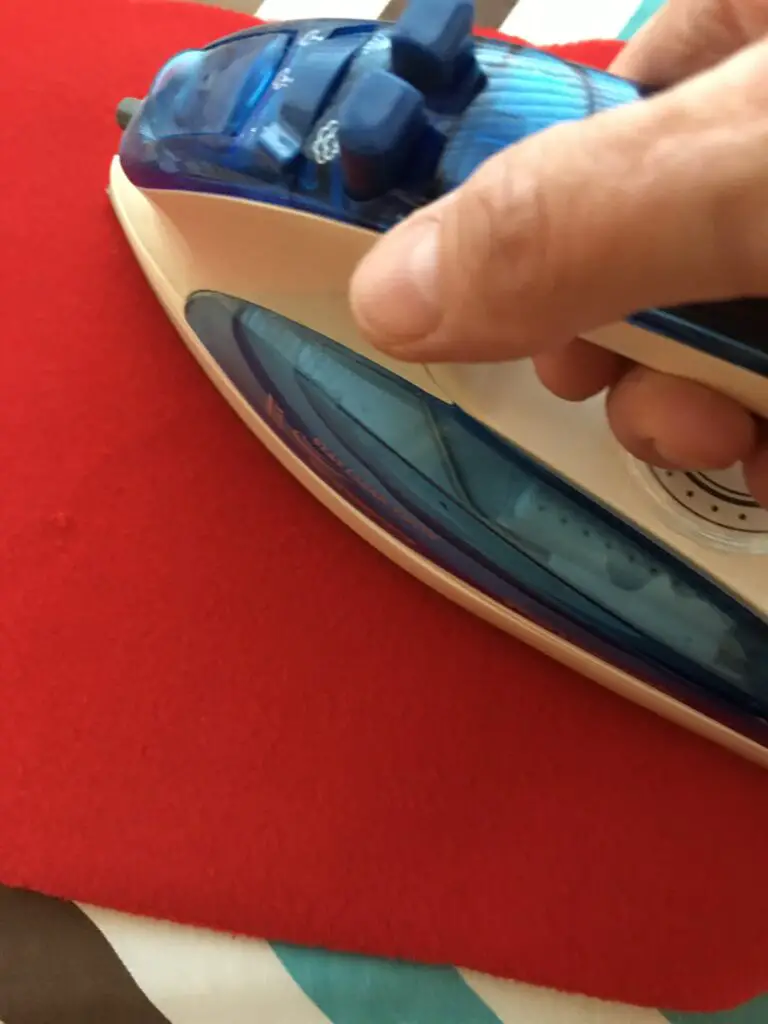
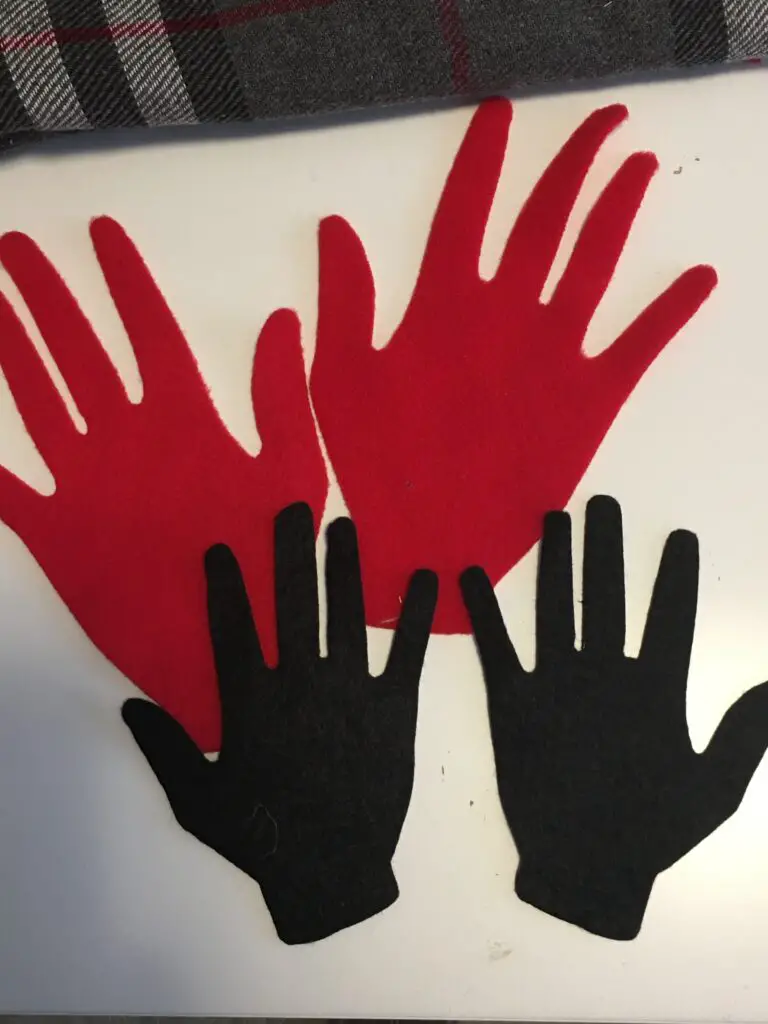
- On all pieces of contrasting fabric, adhere some of the HeatNbond to the wrong side of the fabric. Use a piece big enough to cut 2 hand patterns out of.
- Pin the hand pattern to the contrasting fabric.
- Cut the hand pattern out of the fabric. (Do this step twice so you have two hands)
- Repeat steps 1 to 5 for every person’s hand you will be adding to the scarf.
- Set your hands aside.
- Using your scarf fabric, cut a 10-inch by 70-inch strip. **See scarf notes below**
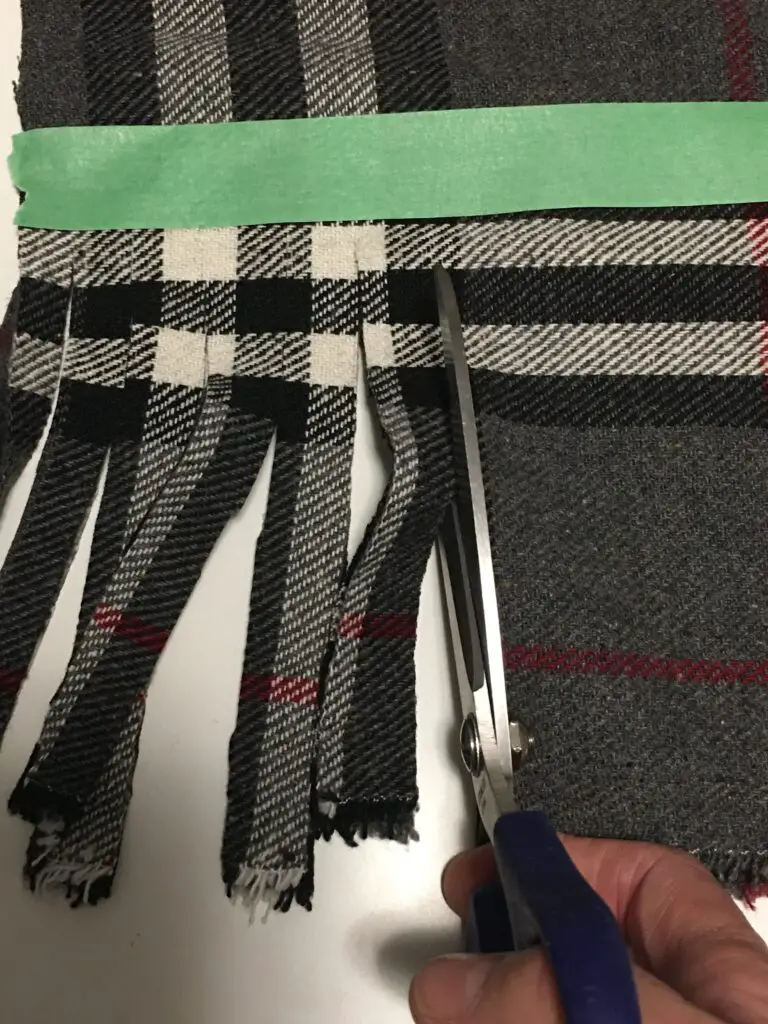
- The next 5 steps are for fringed scarves. If you don’t want fringe, hem or finish the edge of the scarf as desired and skip to step #17
- Using painter’s tape, adhere the tape to the scarf 6 inches from the end. The tape will mark the cutting area for the fringe so that all of the fringes are the same length.
- For curly fringe, cut fringe from the end of the scarf to the painter’s tape 1/2 an inch apart ( This doesn’t work on all fabrics, but works well on fleece and knits)
- When you have finished cutting the fringe, pull it taut (be careful not to rip it off the scarf) and let go quickly.
- For knotted fringe, cut the strips 1 inch apart.
- On each piece of fringe,m tie a knot along the edge of the painter’s tape.
- Remove the painter’s tape
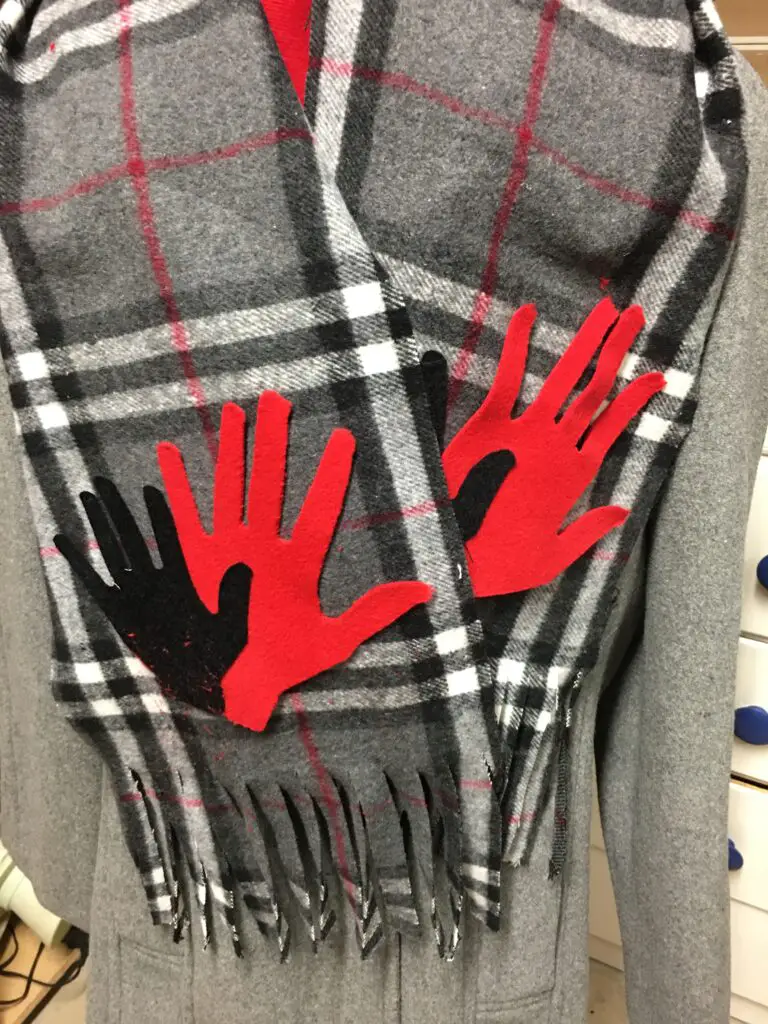
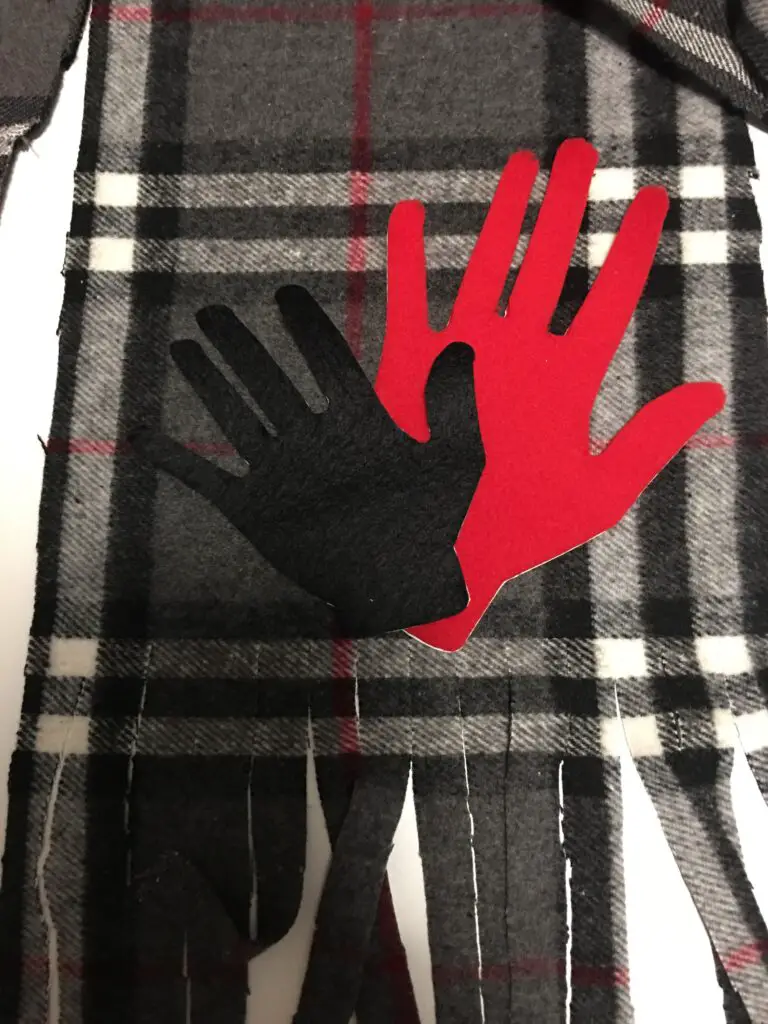
- Lay your scarf out and position your hands as desired. (We overlapped ours slightly, but you can place them however you’d like)
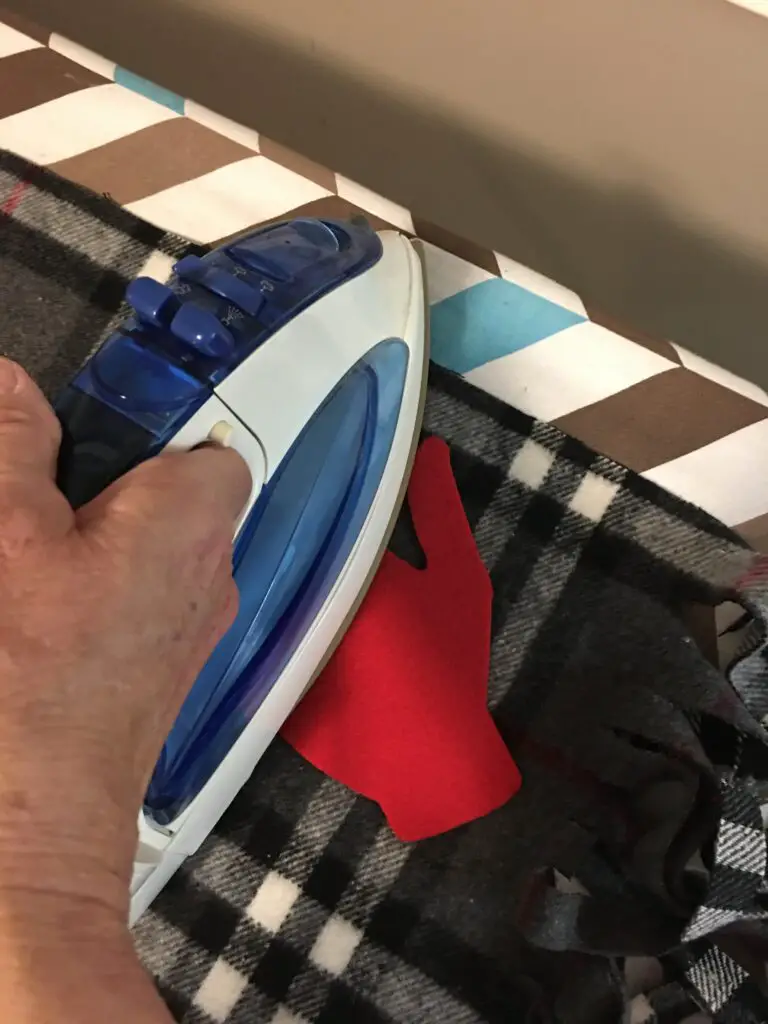
- Once you have the hands in the desired spots, adhere them to the scarf with HeatNbond, following the package instructions.
- Repeat with each hand.
- For Faux Fur – After applying the hands with HeatNbod, topstitch around the edge of the hands. Sometimes with faux fur, the hands come loose after wearing.
- Optional – include the printable tag and attach it to the scarf with a needle and thread.
- You are now ready to gift your Hug Me scarf.
Scarf Notes
- You should have two hand patterns cut for each pair of hands (one for each end of the scarf)
- You can cut out the hands and the HeatNbond separately, but it is hard to line up the hands. We recommend adhering the fabric to the HeatNbond first before cutting out your hand pattern.
- We suggest a 10-inch by 70-inch scarf, but you can make yours longer or shorter as desired.
- You could also use a rotary cutter on a cutting mat when cutting the scarf fabric.
Download the printable gift tag from our free resource library.
Make the Hug Me Scarf for warmer months or for summer
The instructions remain the same, but there are a few simple alterations for using lightweight fabrics that are intended for summer.
- Use Heat N Bond Light instead of the heavier ultra. (This will maintain the fabric’s lightness when the scarf is finished.
- When choosing the scarf fabric, choose a flowy fabric such as breezy gauze and do the hand cutouts in the same fabric, on a different colour.
- When choosing fabric for the hand and cut-outs, try to keep the weight of the fabric close to the weight of the scarf, so the scarf is not pulled down when being worn.
- Some good summer fabrics are lightweight cotton, chiffon, lightweight polyester, breezy gauze, or lightweight rayon.
- Using a tightly woven lace for the hand cut-outs looks beautiful on a chiffon scarf.


Making a Hug Me Scarf
This project is easy to make and budget-friendly. The scarf made in this tutorial costs $3.00 overall to make. (My purchase was $6.15, but there were enough supplies to create 2 scarves)
When making our Hug Me scarf, Pattern weights are always helpful to hold the scarf in place while cutting the fringe. To make your own easy up-cycled pattern weights, check out our DIY tutorial for budget-friendly pattern weights.

This website contains affiliate links. As an Amazon affiliate, I earn a small commission from qualifying purchases (at no cost to you).