

Content Created by Tracey of Baker Street Living 
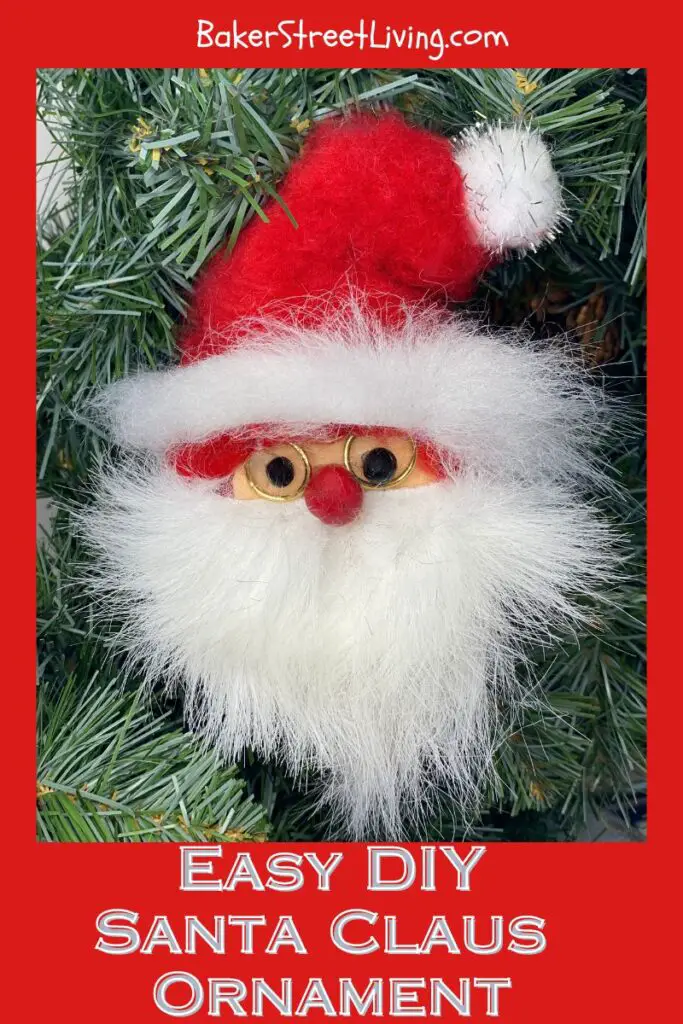
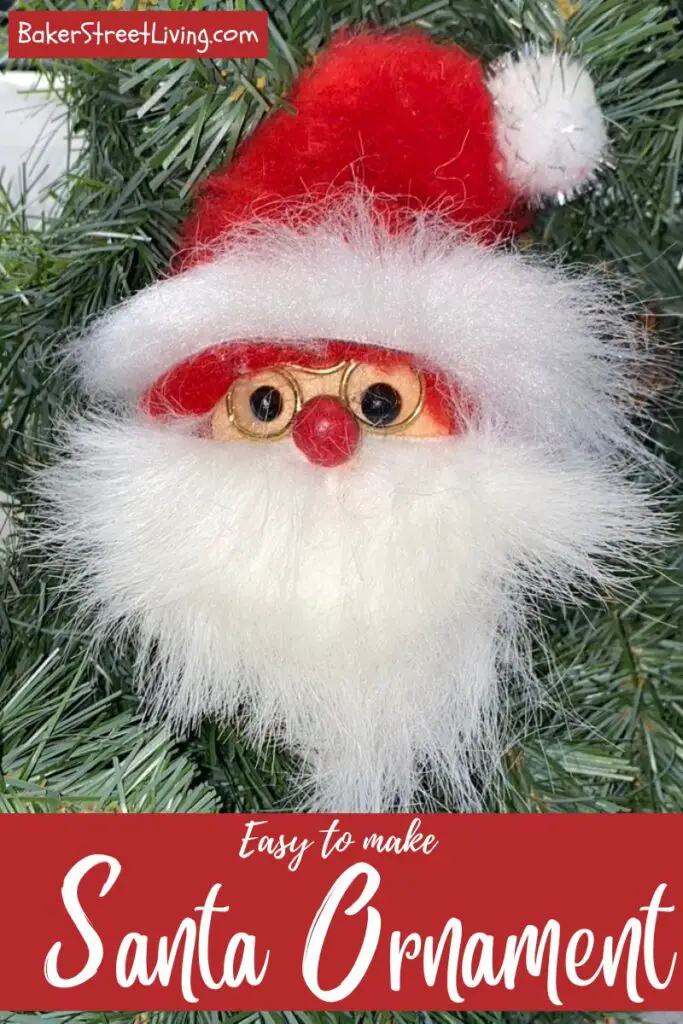
Add a little whimsy to your Christmas Decor with this super cute, easy DIY Santa Claus ornament. This is another fun recycling project and is not only easy to make but budget-friendly as well.
Decorating for Christmas is always fun, and it is even more fun if we put a little love into our homemade decorations.
Easy to Make DIY Santa Claus Ornament Video
Supplies List
This website contains affiliate links. As an Amazon affiliate, I earn a small commission from qualifying purchases (at no cost to you).
- Empty Mio water enhancer containers ( or Tang, Kool-Aid, etc.)
- small red sock. (no design child size 3-5)
- Peach coloured felt (2-inch square)
- Gold wire
- small red bead
- small white pom pom
- White Faux Fur
- Small elastic or small zip-tie
- 2 small black beads
- Jump ring
Craft Room Tools
- Scissors
- Hot Glue Gun
- small wood dowel or pencil (must be round)


Helpful Tips and FAQs
Substitutions for Mio Water Enhancer containers.
Other brands of water enhancer containers work very well. Squeezable lemon juice and lime juice containers are other good options. A small styrofoam egg or half ball can be used as a non-recycling option.
Substitutions for the beads
If you have air-dry or baked clay, such as Fimo clay, you can easily make your beads ahead of time. Small round buttons also work well.
Can I use a different glue?
Hot glue works best for this project. You could opt for Tacky Glue, but you will need extra drying time in between steps.
Substitution for socks
Baby mittens are the perfect size, and since they do not have a thumb, they are ideal for this project. If you have checked out my mini gnome ornaments, you may have already seen that. If you cannot get either product, you can try the thumb or finger of an adult-sized mitten. It will need to be a stretch fleece mitten.
Fleece is recommended as it is thicker and resembles Santa’s suit better than knit.
Step-by-Step Instructions for our DIY Santa Claus Ornament
Assemble your supplies
Make the Santa Glasses
Before you start, hold the wire up to the container, where the eyes will be. Wrap the wire partway across to where the first eye will be.
Holding the wire, wrap it once around the pencil(dowel) and then pull the pencil out and then wrap it again for the second eye. Leave about 1/4 inch in between the circles to go over the nose.
Add a little more wire to go around the side of the face and trim with a wire cutter.
You can play with them as you are making them. Just be cautious not to add bends into the circles where the eyes will be. You want to end up with nice, round glasses frames.
Prepare the Container
Make sure your water enhancer container is empty. Most of them have a small plug where the liquid squirts out. Once empty, apply a bit of hot glue to it and secure the flip top. This will ensure that if there are any drops inside, they will not escape onto your finished ornament.
Assembling the Santa Claus Ornament
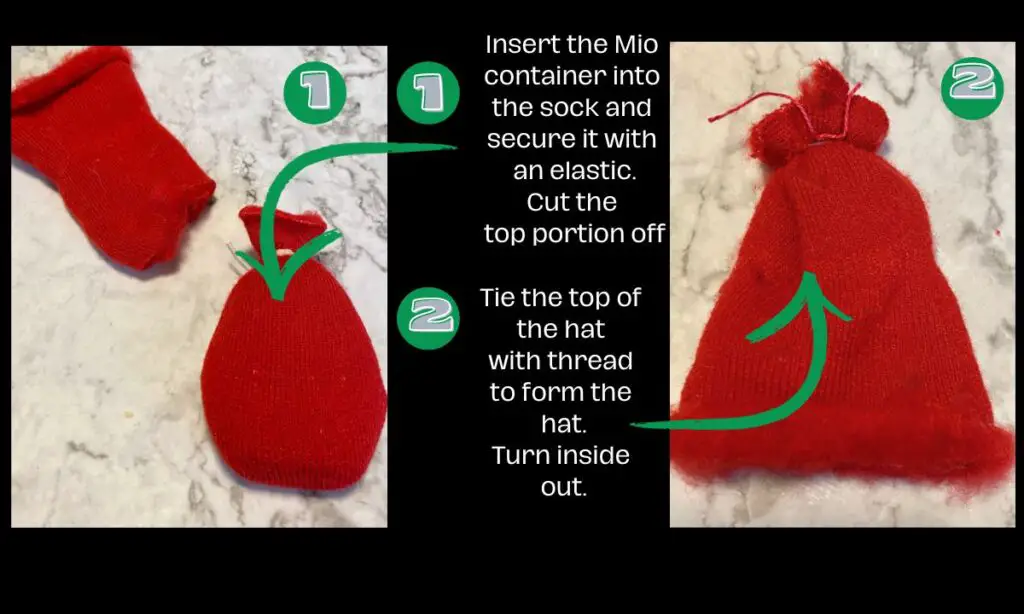
1- Insert the container into the sock and ensure the toe stitching is lined up along the bottom. Add a small amount of glue onto the top of the water enhancer bottle.
2 – Pull the sock up tight and secure it with an elastic or small zip tie.
3 – Cut the top portion of the sock off.
5 – Tie the top of the cut portion to form the hat. Turn it inside out (to hide the tie)
6 – Cut a small oval out of the peach-coloured felt for the face. Check it for the size of the container.
7 – Place the glasses onto the felt to see if the sizing is appropriate.
8 – Trim if necessary and then adhere the felt onto the sock-covered container.

9 – Attach the glasses. Wrap them around the face and secure them with hot glue on the sides where the ears would be. This will be covered up with the hat and beard.
Do not add hot glue to the glasses on the front of the face, as this glue will show on the finished ornament.
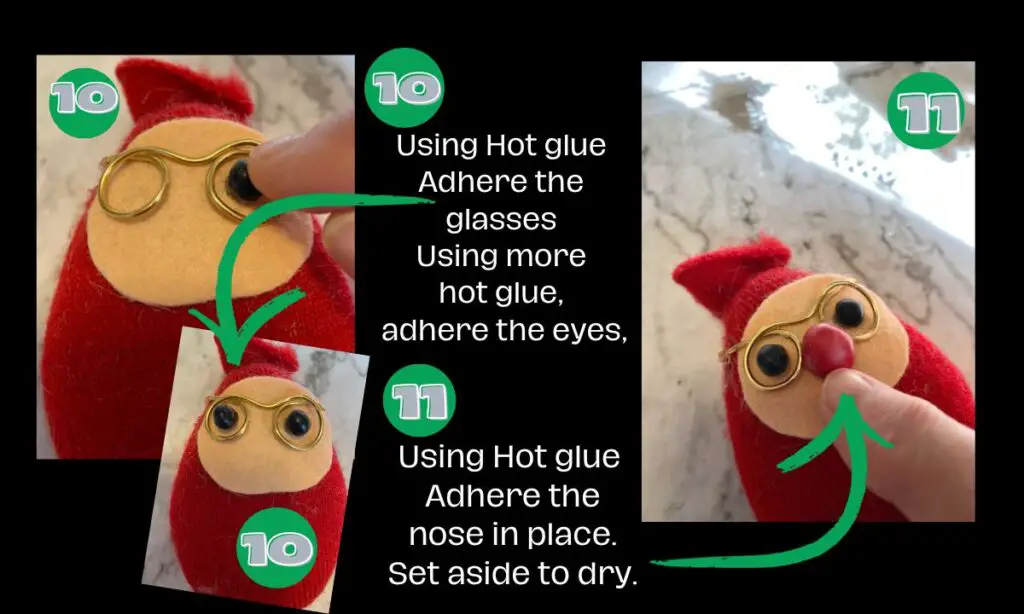
10 – Adhere both eyes inside the glasses frame, using hot glue.
11 – Adhere the nose, using hot glue.
12 – Set aside to let it sit for a few minutes.
13 – Cut a piece of faux fur into a triangle wide enough to go across Santa’s face. I cut a triangle that was 5.5 inches wide and 3.5 inches long.
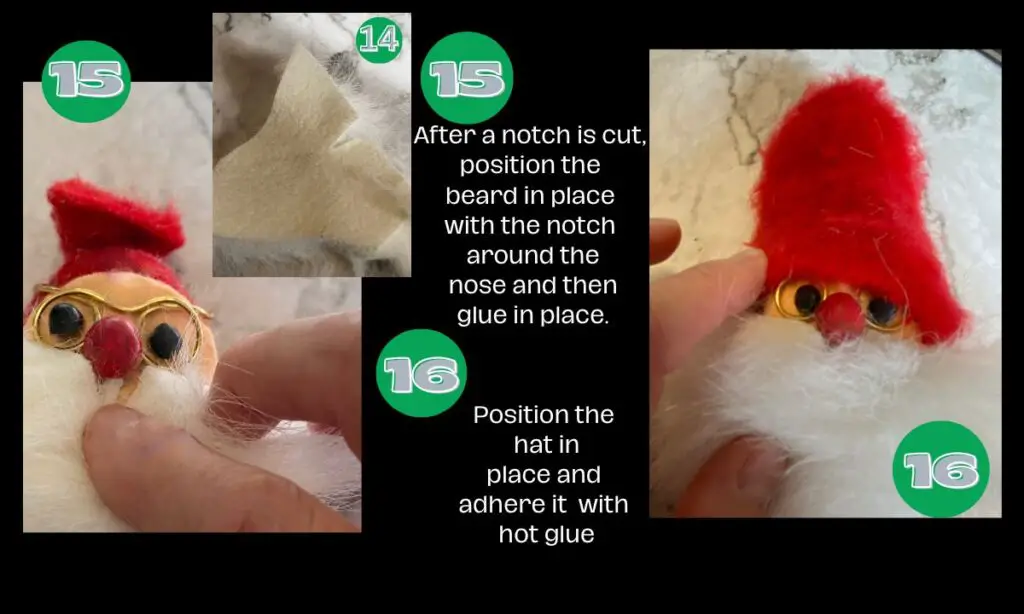
14 – Cut a notch in the center for the nose.
15 – Position the beard in place and adhere it with hot glue.
16 – Position the hat in place and adhere it with hot glue.
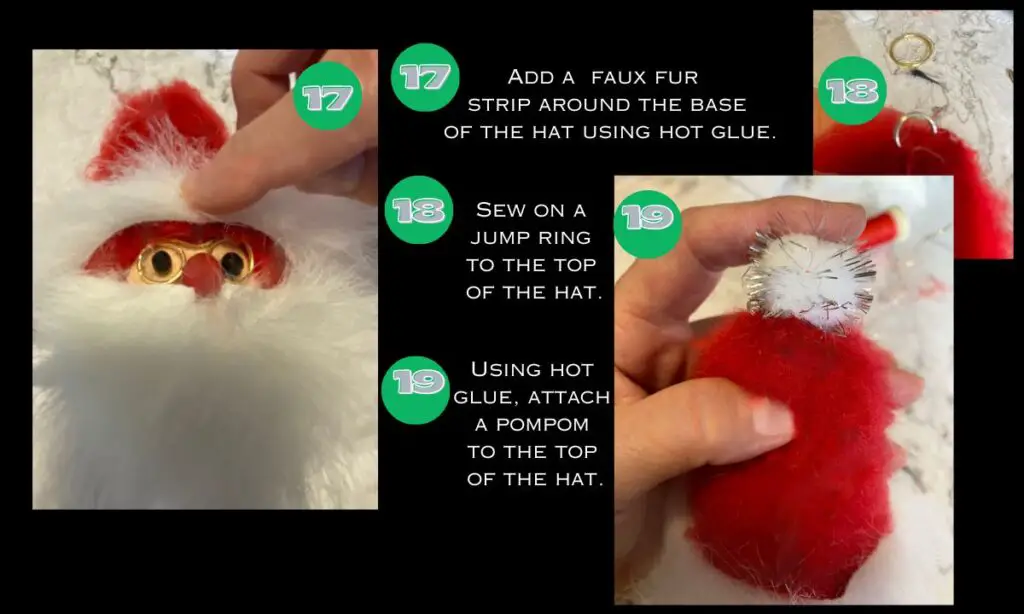
17 – Add a small strip of faux fur around the hat and secure it in place with hot glue.
18 – Using a needle and thread, sew on a jump ring to the top of the hat, for an ornament hanger.
19 – Using hot glue, attach a pompom to the top of the hat.
20 – Allow to fully dry before hanging.
21 – Clean off any bits of fuzz with a lint roller.
I hope you have some fun making this cute DIY Santa Claus Ornament.

This website contains affiliate links. As an Amazon affiliate, I earn a small commission from qualifying purchases (at no cost to you).