
Content Created by Tracey of Baker Street Living 
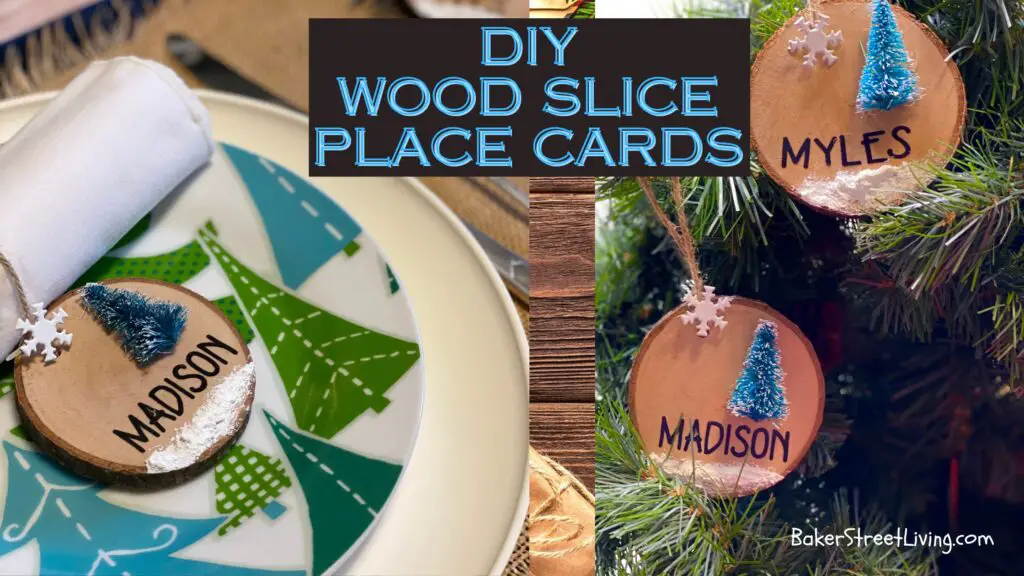
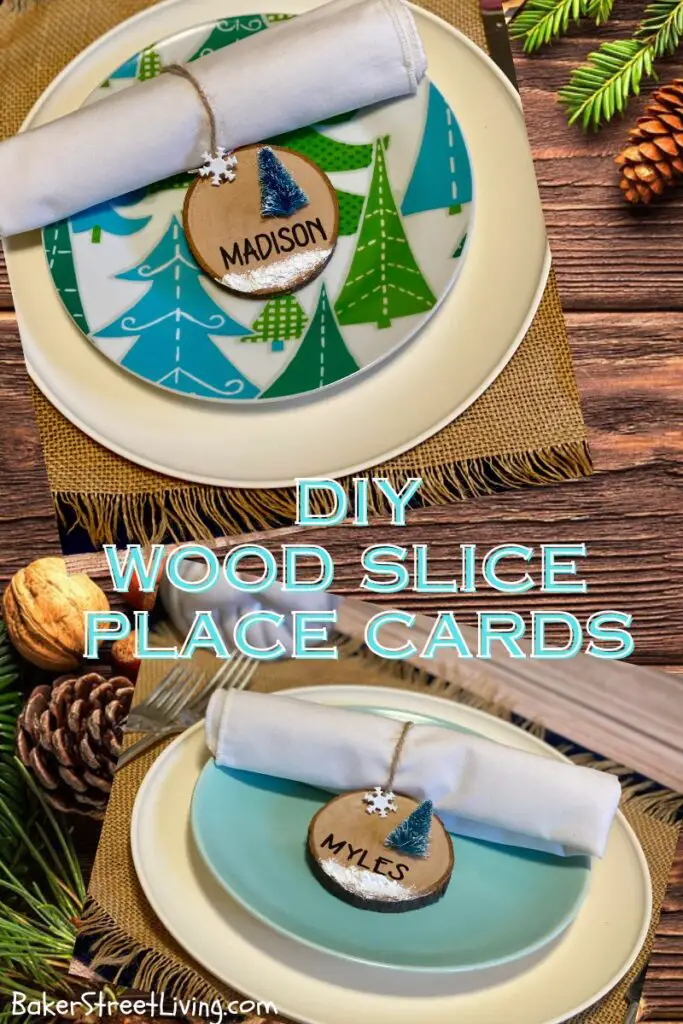
Add some festive charm to your holiday table with these easy Christmas Diy Wood Slice place cards. Personalize each one and let your guests take them home and hang them on their—Christmas tree.
How to Make Christmas DIY Wood Slice Place Cards – The Video
List of Supplies
This website contains affiliate links. As an Amazon affiliate, I earn a small commission from qualifying purchases (at no cost to you).
- 3.5-inch Wood Slice ornaments – as many as you need
- Hot Glue
- Adhesive Vinyl ( dark colour of your choice)
- DecoArt Snow-Tex
- Mod Podge
- Mini Sisal Brush Christmas Trees (or design of your choice)
- Small Snowflake Buttons ( or embellishment of your choice)
Craft Room Tools
- Cricut cutting machine ( or another brand)
- Fine-grit sandpaper
- Small paintbrush
- Larger flat craft paint brush – for Mod Podge
- tack cloth or a damp sponge/cloth


Instructions to make DIY Christmas Place Cards
Making DIY Wood Slice Place Cards without a Cutting Machine
If you want to make these place cards but don’t have a cutting machine, purchase alphabet stickers in the scrapbooking aisle of any craft store or online. Choose a flat script sticker. Puffy letters don’t work well when applying sealant. Choose lettering that is cut around the letter and does not have a white border or offset.
Step 1 – Preparing the wood slice
Using fine-grit sandpaper, smooth the surfaces of the wood slice by sanding lightly.
Remove any traces of dust by wiping with a tack cloth or a damp sponge/cloth.
Set the wood slices aside and allow them to dry before applying the adhesive vinyl.

Creating your design.
Choose a font that you like and create the names on your Cricut canvas.
** I used the “Kitchen Home” font in my design. It is a free font from DaFont.com**
Resize to fit your wood slice
Once you have the name, choose “Combine” from the bottom right corner. Choose to either “unite” or “weld”.
Confirm that all your sizes are correct before making it.
Select “Make “
Move the designs on the mats to make the most of the mat and reduce waste.
Once the cutting is complete, weed your design.
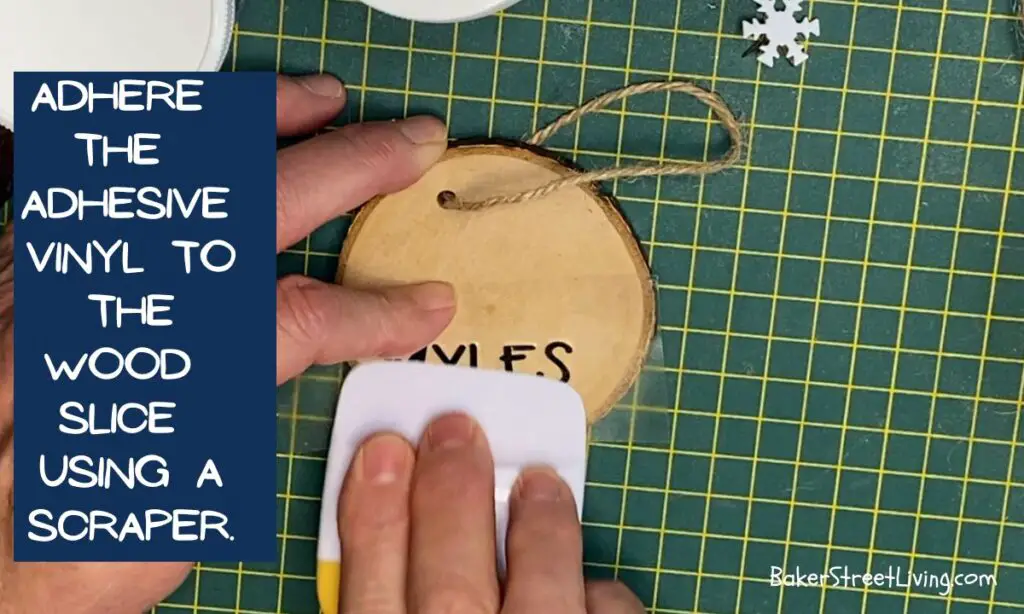
Attaching the Place Card Name to the wood slice
Place transfer paper over your adhesive design and remove it from the backing paper.
Position your design onto the wood slice and, using your scraper, adhere the design to the wood slice.
Use a weeding tool or tweezers, if necessary, to help remove the vinyl from the transfer paper.
Sealing the Christmas Place cards
This is an optional step if you want the place cards to be used as a Christmas ornament later. If you would like the place card to be re-used on another table at a later date with a different name, do not seal it. Simply remove the name after use and add the new name when you want to use it.
I recommend sealing them if you plan to store and reuse them later. The sealing will provide a protective coat as well as reduce the chance of peeling later.
If sealing, apply a thin coat of Mod Podge sealant over both sides of the wood slices. Covering all sides will keep the place cards looking consistent on all sides. If you want the wood slices to look as natural as possible but still want to seal them, use a matte finish.
Allow drying time before moving on to the next steps.
Add Decorations
I am using miniature bottle brush trees and snowflake buttons.
Attach them to the wood slice once the Mod Podge is fully dry.
Apply a bead of hot glue and adhere the tree and button to the wood.

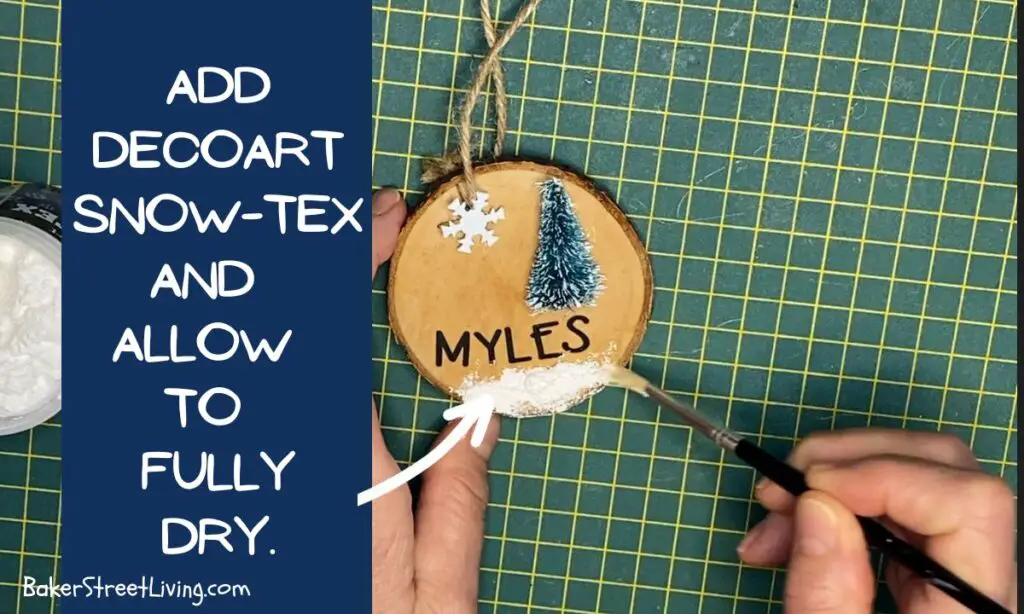
Add Snow-Tex
I have chosen to add DecoArt Snow-Tex to my wood slice design for the winter snow effect, which pairs perfectly with my snowflake button. You can use whatever embellishments you would like. Adding embellishments, such as the snow, adds the finishing touch to your DIY Wood Slice Place cards.
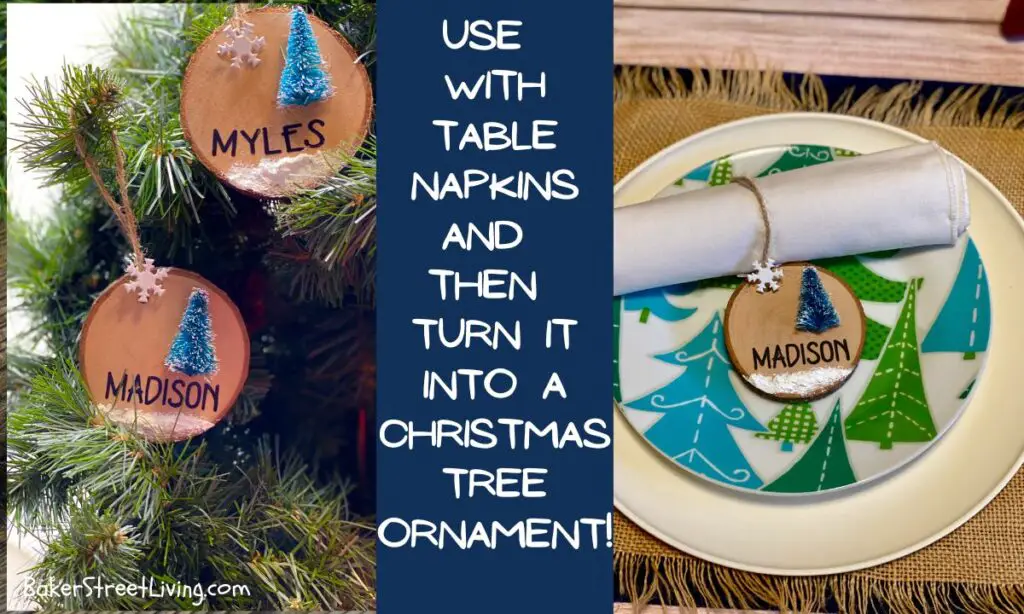
Our DIY Wood Slice Place Cards become Christmas Ornaments!
Tips for Success and FAQs
Can I use Heat Transfer vinyl?
Yes, you can easily use HTV when making these place cards. Be sure to mirror your design before cutting on your cutting mat. After applying the HTV, allow the surface to cool before sealing it with the Modge Podge.
Can I use a home iron instead of a heat press if I use HTV?
Yes, you can. Be aware of the differing temperatures. A heat press allows you to set the proper temperature, and a household iron does not. Using the linen setting is usually the best, but it can vary between brands. Do not use the steam function when applying HTV.
Using the Wood Slice Place Cards.
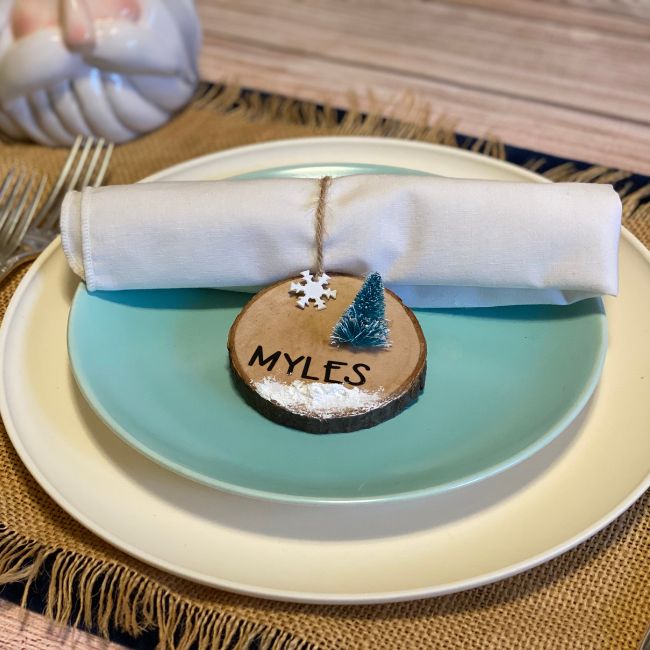
These DIY Christmas Place cards also make cute Christmas ornaments. To use as a place card, use the jute hanging string as your napkin holder. Once you are done with it, allow your guests to take their place card home and use it as a personalized ornament. They look super cute hanging on a Christmas tree.
Which Cricut machine do I need?
You can use any Cricut cutting machine, even the Joy, as long as your design is not over the size of its mat. If making multiple place cards, a full-sized machine makes the process go faster.
Do I need to seal them with Mod Podge?
If you are planning on using your Christmas place cards over again, sealing them with a layer of Mod Podge is recommended. It will make them last longer and secure any of the vinyl edges from fading in the future.
I make a set of sealed Christmas place cards for guests who are regular attendees. I always have a few blanks on hand for extra guests and can quickly apply a name to them.
How to make sure the Adhesive Vinyl sticks to the wood surface.
Prepping your wood surface is the best way to ensure a solid stick. Sand the wood with fine-grit sandpaper and then wipe off all dust with a tack cloth or a dampened paper towel. Wipe over the surface with a bit of rubbing alcohol to remove any traces of oils on the surface. Allow the wood to fully dry and then apply the vinyl.
Printable Instructions
DIY Wood Christmas Place Cards
Equipment
- Cricut Cutting machine ( or other brand)
- Weeding Tools
- Standard grip Cutting Mat
- Hot Glue Gun
- Craft paint Brushes
Materials
- 1 4 inch square of adhesive Vinyl
- 2 3.5 inch Wood slice ornaments
- Modge Podge Sealant
- DecoArt Snow-Tex
- 1 piece fine grit sandpaper
- Damp Cloth
- 1 Mini Bottle Brush Tree
- 1 Mini Snowflake Button
Instructions
- Using the fine grit sandpaper, sand the surface lightly of each wood slice.
- Remove dust with a damp cloth.
- Load your design into Cricut Design Space,
- Resize to fit your wood slice.
- Choose your favourite font and add a name to the inside of the wreath design.
- Once you have your design completed and the proper size, select "Make it"
- Cut your designs.
- Apply the Adhesive Vinyl name to the wood slice.
- Seal with one coat of Mod Podge Sealant.
- Add your mini brush tree using hot glue.
- Using a small brush or craft trowel, add some Snow-Tex under the name,
- Add the snowflake button embellishment to the top of the wood slice (by the ornament string)
- Allow everything to dry.
- Once dry, roll up your napkin, place the jute hanging cord around the napkin and center it on your dinner plate.
- After the meal is over, gift your wood slice ornaments to your guests or hang them on your Christmas tree.
I hope you enjoy this easy project for our Christmas DIY Woo Slice Place Cards. These are great year-round at any celebration, just change the design and decorate your table.

This website contains affiliate links. As an Amazon affiliate, I earn a small commission from qualifying purchases (at no cost to you).