DIY Wood Christmas Place Cards
A quick Christmas place card project that add a festive touch to your table and is a great take home gift for your guests.
Equipment
- Cricut Cutting machine ( or other brand)
- Weeding Tools
- Standard grip Cutting Mat
- Hot Glue Gun
- Craft paint Brushes
Materials
- 1 4 inch square of adhesive Vinyl
- 2 3.5 inch Wood slice ornaments
- Modge Podge Sealant
- DecoArt Snow-Tex
- 1 piece fine grit sandpaper
- Damp Cloth
- 1 Mini Bottle Brush Tree
- 1 Mini Snowflake Button
Instructions
- Using the fine grit sandpaper, sand the surface lightly of each wood slice.
- Remove dust with a damp cloth.
- Load your design into Cricut Design Space,
- Resize to fit your wood slice.
- Choose your favourite font and add a name to the inside of the wreath design.
- Once you have your design completed and the proper size, select "Make it"
- Cut your designs.
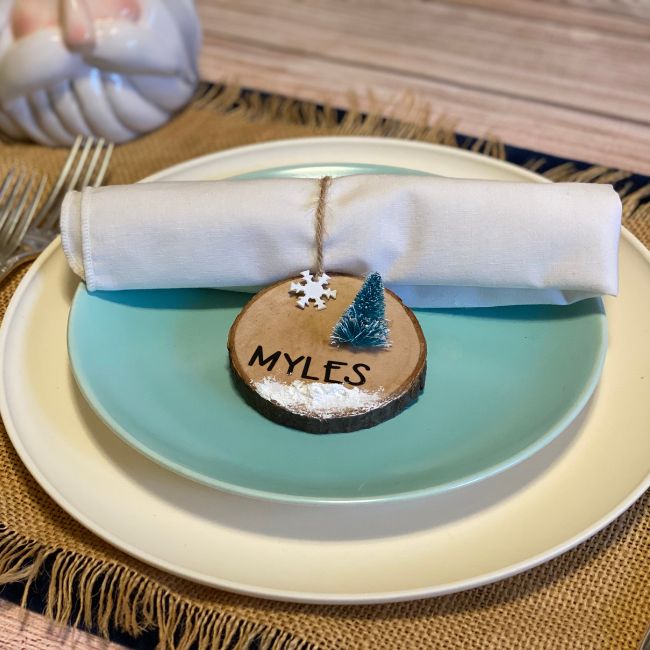
- Apply the Adhesive Vinyl name to the wood slice.
- Seal with one coat of Mod Podge Sealant.
- Add your mini brush tree using hot glue.
- Using a small brush or craft trowel, add some Snow-Tex under the name,
- Add the snowflake button embellishment to the top of the wood slice (by the ornament string)
- Allow everything to dry.
- Once dry, roll up your napkin, place the jute hanging cord around the napkin and center it on your dinner plate.
- After the meal is over, gift your wood slice ornaments to your guests or hang them on your Christmas tree.