
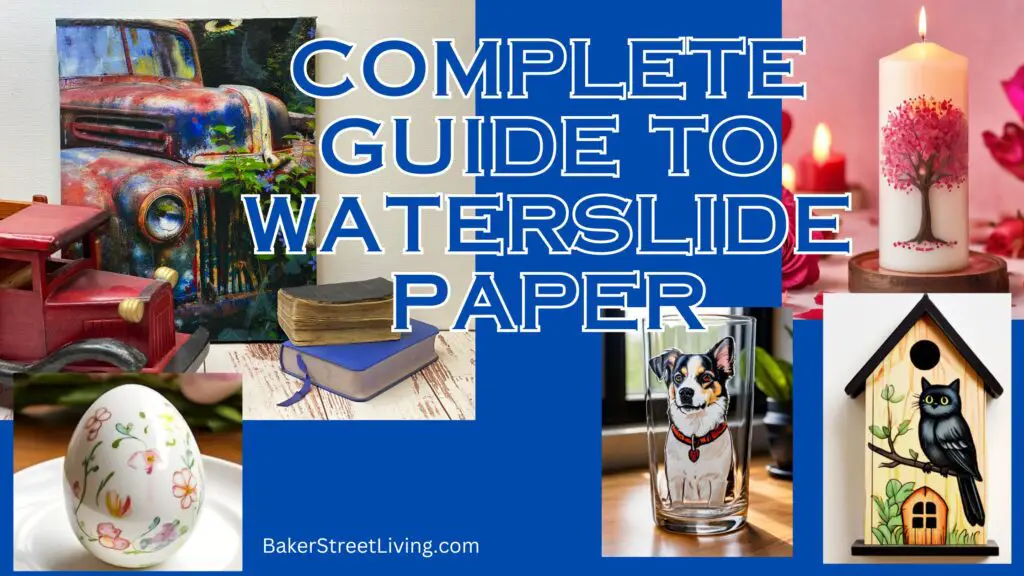
Have you ever wanted to know how to use waterslide paper or what types of surfaces you can use it on? I have been using waterslide paper for over 3 years now, and find it to be an easy-to-use product that allows you to make unique, custom-designed glassware and ceramics.
Waterslide paper is simple to use and allows you to expand your creativity by enabling you to transfer images to surfaces such as wax candles, wood, canvas, fingernails, and, not to mention, glassware and dishes. It is a great way to make custom holiday dishes, for a one-of-a-kind present or serving.
Waterslide paper can be used on mirrors, to make a spooky Halloween Haunted Mirror or even on wine glasses for a special Valentine’s Day dinner.
Waterslide paper is suitable for both novice crafters and old expert crafters alike. Once you have learned how to use waterslide paper, you will see that the options are endless. Read on for more useful information on how to use waterslide paper.
How to use waterslide paper – your complete guide
What is waterslide paper?
This website contains affiliate links. As an Amazon affiliate, I earn a small commission from qualifying purchases (at no cost to you).
Before you learn how to use waterslide paper, it is good to have a basic understanding of what the product is.
Waterslide paper, also called waterslide decals or water transfer paper, is used to transfer an image onto the surface of an item. Waterslide paper is thinner than regular decals and stickers when applied, but has a more seamless appearance when finished.
Waterslide paper is manufactured using a layer of dextrose (corn sugar) on top of a piece of paper.
When you get the waterslide paper, you print an image onto the surface, followed by sealing it and then using water, you remove or slide the paper backing out from under the decal.
Watch a quick video on how to use waterslide paper on glass and ceramics.
What are the different types of waterslide paper?
Waterslide paper is available in white and clear. Waterslide paper is also available for both inkjet and laser printers.
When learning how to use waterslide paper, knowing which to purchase is key to a successful end design. Both are used the same.
White Waterslide paper
The white waterslide paper has a white background and will show up white on the items you transfer the paper to.
Using white waterside paper is useful if applied to a dark object, such as a wine bottle or dark-coloured canister or mug. When applying Waterslide Paper to a dark background, the colours and the design on the clear paper tend to disappear.
Keep in mind that the white background of the white waterslide paper will show up on a dark surface. If you have a cutting machine, you can easily remove some of the backgrounds, resulting in less white showing up on your finished item.
Clear Waterslide paper
The clear waterslide paper has a transparent background. The printed decal on the transparent background will blend into the surface of your finished item. After applying a clear waterslide paper decal, the design blends into the surface beautifully.
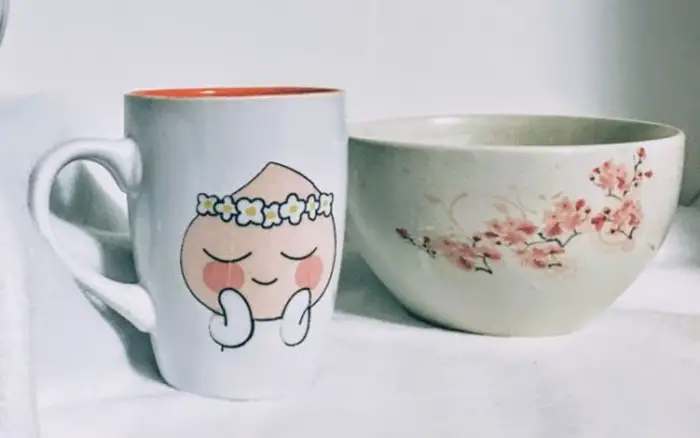
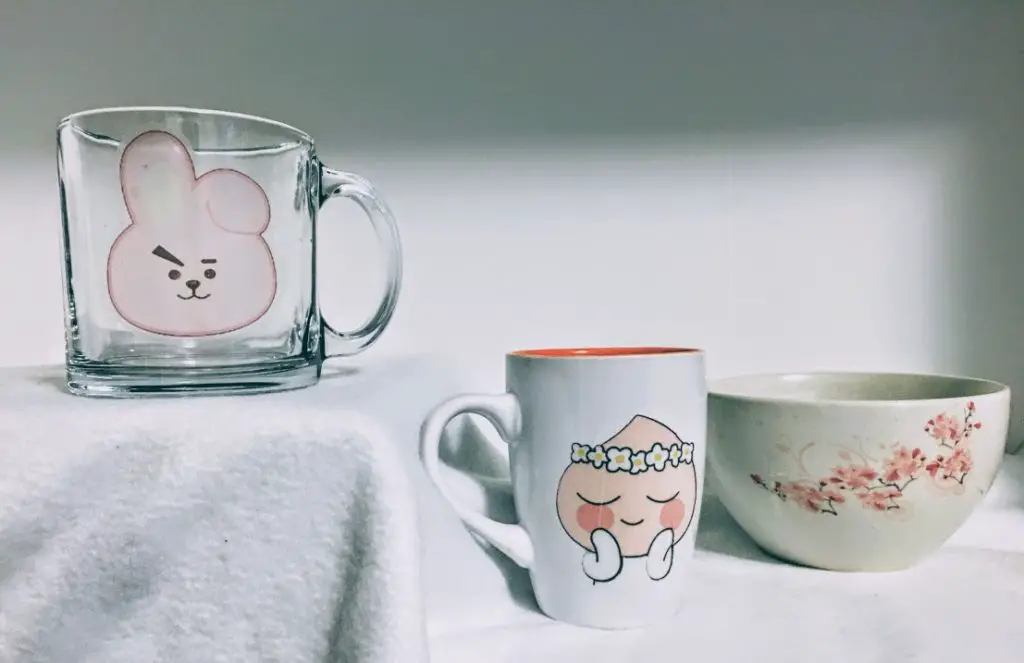
Clear waterslide paper is excellent on light-coloured surfaces, such as mugs, glass, canvas, candles, and even fingernails.
How to use waterslide paper – the steps involved.
- Download your image
- Load your waterslide paper into your printer
- Print your image ( no bleed)
- Spray the waterslide paper with the printed image with 3 coats of acrylic spray sealer. Let dry in between coats.
- Clean the surface of your item with rubbing alcohol and let it dry.
- Cut your image from the waterslide paper (or use a cutting machine)
- Soak the image in lukewarm water for about 30 seconds (or whatever the manufacturer suggests)
- Position your image onto the object you have chosen.
- Gently hold the image and slide the paper out from behind.
- Dab up any drops of water and make sure the image is smooth and in the position you desire.
- Let dry completely.
- Cure in the oven or seal with sealant.
- Finished.
What supplies do you need when using waterslide paper?
This list is all of the items and tools needed when using waterslide paper, plus a few optional ones:
- waterslide paper
- inkjet or laser printer
- Acrylic spray sealer
- rubbing alcohol
- a container of water large enough to submerge your final design into
- cutting machine, scissors, or cutting tools to cut the printed design
- paper towels (or lint-free cloth)
- cardboard box – large enough to place your printed waterslide paper in
- zots adhesive dots
- small squeegee
Where can you buy waterslide paper?
Initially, waterslide paper was only available commercially, but now it has made its way into hobby and craft stores.
Waterslide paper is available at many craft stores, such as Michaels and Hobby Lobby. It is also available at many online retailers, including Amazon.
Creating a design to use on waterslide paper.
The options are endless when creating a design to be used in transferring an image using waterslide paper. You can use your own images, such as family photos, with waterslide paper.
Clipart sites are a good place to get images that can easily be used on waterslide paper. Like the image websites, some are free, and some have paid subscriptions. One free one is “Clipart Library”. They have a wide range of images available and are easy to search for
Fonts can also be downloaded for free personal use. When making waterslide labels and decals, having a wide range of fonts to choose from expands your ability to create. An excellent site for free fonts is Dafont.com. They have thousands of fonts available(for personal use). The4y also have an excellent FAQ section on downloading fonts.
How to print on Waterslide paper
When learning how to use waterslide paper, one of the first things you need to know is how to print your image onto Waterslide paper.
Waterslide paper can only be printed on the shiny side, or the side that you see the film on. You will seal the image onto the film after printing, and then the backing will be slid off the paper. Be sure not to print on the backing. You can easily see the difference between the two sides by holding the paper at an angle to the light.
Waterslide paper can be printed on an inkjet or laser printer. Both varieties of paper are available. Just be sure to purchase a paper that is compatible with your printer.
TURN OFF BLEED
Depending on your design, having the bleed on when you print can ruin your design. If you have any script or intricate details, the bleed will cause it to look smeared. It is best to always have it off. Not all printers have this feature, but if you are using a cutting machine, such as a Cricut Explore Air or Maker, the bleed option will need to be turned off. You can find it on the Project Preview screen.
If you are uncertain whether you need to turn it off, print a draft of your image on plain printer paper and check over how the image was printed first. The bleed option (if you have it) will be found under preferences or options.
What surfaces can waterslide paper be used on?
Waterslide paper can be used on almost any smooth surface, such as
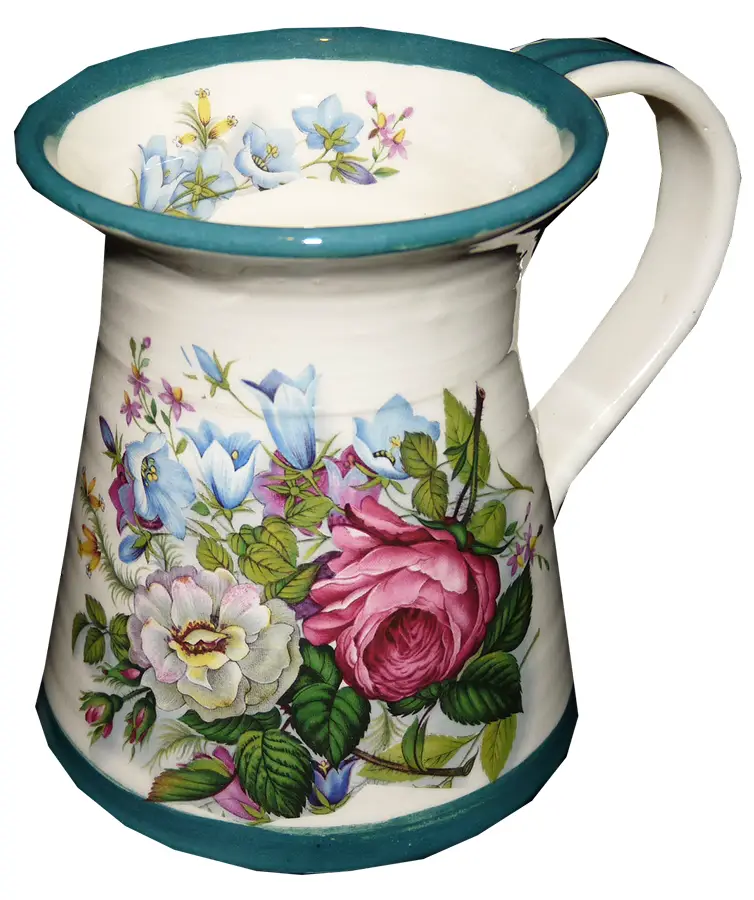
- glass mugs and glass vases
- mirror
- ceramic canisters
- china and porcelain
- wood (very smooth)
- painted and unpainted metal
- smooth plastic
- fibreglass
- terra cotta
- canvas (some)
- tiles
- some book covers
- candles
- polymer clay
- fingernails
Can I use waterslide paper with a cutting machine?
Waterslide paper can easily be used with a cutting machine, such as a Cricut or Silhouette.
When using a cutting machine, make sure that you add an offset around the edges of your design. If you fail to do this, the cutting machine will attempt to cut around the exact edge of your design. The offset enables you to cut your printed image, like a sticker with a border around it. Waterslide paper can be delicate when applied, and this is a very helpful step when using a cutting machine.
Waterslide Paper – Useful Tips
Water temperature when using Waterslide paper.
The water should be lukewarm or at room temperature for the best result. Always soak your decals for the time specified on the package of waterslide paper.
What kind of sealer do I use on the waterslide paper after printing?
Any clear acrylic spray sealant will work on your Waterslide paper. I like the Krylon crystal clear or Rustoleum 2X clear sealer.
How to keep the waterslide paper from moving when sealing small cutouts.
It is best to seal the paper after you have printed it and before you cut it, but if your design is small and you want to save the rest of the paper sheet for another project, you can certainly cut it out first. The problem I have experienced is that the air from the spray will move your cut decal if it is small.
The solution is STICKY TACK or ZOTS
Place a small amount of sticky tack or a piece of a Zot on the back of the cut decal and adhere it to the surface you are spraying in. This is temporary and will hold your decal in place until you have completed all the sealing. This is a tip that I have used over and over when I was learning how to use waterslide paper.
Use a cardboard box as a spray booth to keep overspray from getting outside of your project area.
Always do the spraying in a well-ventilated area!
How to seal waterslide paper.
When your project has fully dried, you may want to sell it or set it to make the decal more permanent. Depending on the surface you have applied it to will determine how you set or seal it. There are 3 things you should know when learning how to use waterslide paper.
Seal in the oven.
For any items that are oven-safe, such as ceramic or glass and some tiles, you can seal them in your oven. Most brands recommend a short baking time of 10 to 15 minutes at a low temperature, or approximately 250°F (110 °C)
Make sure you follow the baking instructions for the brand of waterslide paper that you have purchased
Spray or brush on Sealant
For items that are not oven-safe, such as plastic, canvas, painted metals, wood and even book covers, you can use a spray-on acrylic sealer such as Krylon Crystal Clear or Rustoleum 2X clear spray-on sealer.
For surfaces such as wood or terra cotta, it may be easier to use a brush on Modge Podge sealer.
If your project is going to be near a window or outside, use a sealant such as Krylon Clear UV-resistant clear sealer or ModgePodge for outdoor use. This will help prevent fading and yellowing. Even if it is inside and near a window, this is a good product to use.
Leaving unsealed
There are times when you will choose to leave your project unsealed. I have done this many times, especially on clear plastic containers or on book covers. It will be fine as long as it is not exposed to water, other than a brief wiping off or dusting.
Is waterslide paper food safe?
If you are planning to have your finished project come into contact with food, make sure that you choose a final sealant that is food safe. Not all sealants are, so be sure to check the label.
If making sites like glass serving trays, consider applying your decal to the underside. This will prevent the decal from coming into contact with food and maintain your design. Be sure to mirror your image when doing this.
Is Waterslide paper dishwasher safe?
No, your finished projects should not be put in the dishwasher. For items that are safe to put in the water, such as glassware, ceramics and china, it is recommended that they be hand-washed. I have submerged items in the dishwasher and not had any issues, but it isn’t a good idea to let them soak.,
Modge Podge dishwasher-safe gloss sealer may be an option if you have something that you need to put into the dishwasher. I have tried it a couple of times, and it seems to work ok so far. I prefer to hand-wash my items that have waterslide decals on them, just to be safe.
Is waterslide paper permanent?
Once you have completed your project and sealed it, it will be permanent. If you are making something that hasn’t been sealed, it may not last, depending on how it is used. For mugs and glassware, it will be temporary if left unsealed. If it is just a display item and you are unable to seal it, it should last fine.
Can waterslide paper be removed?
Yes, is the short answer, if it hasn’t been sealed. Once you have sealed a project, you will need to use a paint remover to remove the sealant. The results are usually not good as you will likely need to scrape and scrub off your design. This usually causes scratching of the surface of your item.
Using waterslide paper as a temporary design for events such as Christmas or parties can allow you to customize decorations without making them permanent. Making waterslide paper designs and placing them onto vases, table decor, or candles can add a super personal touch to your celebration.
To remove them, soak in warm to hot water and remove. I have done this a few times and have not had any issue removing the design – except once. I had to do a lot of scrubbing.
Can you use waterslide paper on fabric?
No, waterslide paper is not made for fabric. It can be applied to vinyl upholstery fabric or plastic-coated tablecloth fabric; however, those applications are only good for temporary use. For fabric, choose iron-on transfers.
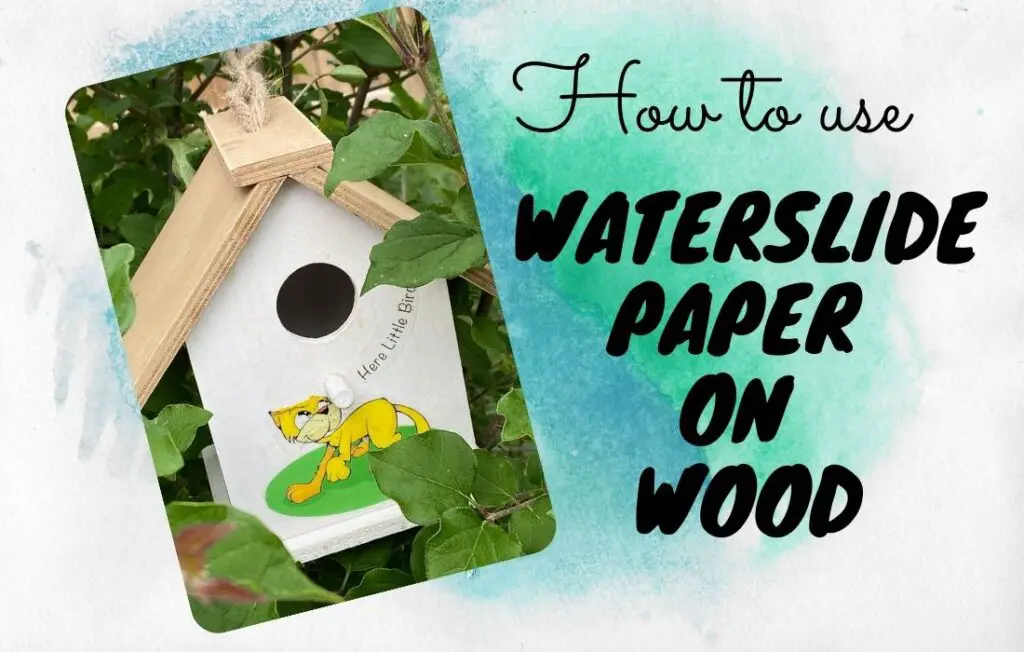
How to use waterslide paper on Wood?
Wood that has a smooth surface works best for applying the waterslide paper. A wood that has a prominent wood grain or a lot of ridges may result in the waterslide paper having gaps or not adhering properly. Be sure to clean the surface with alcohol first, and if possible, apply a light coat of Mod Podge or sealant to the surface before applying your waterslide decal.
Check out our tutorial on how to use waterslide paper on wood.
Is waterslide paper safe for outdoor use?
You can use waterslide paper on objects that will be exposed to the weather, as long as you do a proper sealing before putting it outside. I typically use Mod Podge for outdoor use. This helps cut down on sun damage and damage from rain.
How to use waterslide paper on Candles?
Make sure the surface of the candle is smooth. Clean it with rubbing alcohol and then follow our post instructions for How to use waterslide paper on candles

Check out our tutorial on How to use Waterslide paper on Candles (Printable design included)
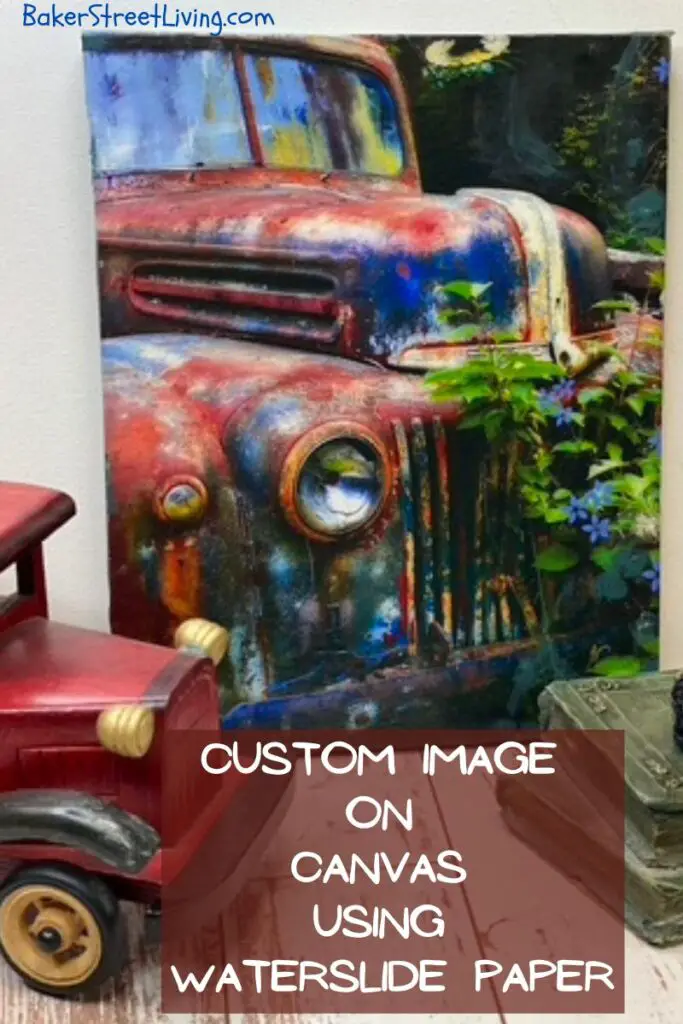
How to use waterslide paper on stretched canvas or canvas board.
Using a stretched canvas or canvas board is a unique application for waterslide paper.
This is a perfect way to edit photos and create a beautiful art piece to hang. If the canvas has already been gessoed or painted on, apply a light coat of spray sealer or a light coat of Mod Podge. This will help to make the decal more manageable while applying. It isn’t necessary, but it makes working on the canvas less challenging.
How to use waterslide paper on fingernails
Follow the instructions on the package and apply to clean or freshly polished nails. Seal with two coats of clear nail polish.
You can also apply waterslide paper to artificial nails before applying the nails. This is an easier process and allows you to do any trimming and repositioning using both hands.

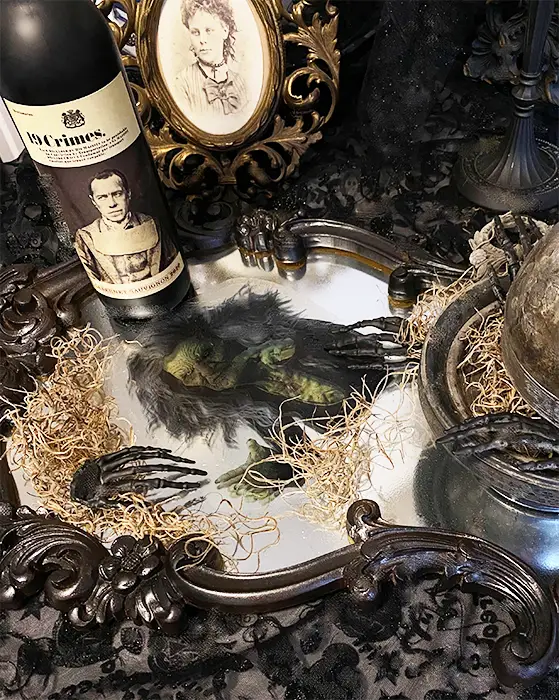
How to Use Waterslide Paper on a Mirror
Using Waterslide Paper on a mirror ( as long as it is glass) is the same as using it on mugs and glasses. We made a very cool Halloween Haunted Mirror using waterslide paper. The difference comes when you are using it on an acrylic mirror.
When you use waterslide paper on the acrylic (plastic) mirror, you need to be picky about how it is sealed. Do not use the heat (baked in oven) method. Only apply an acrylic spray or Mod Podge. But- if you want the mirror to remain usable, such as putting a small decal in a corner or a bathroom mirror, do not seal it. Let it completely air dry.
For a larger glass mirror, use a hairdryer to heat-set the design, if you want it to be permanent.
Learning how to use waterslide paper is often trial and error. We hope we have answered all your questions about how to use Waterslide paper. Watch for more posts on how to use waterslide paper along with free downloadable designs.

Disclaimer: This post contains affiliate links. We receive a small commission when purchases are made through our links.