
Content Created by Tracey of Baker Street Living 
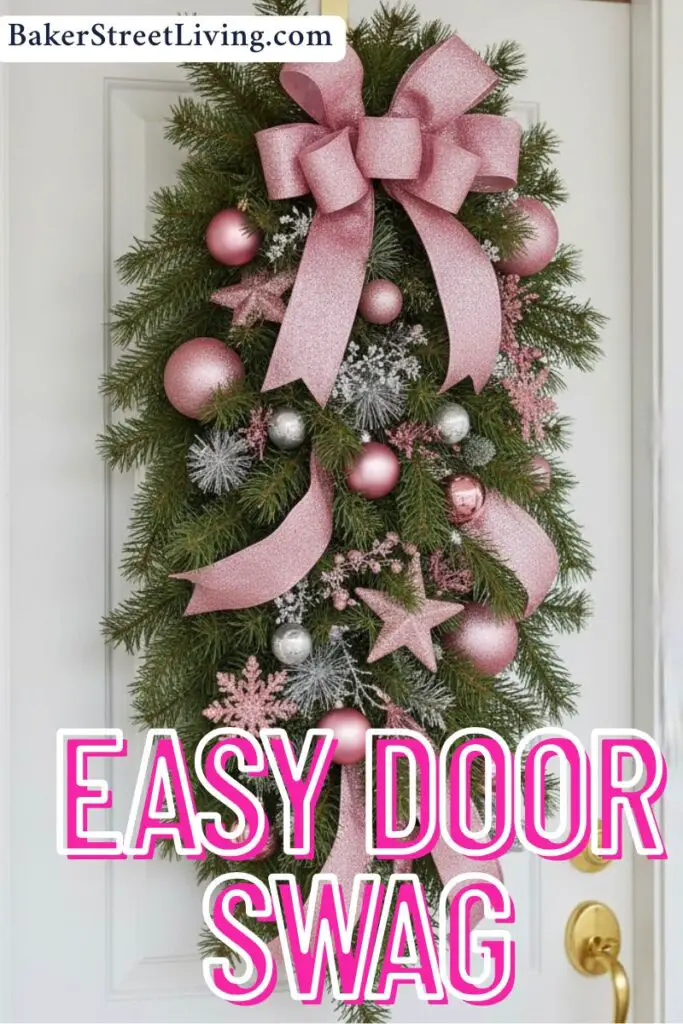
If you’re looking for a simple craft that adds a handmade touch to your home décor but looks professional, a yarn wreath is the perfect project. It’s quick to make, budget-friendly, and easy to customize for any season or occasion, from Christmas and Easter to birthdays and everyday décor.
What You’ll Need
This website contains affiliate links. As an Amazon affiliate, I earn a small commission from qualifying purchases (at no cost to you).
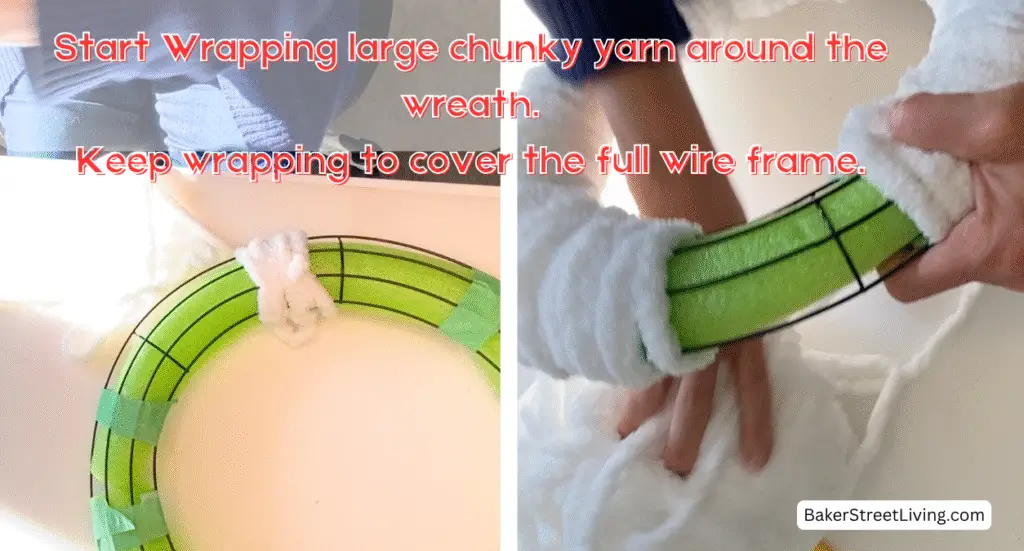
- Chunky Chenille Yarn (or any big, thick chunky yarn)
- Wire Wreath Frame
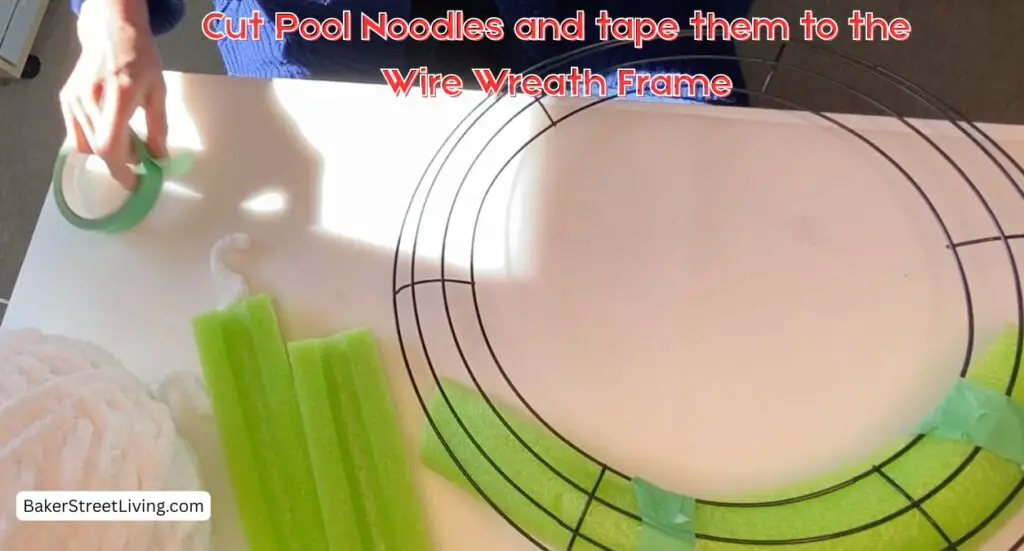
- Pool Noodle
- Masking Tape
- Scissors
- Canary Cutter
How to Make a Quick and Easy Yarn Wreath
1 – Using the canary cutter, slice the pool noodle into 3 pieces that are long enough to fit around the wreath.
2 – Slice the noodles in half lengthwise.
3 – Press them into the wreath frame and secure them with masking tape.
4 – Start wrapping the yarn around the wreath frame. Make sure that you keep the yarn straight and continue all the way around. Keep the yarn tight and do not allow gaps to occur. Keep the yarn snug to the frame.
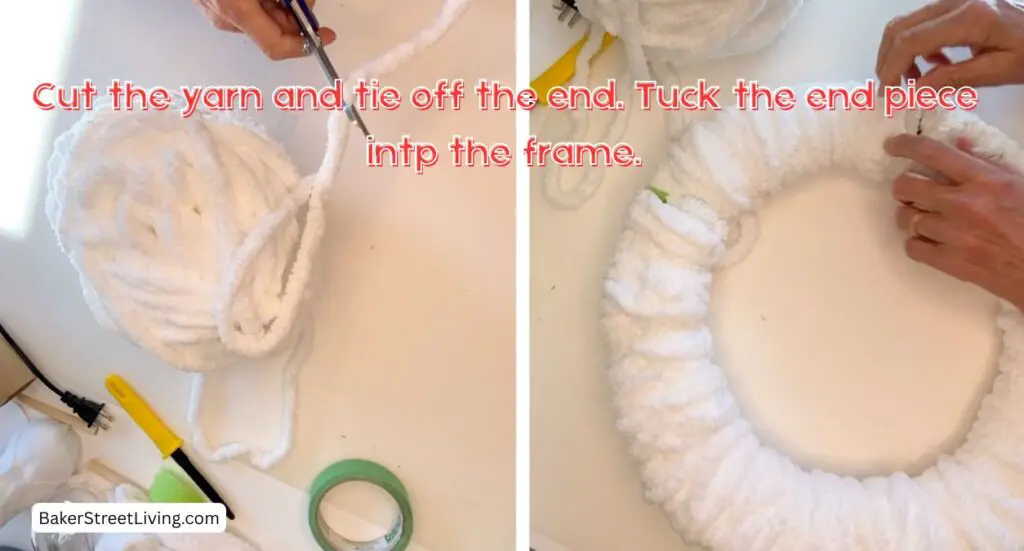
5 – Once you have the wreath fully covered, tie in the end and tuck it into the back of the yarn wreath.
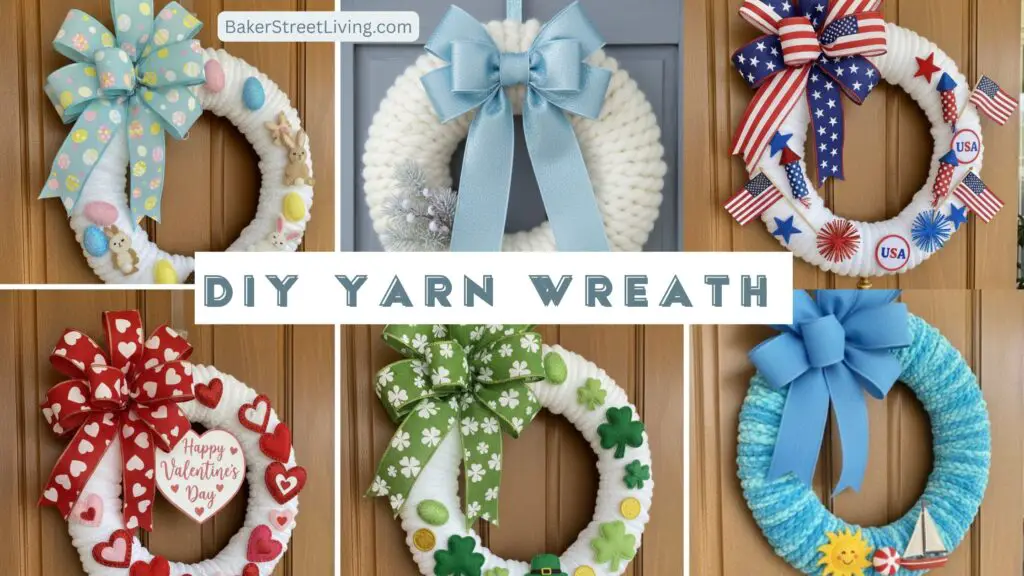
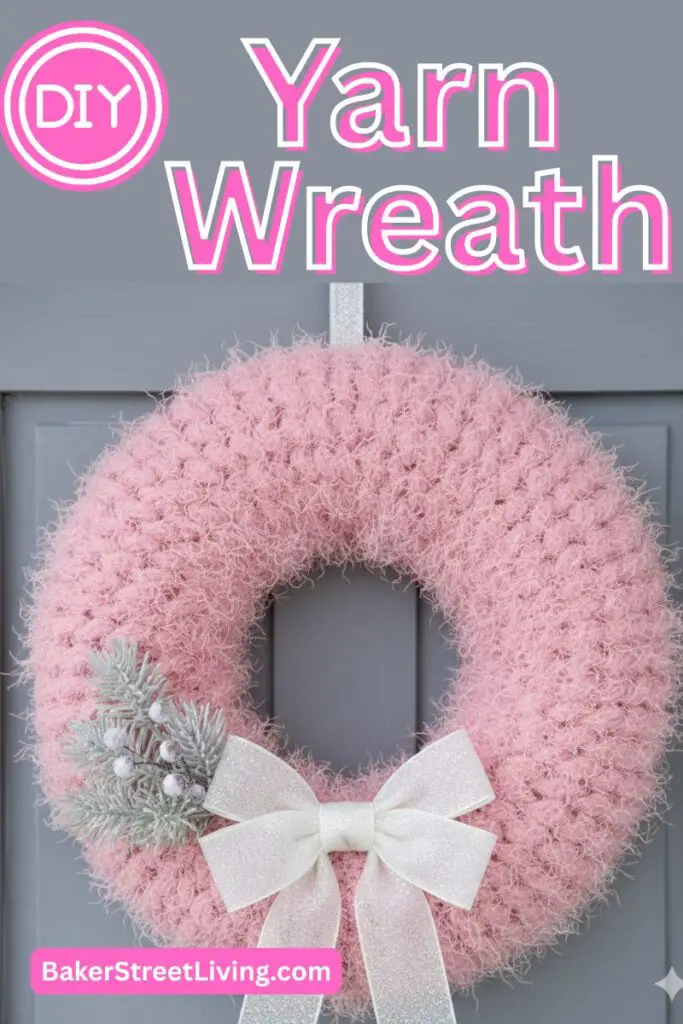
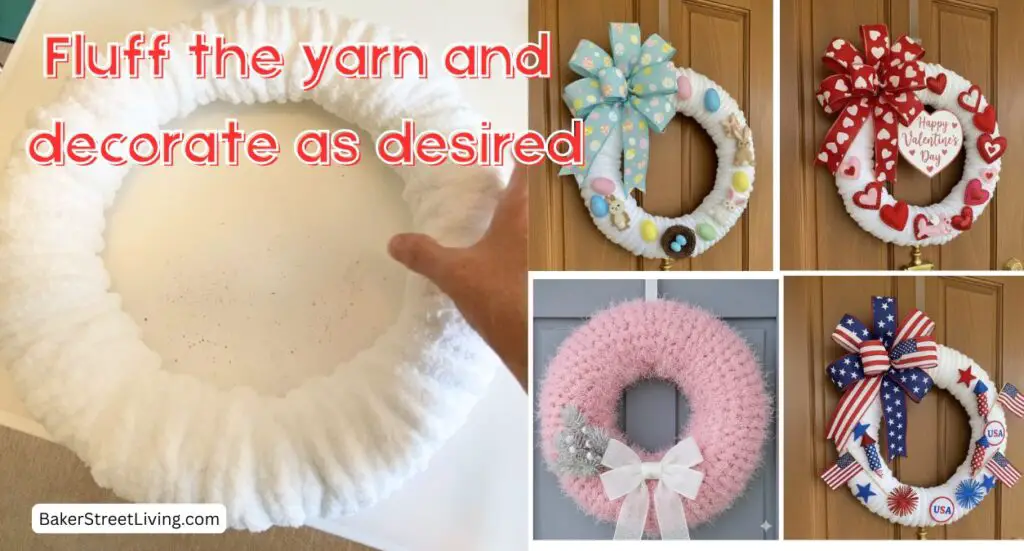
6 – Decorate the yarn wreath for whatever occasion you wish.

Tips and FAQs
Do I need to cut the Pool Noodle?
You don’t have to cut the boodle, but cutting it lengthwise helps the wreath to hang flat and reduces the bulk on the back of the wreath.
Best Types of Yarn for a Yarn Wreath
The best type of yarn for a yarn wreath is a large chunky or loop yarn. Any yarn that is designed for hand knitting or blankets is ideal. Thin yarns tend to show the frame of the wreath and do not look as nice when finished. If using a thin yarn, I don’t recommend a wooden wreath frame. A foam wreath base is more suitable for thinner yarn.
How to Wrap the Wreath
Keep the yarn in a ball and pass the ball through the frame. If the yarm gets long and loose, it tends to become crooked and can knot. Keeping the ball of yarn tight will help keep the wrapping straight and uniform.
Recycling your Yarn Wreath
When adding embellishments, use Velcro tabs or less permanent means to attach them. When the holiday is over, remove the embellishments and add the next ones. This is an easy way to reuse the same wreath but get a different look, without having to remake a new wreath every time.
Is this project outdoor-friendly?
If the yarn wreath is hanging outdoors, make sure that it is not exposed to rain and snow. Keep it hung under an eave or out of the elements for the best chance at longevity. If the yarn gets wet, it will sag and will become subject to mould.
Embellishment Ideas
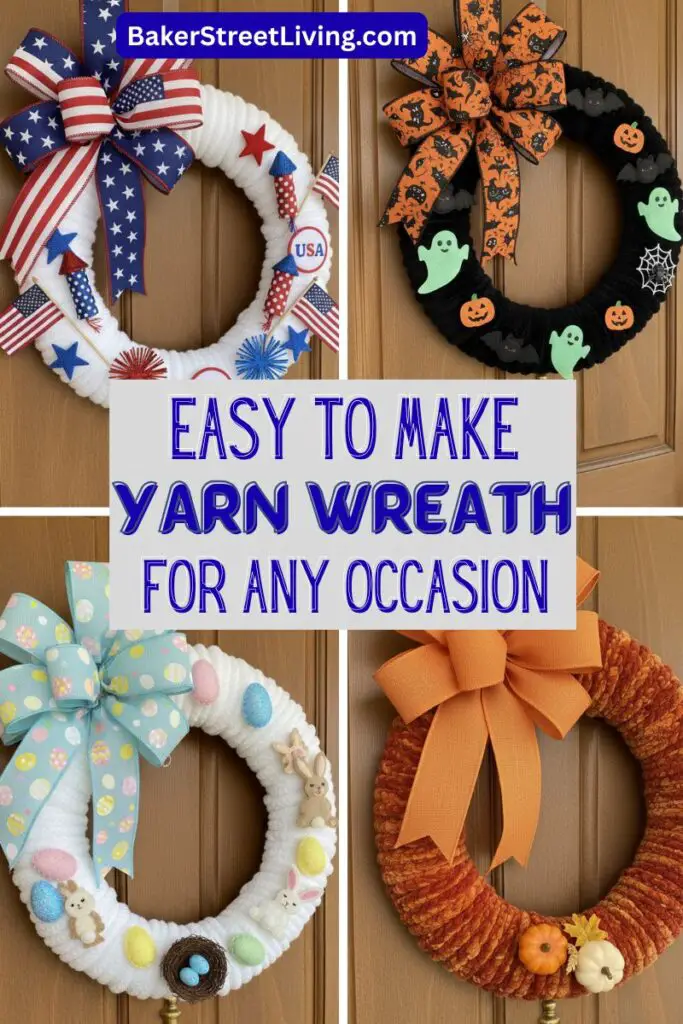
- Valentine’s Day – Decorative fabric hearts and cupis and. red bow
- Spring – Daisies and a light green bow
- Easter – Decorative eggs and a bunny, and a pink Easter bunny
- July 4th – Flags and stars in red, white and blue
- Canada Day – Red and white ribbon with flags and red maple leaves
- Summer Wreath – Beach umbrellas, flip flops and starfish
- Autumn – Autumn leaves, orange ribbon and pine cones and acorns
- Halloween – Pumpkins, ghosts, jack-o’-lanterns and miniature with brooms
- Thanksgiving – Pilgrim hats and turkeys with a dark orange ribbon
- Winter – Snowflakes, snowment and blue ribbon
- Christmas – Red ribbon, ornaments and mini gnomes.
This quick and easy yarn wreath is one of those timeless crafts that can be adapted for any occasion. It’s inexpensive, relaxing, and makes a thoughtful, handmade gift or beautiful accent for your own home.
So grab your favourite yarn and get wrapping. Your next seasonal wreath is just a few loops away!

This website contains affiliate links. As an Amazon affiliate, I earn a small commission from qualifying purchases (at no cost to you).