

Content Created by Tracey of Baker Street Living 
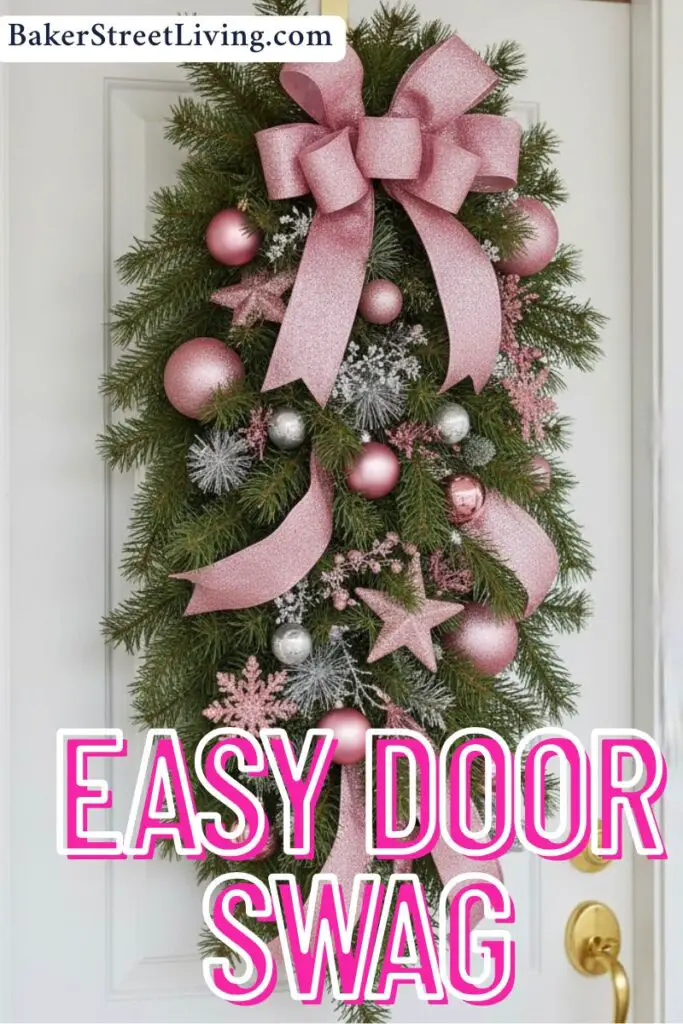
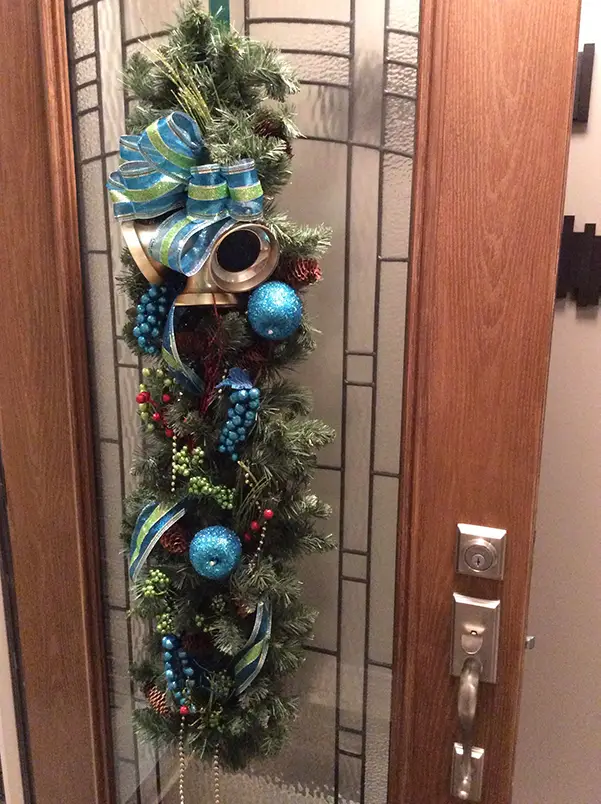
One of the fun parts that we look forward to at Christmas is decorating. Depending on the style of your front door and what your own personal preferences are, you might like to have something different than the traditional wreath. This great Christmas swag wreath might be just the thing you’re looking for.
It looks amazing paired up with our Festive, easy-to-make DIY Cedar Kissing Ball.
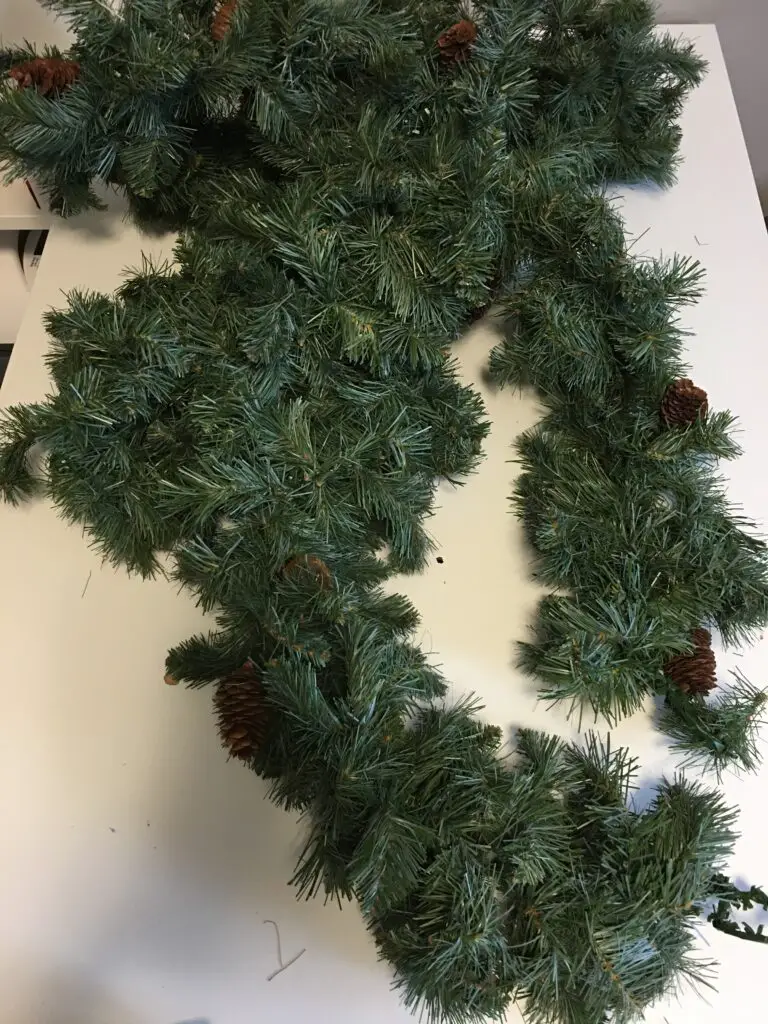
Our Christmas swag wreath is made from leftover artificial pine garland. It can be put away and used year after year or I can change up the decor on it from year to year. Even though we love real pine and cedar for their imperfect appearance and festive smell, we have decided to use artificial pine garland.
Make an Easy Christmas Swag
The great thing about using the artificial garland is no falling needles on your doorstep.
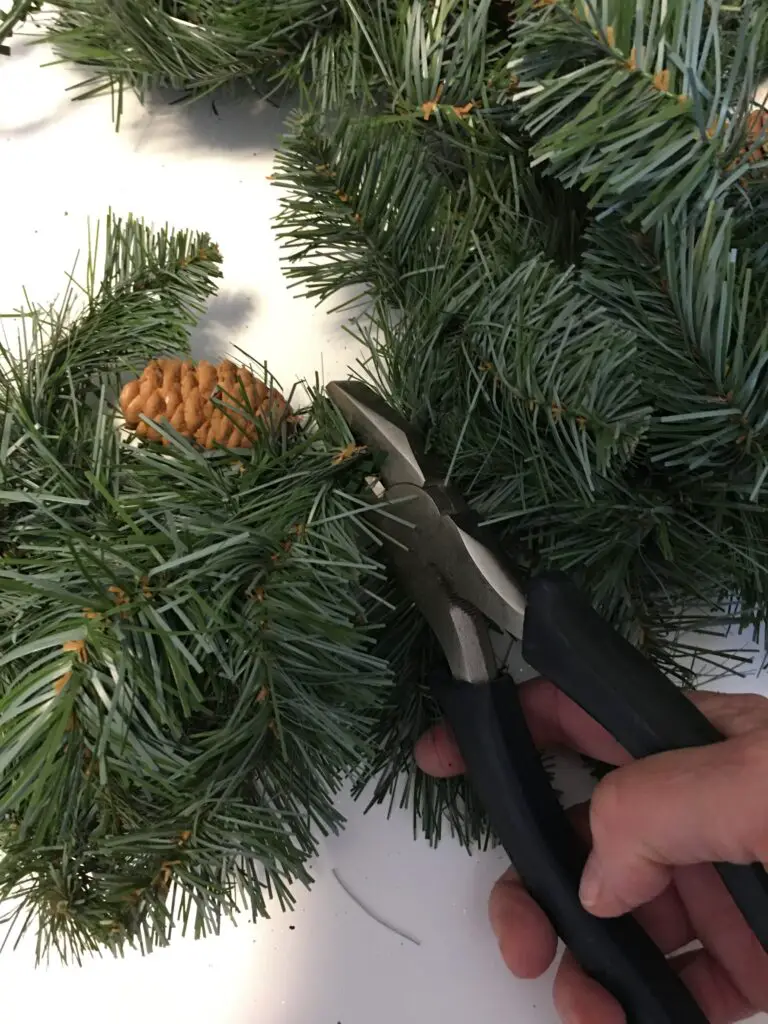
Our garland had pinecones woven into the strands, but if yours does not have them, we recommend adding them. They add to the realistic look.
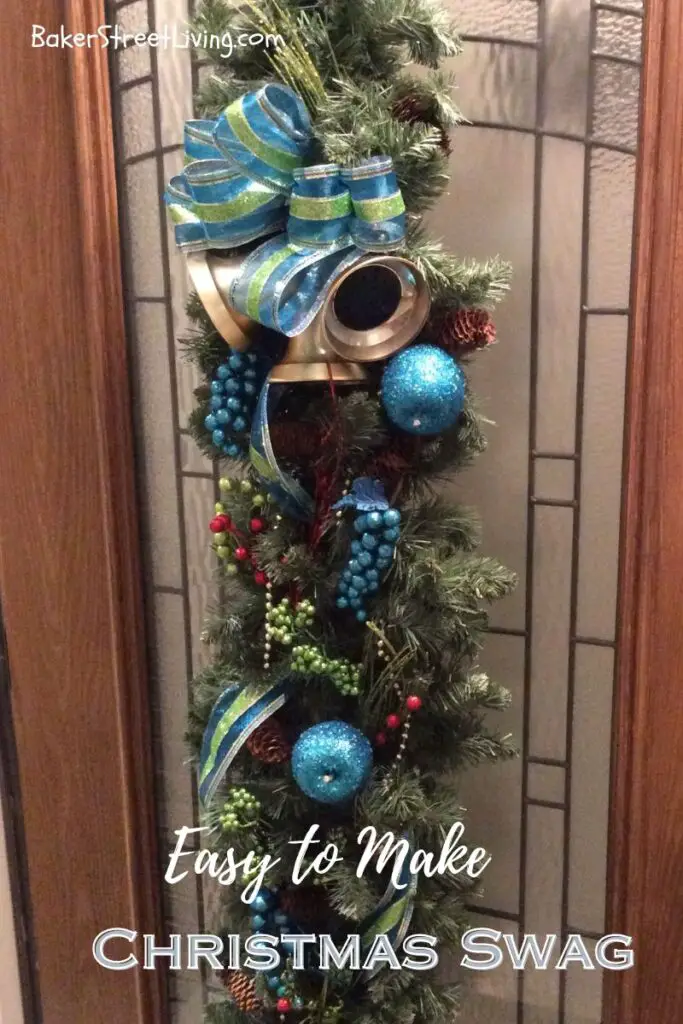
Did you know that the price for a swag the size of the one in the photos retails for $170 in a local home decor store? We have seen them for as high as $275. That’s crazy! If that doesn’t motivate you to make your own, I don’t know what will. It’s easy to do, and once you have all your supplies, you can put it together in an afternoon and still have time for coffee.
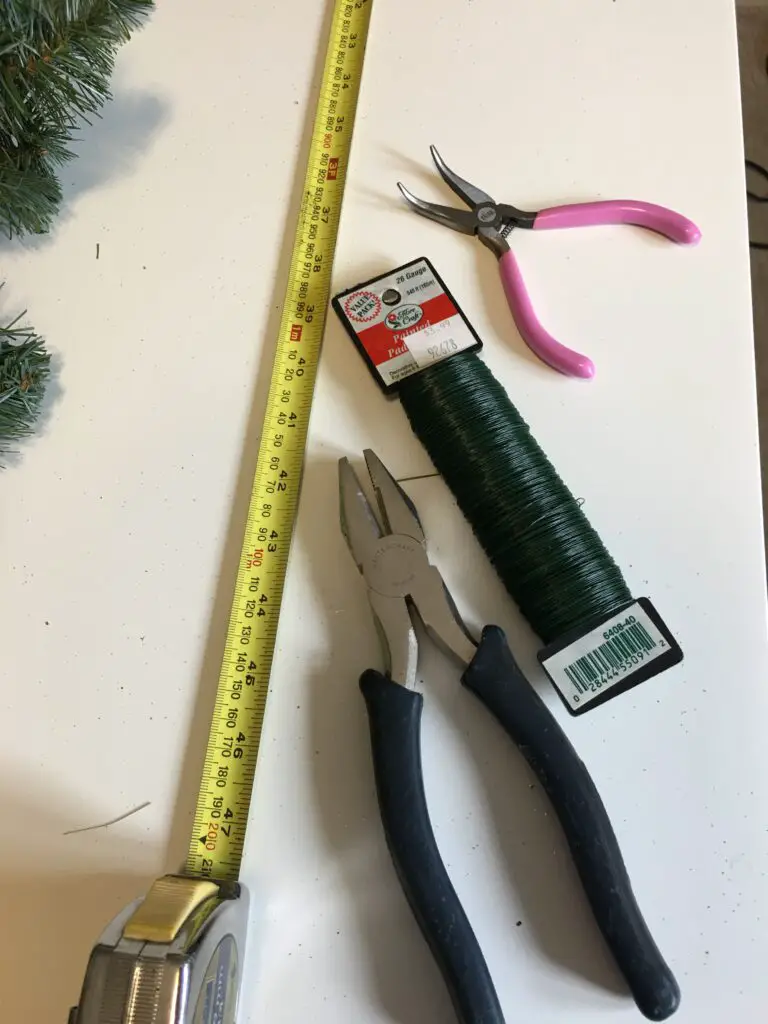
What You’ll Need
This website contains affiliate links. As an Amazon affiliate, I earn a small commission from qualifying purchases (at no cost to you).
- artificial pine garland.
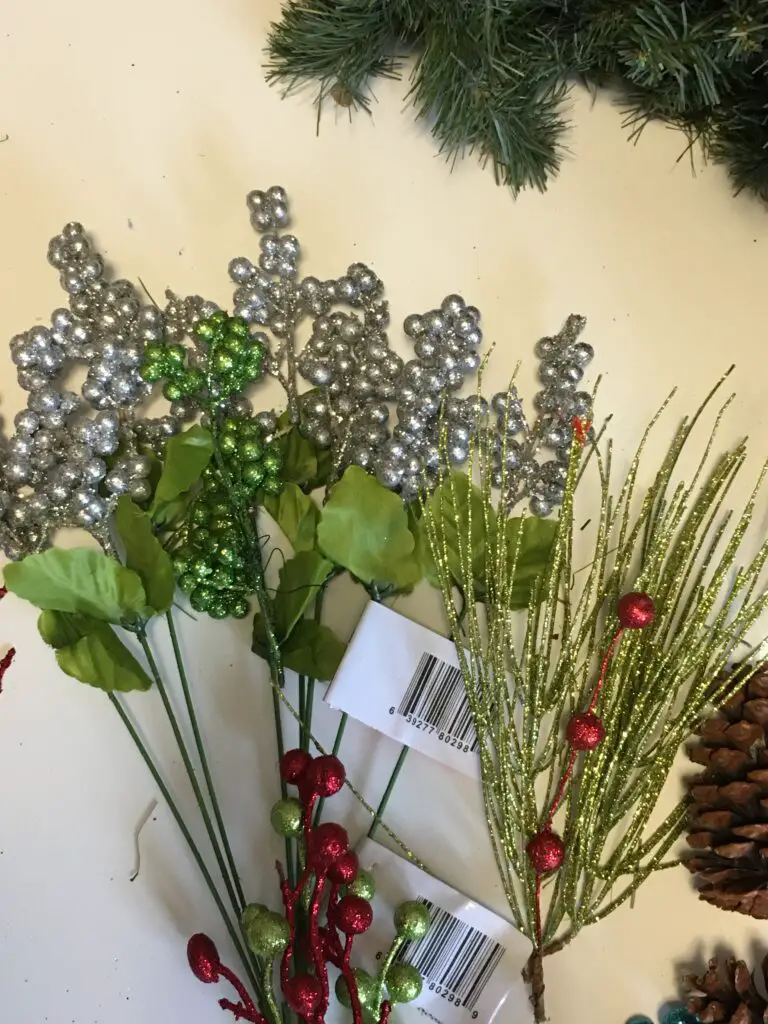
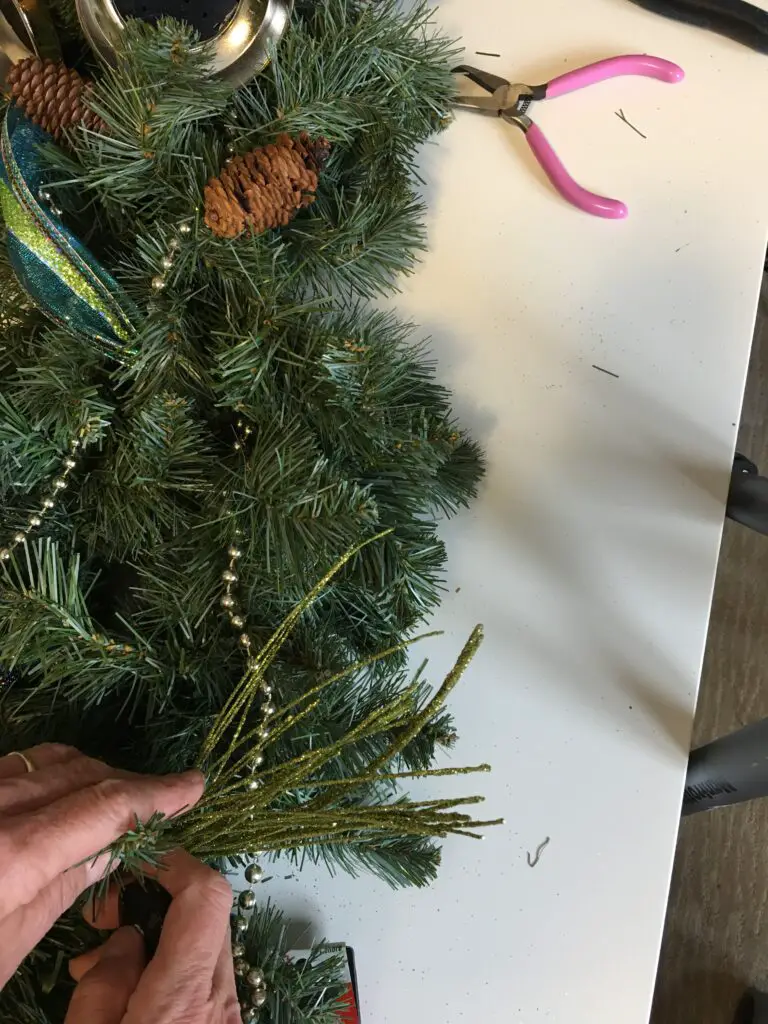
- glitter Christmas floral picks
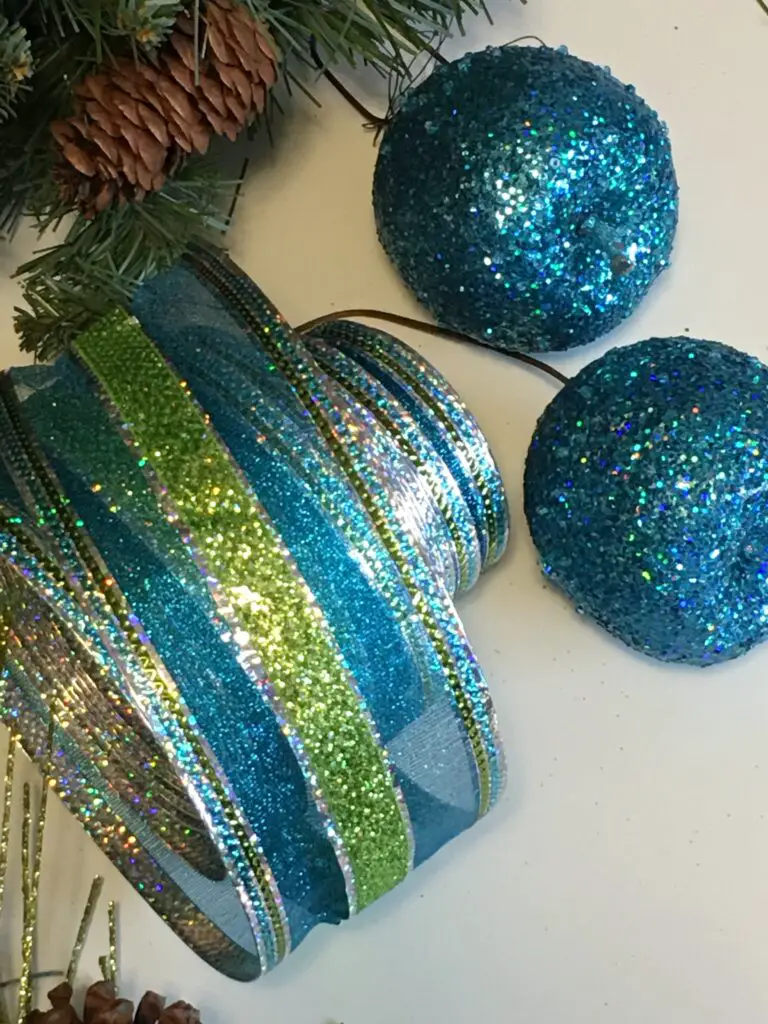
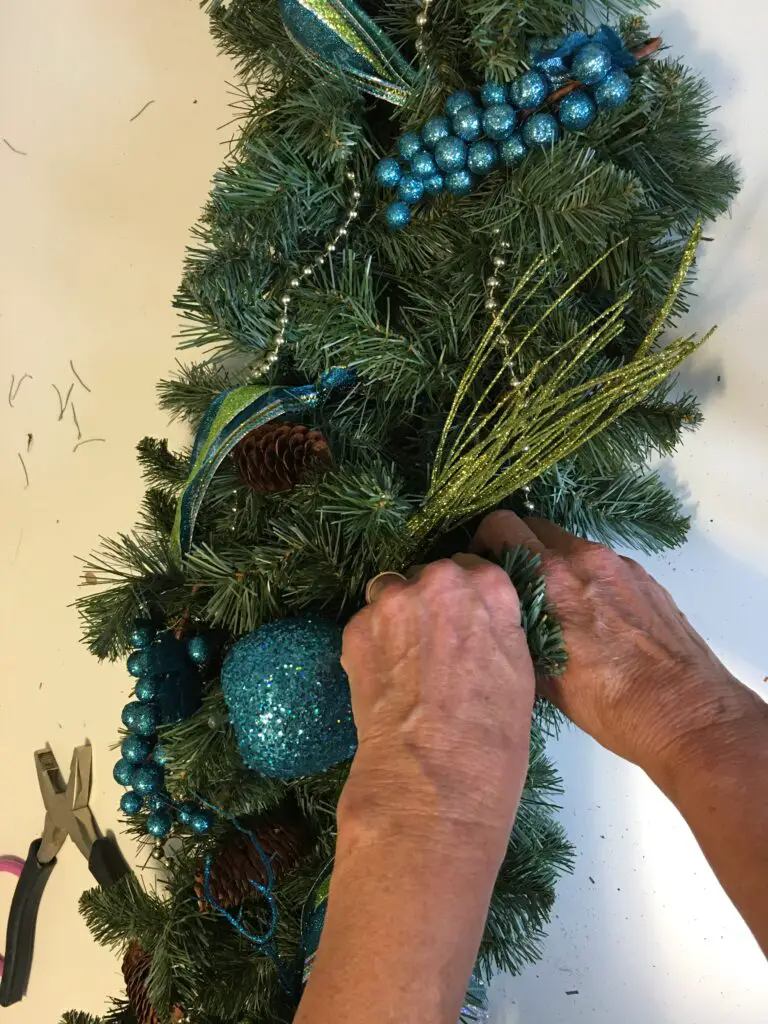
- glitter Christmas ornaments
- glitter-wired ribbon
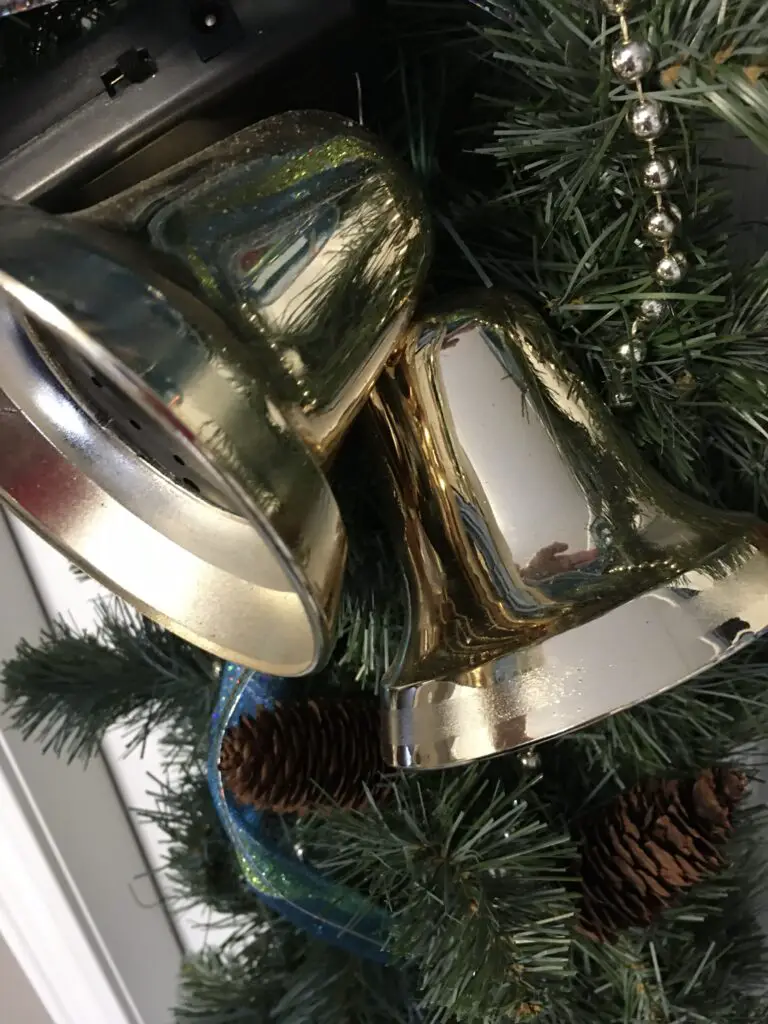
- large ornamental bells
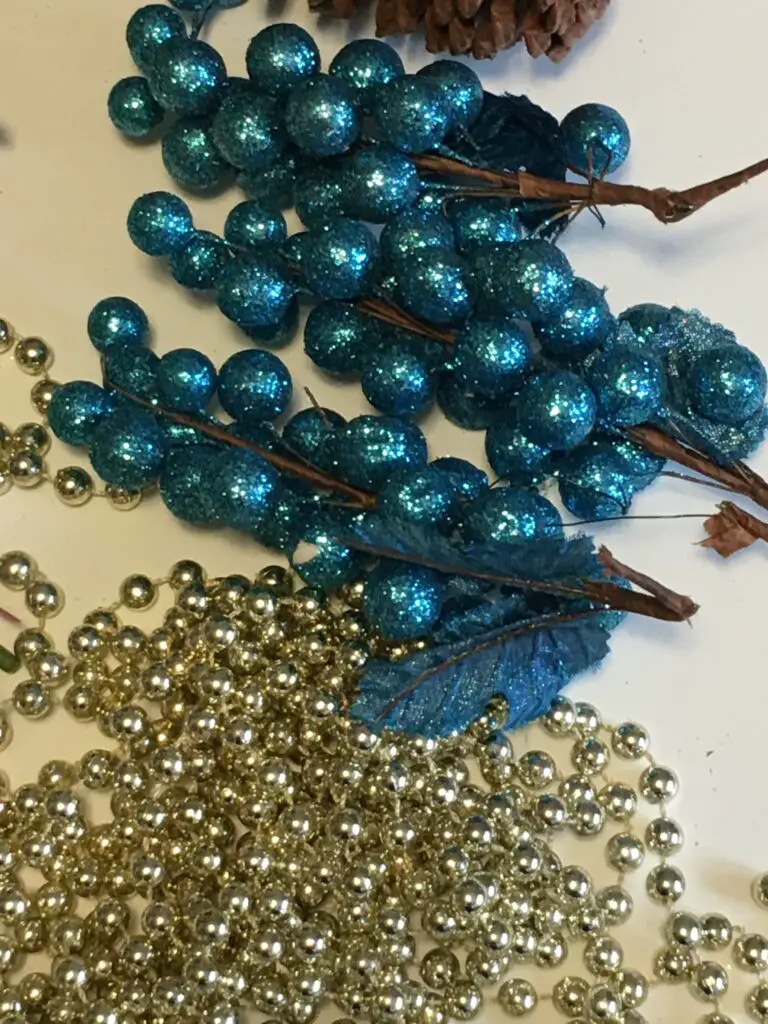
- glitter berry picks
- glitter leaf picks
- adjustable wreath hook for the door
- floral wire
- wire cutters
Important considerations when choosing products for your Christmas swag wreath
Lighting – if the swag is hanging on a door, is there adequate lighting to show off your Christmas Swag? If not, you could always add battery-operated lights to the swag. If you have a light that is above the wreath, and it is bright. Consider changing the bulb out for one that is a little dimmer so you can see the sparkle on the swag.
Sunlight – depending on how much sunlight you get, you may want to make sure the items you use have some sort of UV protection. The brightness of direct sunlight can easily fade your ribbons and decor.
Weather – Will your swag be protected from the elements?. if there is the potential for rain or snow to be blown onto your swag, make sure that all of your decor is suitable for the outdoors. Wired mesh ribbon is good, but paper or fabric ribbons get wet and droopy.
Door – What type of door will the swag be hanging on? If it is a wood or painted door, put a piece of adhesive felt onto the back of your wreath hanger. This will protect the finish of the door from scratches when the wreath moves in the wind or when the door is opening and closing.
Wreath Hook – We recommend an adjustable wreath hook for your swag. You can purchase non-adjustable hooks, but you are stuck with the length of the hook. If the hook is adjustable, you can shorten or lengthen your swag to your preference.
Assembling your Christmas swag
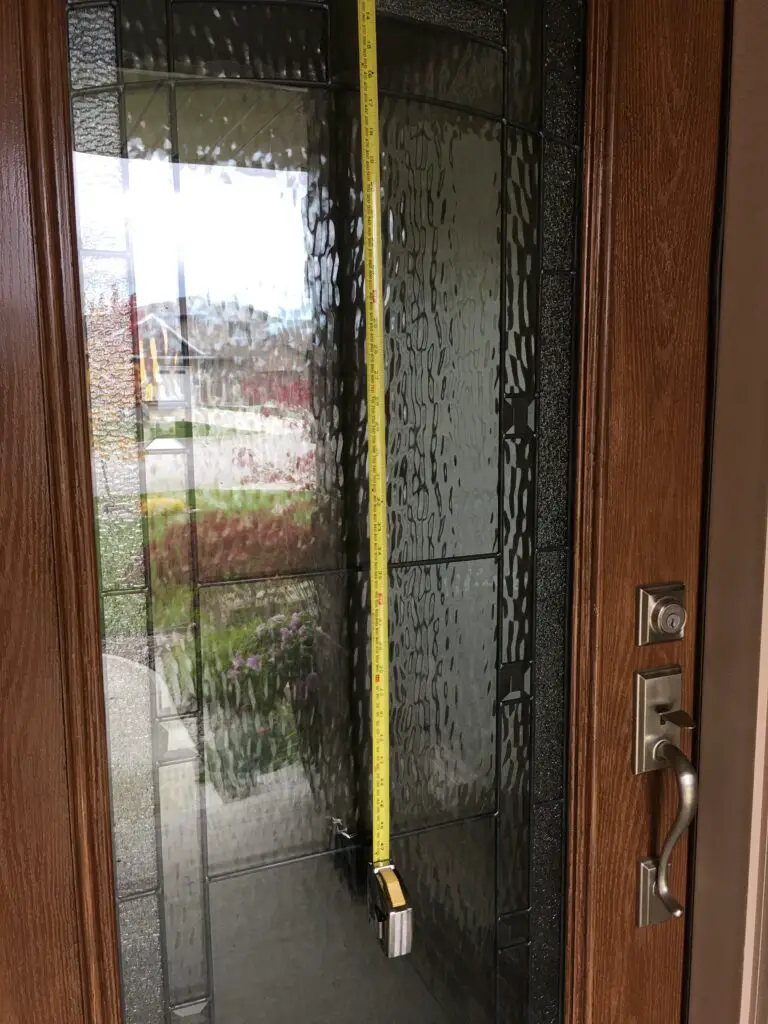
- Measure the length that you want your swag to be on your door. It is a good practice to make it about 2/3 to 3/4 of the length of the door.
- Double the desired length and cut the artificial pine garland with wire cutters to that length.
- Fold the garland in half and lay it on a work surface, such as a table or floor.
- Using floral wire, secure the garland in a few places to give it the look of one thick garland.
- Attach a loop or ensure the top of the garland is open, and the wreath hanger fits onto the hanger.
- Hang it up on the door you will be using and check the length.
- if you are satisfied with the length, start attaching your ribbon, followed by the string of beads. Weave the ribbon through the swag, attaching it with wire in a few spots to ensure it’s securely attached. Do the same with the string of beads. Leave a little ribbon and beads sticking out of the bottom. To be sure the ribbon is secure, you can use pliers to twist the wire tightly.
- NOTE – If the lighting is poor and your swag would benefit from battery-operated lights, add them now. Make sure that the battery box is hidden in the back of the swag, but can be accessed to replace batteries.
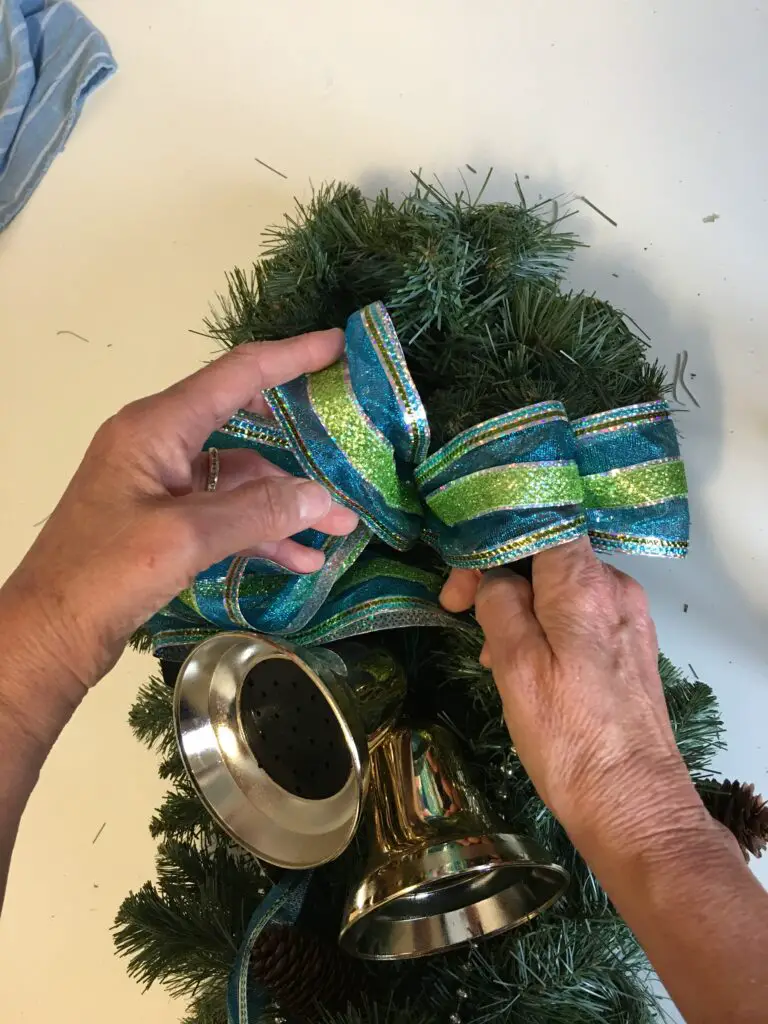
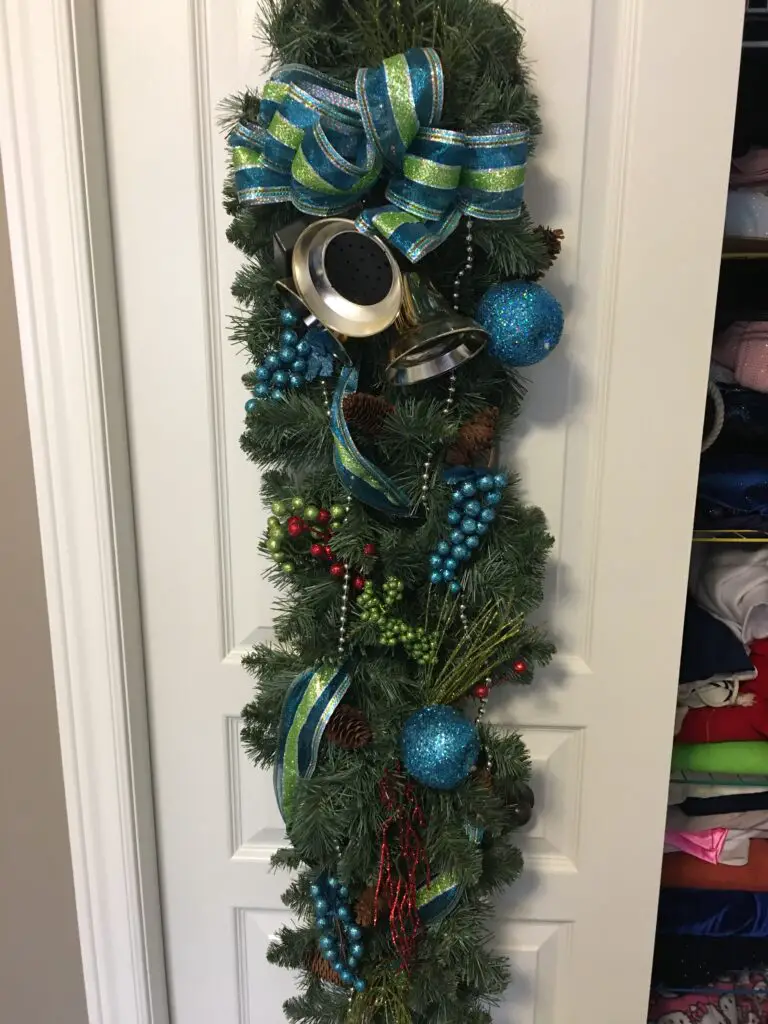
- Add your bells to the top, wiring them securely in the center. Leave some space from the top – about 6 – 8 inches, depending on the length of your swag. Refer to our picture for an idea of how much space to leave/ You will also need some space to add the bow above the bell.
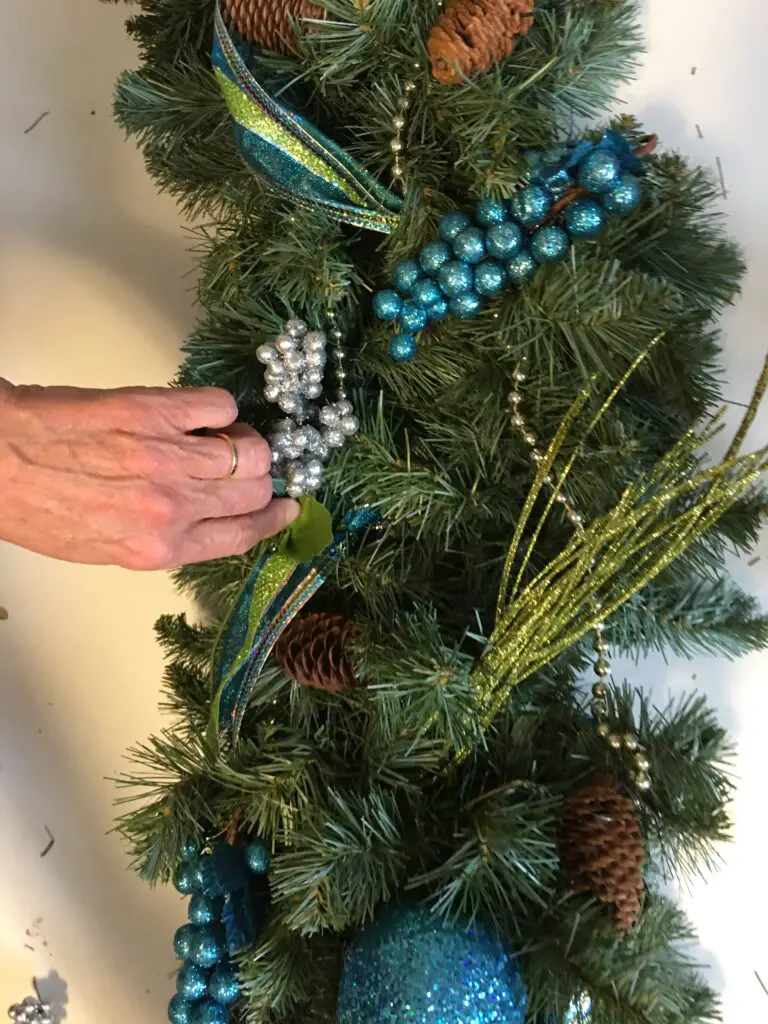
- Add your picks and glitter stems throughout the swag, making sure to securely wire them into place.
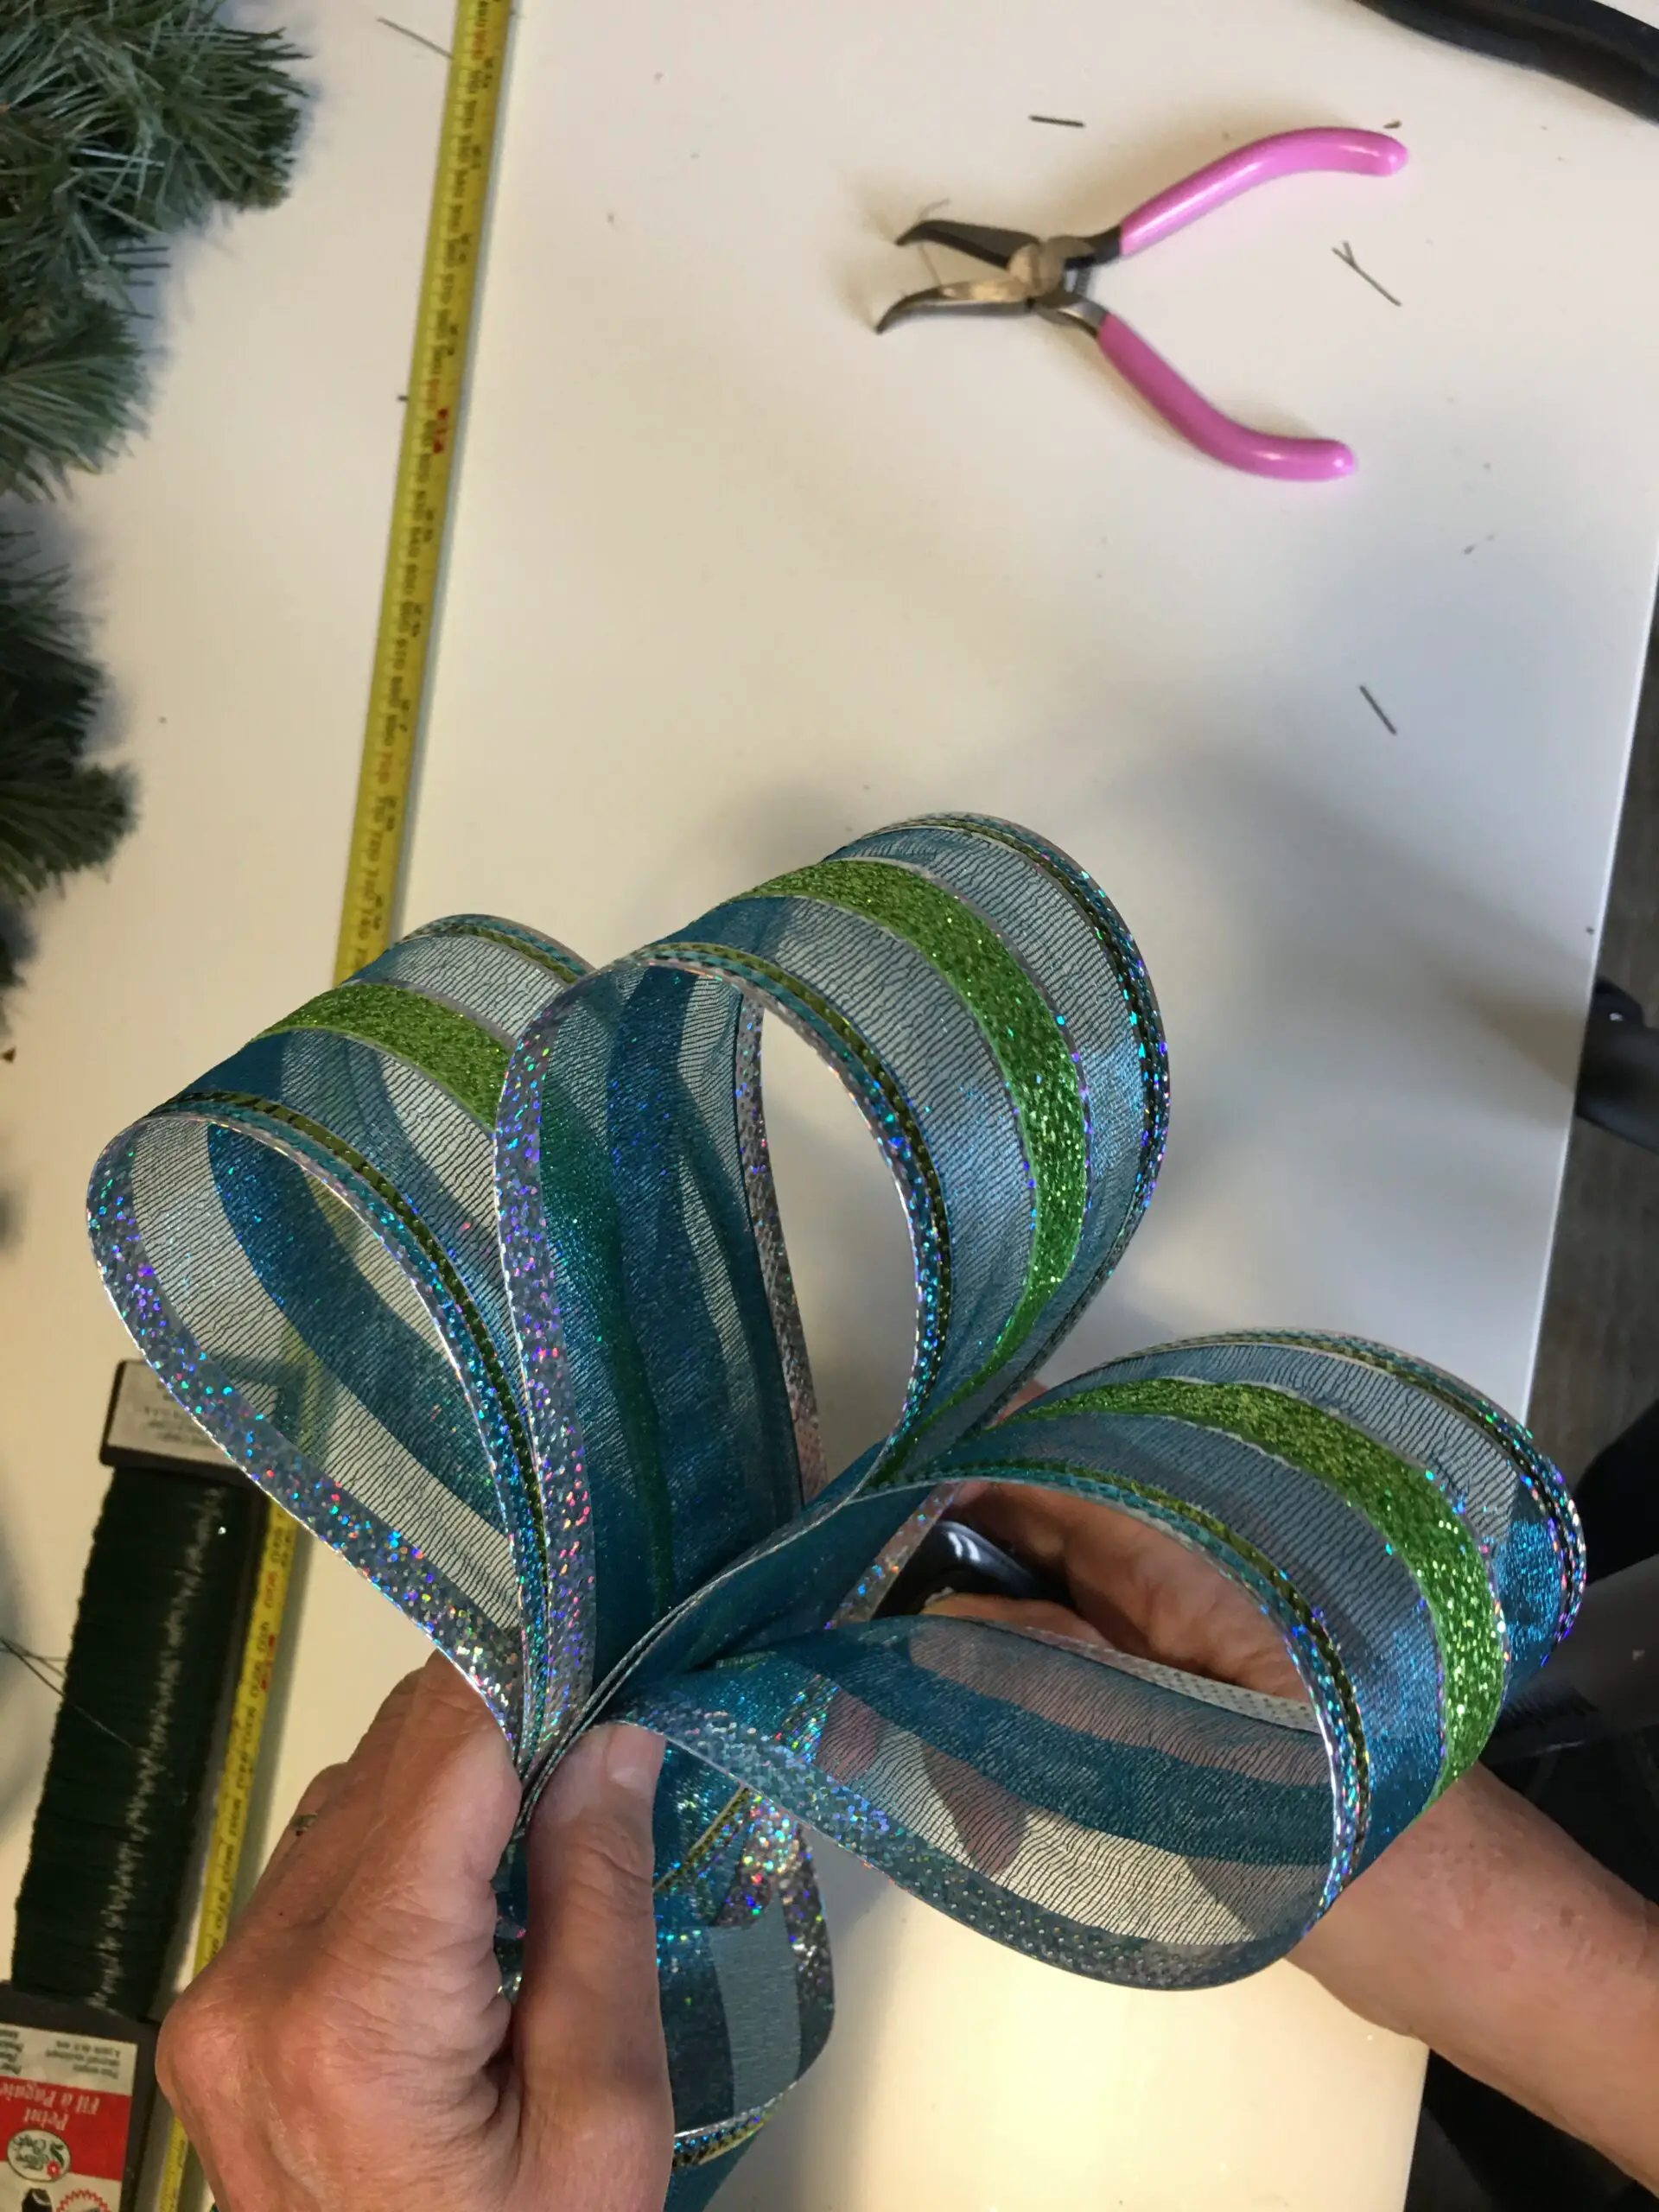
- Create your bow for above the bell.
- Attach the bow with floral wire. Arrange the loops of the bow. This is the benefit of the wired mesh ribbon. It allows you to shape the bow, and it will stay where you place it.
- Hang up your Christmas swag and check to see if it looks balanced. If not, then rearrange or add more picks.
- For your wreath hanger, we recommend adding a strip of felt to the back. The felt will protect the surface of your door from any scratches or scrapes. Before we did this, we had a wreath on the door, and the wreath holder left a small abrasion on the window trim. After adding the felt, we’ve never had an issue again. If possible, use an adhesive felt. It eliminated any mess and no glue
- Stand back and admire your beautiful Christmas swag. Your door will look amazing.
Steps to make a Christmas Swag Wreath


Have fun putting together your custom door swag. Choose your favourite colours and make them your own. Add funky accents or even let the kids add their special touch.

Disclaimer: This post contains affiliate links. We receive a small commission when purchases are made through our links. Thank you for your support
I love this how-to-make project. You made something that looks so elaborate so simple with your instuctions. Thanks also for adding the visuals. It makes it doable not only for me, but for my 85 year old mother.
Thanks Jean. Glad you enjoyed it.