
Content Created by Tracey of Baker Street Living 
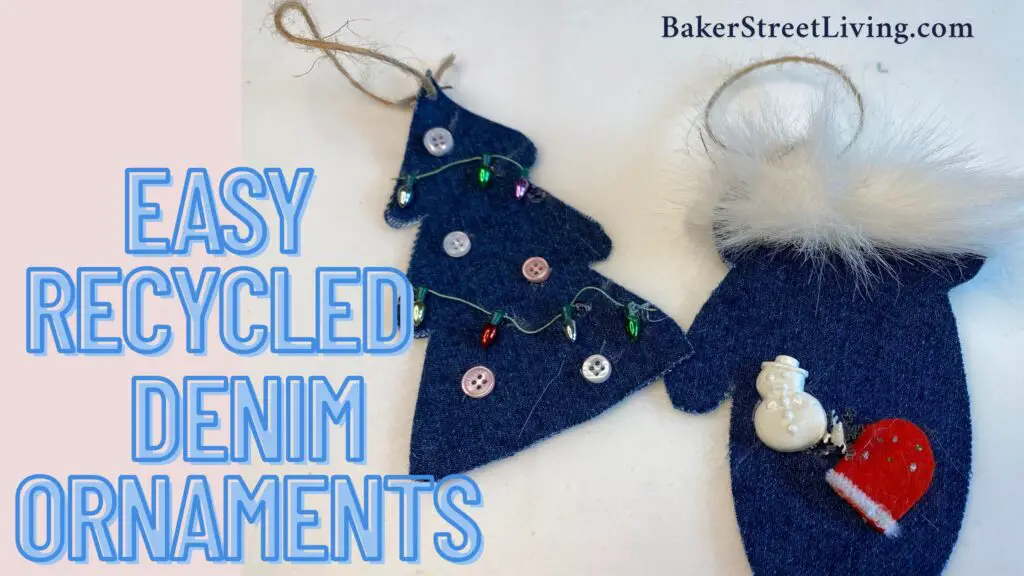
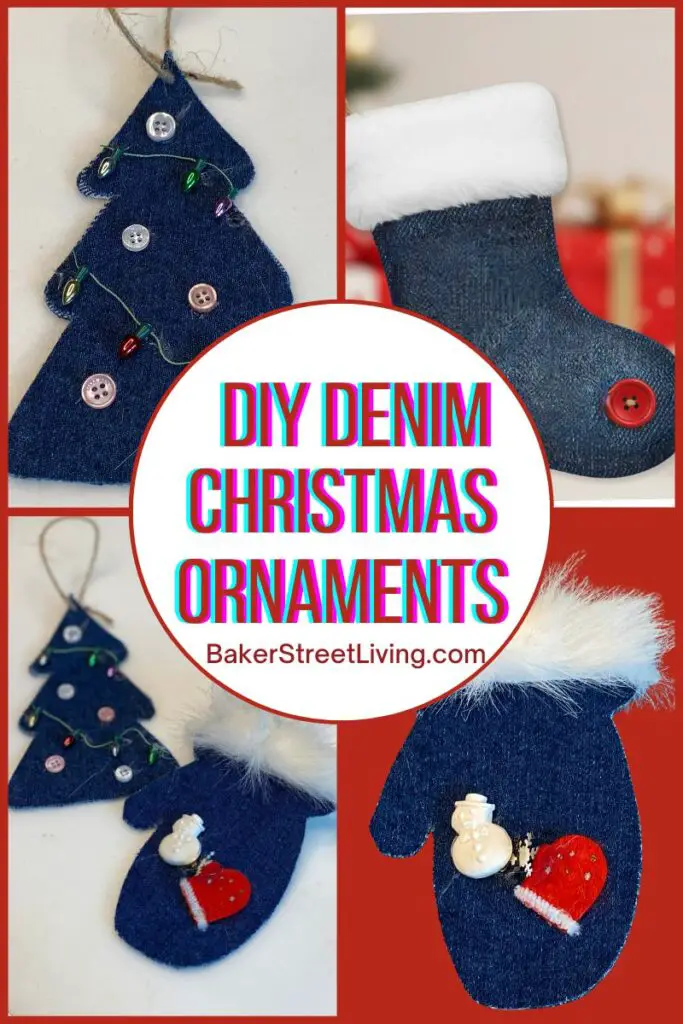
f you love adding a personal, rustic touch to your holiday decorating, DIY denim Christmas ornaments are the perfect craft project for you! Not only do they look charming and cozy on your Christmas tree, but they’re also a great way to upcycle old jeans and keep fabric waste out of the landfill. In this post, I provide step-by-step instructions, the Free SVG Pattern and the Free Printable Pattern for these cute denim Christmas ornaments.

Supplies List
This website contains affiliate links. As an Amazon affiliate, I earn a small commission from qualifying purchases (at no cost to you).
- Denim Fabric ( from recycled clothing)
- Hot Glue
- Small Assorted Buttons
- Twine or Ribbon
- Faux Fur Trim (for the mitten and stocking only)
- Mini String Pearl Trim or Mini Christmas Light Trim
- Heat ‘nBond
Craft Room Tools
- Scissors
- Household Iron or Heat Press
- Cutting machine that is fabric compatible (if using SVG) with a mat and rotary blade
- Glue Gun
How to Make Denim Christmas Ornaments
For Cutting Machine Users
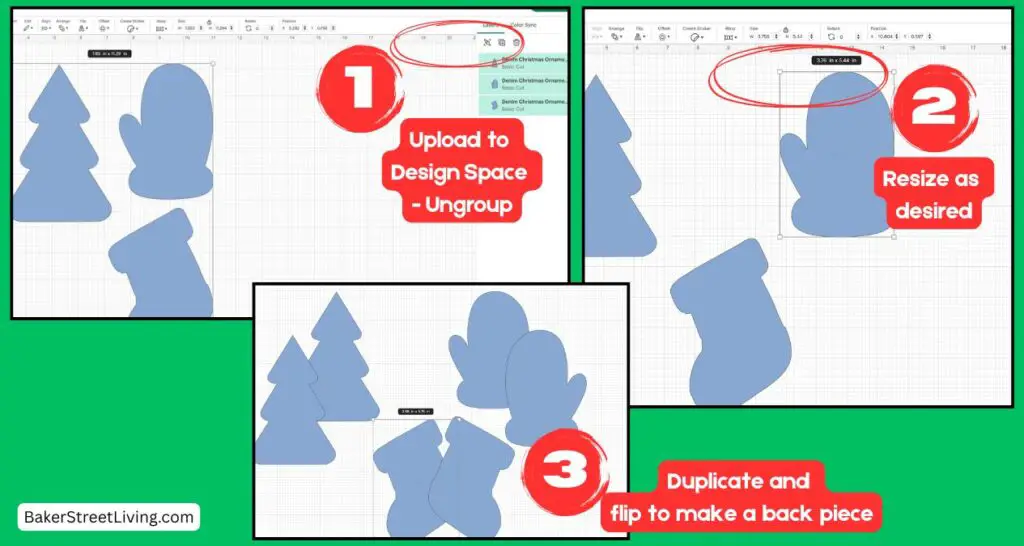
Download the Free pattern and upload it into Cricut Design Space.
Once you have the pattern on the canvas, Ungroup and resize according to your desired size.
The ornament is 2 sided. To make the back pattern piece, duplicate the ornament piece and flip it.
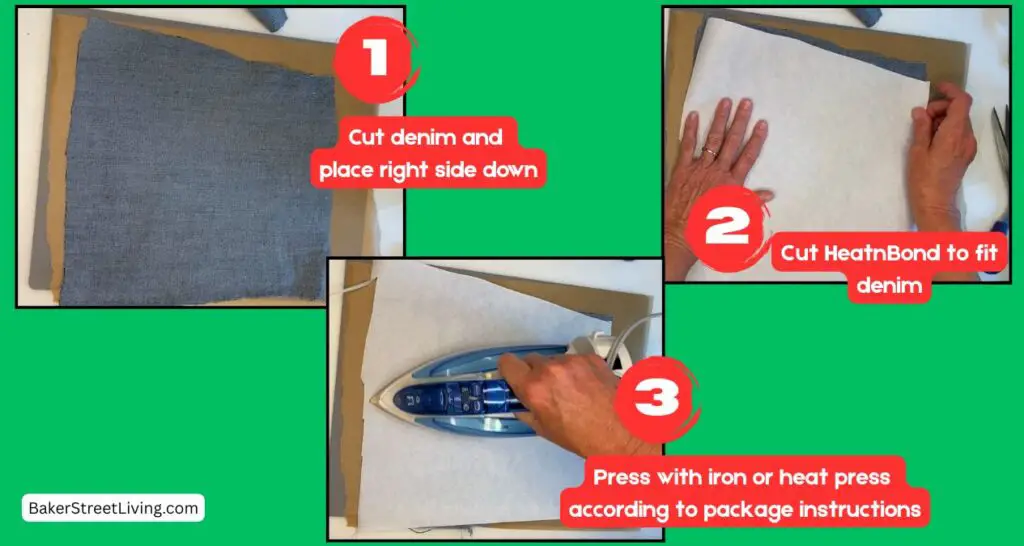
Cut the 2 pieces of denim to fit your fabric cutting mat. One for the HeatnBond and one for the back pieces.
Cut a piece of Heat’nBond to fit the fabric and apply it to the wrong side (back side). The Heat’nBond only needs to be applied to one side of the fabric. If you are making only a single ornament of less than the full mat size, cut only enough HeatnBond for the number of ornaments you are making.
Apply the Heat ‘n Bond according to the package instructions.
Cut Pattern Pieces
To make it easy, change the colour of the back pieces of the ornament on the design space canvas before making it. This will separate the front pieces from the back pieces, simplifying sorting on the “make” screen.
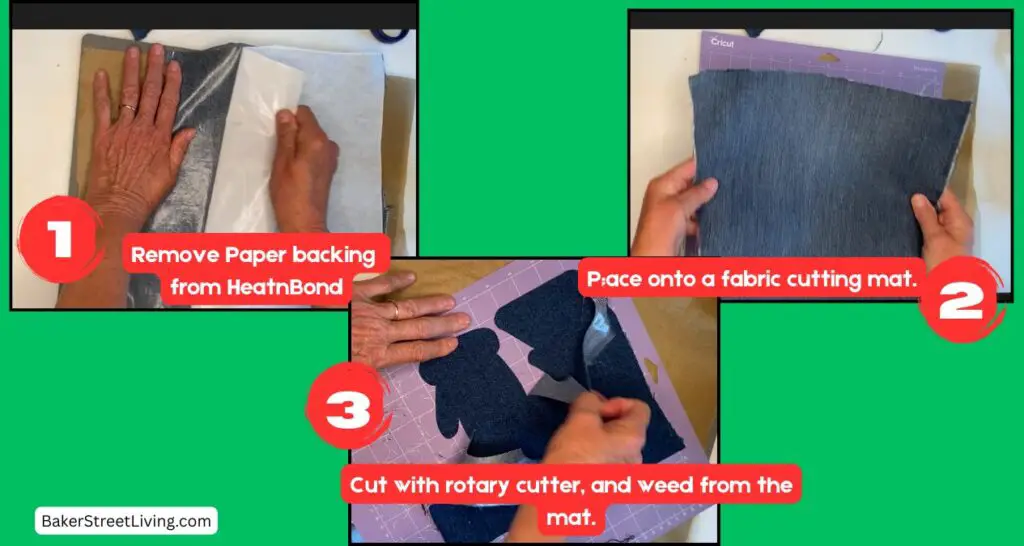
Peel off the paper backing of the Heat’nBond and place the fabric on the fabric cutting mat, right side up, with the adhesive side down.
Remove wrinkles and ensure the fabric is flat and secure.
Cut using a rotary tool and Heavy fabric (like denim) setting. * I select “more” pressure when cutting. Check the cuts before unloading the mat and make another cut of the fabric is not cut completely.
Once all pieces are cut, weed them from the cutting mat.
Repeat cutting the back pieces (without HeatnBond) on the cutting mat.
Continue Next Steps Below for All Users.
For Printable Pattern Users
Print the patterns and cut out the shapes for the ornaments.
Lay the fabric flat, and press if there are wrinkles or the fabric doesn’t lie flat.
Cut a piece of Heat’nBond to fit the fabric and apply it to the wrong side (back side). The Heat’nBond only needs to be applied to one side of the fabric. If you are making only a single ornament of less than the full mat size, cut only enough HeatnBond for the number of ornaments you are making.
Apply the HeatnBond according to package instructions.
Cut Pattern Pieces
Lay pattern pieces onto the HeatnBond-treated denim and cut one piece for every ornament. Repeat cutting all the pattern pieces on plain denim for the back pieces. Flip the pattern piece over and cut the shapes.
All Users
Assemble Ornaments
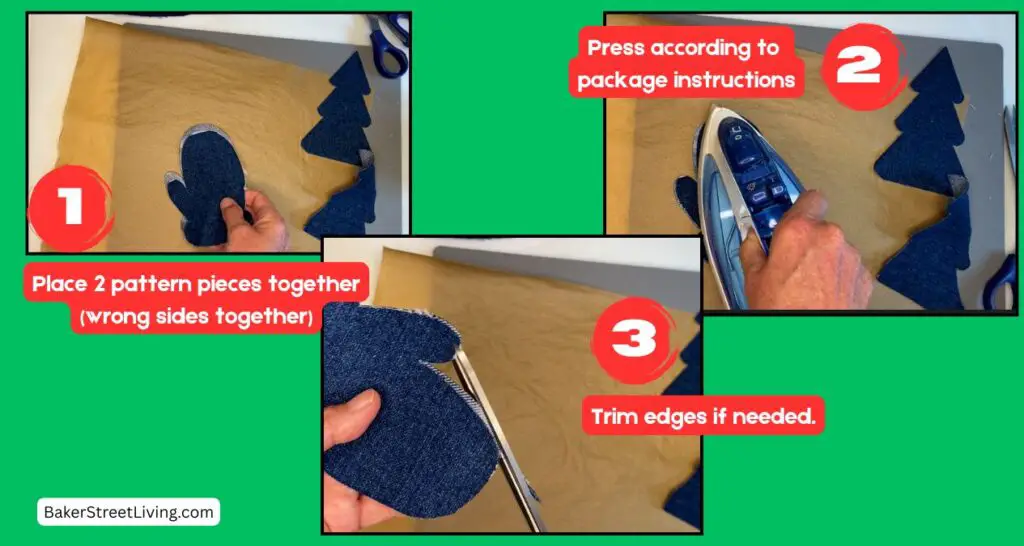
Match up the front and back of each ornament.
Press according to package instructions.
Trim off any excess or threads before adding embellishments.
Add Embellishments
Lay the embellishments onto the denim to determine the placement of your ornament.
Using a hot glue gun, adhere the embellishments in place.
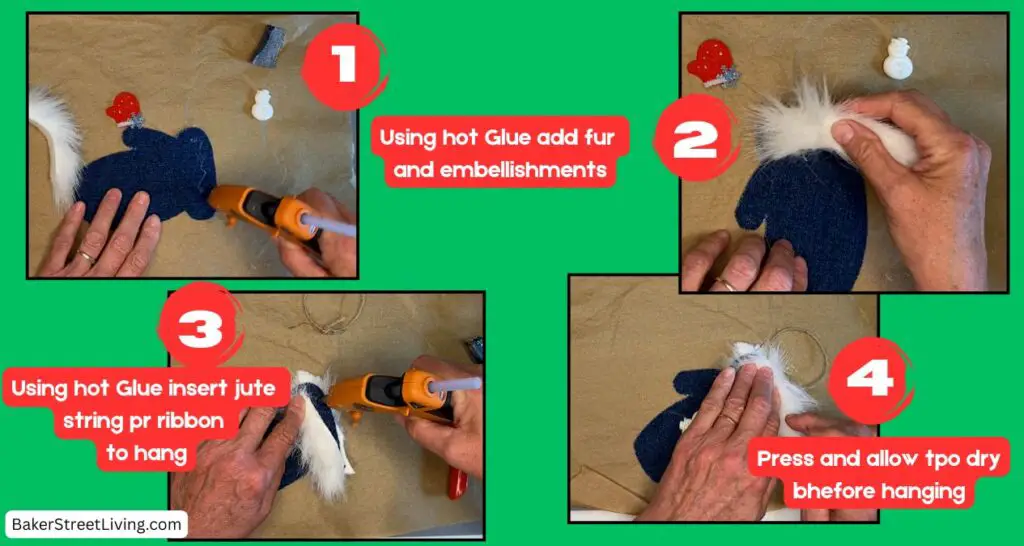
Allow the glue to dry and repeat on the other side.
Once all is dry, hang or display your denim Christmas ornaments.


This website contains affiliate links. As an Amazon affiliate, I earn a small commission from qualifying purchases (at no cost to you).