
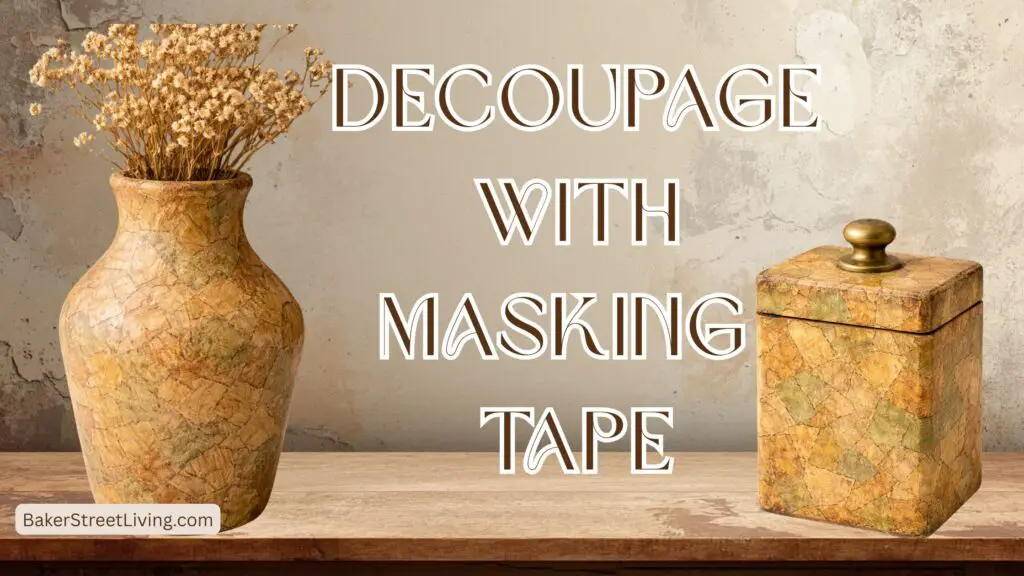
If you love vintage crafts, you’re going to adore this retro-inspired technique. Decoupage using masking tape is a fun, affordable, and unique throwback to the DIY trends of the 1970s, when creativity was all about using what you had and making it beautiful.
This method combines the classic look of decoupage with the soft, matte texture of masking tape to create layered, slightly aged designs that feel straight out of a vintage craft room
Content Created by Tracey of Baker Street Living 
What Is Masking Tape Decoupage?
Traditional decoupage involves gluing paper cutouts onto a surface and sealing them. In this 70s-inspired version, strips of masking tape replace paper, creating a textured, slightly translucent collage effect.
Because masking tape has a natural beige tone, it instantly gives your project that warm, retro vibe—perfect for vintage-style decor.
Supplies You’ll Need
This website contains affiliate links. As an Amazon affiliate, I earn a small commission from qualifying purchases (at no cost to you).
- Masking tape (classic beige works best)
- Scissors or a craft knife
- A surface (wood, glass, cardboard, canvas, etc.)
- Mod Podge
- Dark Brown Acrylic paint
- Antique Gold Acrylic Paint
- Colour Float – Optional
- Paintbrush or foam brush
- Small Sea Sponge
How to Decoupage using Masking tape -Step by Step
Approximate time needed to decoupage an item using masking tape
Of course, time varies, but I will give a couple of examples to help you navigate how much time you will need. These estimates do not include removing labels or prepping recycled materials.
A standard mason jar = 1/2 hour to apply and layer tape + 10 minutes to cut/tear tape + 25 to 30 minutes for applying stain + drying time for paint/stain 1 hour + Mod Podge application time 10 minutes + drying time 3+ hours = 5 1/2 hours from start to finish.
A Dollar Store Vase (1 1/2″ diameter by 9″ tall = 15-20 minutes to apply and layer tape + 10 minutes to cut/tear tape +10 minutes for applying stain + drying time for paint/stain 1 hour + Mod Podge application time 5 minutes + drying time 3+ hours = 4 3/4 hours from start to finish.
The time to dry at the end remains the same for all projects.
These quick references of time can help you determine the time needed to create your own completed item.
Prepare the surface
Start with a clean, dry surface. You can paint it first if you want a colored background, think avocado green, mustard yellow, or burnt orange for that authentic 70s feel. Once dry, lightly sand with plain craft paper, then wipe off any dust.
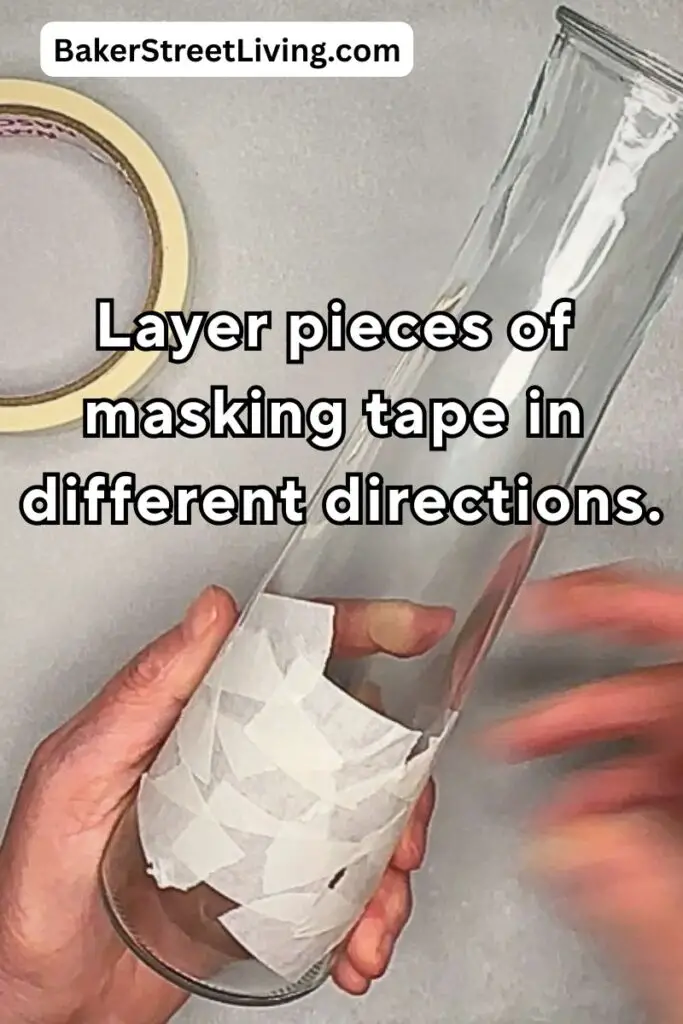
2. Cutting or tearing tape
I like to tear my tape for a more artsy look, but you can easily cut for a more streamlined or geometric look. I like to prepare numerous pieces of different lengths ahead of time.
3. Start Layering
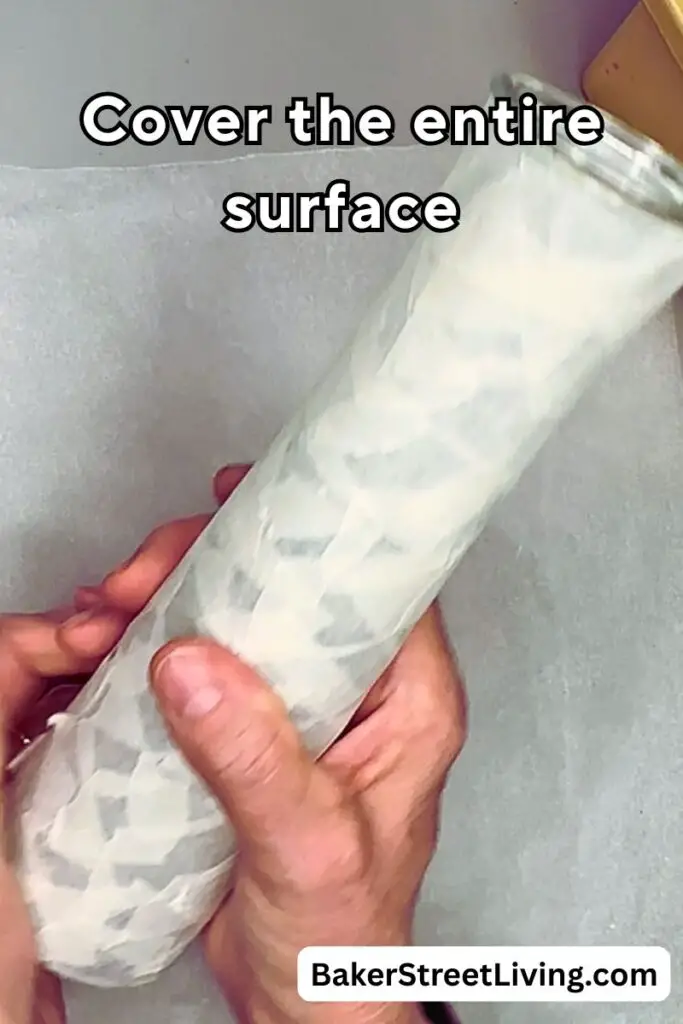
Stick the tape directly onto your surface, overlapping pieces as you go. For a vintage vibe, don’t line up the pieces or tape. Mix it up a little.
Tips:
- Slight overlaps create depth
- Wrinkles add character, don’t try to make it perfect
- Mix directions (horizontal, vertical, diagonal) for interest
Perfect lines = modern
Imperfect layers = vintage charm
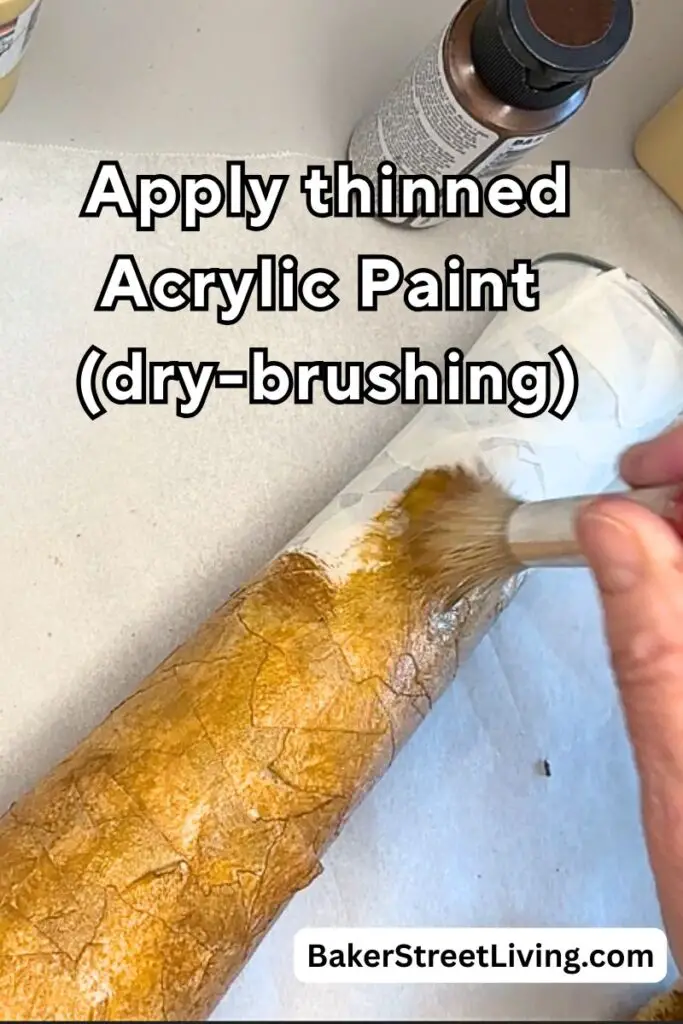
4. Stain for an Aged Effect
This is the magic step that gives that old-paper look.
Lightly brush or dab over the tape with
- brown acrylic paint thinned slightly with colour float
- Antique gold acrylic paint thinned with colour float
Alternatives to the pain.
- Brewed coffee (cooled)
- Tea (for a lighter stain)
- thinned alcohol inks
How to do it:
- Dip a brush or cloth in your paint
- Wipe most of it off (dry-brush technique)
- Lightly pounce or brush over the surface
- Remove excess and blend using a small sea sponge.
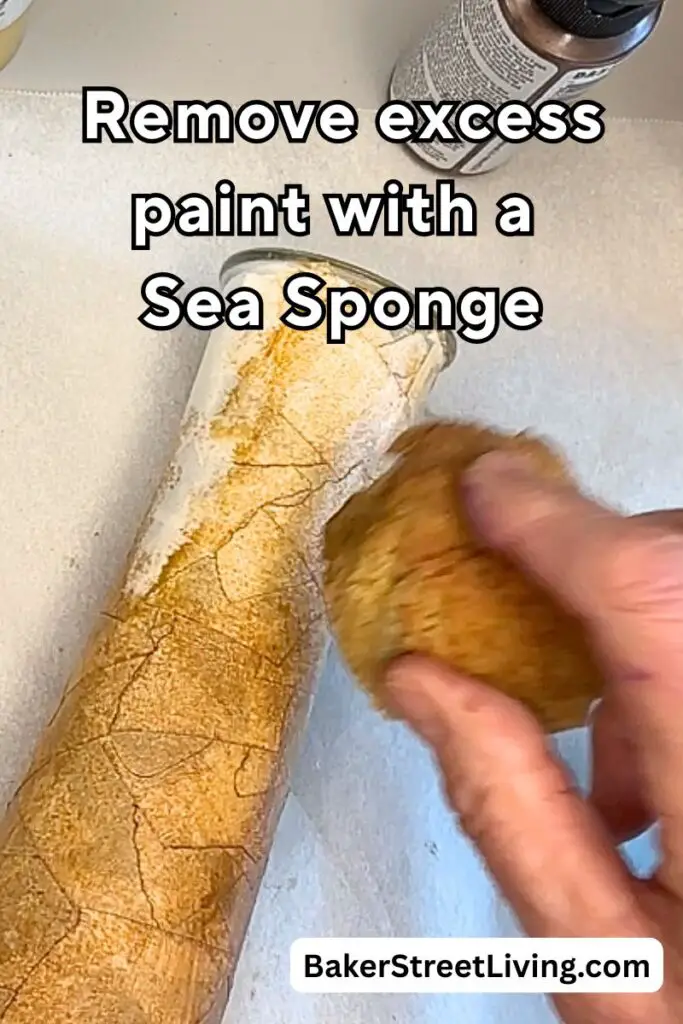
Focus on:
- Edges
- Corners
- Seams between tape pieces
This creates that slightly dirty, timeworn look.
5. Add Subtle “Wear and Tear.” (optional)
To mimic aging:
- Lightly sand edges after everything dries
- Gently peel back tiny corners of tape
- Add faint scratches with sandpaper or a nail file
Less is more, you want “naturally aged,” not damaged
7. Seal (But Keep It, Matte or satin finish)
Bruh on the MNod Posge sealant. Brush in one direction and push down any bits of taoe that are sticking up. The Mod Podge will stick down any stubborn corners.
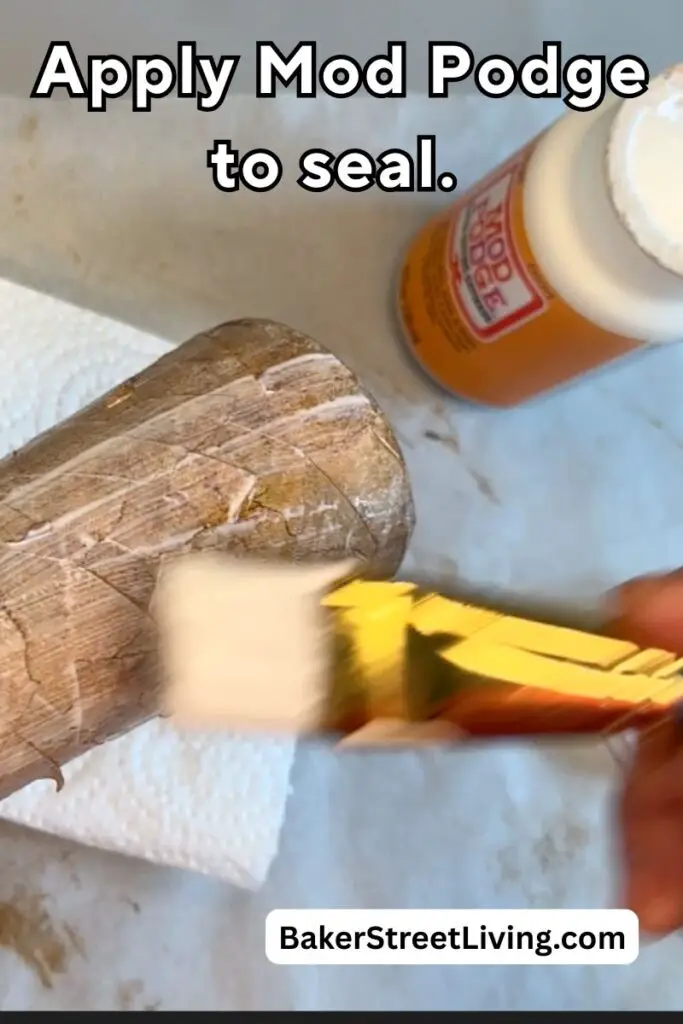
Matte – satin or Glossy
- Glossy = shines and is new-looking
- Satin – hint of shimmer but still looks sgaed.
- Matte = soft, aged finish
Apply thin coats so you don’t lose the tape’s texture or create brush marks.
Allow your piece to dry.
Once dry, it is ready to use or embellish with jute twine for a rustic farmhouse look.
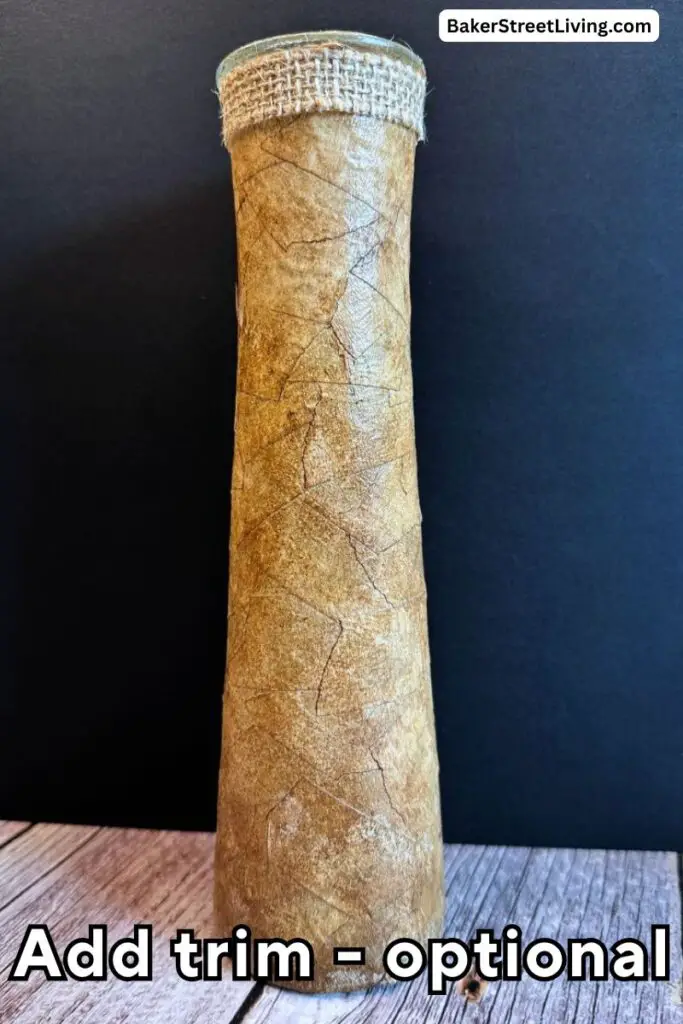
For more aging, add a hint of colour to the Mod Podge with acrylic paint.
Pro Tips for a True 70s Aged Look
- Slight yellowing is your friend
- Uneven colour makes it believable
- Focus aging around edges and high-touch areas
- Combine multiple techniques (stain + sanding = best results)


The Secret to Authentic Aging
The biggest trick? Don’t overdo it.
Real vintage pieces aged gradually over time, so your project should look subtly worn, not heavily distressed. Step back often and stop when it just starts to look old.
This 1970s-inspired decoupage using masking tape technique is like stepping into a time when crafting was simple, resourceful, and full of personality. Whether you’re decorating your home or creating content for your blog or social media, this nostalgic craft is sure to stand out.
If you love retro DIY projects, this is definitely one to add to your list.

This website contains affiliate links. As an Amazon affiliate, I earn a small commission from qualifying purchases (at no cost to you).