
Content Created by Tracey of Baker Street Living 
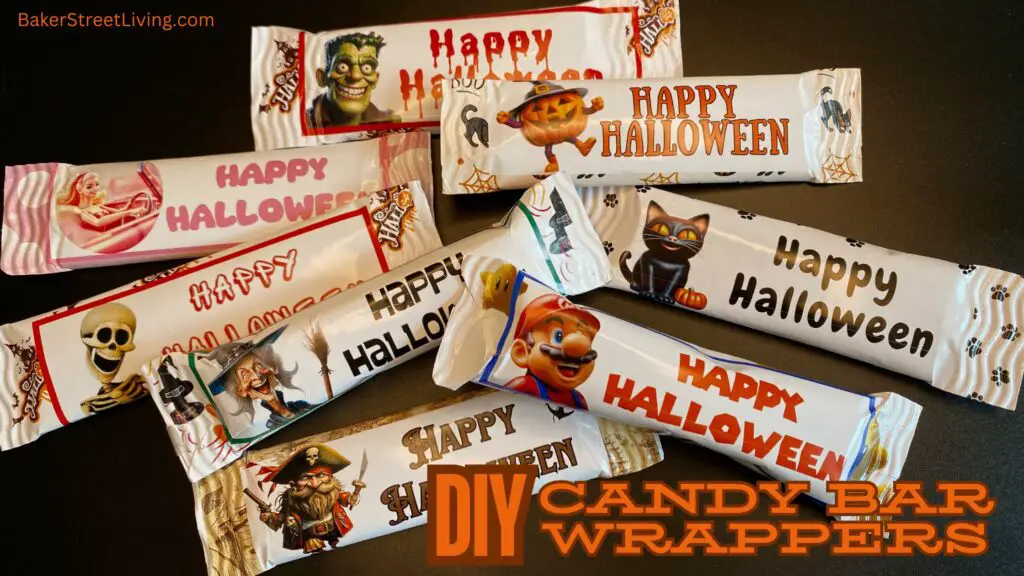
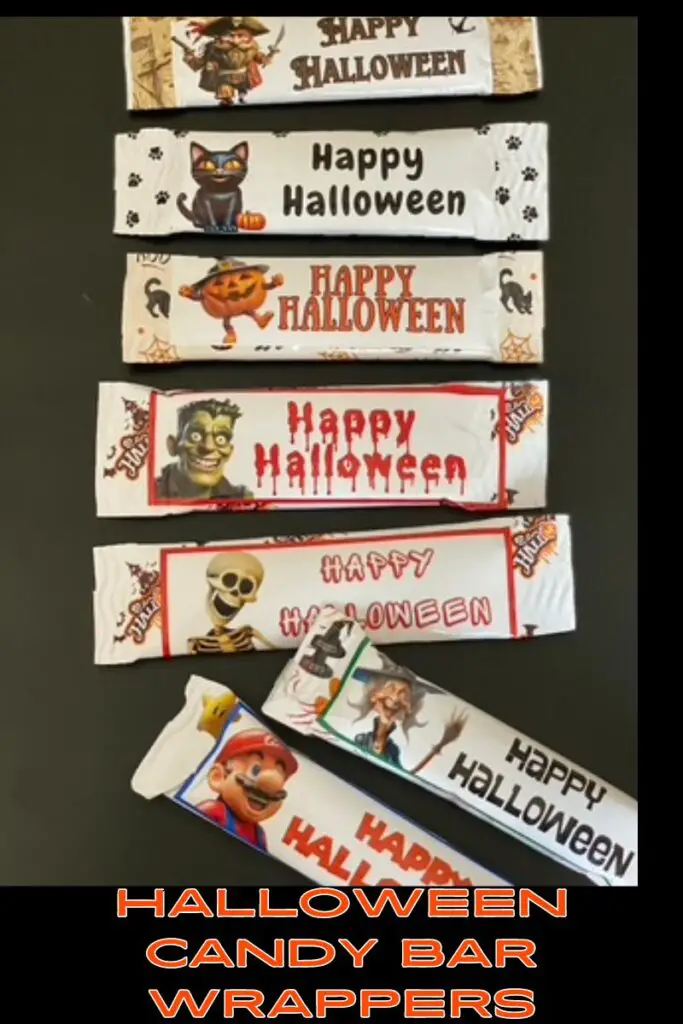
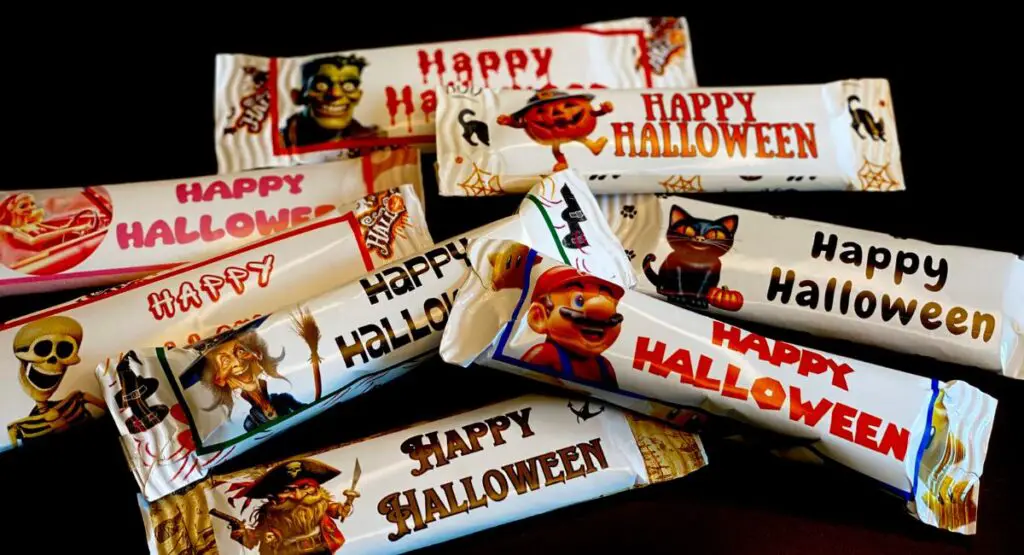
These DIY Candy Var Wrappers are perfect for classroom handouts or making special handouts for relatives and neighbours. Sometimes, adding personal touches makes an ordinary event a little extra special. These are especially great when you are handing out candy to someone with dietary restrictions. It’s an easy way to make sure that the right candy goes to the right person.
Supplies List
This website contains affiliate links. As an Amazon affiliate, I earn a small commission from qualifying purchases (at no cost to you).
- Brochure Printer paper
- Double Sided Tape
Craft Room Tools
- Computer – access to Canva (a free design program)
- Printer – inkjet
- Measuring tape
- Paper trimmer or Scissors
- Paper Crimper – optional
How to make DIY Candy Bar Wrappers
Feel free to use our 6 free designs for personal use. Please do not use our designs commercially or for self-promotion without written permission from us.
Create A Custom Design
Sign up to Canva to get started if you don’t have a Canva account.
1 – Measure the length of the candy bar and add 1.5 inches.
2 – Measure around the candy bar and add 3/4 of an inch. This will be the wrapper width including allowances for crimped ends and glued back.
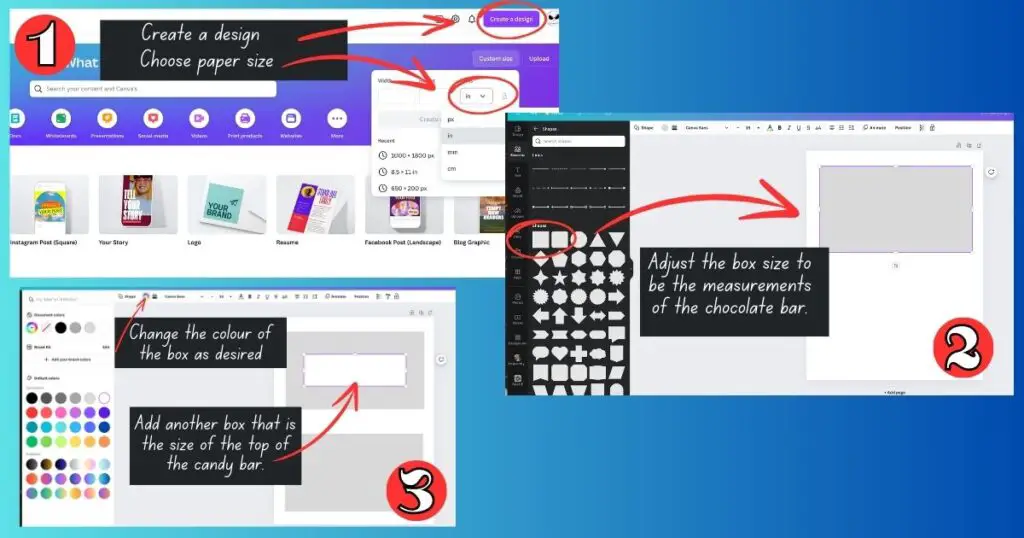
3 – Go to Canva
4 – In the upper corner of the home page, choose “Create a new design”
5 – Change the measurements to the size of your printer paper (8.5 x 11″)
6 – Measure across the top of the candy bar. This will be the top label portion of the wrapper
6 – On your Canva canvas, create a square (rectangle) shape from the elements tab on the left side.
7 – Adjust the size to equal the measurements of the candy bar wrapper.
8 – Create another box that is the size of the top of the candy bar and center it on the wrapper box.
9 – Upload images or choose from the elements tab and place them onto the top rectangle.
10 – Select the Font tab from the left side menu and type your desired wording. To change the font, click on the font title on the top menu bar. Choose a font.
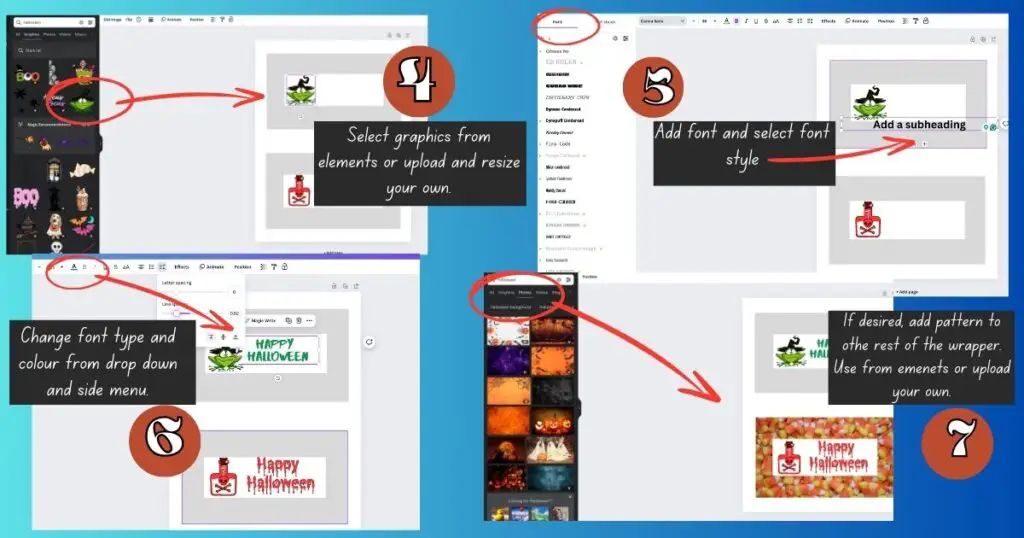
11 – Browse the styles and choose a font. Change the size, alignment and colour of the font from the drop-down menu bar along the top.
12 – Add graphics or backgrounds to your wrapper from the elements on the left side panel, or upload your own. When uploading your own, the easiest way is to drag and drop the image into the canvas from an app or another program on your computer. The image will then be stored under the uploads tab on the left side panel.
13 – Once you have your customizations done, repeat for as many wrappers as you choose before printing (to save paper)
Printing and Cutting Your Wrapper
1 – You can print from Canva, or you can download the image to your computer to print later. Once you close Canva, your document will still be there when you return to Canva. The auto-save makes it easy to go back later and change the printable or add to it.
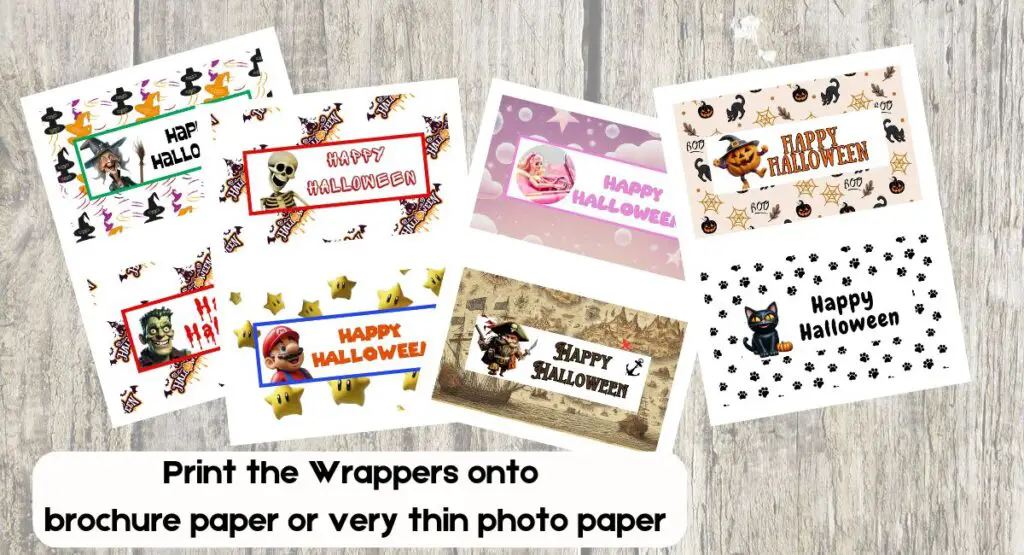
2 – When printing, you can choose between PDF Print or Image. I like to choose PNG Image as I get the best colour results when using the brochure paper.
3 – Choose “best quality” for printing.
Trimming
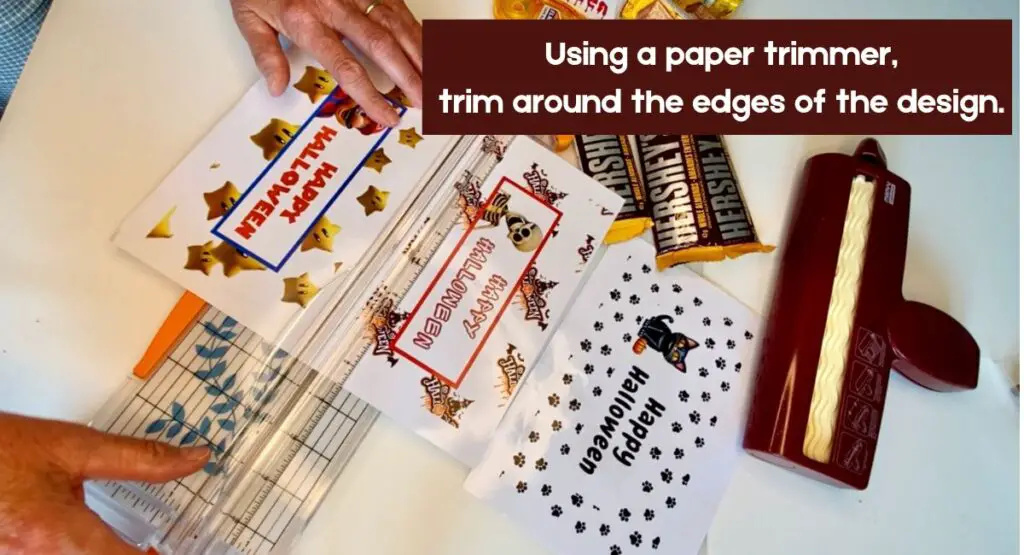
I use a sliding paper trimmer or guillotine-style paper trimmer, but you can use scissors.
1 -Trim around the outer edge of the wrapper.
Applying the Wrapper
1 – Check to make sure the wrapper fits the bar.
2 – Add a crease along the folds, where the wrapper goes around the bar. *This step isn’t necessary. but makes the process easier.
3 Run a bead of double-sided tape along the top of the edge of the back of the bar and the inside of both ends.

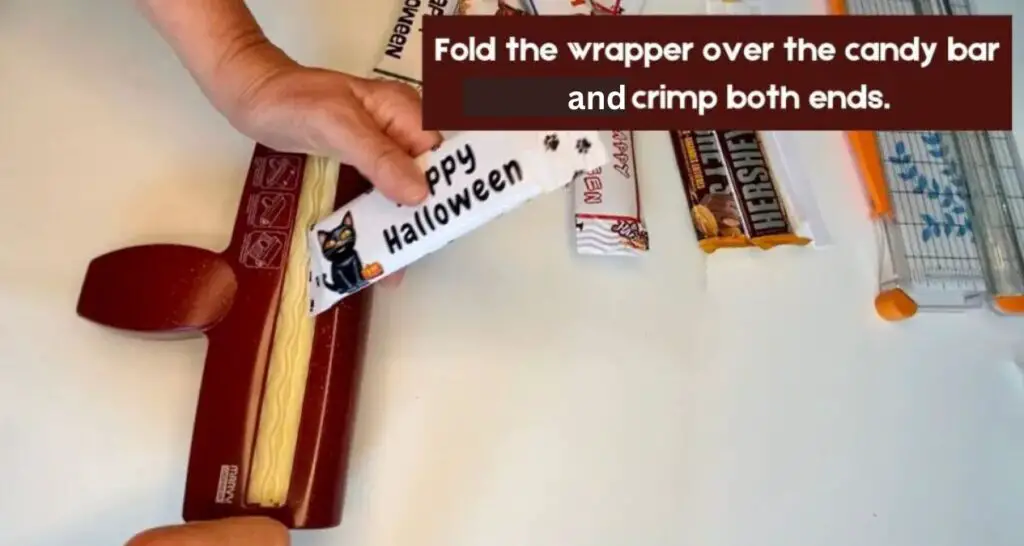
4 – Carefully fold over the wrapper, adhere to the long side, and then pinch both ends together.
5 – Using a paper crimper, crimp both ends of the bar.
6 – You are now finished making your DIY candy Bar wrappers. I bet they look amazing.

Pro Tips and FAQs
Choosing Paper
Make sure that the paper type is compatible with your printer. Some brochure papers are not compatible with some models of inkjet printers.
Brochure paper or paper that is for flyer use is the best choice. It is very light and has a nice sheen. It is available in both matte, double-sided and one-sided. I use one-sided glossy, as it is a little cheaper than double-sided and no one will be looking at the inside.
Look for paper that is instant dry and water resistant.
About the Double-sided Tape
For ease of use, I chose a double-sided tape in a dispenser. This makes it easy to apply, resulting in neat seams.
I do not recommend glue dots or any thick adhesive. It makes the bar look bulky.
I don’t recommend using glue as it can be messy and make the crimped ends harder to crimp.
Resizing our Designs
If you are using our designs, you can crop them and reuse them in Canva. Depending on the size adjustment needed, you can make some size changes when printing.
I hope you have enjoyed this easy, fun-to-make project. Get creative and make some candy bar wrappers today.

This website contains affiliate links. As an Amazon affiliate, I earn a small commission from qualifying purchases (at no cost to you).