
Content Created by Tracey of Baker Street Living 
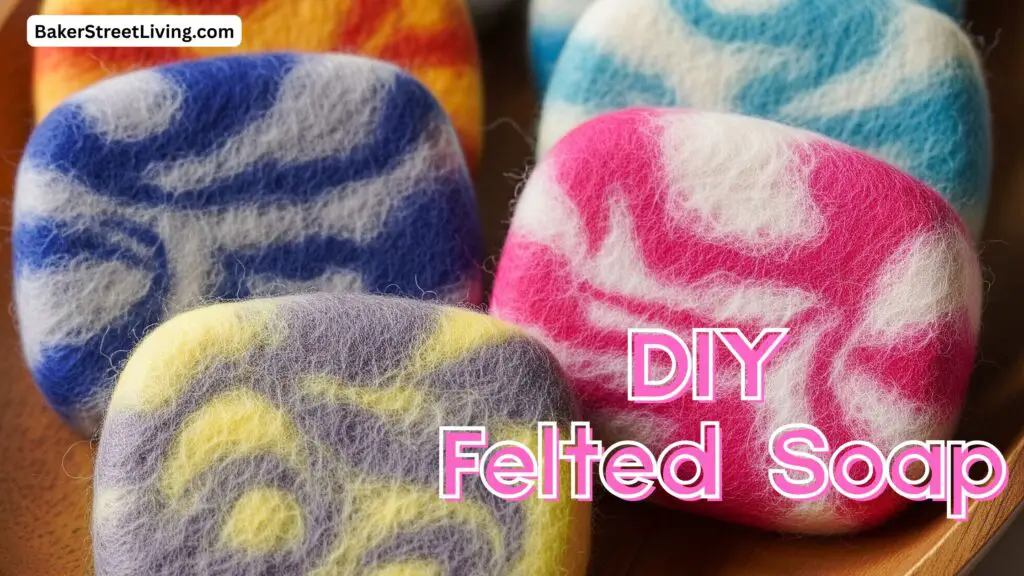
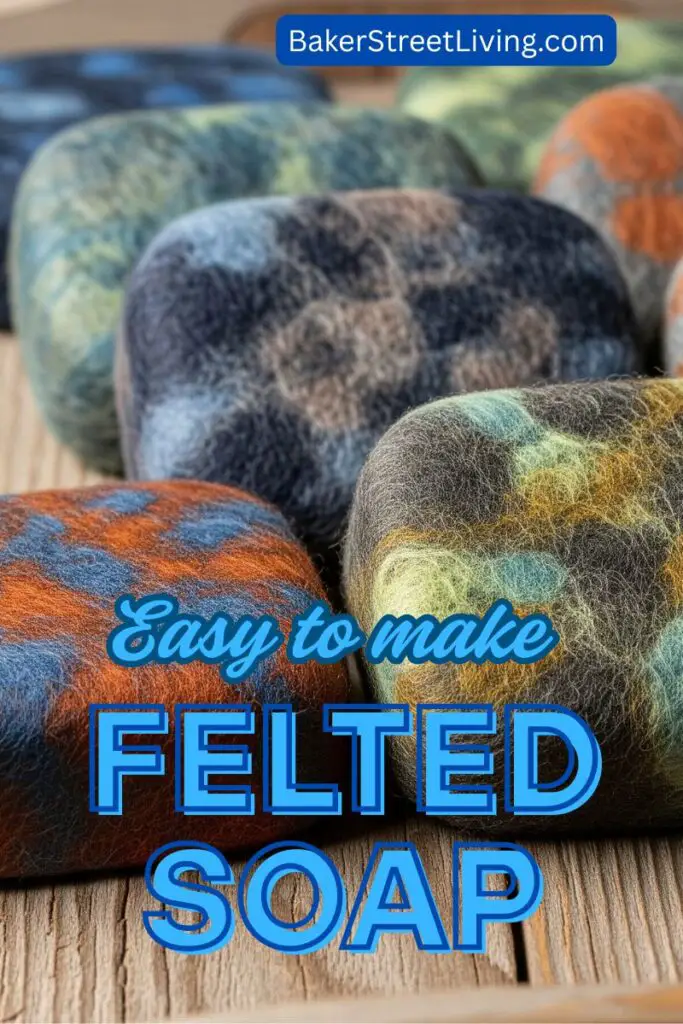
As an avid gardener and wool felter, I couldn’t resist the opportunity to combine gardening and wet felting into one project. This easy-to-do DIY Felted Soap is so easy and makes cleaning up after gardening a breeze. Felted soap isn’t just for gardening. In this tutorial, we will show you some ways to customize your felted soap for special occasions or as decorations.
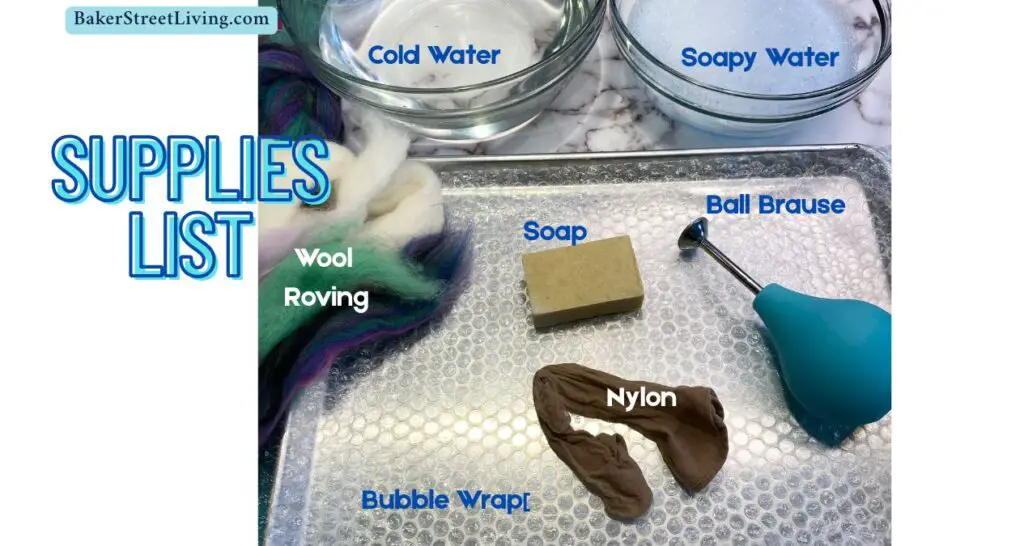
Supplies List
This website contains affiliate links. As an Amazon affiliate, I earn a small commission from qualifying purchases (at no cost to you).
- Wool Roving
- Good Quality Bar of Soap (rounded edges work best)
- 1 Nylon Stocking
- 2 Bowls
- Piece of bubble wrap
- Ball Brause or Spray Bottle.
How to Make Felted Soap
DIY Felted Soap Instructions
- 1 – Place some bubble wrap on a flat surface
- Lay pieces of wool roving in one direction in a thin layer
- Add another layer in the opposite direction and then repeat twice.
- Get the bar of soap wet.
- Place your bar of soap in the middle of the felt, then wrap the wool tightly around it.
- Once the wool is fully wrapped around the soap, add water to the wool using a ball brause or bottle.
- Place it the damp soap into a nylon stocking. Put a knot in the stocking to make it easier.
- Fill one bowl with hot water (or as hot as you can stand) and one with cold water.
- Dip the soap(and stocking) into the hot water.
- Start rubbing the nylon-covered soap onto the bubble wrap. The key to making felted soap is providing abrasion to make the felt stick together. Do this for 8 to 10 minutes. Dip the soap back into the hot water to reduce the amount of foam.
- Remove the soap from the stocking.
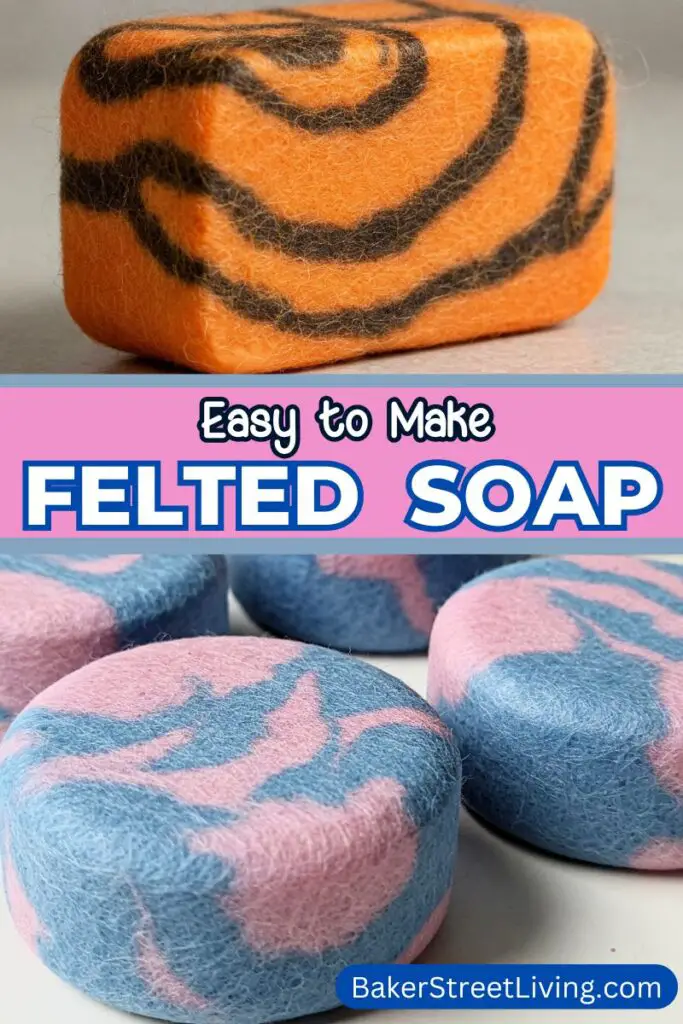
- If desired, add very thin strands of wool to the soap to get a more marbled pattern. This is optional. I do this when I’d like a more decorative soap, especially when giving it as a gift.
- If you wish to add specific shapes, needle felt a small design onto the soap. Make sure you don’t poke too deep, as you don’t want to penetrate the soap or, worse, break the needle in the soap. Keep the needle straight up and down and poke lightly until you have the desired sign. I have found that this can take longer than regular needle felting, as you can not go too deep.
- Allow the felted soap to dry fully.
- Once dry, add more needle-felted designs if desired.
- Use and enjoy or give as gifts.

Tips and FAQs
Choosing Soap
Soap colour
Some soaps contain dyes that will mix with the wool. For example, I tried a bar of black charcoal soap, and the wool turned grey after a few uses. It was still usable but not very attractive. To quickly check if the colour will run, get the soap wet and into a lather. If the lather is coloured, then that is what will run into the wool. If th4r4 is no colour run, then the wool will stay as is.
Rounded Edges
Rounded corners work better than perfectly square corners. To round off the corners, use a vegetable peeler to remove sharp corners. If there are writing or designs stamped into the soap, shave them off with the vegetable peeler before you start.
Choosing Wool Colours
When making your felted soap, it is important to remember that light colours such as white ivories and light pinks tend to look dirty after a couple of uses. It is ideal to choose colours that don’t appear dirty quickly or hide dirt. Good options are dark, purples, blues, and greens. The dark colours appear rich, and you can add light touches of lighter colours in small amounts as accents.
if you are making your DIY felted soap for decoration or a general purpose, choose colours according to your personal preference. It is important to remember that if the soap is being used by children, after painting, crafting or a messy meal, the soap could be stained. Dark colours tend to hide stains and will last longer.
Considerations
There are a couple of considerations to remember when making a DIY felted soap.
1 – Allergies – if you are giving your felted soap as a gift, make sure the receiver does not have a wool allergy. Roving wool is 100% wool and may not be appropriate for people with allergies.
2 – Pets – Believe it or not, cats love wool. They don’t just love it. They love to tear it apart. I know this from personal experience, as I have had many projects destroyed by forgetting to put them away. If you have cats that will have access to the felted soap. It may not be the best choice.
Advantages of DIY Felted Soap
Making felted soap is a great way to use up leftover soap bits. You can wrap them all up in a small bundle, covered with all roving, and then make a decorative outer layer. This is a great way to recycle pieces of soap that are too small to use.
Felted soap tends to last longer than a plain bar of soap. You don’t have the sticky residue left over that gets wet and gooey in the soap dish. The wool absorbs all of the leftover dampness in the soap and does not run down the sides of your sink. It looks great and keeps the mess to a minimum.
Using Natural Unprocessed Wool
Raw wool that has not been processed is not ideal for making felted soap. Part of the processing is the multiple washes and the type of soap used to clean the wool. Raw wool is not difficult to card, but it can be hard to remove the lanolin smell. I am fortunate to have a family member in the sheep business and have had access to freshly shorn fleece. It is a lot of work getting it clean and scent-free. As soon as it gets wet, the smell of the lanolin returns. It’s not exactly pleasant.
Adding Designs to Felted Soap
For Marbling, add coloured roving strands to the wool layer before adding the soap. Once you have added the bar of soap and are working on felting, you can always add more to the design and keep working on it.
For specific designs, such as hearts, snowflakes, or flowers, you can needle-felt them in. This can be hard, but it is doable. Add a couple of extra layers of wool when you are laying it out on the bubble wrap. When you are poking with the needle, don’t go too deep. If a needle breaks and sticks into the soap, you will need to cut the wool off the soap to remove the needle fragments. Be gentle, for the best results.
I hope that this has inspired you to make some Felted Soap and that you have fun making some for yourself or to share with others.

This website contains affiliate links. As an Amazon affiliate, I earn a small commission from qualifying purchases (at no cost to you).