
Content Created by Tracey of Baker Street Living 
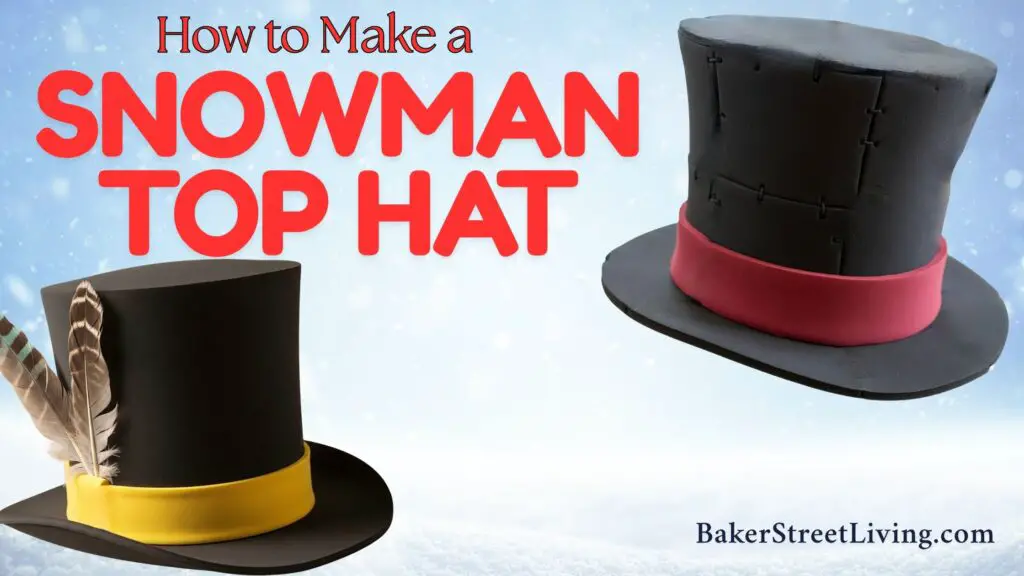
If you’re looking for a cute and easy winter craft, this foam snowman hat is a perfect project! Whether you’re creating a snowman centerpiece, decorating your front porch or making festive holiday décor, a classic snowman top hat adds the perfect finishing touch. We provided both a free printable pattern and a free SVG file for use on a cutting machine.
What You’ll Need:
This website contains affiliate links. As an Amazon affiliate, I earn a small commission from qualifying purchases (at no cost to you).
- Craft foam sheets (or preferred surface, felt, paper, etc.)
- Hot glue gun and glue sticks
- Scissors
- Optional: Red felt or ribbon, holly leaves, buttons, glitter, or faux snow for decorating
For Cutting Machine Users
- Cutting Machine
- Standard Cutting Mat
- Cutting Blade (compatible with your chosen material)
- Weeding Spatula
For Printable Pattern Users
- Scissors
- Printer
- Compass or Circle Cutter
How to Make a Snowman Top Hat
Download the free Pattern from our Free Resource Library.
For Cutting Machine Users
Once you have the pattern downloaded, upload it into your cutting machine software. I am using Cricut Design Space and will be using Cricut terminology hereafter.
You will likely want to resize the pattern. I recommend resizing before you ungroup it. This will ensure that the brim fits the crown.
Once Resized – Ungroup.
Duplicate the Brim piece.
If you wish to cut a band, create one using the rectangle shape.
Select Make.
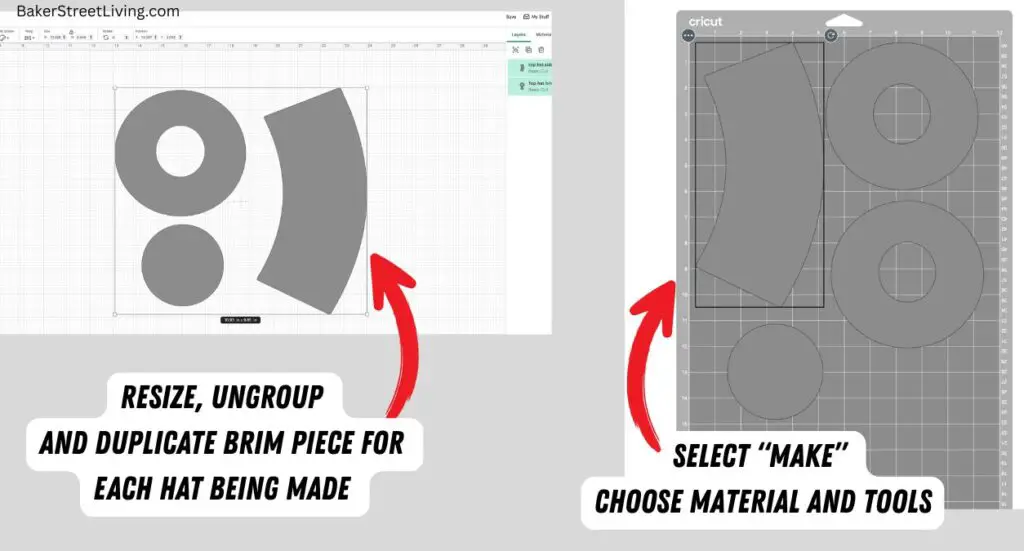
Choose your material and blade/Mat accordingly. (For thin craft foam, I get the best results with the fleece setting and extra pressure, using the rotary tool)
Cut and Weed.
For Printable Pattern Users.
Download and print the pattern.
Cut out the pattern pieces.
To Resize – Use the pattern pieces as a guide to enlarge them, or use a copy machine and enlarge.
Place the pattern pieces onto your material and pin or trace the pattern using chalk.
Cut the pieces – 1 top, 1 crown and 2 brim pieces.
Assemble the Snowman Top Hat
Run a bead of hot glue down one side of the crown.
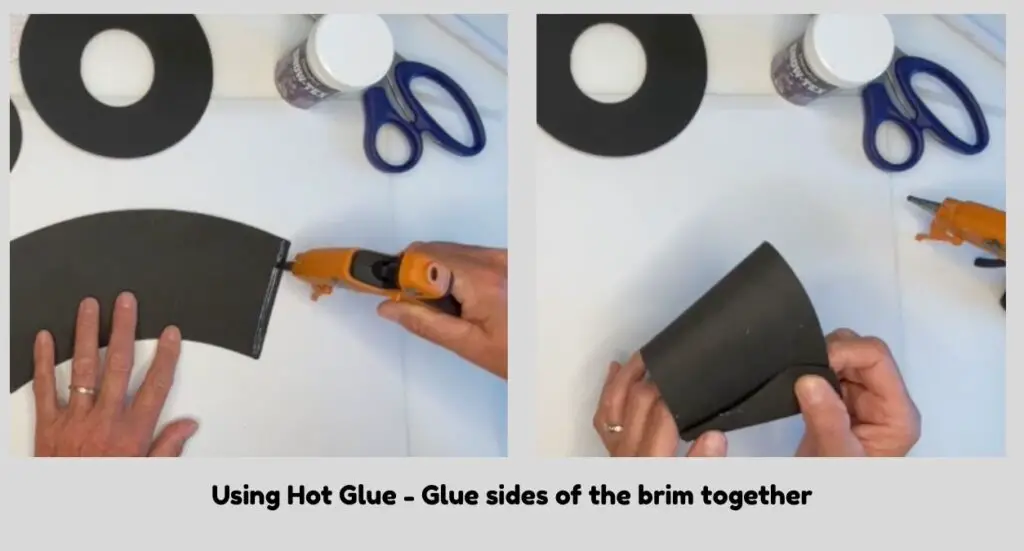
Press the other side of the crown piece, adhering together.
Cut small slits in the bottom of the crown. Cut them all the same length
Slip one brim piece over the slits.
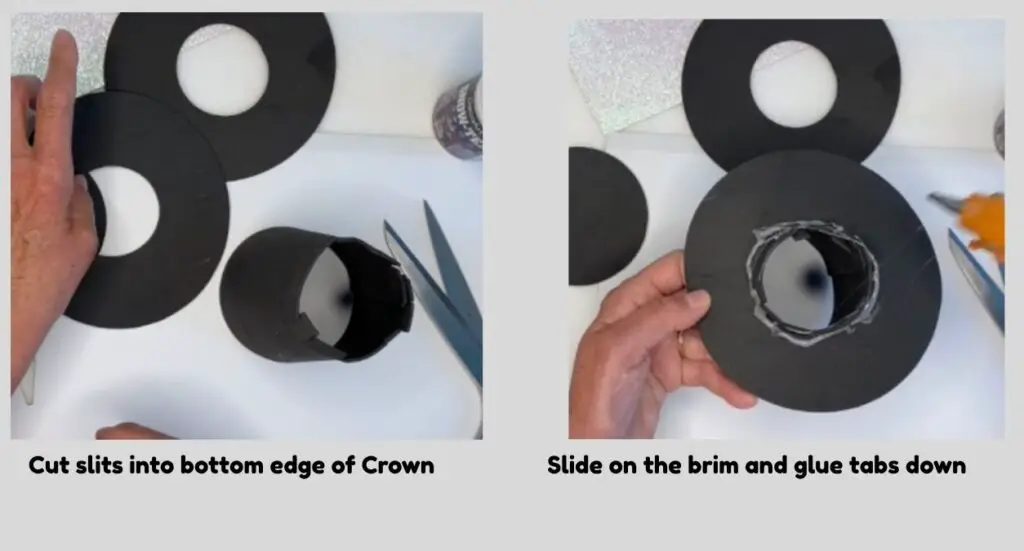
Fold the bottom slits outward. If your foam is less pliable and they don’t stay, try scoring around the bottom of the folds.
Apply glue to the slits and press down the brim. Allow the glue to dry, to keep the brim in place while you continue assembling.
Turn the hat over and add a liberal amount of glue to the underside of the brim.
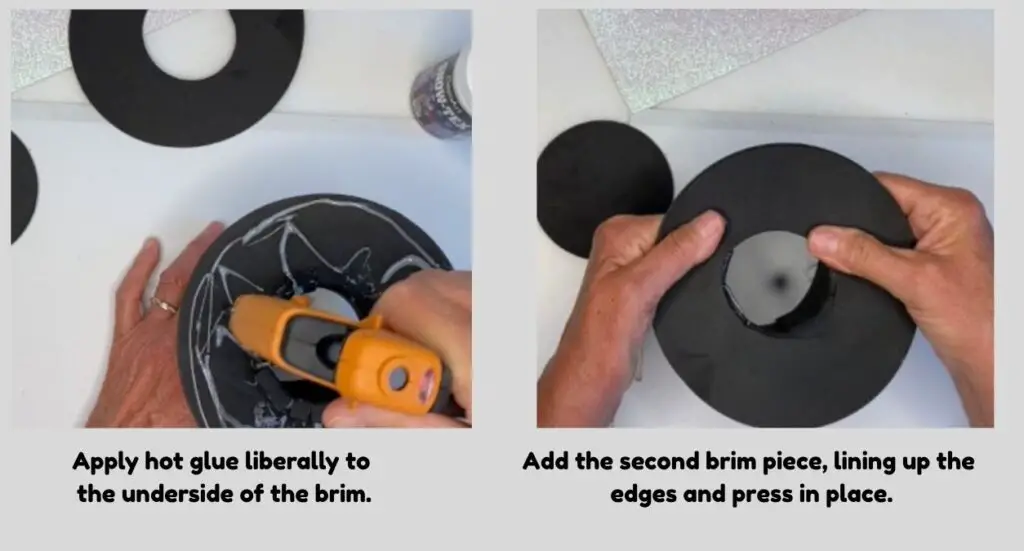
Place the second brim piece on top, lining up the holes in the hat.
Press and add more glue if necessary to seal any gaps.
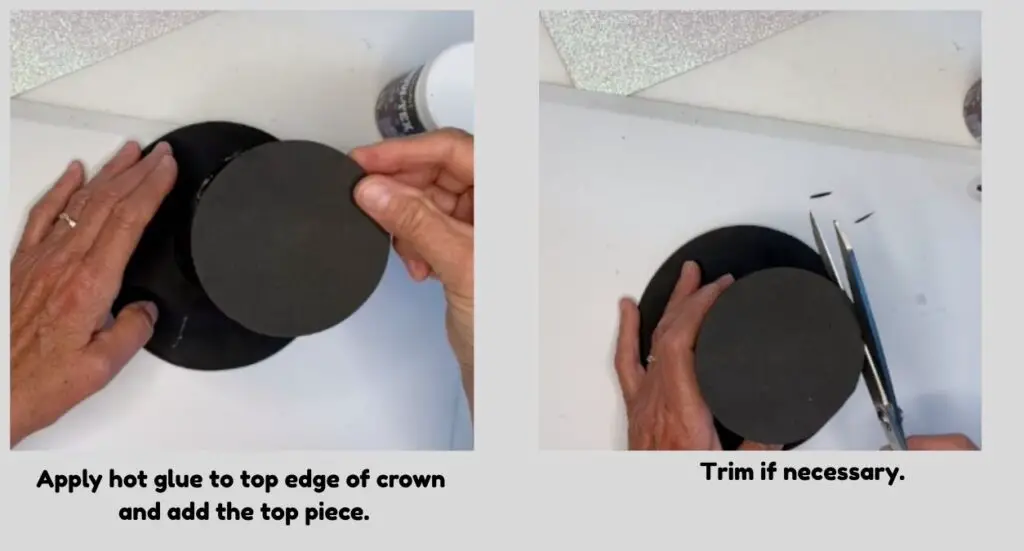
Carefully add glue around the top edge of the hat (see notes for alternative method)
Place the top piece onto the hat and press to secure.
Trim, if necessary.
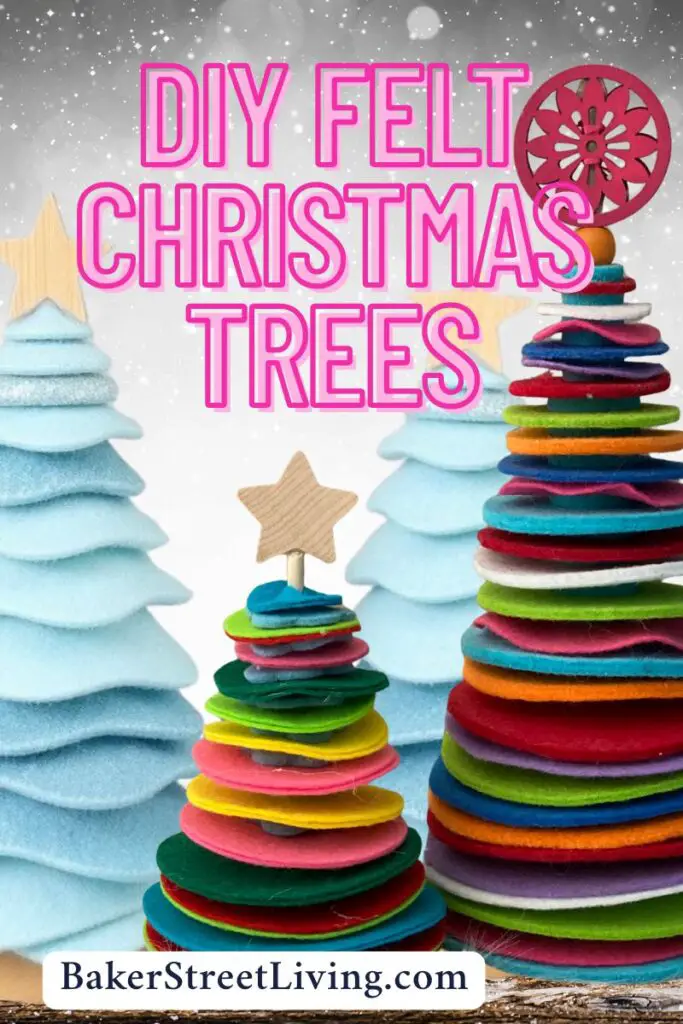
Allow to dry.
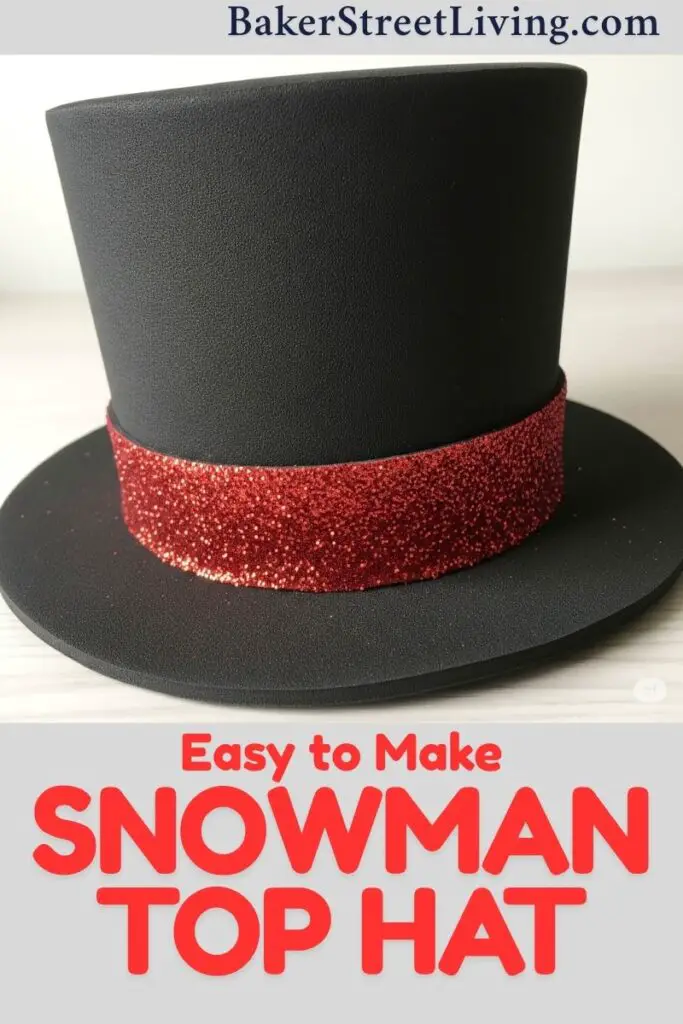
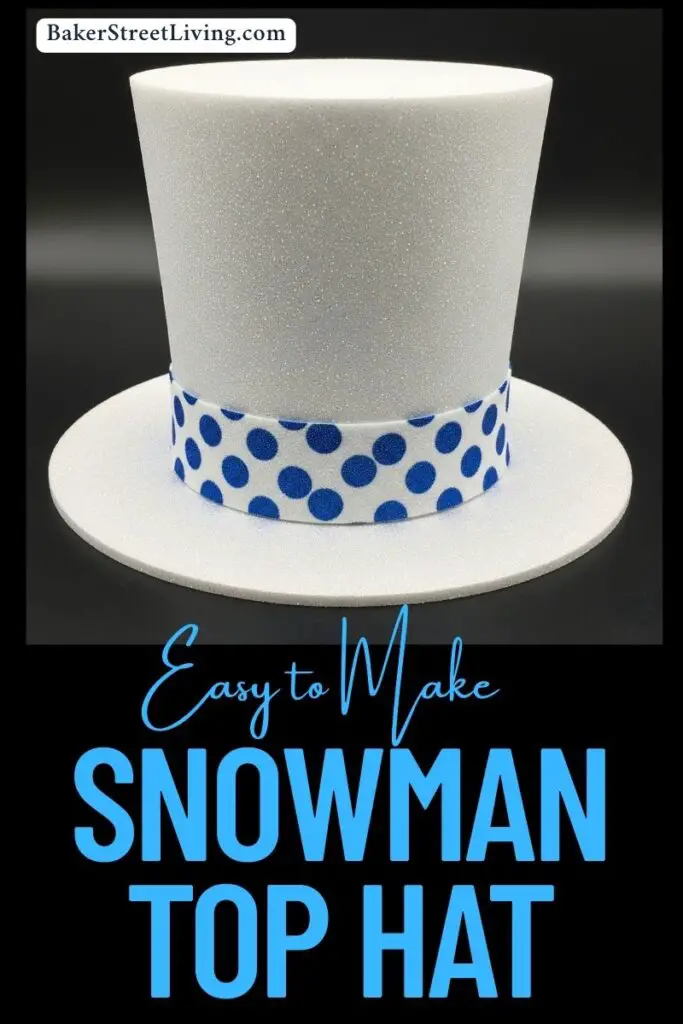
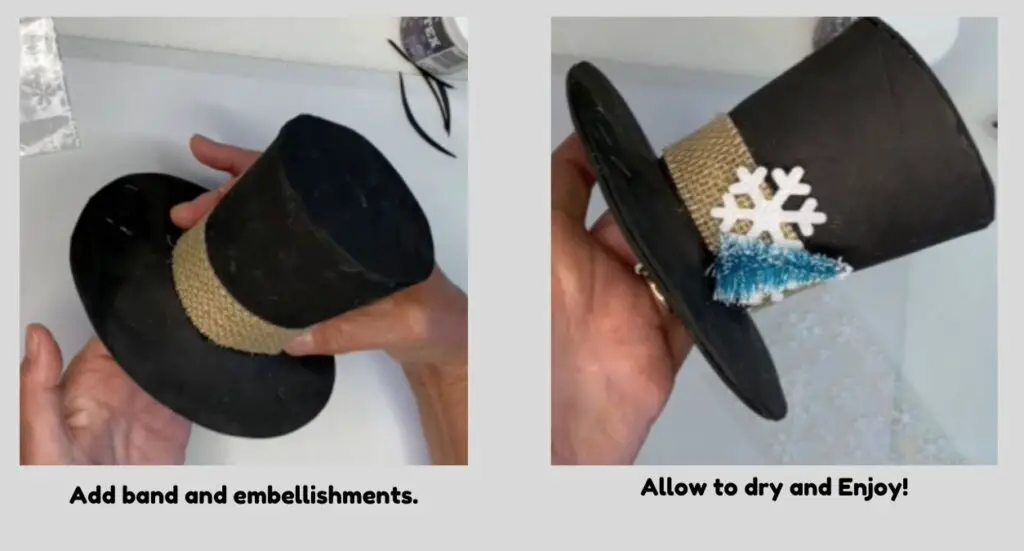
Add a band around the base of the crown.
Adhere embellishments, if desired. (see below for embellishment ideas.

Alternative Top Method
If you find it difficult to apply glue to the top edge, or you are using paper or felt in place of the foam, cut small slits in the top of the crown and fold them inward.
Apply glue onto the top of the slits.
Place the top piece onto the sides, lining up the top piece to the edges and press to adhere.
Turn the hat upside down on a flat surface to flatten it out.
Embellishment Ideas
Looking for ideas? Here are a few:
- Buttons
- Glitter foam shapes
- Small plastic or silk popinsettias and flowers.
- Scrapbooking items such as mini trees, snowballs and winter-themed dimensional items,
- recycled jewellery
- Faux snow (Snow Tex)
- miniature birds
Tips for Making a Snowman Top Hat from thick EVA Foam.
EVA foam is difficult to fold over with slits. Add a thin piece of craft foam to the top and bottom of the crown and cut the slits into the thin foam. Fold the slits and continue adhering the thick foam.

This website contains affiliate links. As an Amazon affiliate, I earn a small commission from qualifying purchases (at no cost to you).