
Content Created by Tracey of Baker Street Living 
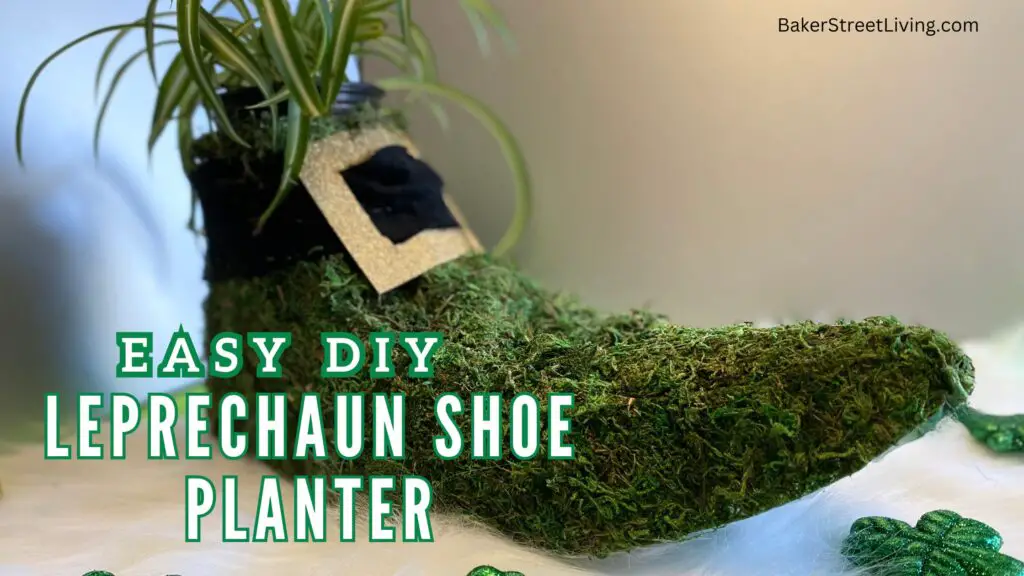
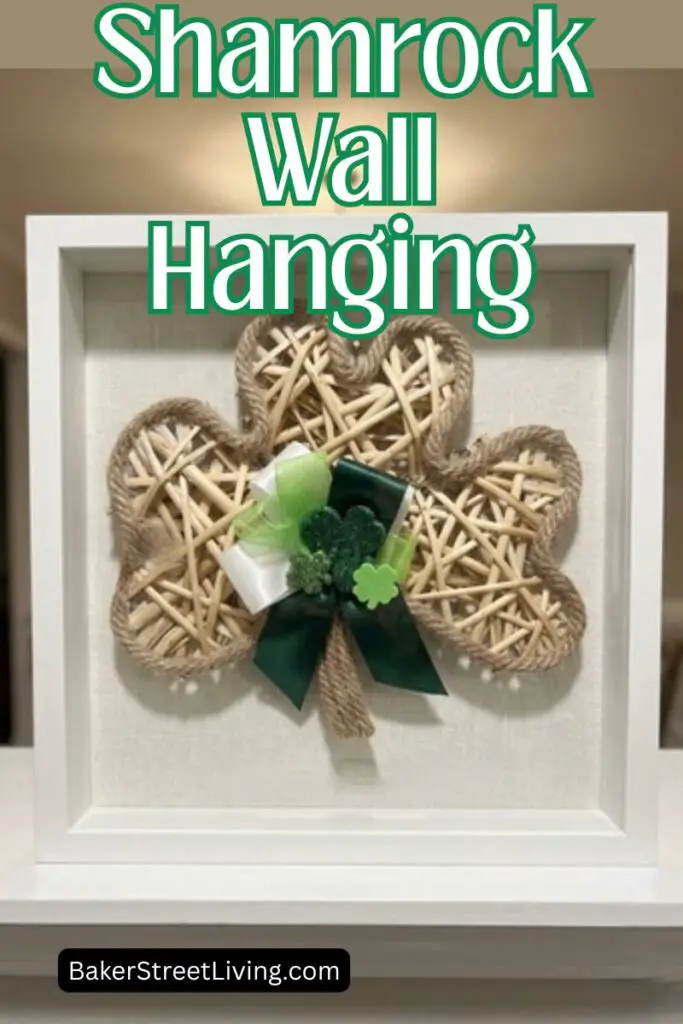
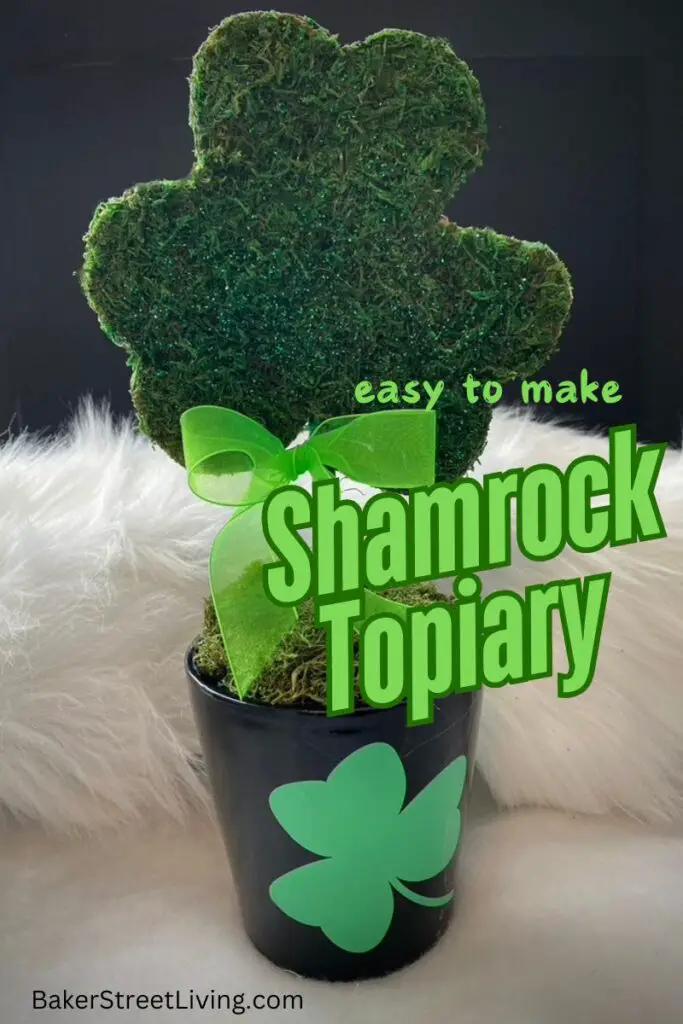
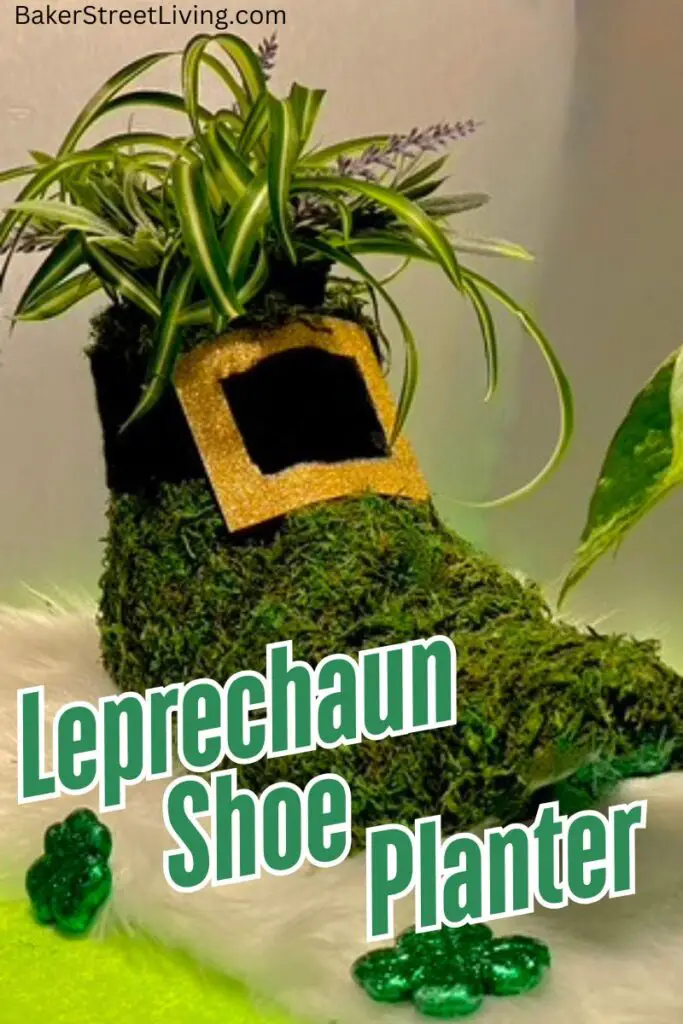
This DIY Leprechaun Shoe Planter is super easy to make and looks amazing on a sideboard, table, or front porch. This is also a great recycling project that kids will enjoy. Don’t forget to save the leftover moss for our cool and easy Shamrock Topiary.
This website contains affiliate links. As an Amazon affiliate, I earn a small commission from qualifying purchases (at no cost to you).
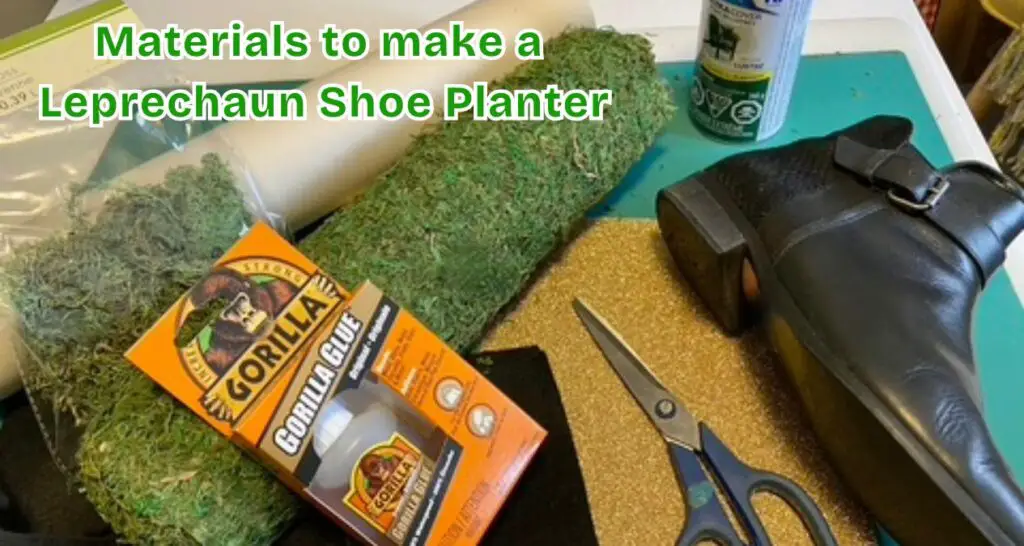
Materials List
- An Old Shoe or Ankle Boot (see Tips for where to find)
- Wire
- Aluminum Foil
- Paper from a newspaper or flyers (see Tips below for alternatives)
- Sheet Moss or fake grass matting
- Loose Reindeer Moss
- Black Felt
- Gold Glitter Foam (4-inch square is enough)
- Gorilla Glue (or other glue suitable for outdoors). If using indoors, I recommend hot glue.
- Duct Tape
- Small Jar or plastic plant pot that fits into the shoe.
- Green Spray Paint
- Alcohol Wipes or Rubbing Alcohol and a Paper Towel
Craft Room Tools List
- disposable Paintbrush
- Scissors
- Wire Cutters
- X-Acto Knife
- Cutting Mat
- Small ruler or straight-edge


This is a messy project. To make clean-up simple, cover your work surface with a plastic tablecloth and wear gloves. I didn’t wear gloves and had fun (not) getting the excess glue off of my hands!
How to Make a Leprechaun Shoe Planter
Step By Step Instructions
1 – Start by cleaning off the shoe. removing any dirt, oils or debris,
2 – Once the shoe is clean, wipe the surface of the shoe with an alcohol wipe or paper towel that has been dampened with rubbing alcohol. Allow it to dry
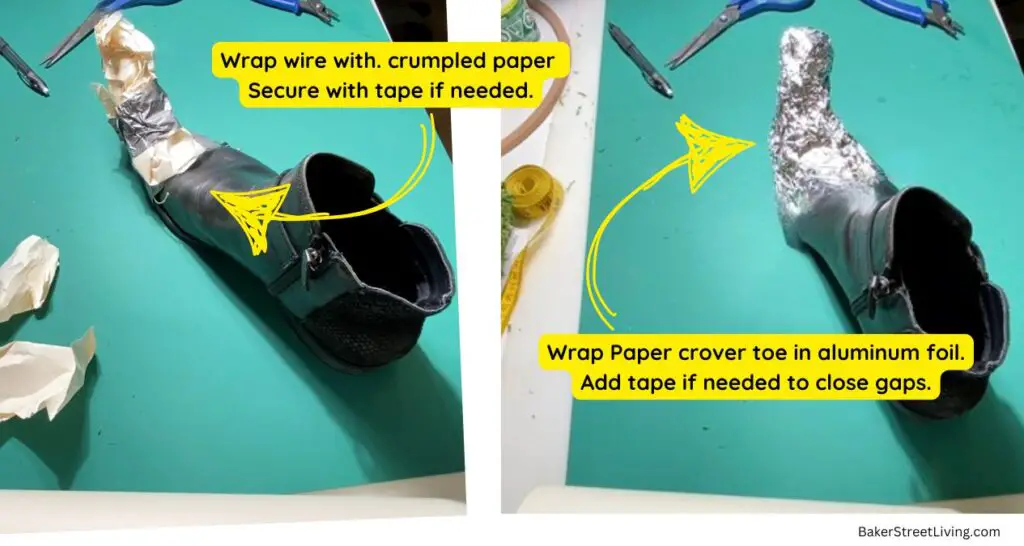
3 – Using wire cutters, cut the wire into a 10-inch-long piece. Bend the wire in half.
4 – Using duct tape, attach the bent wire to the toe of the shoe. Add multiple pieces of tape to ensure it is tightly secured, and the sharp ends are covered.
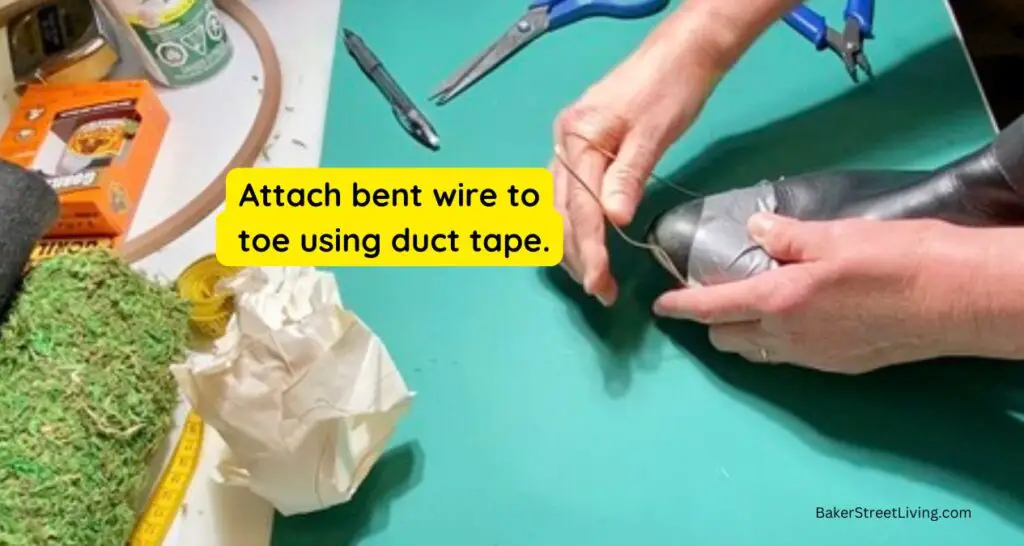
5 – Shape the wire into a point and curl it upward.
6 – Wrap the wire in paper and then cover it with a tight layer of aluminum foil. Use duct tape if desired to make it tight.
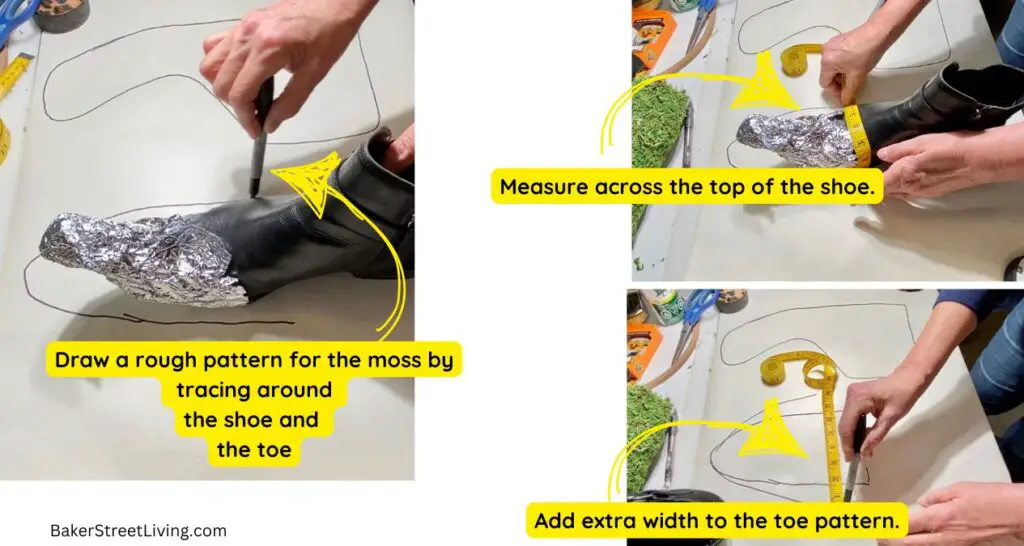
7 -Draw around the shoe by drawing a rough pattern for the sheet moss. Lay the shoe on its side and trace an outline for a side pattern, and then set the shoe upright and draw around the toe. Make sure you measure the width of the toe and add the extra width to the pattern. Cut the pattern out.
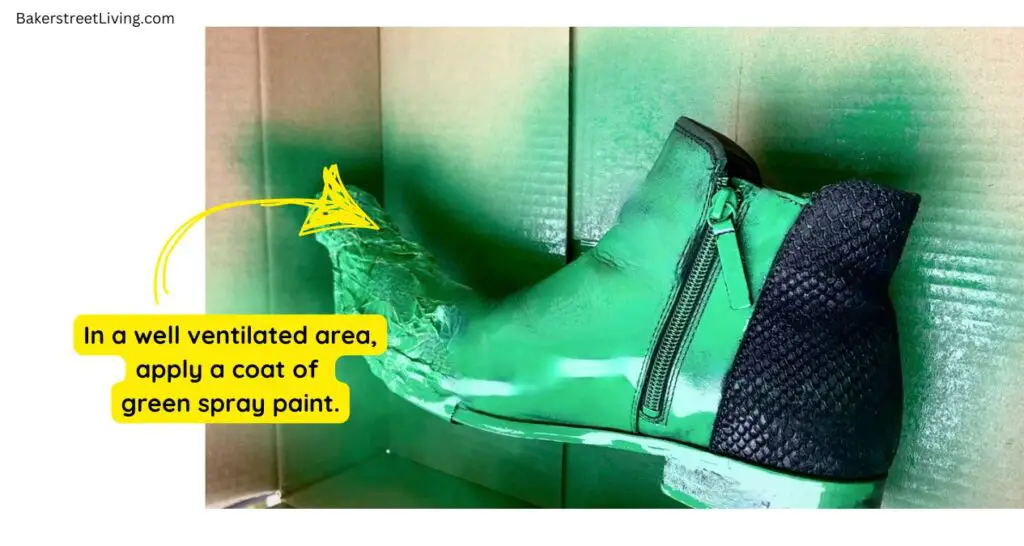
8 – In a well-ventilated area, apply a coat of spray paint. Any shade of green will do. The purpose of the paint is to give the finished Leprechaun Shoe Planter a deeper green colour when finished. If there are any thin spots in the moss, the green-painted shoe will help to hide the original colour of the shoe. Allow the paint to dry completely.
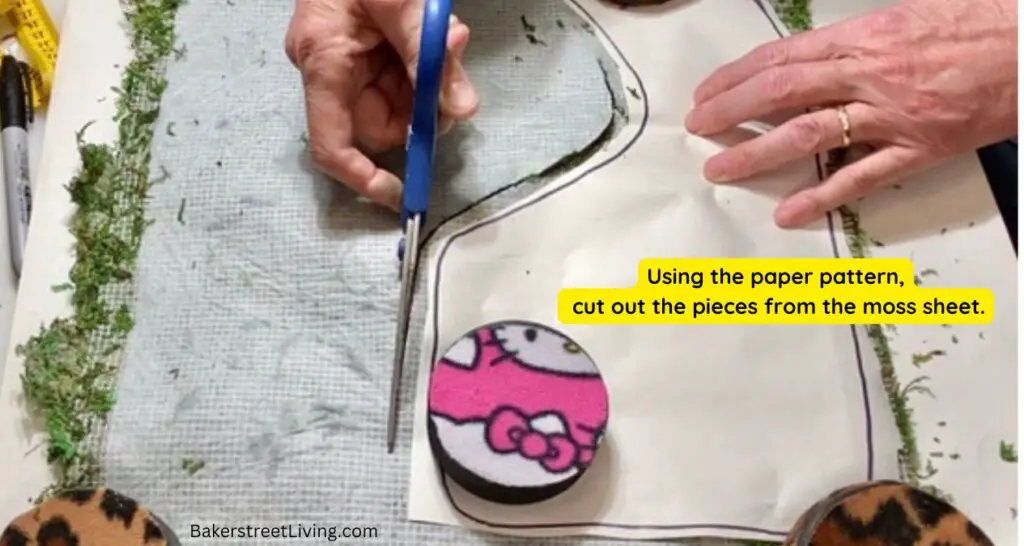
9 – Using your paper pattern, cut the pattern pieces from the sheet moss. Make sure to flip the paper pattern piece for the side over so you get the right cut for the opposite side of the shoe.
10 – Using a glue brush, apply a layer of glue to the surface of the shoe. It is best to do one part at a time. Do each side separately, followed by the heel and then the toe last. Press the moss into the glue, working your way around the shoe. Save the bits of moss that fall off, add glue along the edge of the pieces and add loose moss. This will cover the edges of the pieces.
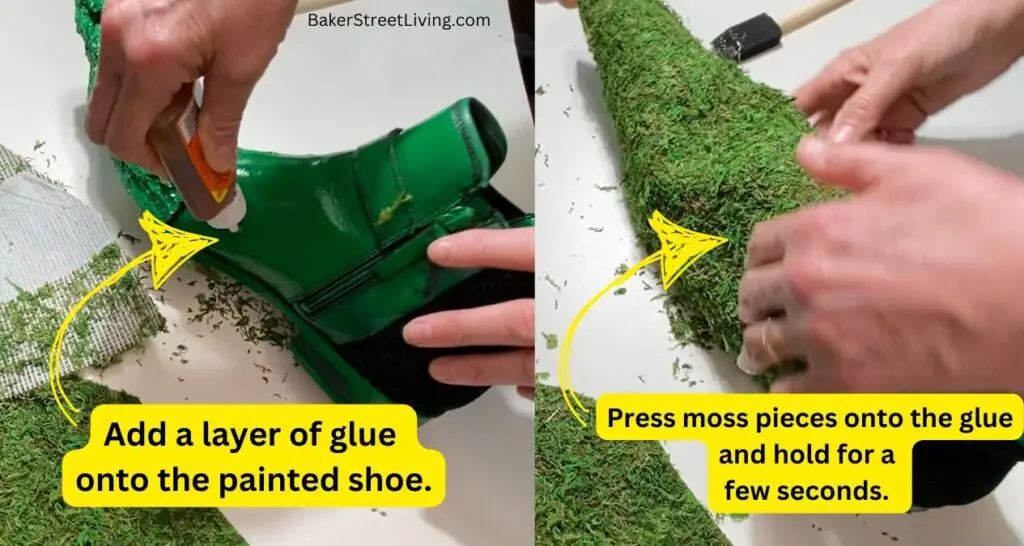
11 – Allow the glued moss to dry.
12 – Measure around the outside of the shoe and cut a band from the black felt to the length you measured and approximately 1.5 inches wide. (as seen in pic).
13 – Cut a square for the buckle from the gold glitter foam.
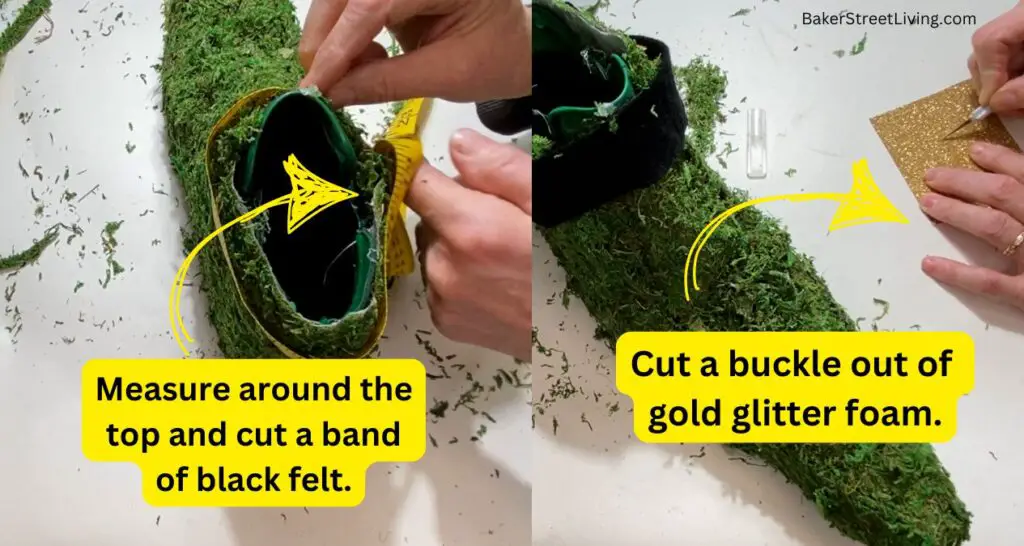
14 – Using your X-Acto Knife and ruler, cut the inner rectangles out of the glitter foam to form a buckle.
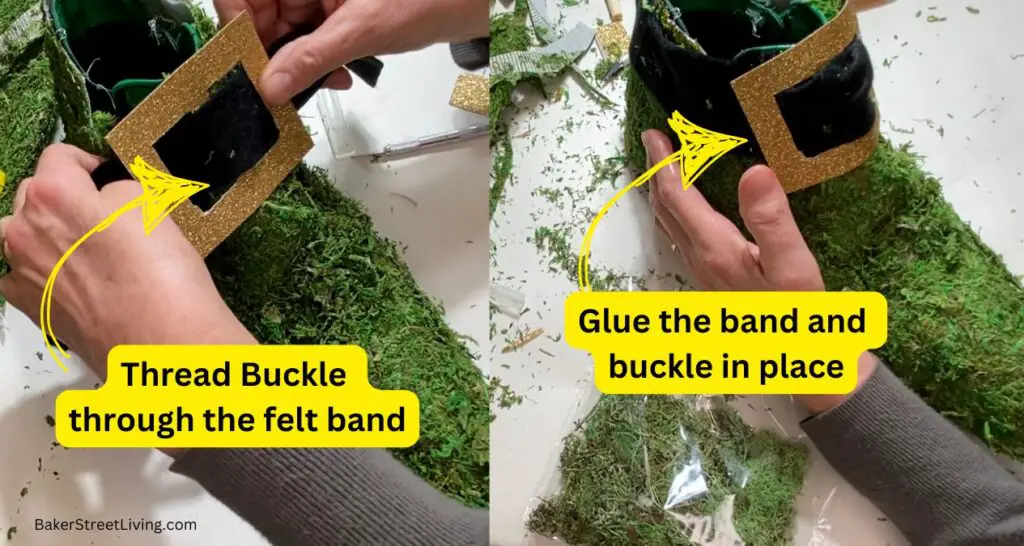
15 – Thread the buckle through the black felt band.
16 – Apply some glue to the back of the band and buckle, and secure it in place on the moss-covered shoe.
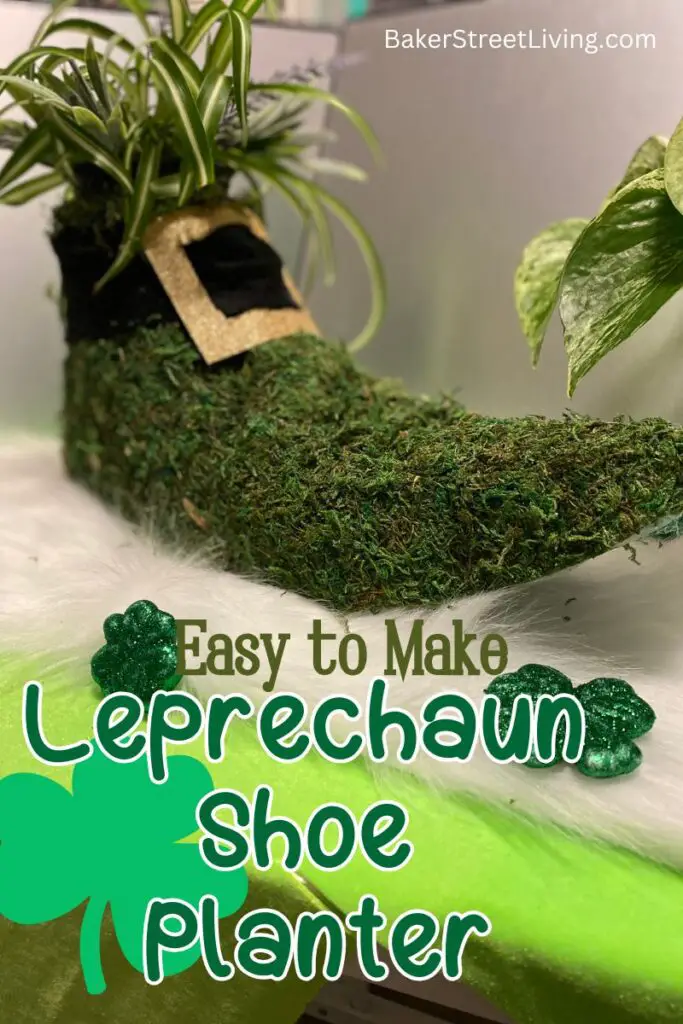
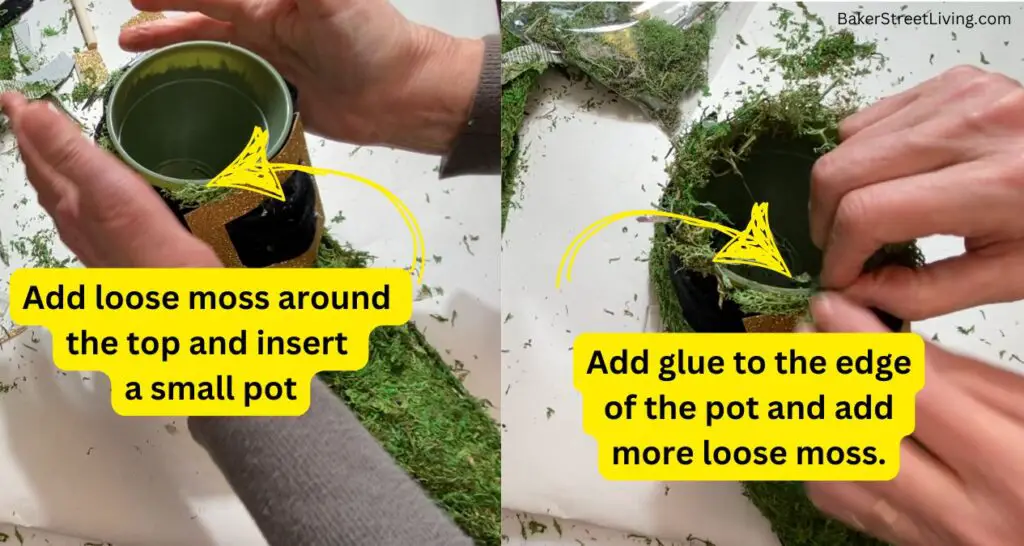
17 – Insert the small pot or jar into the opening of the shoe. You can glue it in place if you want it to be permanent or if you are hanging it on a vertical surface.
18 – Add some glue and moss around the opening of the shoe. This is optional, but it will cover up any shoe parts or edges of the pot.
19 – Insert a shamrock plant or your favourite plant into the pot.
20 – All that is left is to show it off.
Leprechaun Shoe Planter Tips and FAQs
Using an alternative glue.
You can use a basic Elmer’s glue or tacky glue if the shoe is going to be temporary and kept indoors. I have found that over time some of the moss falls off in areas, but if you don’t plan on keeping it for more than a few months, it will work fine. The thicker the glue, the better it will stick. Hot glue works very well, but is best used indoors.
For outdoor use, be sure to use a waterproof outdoor adhesive. Even if the shoe is kept out of the weather, the moisture in the air can cause the moss to fall off.
Indoor Vs. Outdoor use.
As mentioned above, make sure you are using good outdoor glue when using your leprechaun shoe planter outdoors.
Bird Advisory – The moss makes perfect nesting material for birds. If the shoe is accessible to birds, expect to lose some moss.
Bugs and Insects. – I would not recommend bringing the shoe back inside after leaving it outdoors. The moss attracts bugs and insects, and they will come in with the shoe. Yuck!
Alternatives to Newspaper stuffing
Good alternatives are any paper that crumples and will hold its shape. Some examples are newsprint paper (available in most craft stores), wrapping paper and thin construction paper. A non-paper item that works well is fabric p[pieces or rags.
Finding the ideal shoe
The best type of shoe to make a leprechaun shoe planter is a solid-sided one. Shoes that have an open weave, such as slip-on and running shoes, do not work well, simply because they absorb the paint and sometimes the glue. Choose high tops or ankle boots that do not have laces. The lower the heel, the better the result. If the shoes you choose have a heel, a chunky heel works better than a spiky heel.Cover the heel with tape when painting the short green and paint the heel black, if it isn’t black.
I hope you are inspired to make your very own Leprechaun Shoe Planter. It is super cute and is a great decor piece for St. Patrick’s Day.

This website contains affiliate links. As an Amazon affiliate, I earn a small commission from qualifying purchases (at no cost to you).