
Content Created by Tracey of Baker Street Living 
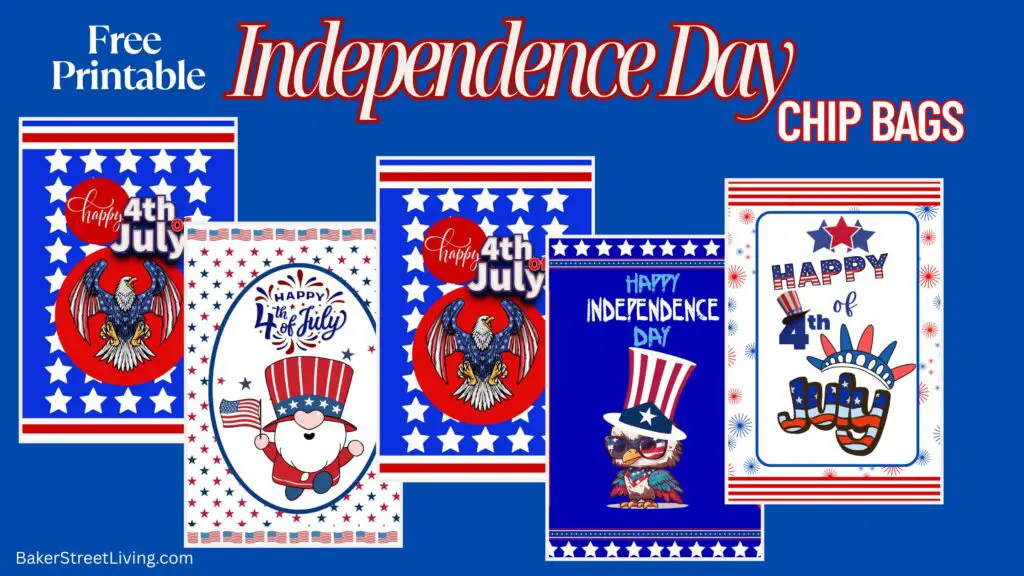
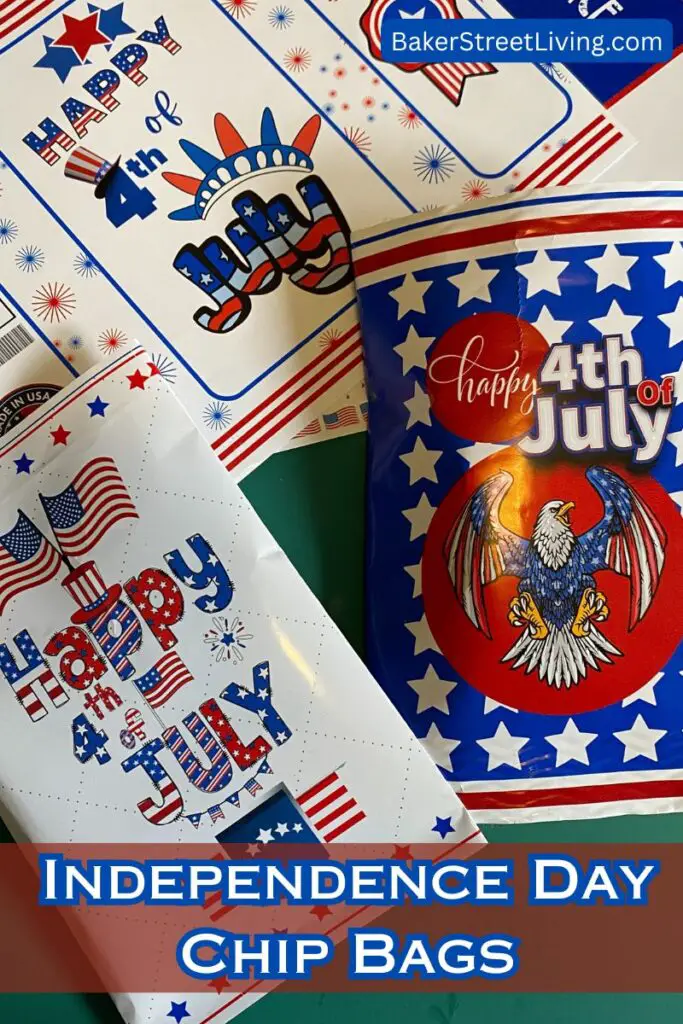
Get ready to celebrate Independence Day with a burst of flavour and patriotic flair! Imagine your picnic table adorned with custom Independence Day chip bags, each a miniature work of art showcasing your love for the red, white, and blue. Get my FREE downloadable design that’s easy to use and guaranteed to impress your guests. We love printable chip bags and printable wrappers. They are such a simple way to bump up an ordinary party table.
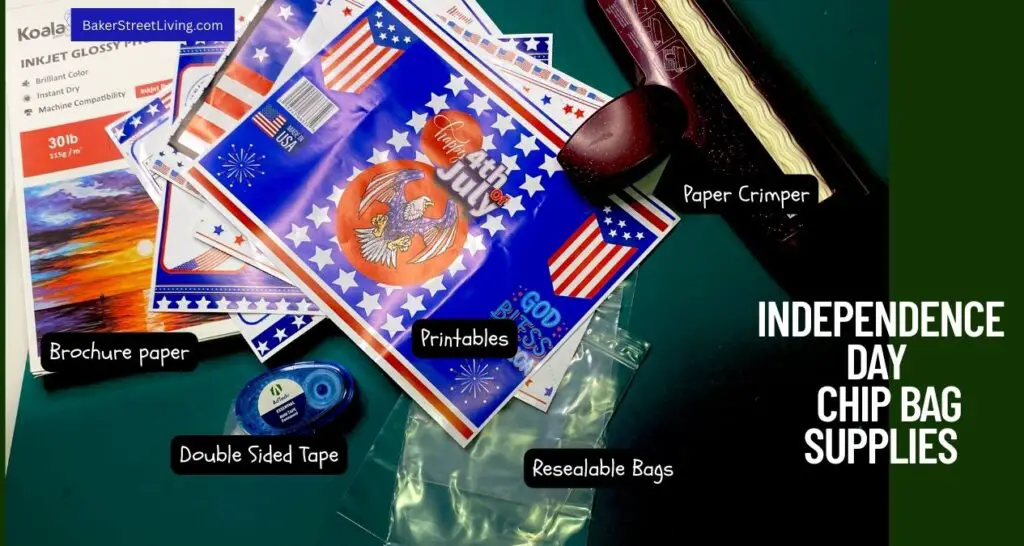
Supplies List
This website contains affiliate links. As an Amazon affiliate, I earn a small commission from qualifying purchases (at no cost to you).
- Paper Crimper
- Brochure Paper – Glossy that is compatible with your printer
- Double-sided tape
- Resealable Zipper Bags (5×7)
- Printer
How to Use Our Free Download for Independence Day Chip Bags
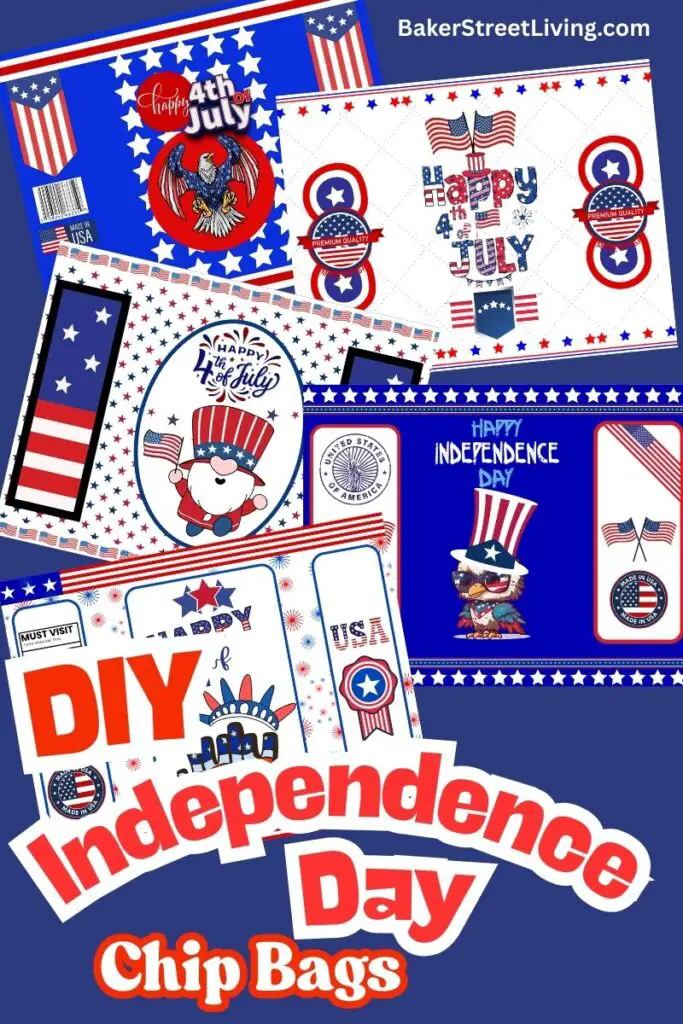
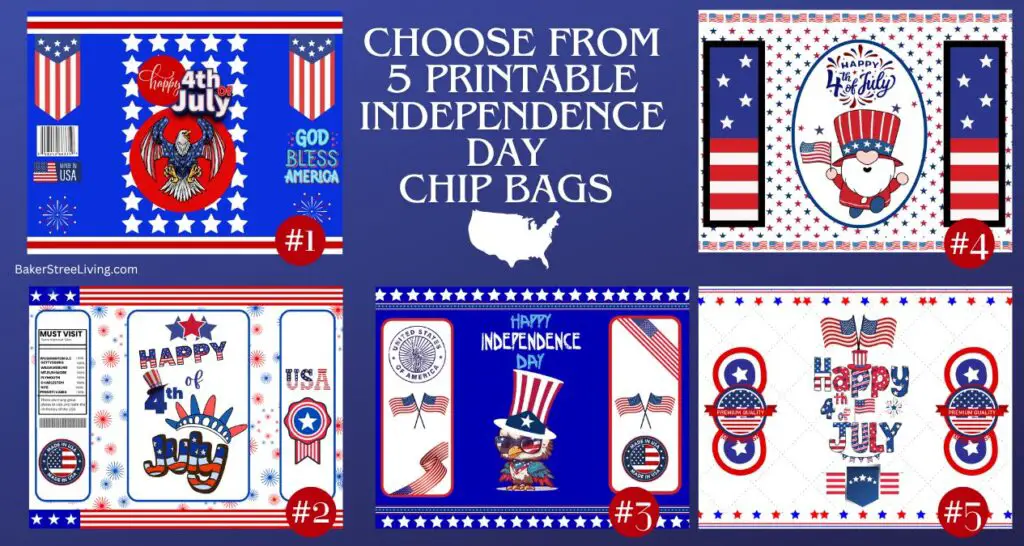
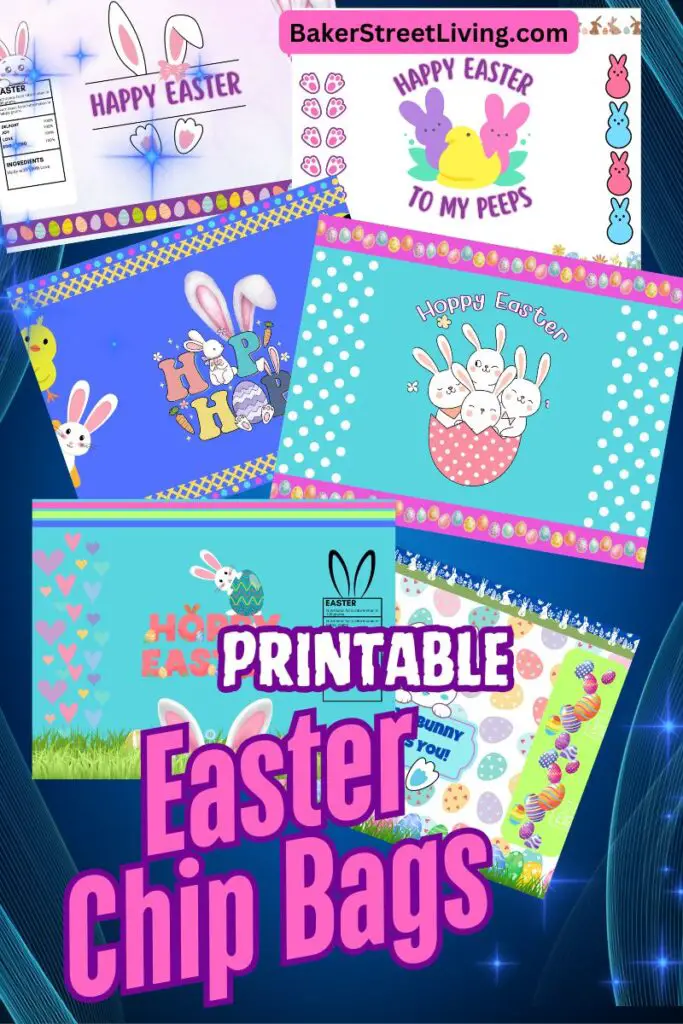
There are 5 free Independence Day Chip Bag designs in our free library. These designs are free for your personal use. Selling and commercial use are prohibited. Thank You!
Our designs are stored in our free resource library. If you already have a password, click the button below to enter the library, or get one through the clickable link and then proceed to the library.
2 – After downloading the Independence Day Chip Bag templates, double-click on the zip file to open up the designs. Choose which one to print and select print. This will open up the open the print queue (print preview)
Before you print – Check the settings. I recommend changing your default print setting to the following for the best results.
- Media and Quality – Paper Type – this should match your paper. For regular glossy brochure paper – select specialty paper-glossy or photo on glossy paper (or similar wording)
- Confirm the orientation of the paper; one chip bag fills an 8.5 x 11-inch page.
- Scale – make sure the entire page is filled. It’s not a deal breaker if you forget this, but you will need to trim off any white edges.
- Quality – Choose high or best-quality
- Print in colour
A note about a brochure or thin photo paper. I have found that when I print multiple copies, sometimes the pages stick together. To help avoid this, separate the pages before placing them in the printer tray. This doesn’t guarantee they won’t stick together, but I have fewer difficulties when I remember to do this.
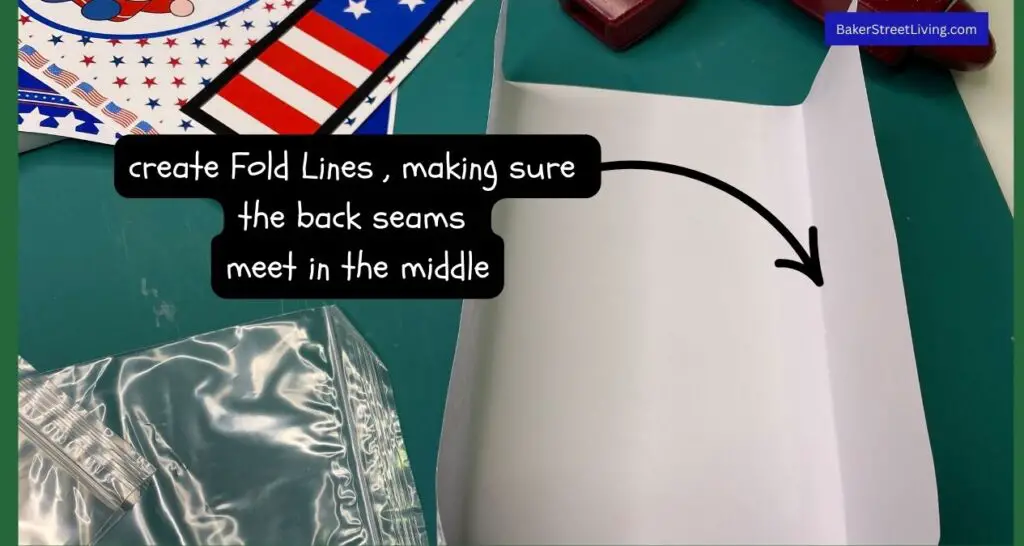
3 – Fold the Chip Bag paper so that the front image is centred and the back seams slightly overlap. Make crease lines and then unfold.
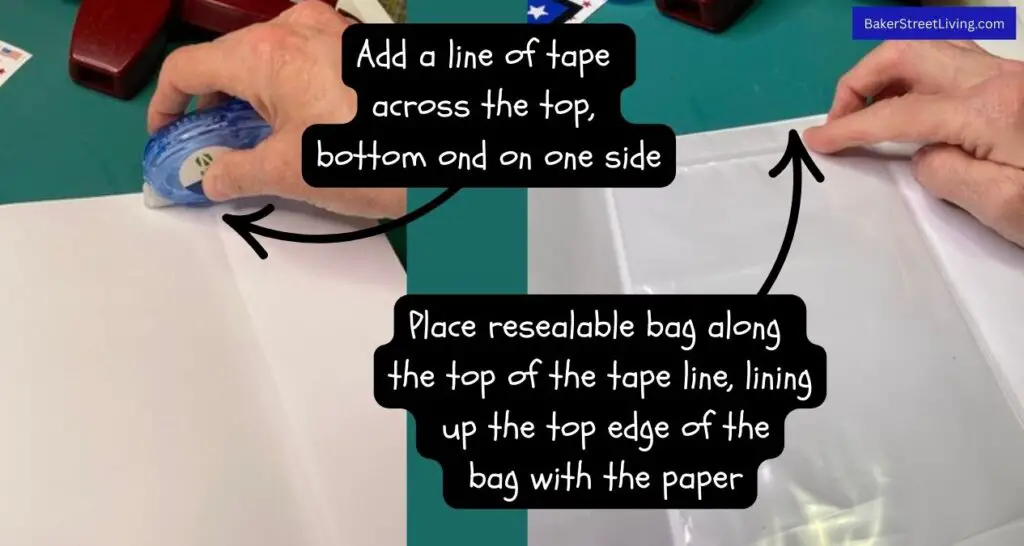
4 – Run a tape line across the paper’s top and bottom and along one side..
5 – Place a resealable bag onto the tape line, lining up with the straight edges. Make sure the bag is straight.. Trim the top if necessary. If the bag is too long, you can fold up the bottom or use a heat sealer to shorten the bag.
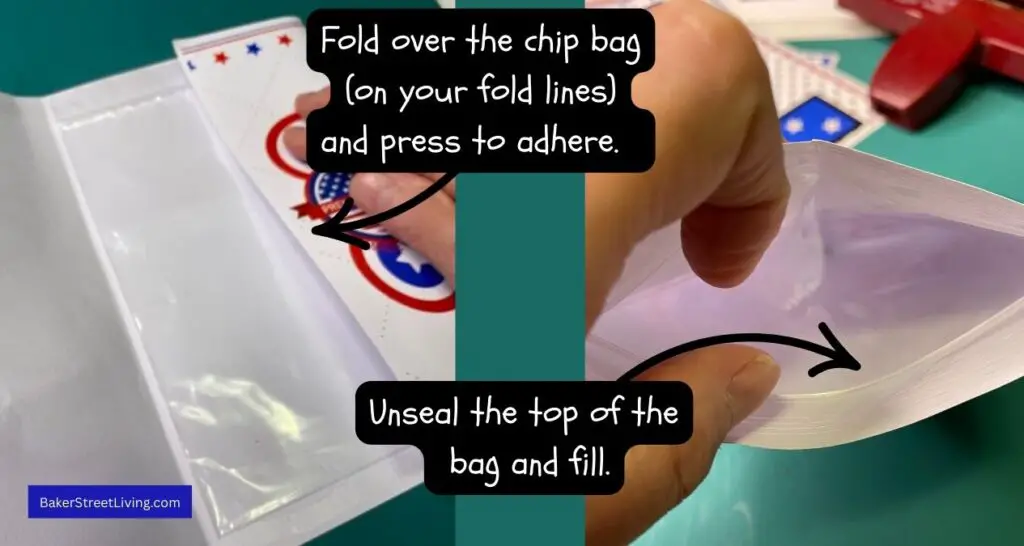
6 – Fold the paper along your crease lines and press to seal the bag.
7 – Now the fun part. Unseal the bag and add your favourite chips or snacks.
Helpful Tips and FAQs
Making Independence Day Chip bags without Ziploc bags.
Just omit the resealable bag (step #5). When the instructions say to insert the bag, skip to step #6.
Reasons to use the Resealable Bag Insert
Using the resealable bag will allow you to reuse your bag as well as keep the contents from spilling out at snack time.
One of the top reasons to use resealable bags is that it eliminates the air problem. Sometimes the snack bags contain so much air that it is hard to get the bag to fit into the printed chip bag. If you have to poke a pinhole into the chip bag, you can lose freshness.
If you are placing chips or candy directly into the printed bag, oils and colouring can be absorbed by the paper. It also protects the food if you are placing it into the bags unsealed.
Lastly, the chip bags are difficult to open, especially for children. The paper is much stronger than a typical chip bag. Sometimes scissors are needed to get the printed bag open
Other Types of Paper
You can easily switch to any paper as long as it fits your Ziploc bags and/or chip bags.
Standard Orinter paper works fine, but is not going to be shiny.
When choosing alternative papers, look for papers with a glossy finish and that are thin. I typically use a 30-pound weight pa) Most paper is labelled by weight or class. Stick to 25-37 or lightweight for best results.
Resizing a Ziploc Bag
if you aren’t able to find the proper size Ziploc bags, there are a couple of simple ways that you can resize a standard bag.
1 – On your Ziploc bag, mark the lines where you would like to make it smaller. Use a bag sealer machine to remove the unwanted portion of the bag. Make sure you don’t eat it too long because it melts too much and causes big wrinkles.
2 – Another option is the hot knife method. While wearing heat-resistant gloves, hold the handle of a long-bladed kitchen knife. Hit the blade with a kitchen torch or another source of heat. Once the blade is hot, press it onto the area of the bag where you want the new seam to be. Hold it in place until it’s sealed, and then remove the remainder and discard..

I hope you have been inspired to make these easy Independence Day Chip Bags. Don’t forget to get the free download and check k out our other free downloads.

This website contains affiliate links. As an Amazon affiliate, I earn a small commission from qualifying purchases (at no cost to you).