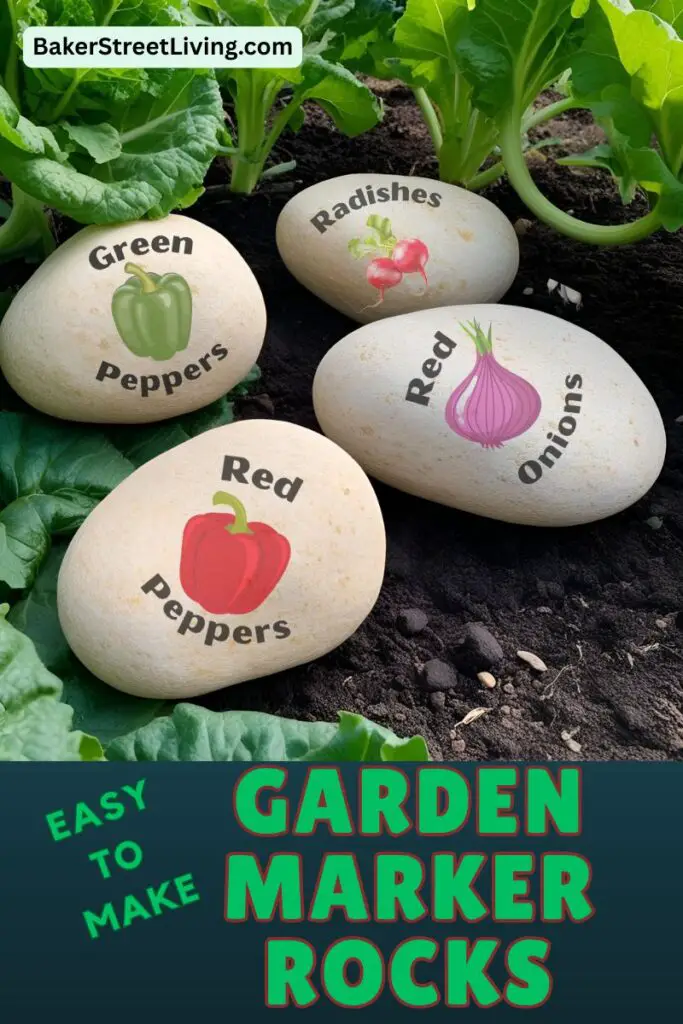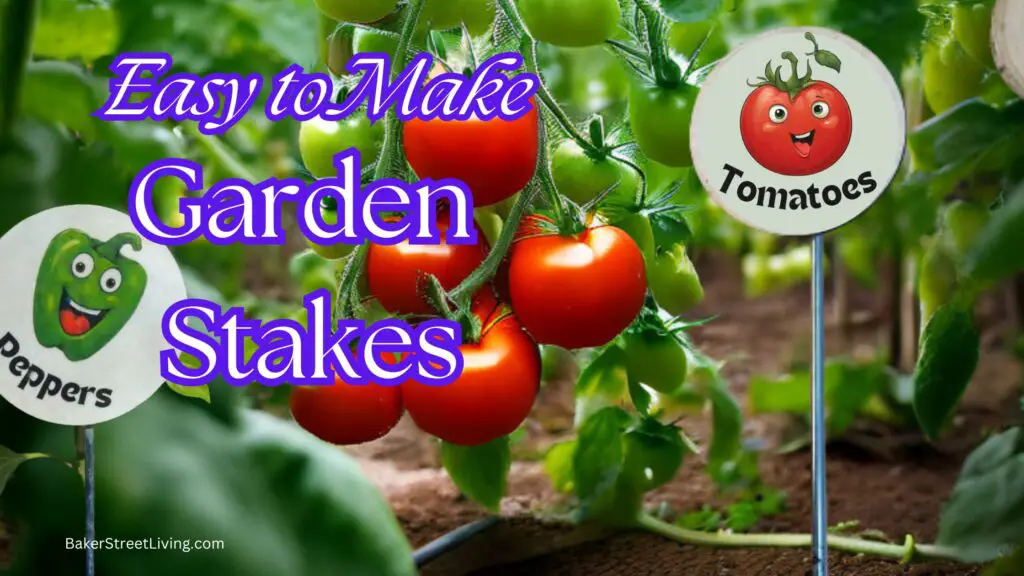
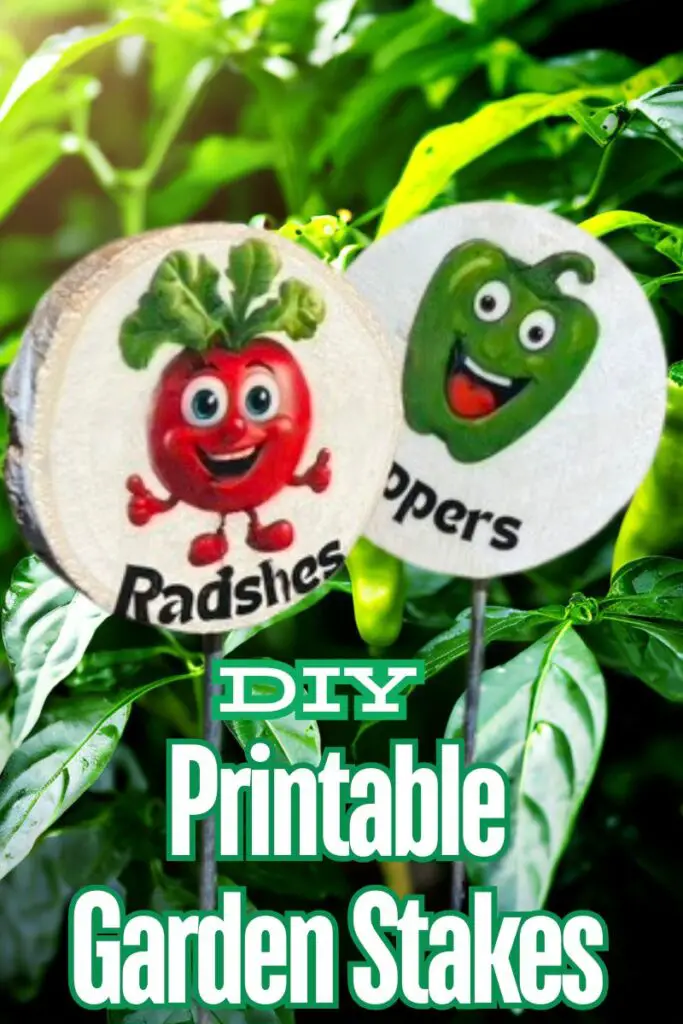
Making your own DIY printed Plant Labels is a great way to keep your garden organized, especially if you plant seeds and want your garden to look orderly. Unlike our sublimation plant labels, you don’t need a special printer. A standard inkjet printer and some waterslide paper are all you need for these custom labels.
Project Supplies List
This website contains affiliate links. As an Amazon affiliate, I earn a small commission from qualifying purchases (at no cost to you).
- Inkjet or Laser Printer
- Waterslide Paper (Must match your printer type)
- Wood Rounds
- Garden Stakes
- Clear Acrylic Sealant Spray
- Construction Adhesive
- ModgPodge – Outdoor
- Dish for water – must be larger than the label
- Cardboard Box – for a mock spray booth
- Zots Adhesive Glue Dots (optional)
- Paper towels
Do you want to use our Designs for your DIY Printed Plant Labels?
To use the designs used in this tutorial hop into our Free Resource Library and grab our designs. They are located under “Everday Projects” Our designs were created with a touch of whimsey and are perfect for a children’s garden.
For other free designs, search on Canva – Elements – the vegetable name – Graphics. They are free for personal use. For commercial use make sure you read their policies.
Getting the right waterslide paper
Waterslide paper is very versatile, but there are a couple of things you need to know before you purchase.
1 – Type of Printer
Waterslide paper is available in Inkjet-compatible and laser-compatible paper. Choose the paper that is compatible with your printer.
2 –Background Colour
Waterslide paper is available in clear and white paper. Clear is best for applying to white or clear surfaces (glass, mirror etc…). White waterslide paper is best for use on dark surfaces. Using clear paper on a dark surface results in much of the image fading into the dark background.
DIY Printed Plant Labels – Step-by-Step Instructions
1 – Create your label
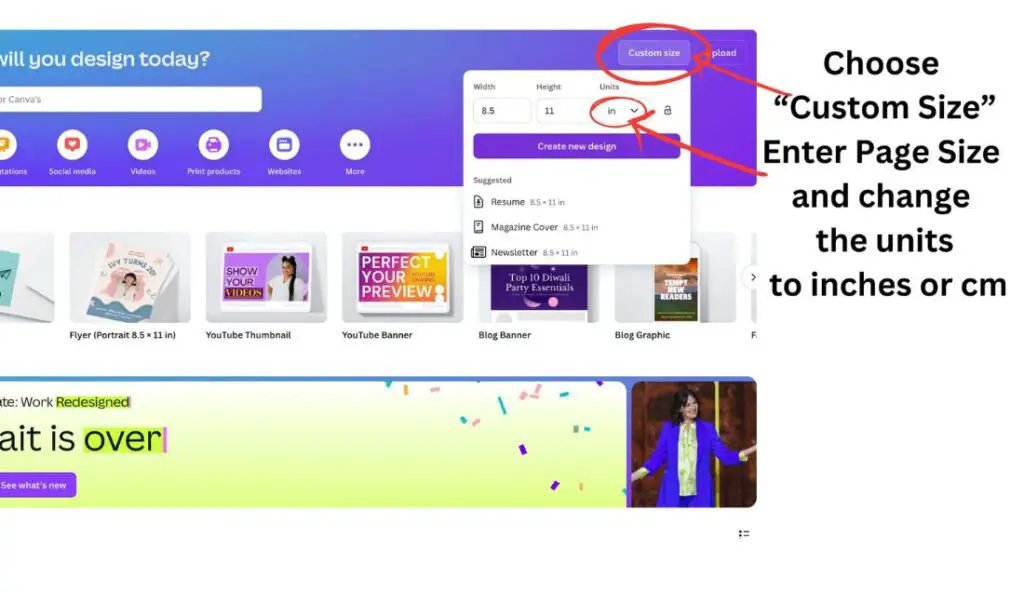
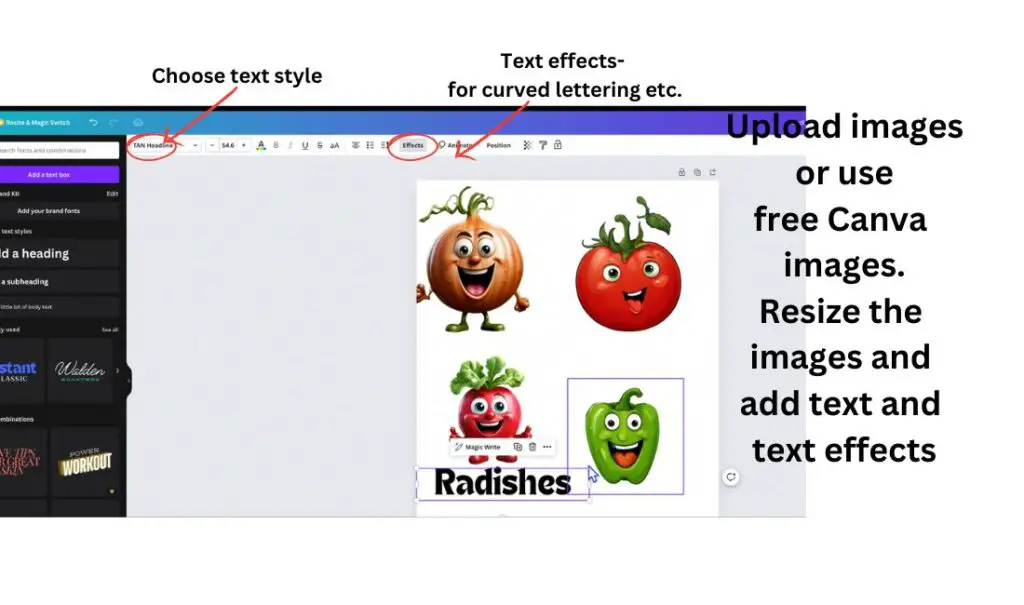
A great place to create the printable label is in a graphics program. In this tutorial, I will use Canva. Canva is free to use for anyone. Go to Canva.com, create an account and start creating. There is a premium pad program, but the free program offers a lot of great options.
When creating your label, start by choosing the paper size. If you use 8.5 by 11-inch waterside paper, create the same size design in Canva.
Measure the wood piece and create each plant label according to the size of the wood piece.
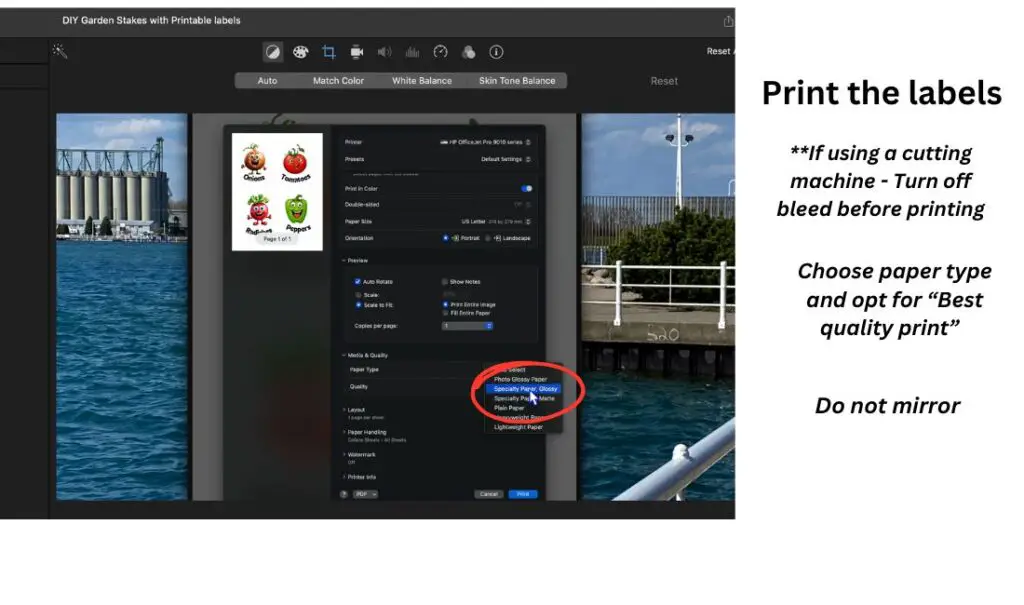
2 – Print the Plant labels.
This is a simple step that does not require any extra work. If printing from Cricut or another brand of cutting machine, turn off bleed. You can add an offset if you like. Keep in mind that waterslide paper can be fragile when sliding the paper off the backing, and sharp, intricate cuts are prone to breaking or tearing.
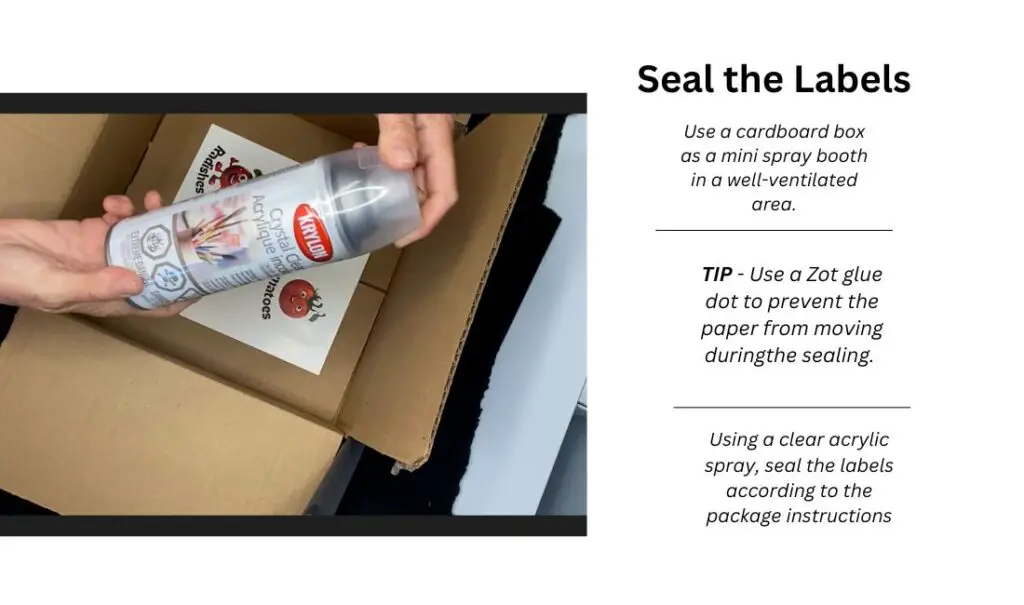
3 – Seal the Labels
Place your printed labels at the bottom of the cardboard box. Using a Zot adhesive glue dot will help keep the paper in place.
Apply a coat of the clear acrylic spray sealant and let the sealant dry. Follow the Instructions for the waterslide paper brand you buy.I typically apply 3 coats of sealant to the waterslide paper.
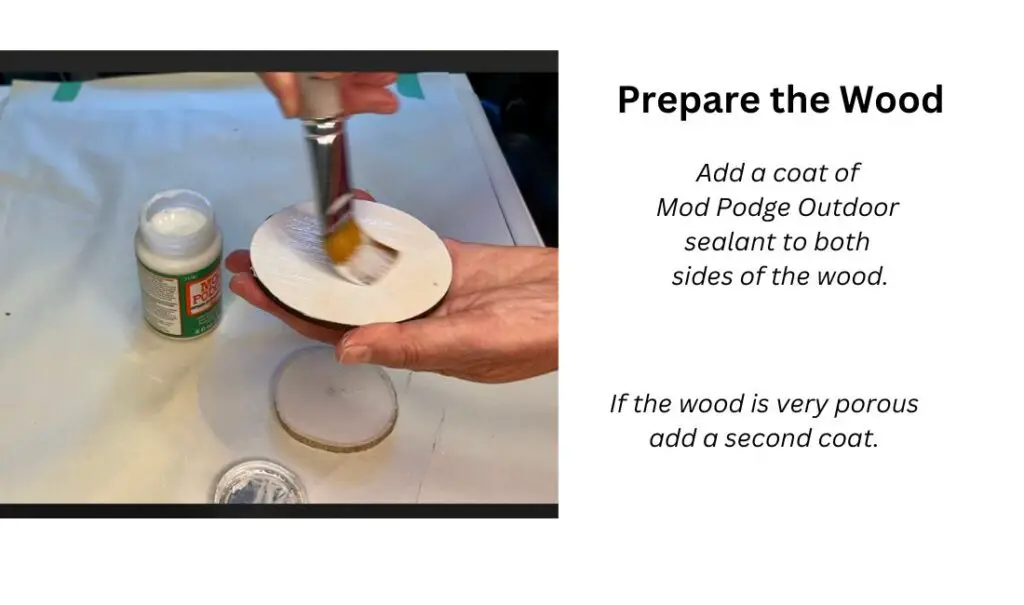
4 – Prepare the wood
Depending on the look you want, you may want to paint the wood ahead of time.
Add a coat of Clear Mod Podge to the wood. This will help give us a smooth surface for the paper to slide onto.
Allow the wood to dry before applying the decal paper.
5- Trim the Lanels
If you are using a cutting machine, you will skip this step. If you are using scissors, only trim around your images if you have a lot of the sheet left and plan to use the rest of it later. Once you have sealed the waterslide paper, you can not print on it and reuse if later.
6 – Get Organized
Gather your supplies, and make sure that you are ready to complete everything without distractions. Have your soaking dish ready, as well as having the wood pieces stacked or close by and ready to use.
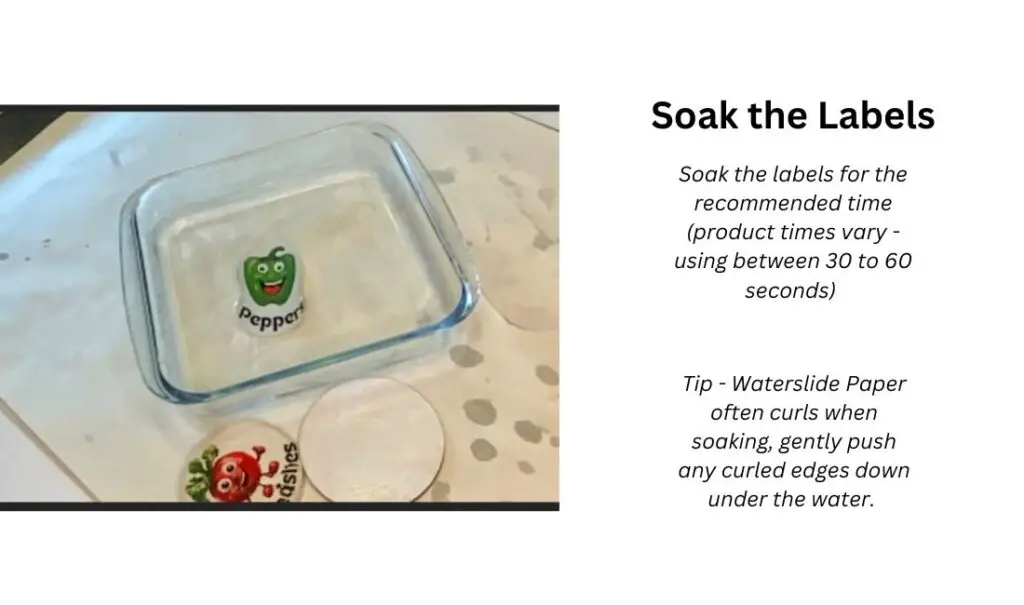
7 – Soak the waterslide paper
Have everything ready to go. As soon as you soak the waterslide, there is no going back. I recommend that you only soak one label at a time.
Soak the image in the water as directed by the product instructions. Typically, it is for 30 to 60 seconds. Make sure the image is under water and not sitting on the water. You may need to push it under the water slightly.
Take the decal out of the water and gently slide the corner between your fingers to check and make sure the backer paper is beginning to slide off.
If the backer paper is not sliding, soak it for a few more seconds.
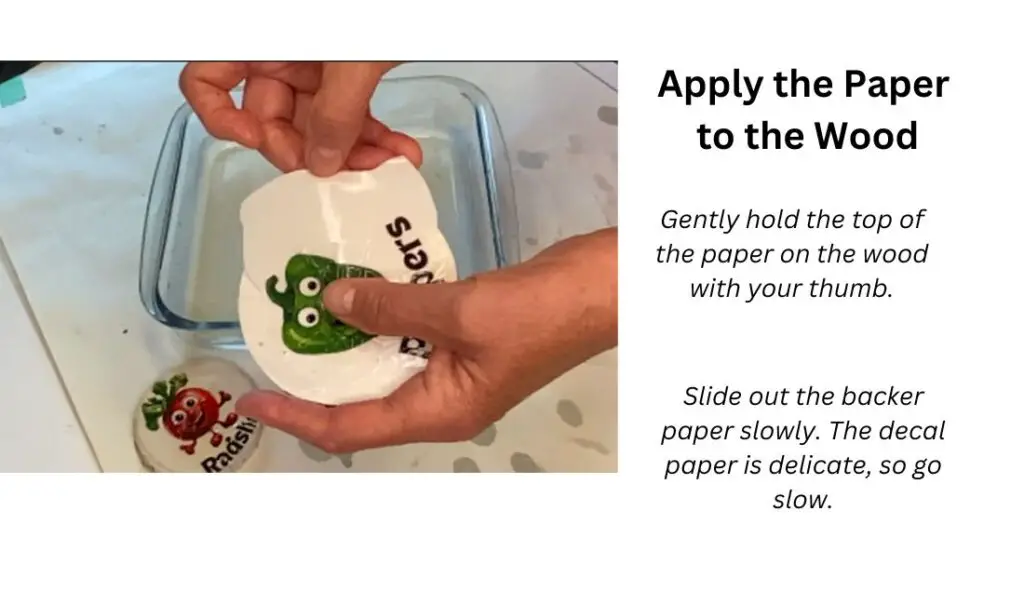
8 – Place the decal
Before placing the decal onto the wood, dab a bit of water onto the wood with your fingers, making the surface wet.
Place your decal onto the wood garden marker and gently slide the backer paper out. The image is fragile, so go slowly to avoid tears.
If you accidentally tear the decal, add a few drops of water and carefully slide the pieces together.
9 – Remove water
Once you have the decal in place, use a paper towel to blot excess water and smooth out the paper, removing any wrinkles.
10 – Drying Time
Allow your DIY printed plant labels to dry completely before sealing. Leaving them to dry overnight is best if you have the time.
If you are pressed for time, use a hair dryer to speed up the drying.
11 – Seal
Seal the dried plant labels with at least one coat of outdoor Modge Podge UV Sealant. (I like at least 2 coats)
12 – Add Stakes
Add a bead of construction adhesive to the back of the wood plant marker. Place the garden stake onto the glue and press it in place.
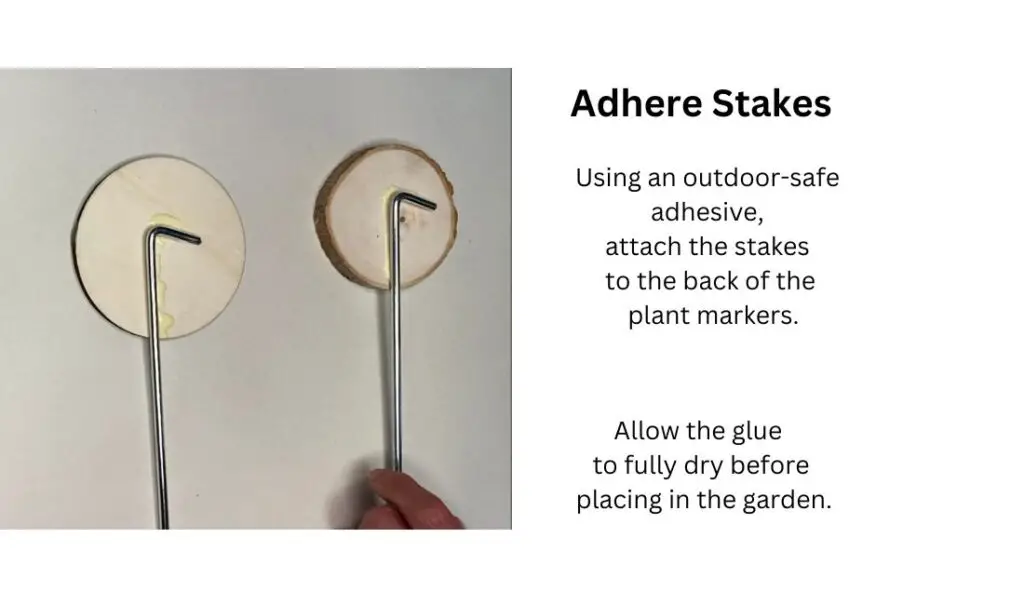
Allow the glue to dry.
13 – Use and Enjoy!
How to Fix Tears or Cracks in Your Labels.
Sometimes, no matter how gentle you are, cracks can happen. The cracks may be a result of not soaking long enough, too much acrylic sealant or not enough sealant. Cracks can be fixed on some surfaces, such as wood and metal. Use a Sharpie marker the same colour as the area where the crack is and fill in the crack. JLightly touch the marker to the area that is cracked and dab it a few times to fill in the area. Alternatively, dab it into the crack with acrylic paint and a soft brush. Use a small amount at a time to get the best effect. Remember that any repairs you make to cracks may not be waterproof and may require sealing.