
Content Created by Tracey of Baker Street Living 
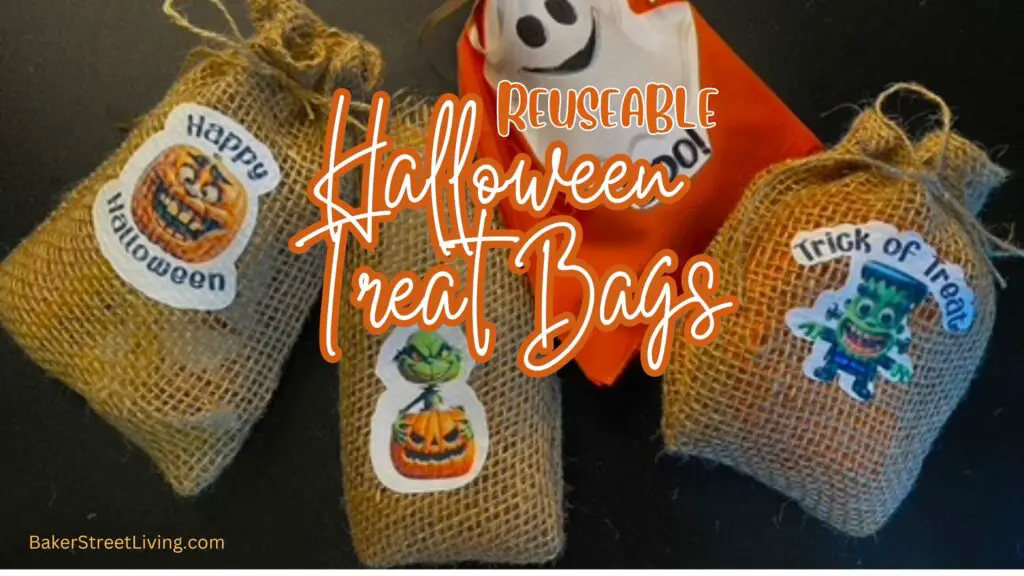
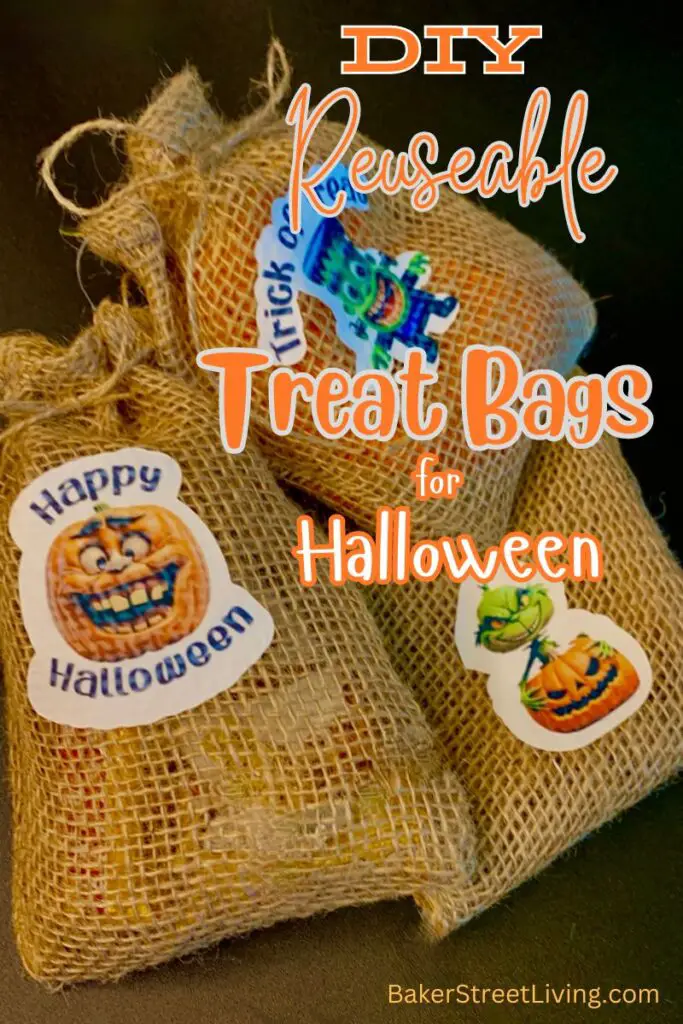
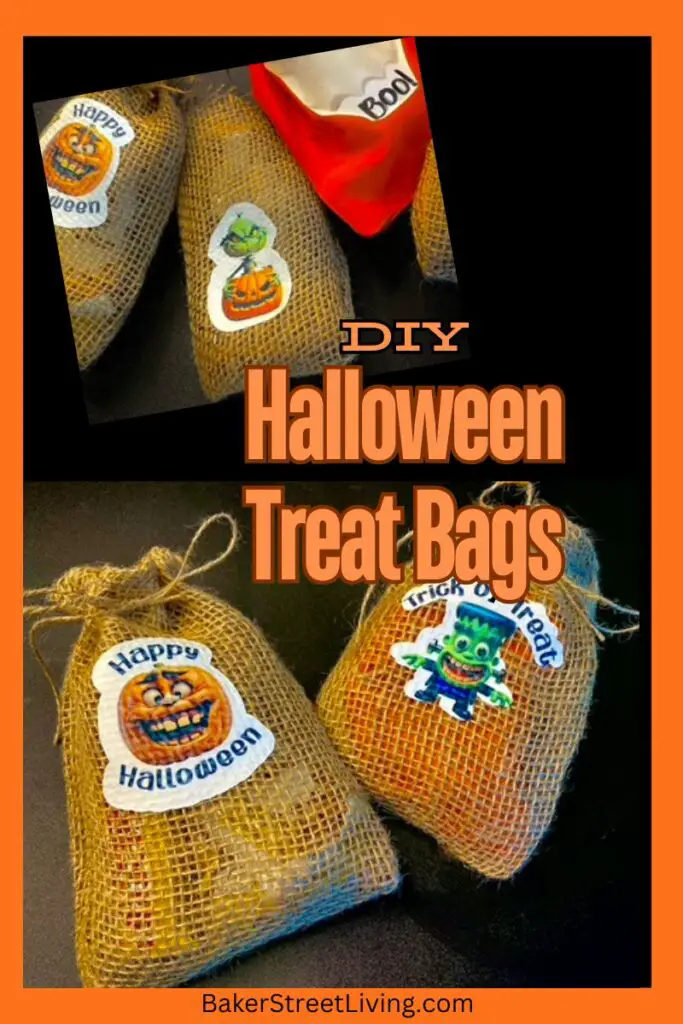
These cute DIY Reusable Treat Bags are super easy to make and kids love them. Personalize them for those special kids in your life or add their names to each for handing out to classmates.
Supplies List
This website contains affiliate links. As an Amazon affiliate, I earn a small commission from qualifying purchases (at no cost to you).
- Muslin or Burlap 5-6 inches wide (or fabric of your choice)
- Jute String
- Sublimation HTV vinyl
- Parchment Paper
- Fun Halloween Design – create your own or use our free design
- Heat Resistant Tape
- Sublimation Paper
The design used in this tutorial is free for you to use (personal use only). Hop on over to our free resource library and download the Halloween Images. You will find them listed under the Halloween category.
Craft Room Tools
- Sublimation Printer
- Heat Press
- Sewing Machine or Serger * can be hand sewn)
- Cricut Cutting Machine
- Standard Grip mat and spatula tool
- Darning Needle
How to Make Reusable Treat Bags for Halloween
If you are using a store-bought bag, proceed to“preparing the Design”
Make the Bag

1 – Cut a 14-inch-long piece off the burlap roll (or chosen fabric). The rectangle will be folded in half and sewn. If you are making multiple bags, it is best to make them all at once, so that they are all the same dimensions, which is especially important if handed out to a large group at one time.
2 – Fold the burlap rectangle in half, right sides together, and sew a straight seam on both sides of the bag. Next to the straight seam, sew a zig-zag seam to prevent fraying of the sides of the bag. You could also use a serger (my favourite method), but if you don’t have a serger, a zig-zag seam works well.
3 – Turn down the top edge about 1/2 inch.
4 – Sew around the top edge with a zig-zag stitch and a straight stitch, just as you did to the sides of the bag.
5 – Turn the bag right side out.
6 – Using your heat-press, give it a quick press to flatten out the bag.

Preparing the Design
1- Download our free design or choose a design of your choice.
2 – Upload the design into Cricut Design Space.
3 – Choose “Complex” and Print and Cut.
4 – Select “Add to Canvas”
5. Add text around the image if desired. (The font used in the tutorial is “Magic Smile” available from Dafont.com) Curve the test if desired and then group the image and the text together
5 -Select “offset” from the top menu bar.
6 – Use the slider bar to choose the size of the offset. Make sure the “weld” feature is selected on the offset. Change the offset colour if needed.
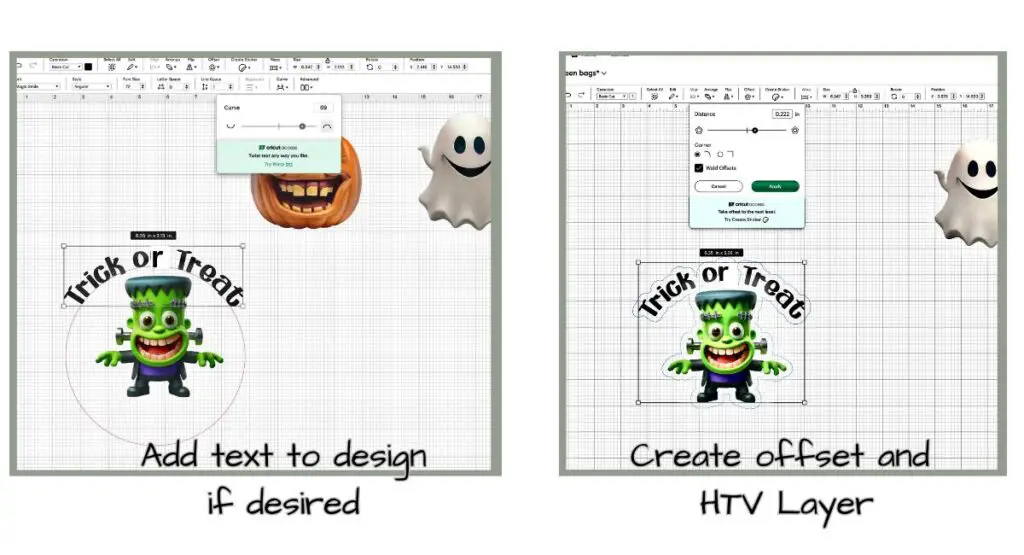
7 – Select “Flatten” to make a one-layer print and cut image.
8 – Now we need to make the sublimation Layer. Select duplicate.
9 – Once duplicated, separate the 2 images, select one of the images and, go to the top menu bar and select “Basic Cut”
10 – Once you are finished, you should have 1 print and cut image that has an offset around it and one background shape that is to be cut.
11 – Select “Make”
Before you Print!
Make sure that you have mirrored the design. Sublimation needs to be reverse-printed and then applied with a heat press.
Choose the pressure you wish. I normally choose “more” for pressure, but with a new cutting tip, I choose the default.
Make sure you have the printer colours set to the proper colour profile.
If you haven’t printed in a while, do a test page and make sure that head cleaning is not required.
Cut
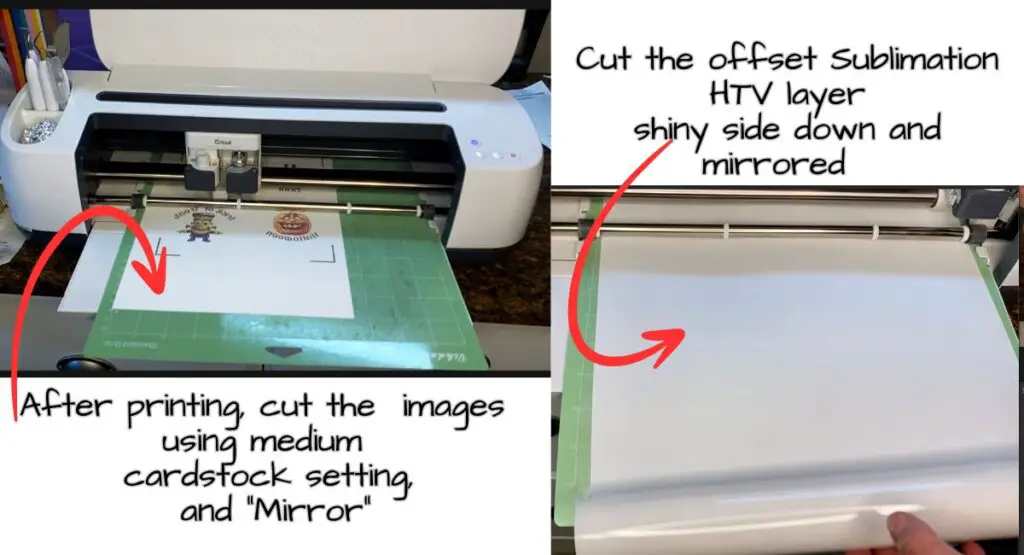
After the image has been printed it is time to cut.
I use the “Medium Cardstock ” setting for cutting the sublimation paper.
Cut the sublimation background layer for the design ensuring that it is mirrored before cutting. I am using HTV Ront vinyl and I choose the Everyday Iropn On setting.
Prepare the Treat Bag
Using a lint roller, remove any fibres, dust or debris. It can be difficult with burlap, but it will make a difference.
Apply the HTV
Before you start, place a piece of parchment paper or butter paper inside of the burlap bag to prevent any bleed-through
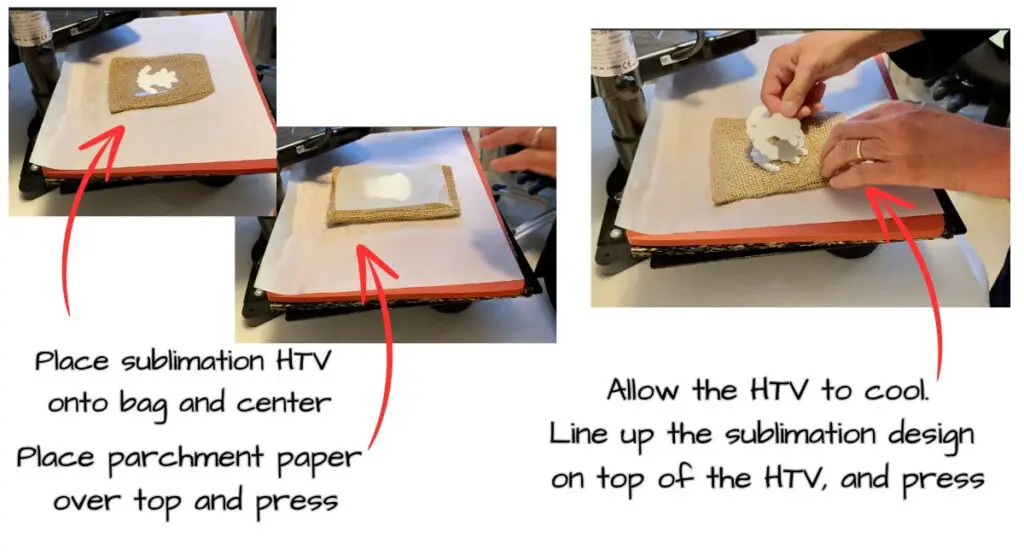
1 – Press the bag flat, before adding the HTV.
2 – Center the HTV onto the surface of the bag and cover it with a puce of parchment or butcher paper.
3 – Using your heat-press, press the Sublimation HTV according to the directions. The times and temperature vary widely, so make sure you read your product instructions. If you aren’t sure, check the brand instructions online. (I am using HTV Ront which uses a heat press set to 315 for 10 seconds for 10-15 seconds.)
4 – Allow the HTV to fully cool before placing the sublimation paper onto the background. If you place the sublimation design on before the background is cool, it can cause the colour to begin to transfer. If you have to [reposition the design, this can cause ghosting. and bleeding. This can make it look messy or blurry.
5 – Place your sublimation print face down over the HTV being careful to center the image.
6 – Once you have the image lined up with the background secure it in place with some heart-resistant tape.
Press the Sublimation Paper
1 -.Make sure the butcher paper is still inside of the bag.
2 – Cover the bag and design with another piece of parchment.
3 – Press with heavy pressure at 390 F for 45-50 seconds.
4 – Before you remove the image, check to make sure the colour has transferred.
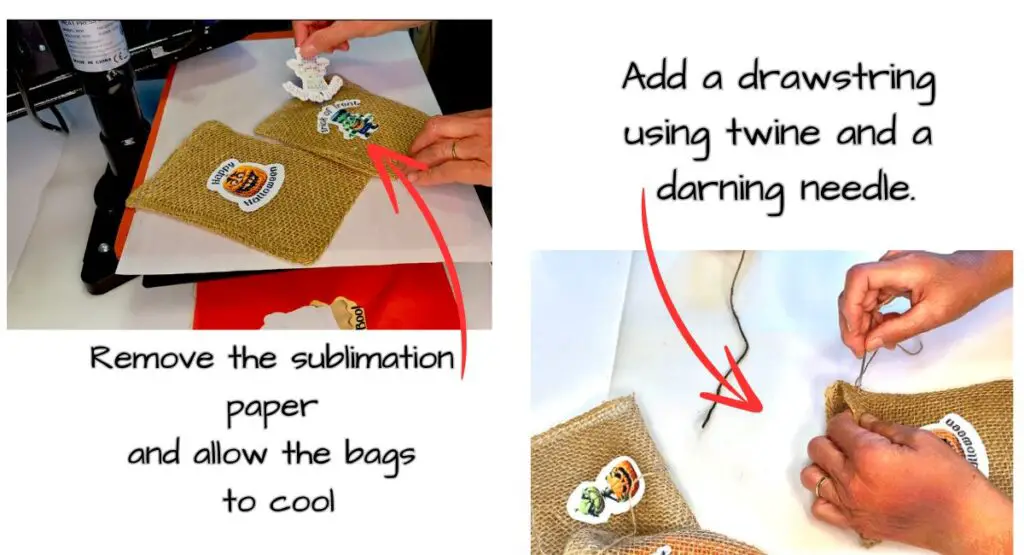
5 – If it looks good, remove the paper, parchment and tape and allow the bag to cool before using.
Final Touches
1 – Once the bag has cooled, add a drawstring.
2 – Using a darning needle and thin twine weave in a drawstring.
3 – Tie a knot at each end of the string.
4 – Now all that’s left is to fill your bags with candy!
Helpful Tips and FAQs
Alternative Fabric
Any fabric that is not heat-sensitive will work for this project.
You can substitute the twine with ribbon or embroidery floss.
Lining the Bag
For a non-see-through look, use a lightweight lining such as cheesecloth, polyester lining or interfacing (non-fusible). Make sure that you check for heat sensitivity before adding the lining.
Alternatives to Sewing
Heat and Bond with work well with a tight weave burlap, but fabric glue or hot glue is not recommended.

This website contains affiliate links. As an Amazon affiliate, I earn a small commission from qualifying purchases (at no cost to you).