
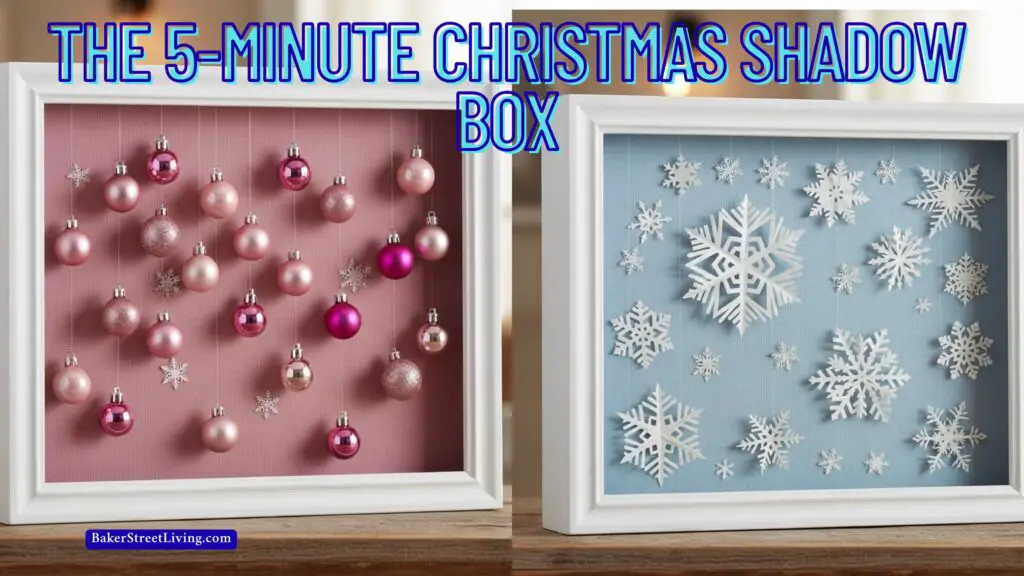
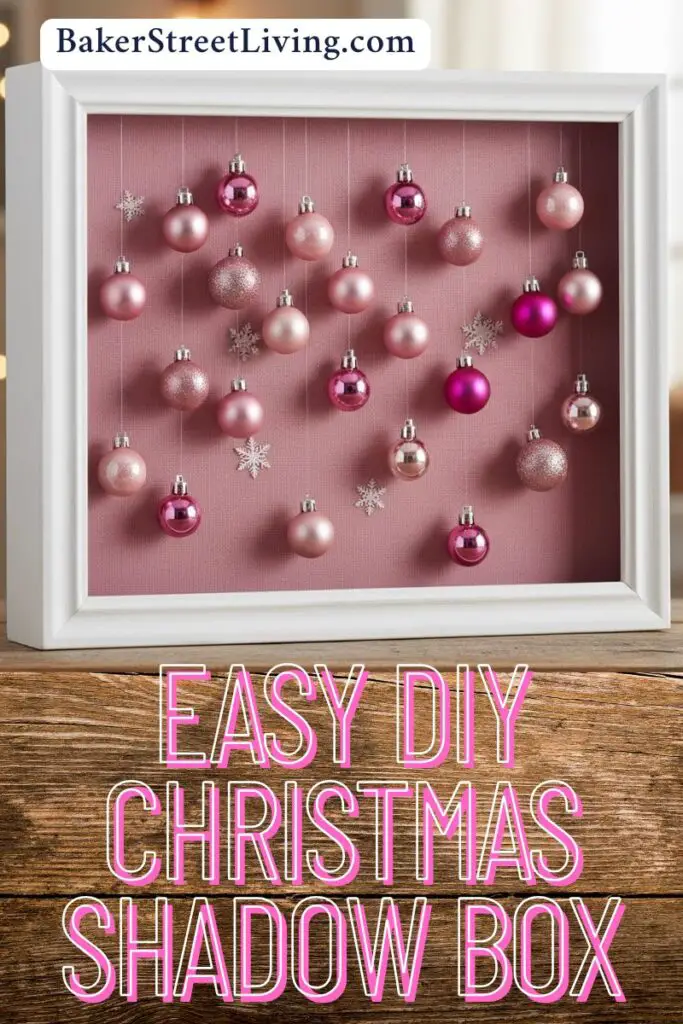
Have you ever stood back and looked at your Christmas decor and thought there was just a little something missing? This easy-to-make Christmas shadow box is the perfect fit. A Christmas shadow box is a quick and festive craft you can make in just five minutes, perfect for adding a touch of holiday charm to your home
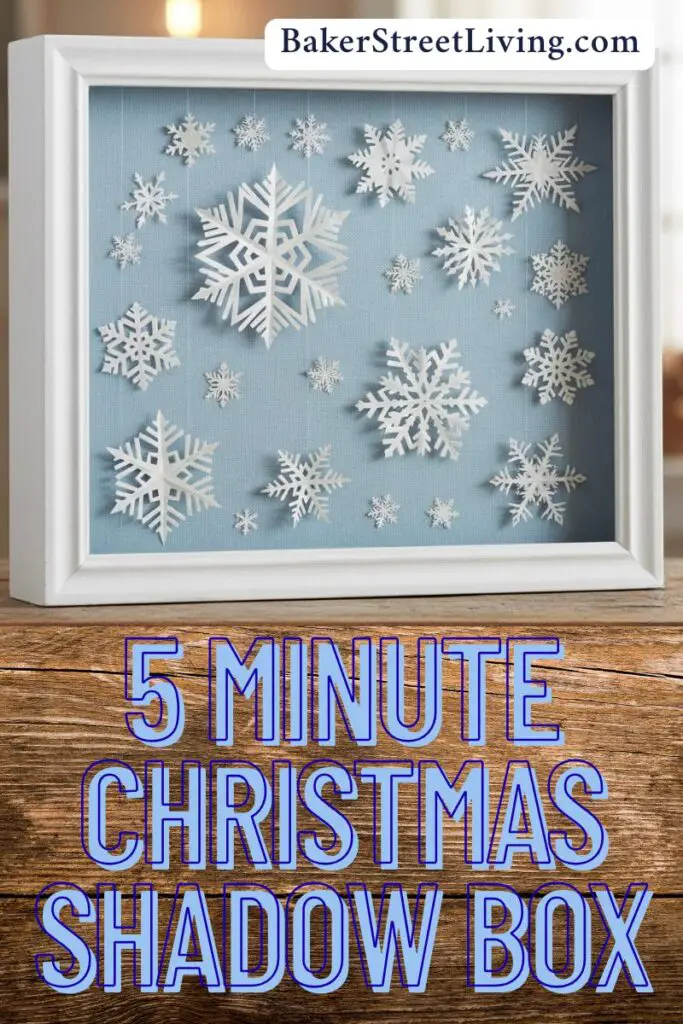
This easy-to-make Christmas shadow box is the perfect 5-minute craft that adds a bit of bling to your Christmas decor. You can easily personalize it to your liking and match your colour scheme, and change it up every year to match whatever your heart desires.
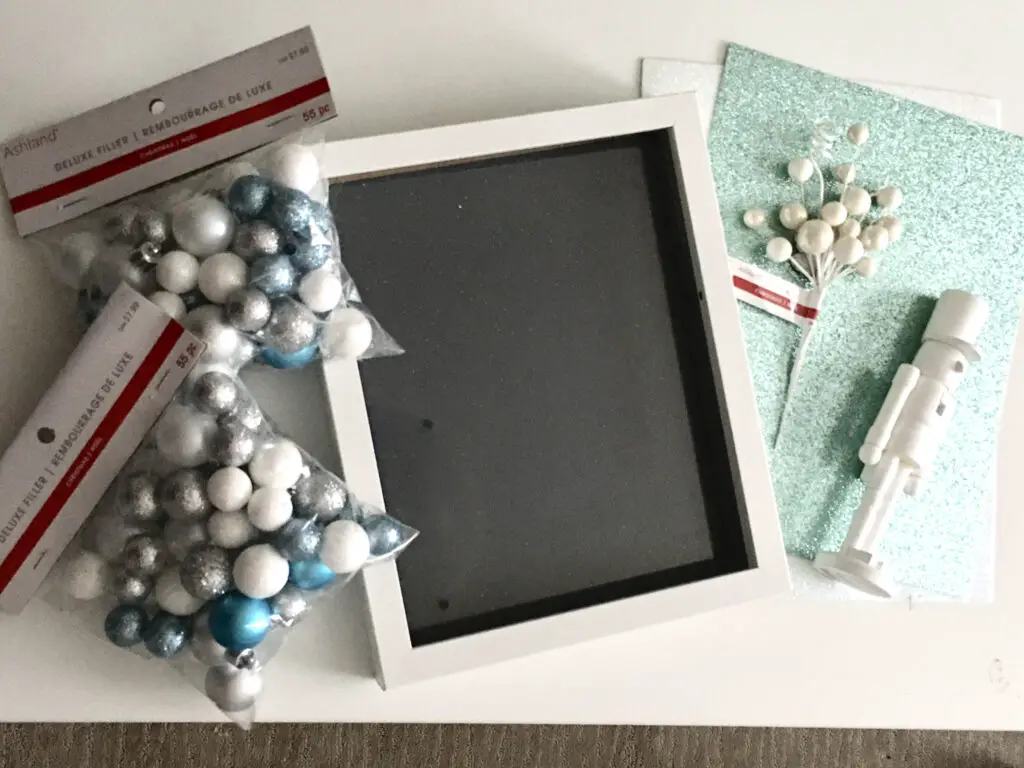
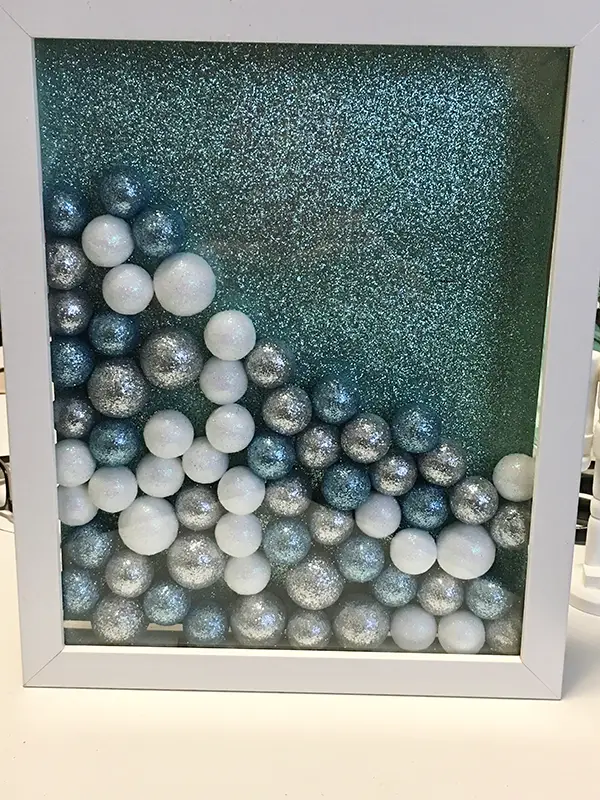
For our 5-minute easy-to-make Christmas shadow box, I used a white shadow box, but you can use a black shadow box or whatever colour and size is to your liking.
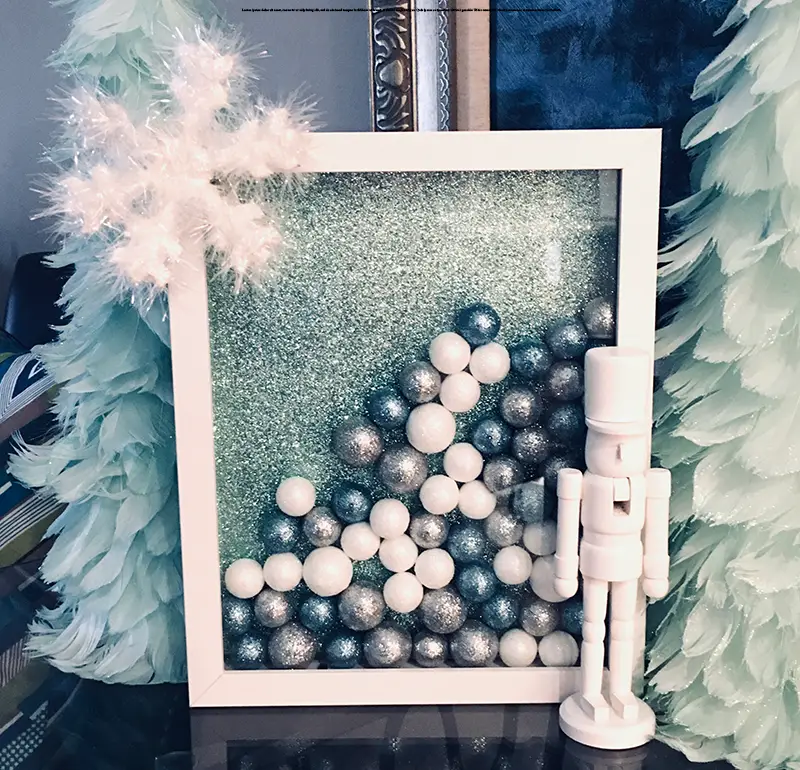
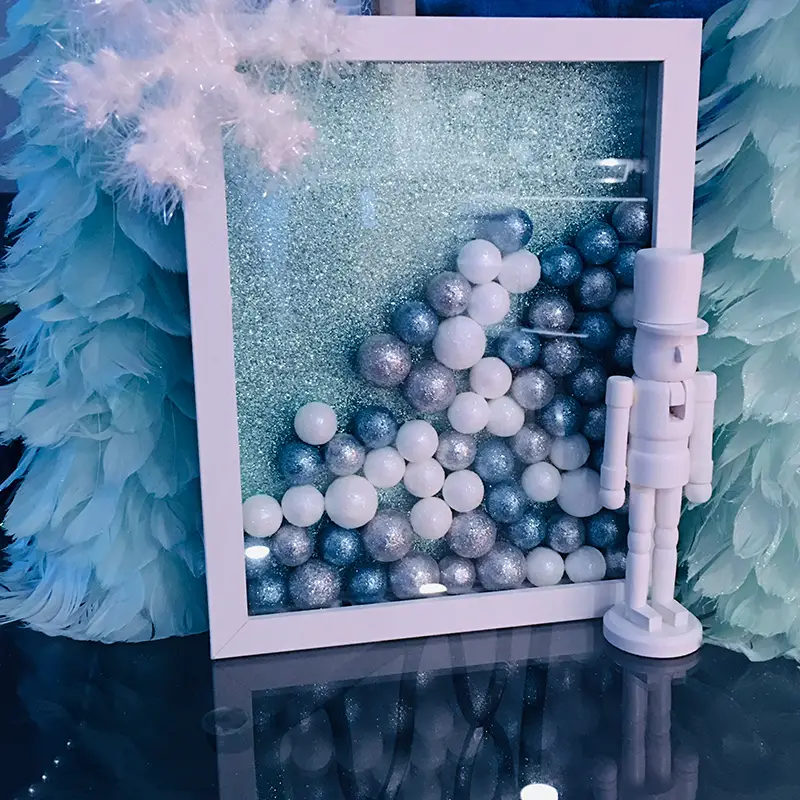
Our mini glitter balls are white, silver and turquoise. Our miniature white wooden nutcracker was a dollar store find and the snowflake came out of our Christmas decorations. An easy way to upcycle some of your Christmas decor that you already have.
Supplies List
This website contains affiliate links. As an Amazon affiliate, I earn a small commission from qualifying purchases (at no cost to you).
- Shadow Box
- mini ornaments
- Glitter snowflake
- Glitter cardstock
- small white nutcracker
- tacky glue
- double-sided tape
How to Make a Christmas Shadow Box
- Remove the backboard from your shadow box.
- Clean the inside of the glass in the shadow box. Remove any dust or oils from manufacturing with a window cleaner.
- Using the shadow box backboard as a template, cut the glitter cardstock to fit the board.
- Adhere the glitter cardstock to the backboard of the shadow box with tacky glue or double-sided tape. * If you are going to use the shadow box over and over, I recommend double-sided tape, as it removes easily without damaging the cardstock or the board.”
- Open your Christmas mini-ornament packages and pour the desired amount into the shadow box. To check if the amount is to your liking, place the backing on the box and stand it upright and check. Add more if desired.
- Once you have the desired amount of Christmas mini glitter balls in the shadow box, place the box on its back on your work surface.
- Apply tacky glue or adhesive zots to the top left corner and attach your glitter snowflake.
- Apply tacky glue or hot glue to the bottom right corner and attach your white nutcracker.
- Leave it to dry.
- Once dry, hold up and tilt the shadow box to the side. This will move the mini glitter ornaments a bit towards the side so that they are on an angle in the box.
- Place your shadow box prominently amongst your Christmas decor.
- To add more permanent ornaments, us hot glue or tacky glue to adhere them to the backer board (as in our snowflake or pink mini ornament boxes)
Christmas Shadow Box Display Ideas
- Make three and line them up in a row on a shelf or mantle.
- Nestle it on a buffet or side table with an assortment of glitter trees.
- Put one on a shelf surrounded by Christmas Cards
- Sit one next to “Elf on the Shelf”
- Place one on the nightstand in a spare bedroom for a little festive decor for your holiday guests.

NOTE** Adhesive Zots are an excellent alternative to using tacky glue. If you plan to reuse the box later, they are easily removed and don’t leave behind any sticky residue.

This website contains affiliate links. As an Amazon affiliate, I earn a small commission from qualifying purchases (at no cost to you).