
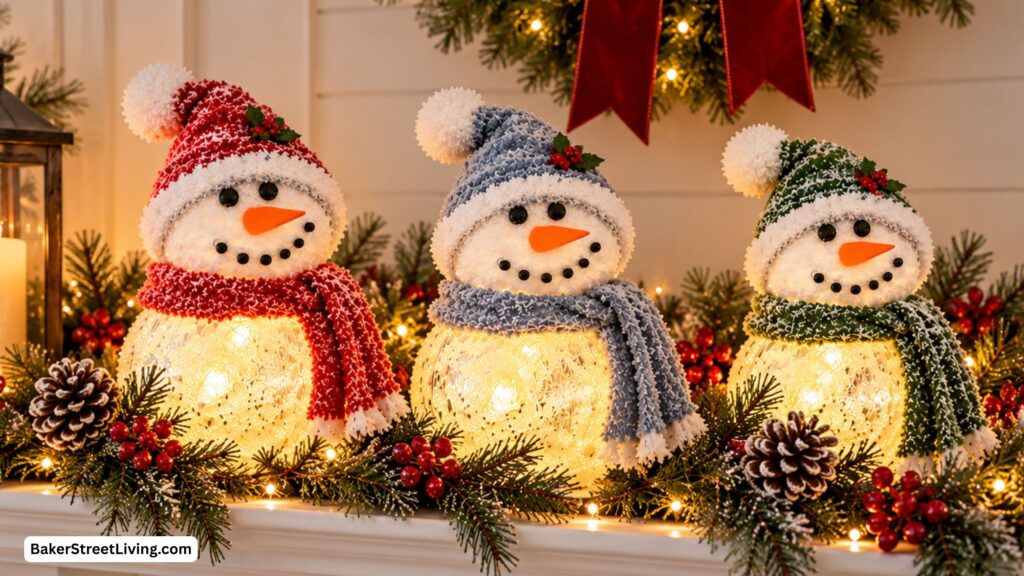
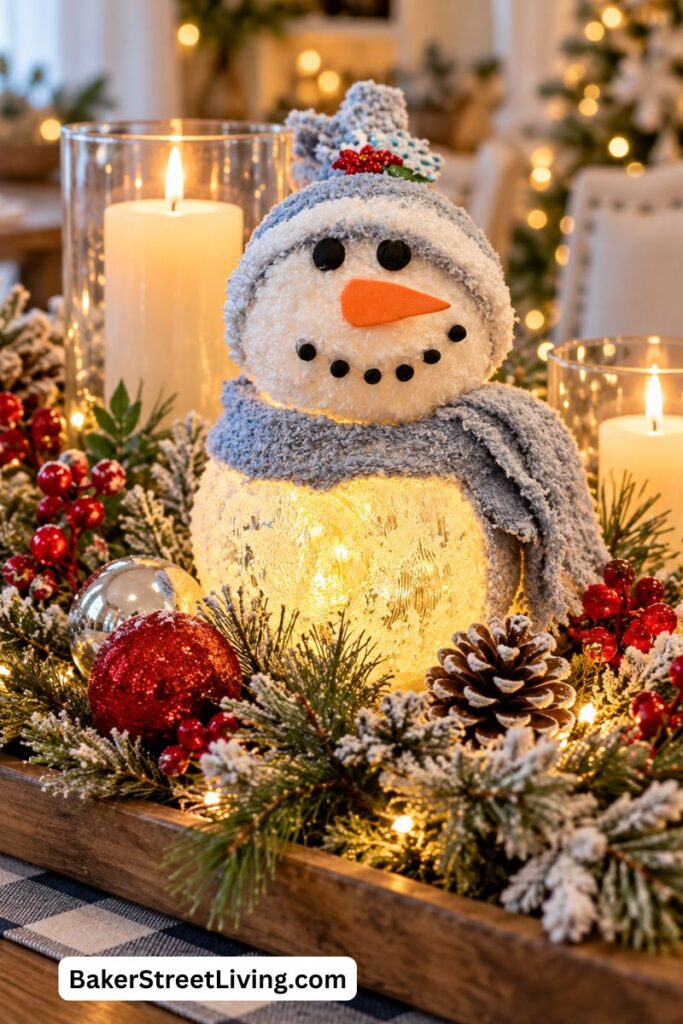
Looking for an easy Christmas decoration that adds a warm, cozy glow to your holiday decor? This adorable DIY light up snowman decoration may be just what you’re looking for. The glass vase base becomes the snowman’s sparkling body, while the lights inside create a beautiful glow. I added glass bead gel to the outside of the vase to give the snowman a frosty, snow-covered appearance.
This is a simple Christmas craft that can be customized with different colours of fleece, buttons and embellishments to match your holiday decor. It is simple and beginner-friendly.
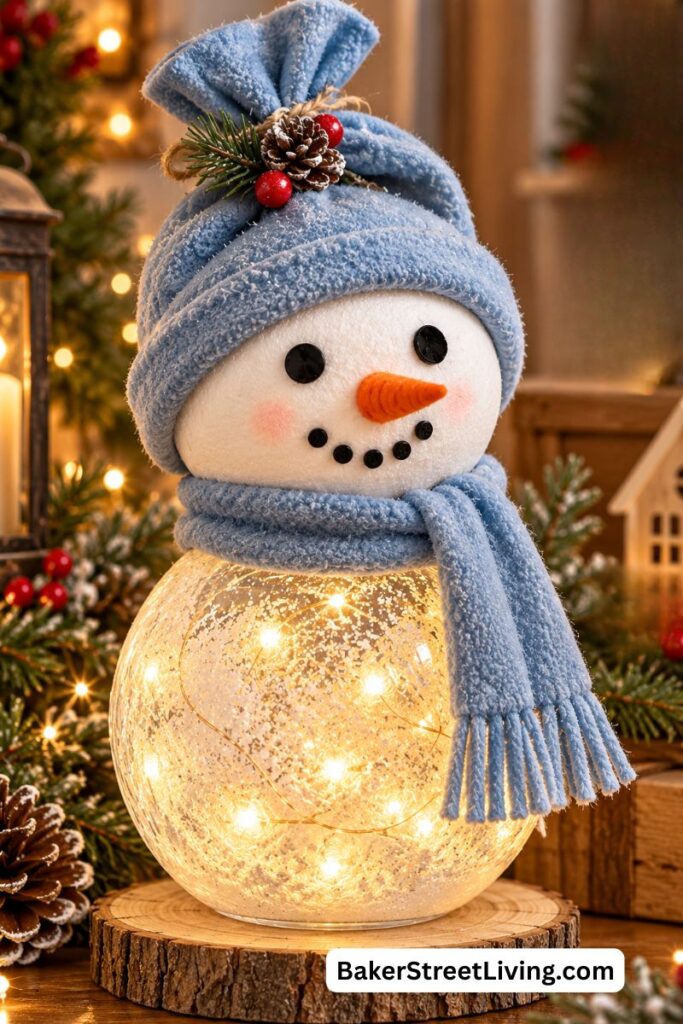
Supplies List
This website contains affiliate links. As an Amazon affiliate, I earn a small commission from qualifying purchases (at no cost to you).
- Small globe-shaped glass or plastic clear vase
- Small Styrofoam ball for the head (big enough to fit over the vase opening)
- White fuzzy sock large enough to cover the Styrofoam ball
- Fleece Sock for Scarf and Hat
- Orange 2mm craft sheet for the nose (a small bit is all you need)
- Black Air Dry Foam Clay for Eyes and Mouth
- White battery-operated Fairy lights
- Glass bead gel ( Liquidtex Professional Effects Acrylic Medium with Glass Beads)
- Artist Trowel
- Scissors
- Hot glue gun and glue
- Small Christmas embellishments for the hat (optional)
- Rubbing Alcohol
- Paper towel
- Small elastic band
Tip: Many of these supplies are available at your local dollar store – links are provided for your convenience.
How to Make a DIY Light Up Snowman
1. Prepare the Glass Snowman Body
Start with a small globe-shaped glass vase.
Remove any labels or tags that may show through the light.
Use a clean paper towel and rubbing alcohol to wipe the surface and remove dust or oils. Allow it to dry.
2. Add the Sparkly Snow Effect
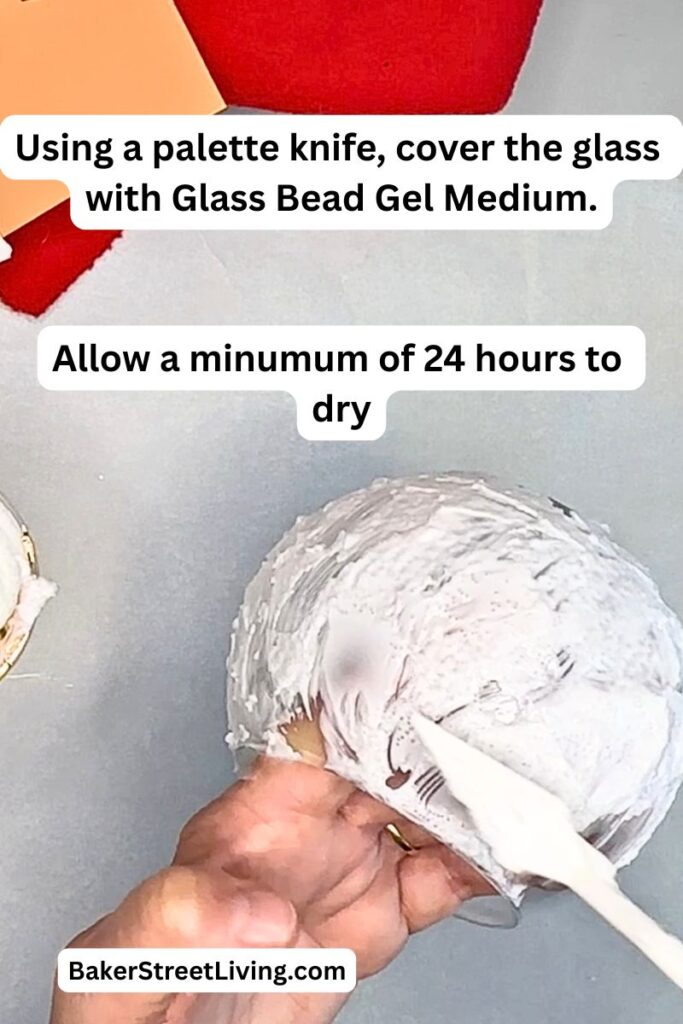
This is where the glass bead gel gives the snowman its pretty frosted appearance.
Using a paintbrush, apply glass bead gel to the outside of the glass vase.
You don’t need to completely cover the glass. Leaving some areas more transparent allows the LED lights to shine through while the glass bead gel creates a sparkling, snowy texture.
Allow the gel to dry completely according to the manufacturer’s instructions. I am using Liquitex brand acrylic medium with glass beads applied in a fairly heavy coat. I allowed it to dry for 24 hours. Set it aside and work on the head while the glass base is drying.
Tip: Apply the gel unevenly rather than creating a perfectly smooth coating. The variation makes the finished body look more like sparkling snow.
3. Add the Lights
Once the glass bead gel is completely dry, place a string of white fairy lights inside the vase.
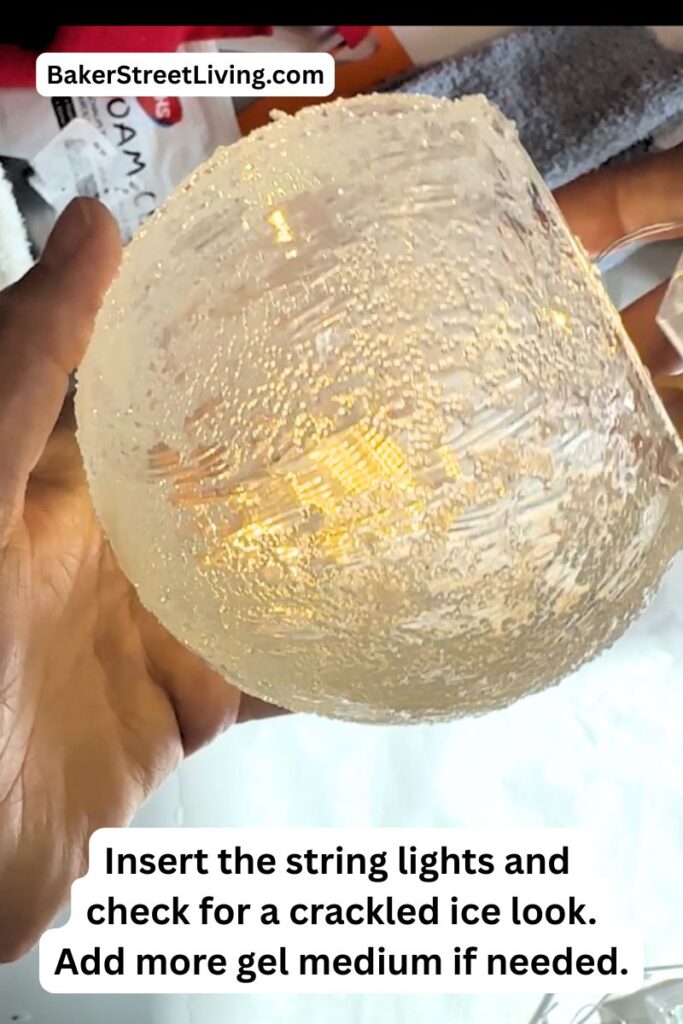
Turn the lights on and check for any surface areas that need a little more gel medium.
Complete touch-ups as desired, then let the surface dry again.
Remove the lights and continue working on the rest of the project.
Important safety tip
Use LED lights only, since they produce very little heat. Never use candles or any heat-producing light source inside the glass vase.
4. Make the Snowman’s Head
For the head, use a Styrofoam ball that is proportionate to your glass vase.
Stretch a clean white sock over the Styrofoam ball.
Pull the sock smoothly over the ball so there aren’t large wrinkles across the front of the snowman’s face.
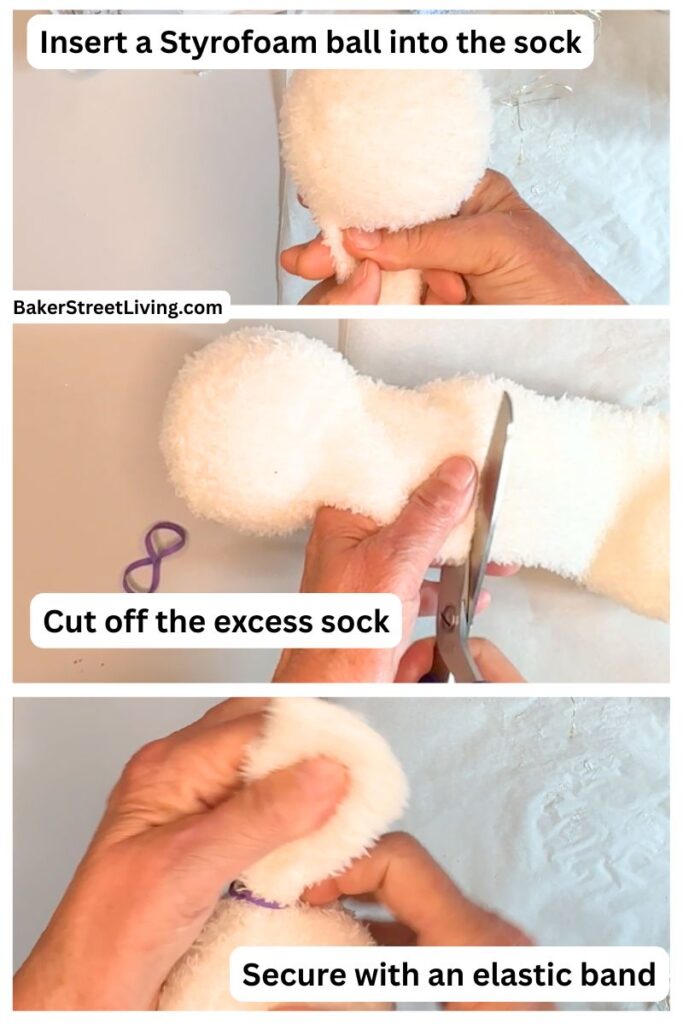
Add a bead of hot glue to the opening.
Pull the sock tightly and secure it with an elastic band.
Press into the hot glue and hold for a second or two to set.
Trim away excess material if necessary.
The sock gives the head a soft, slightly textured appearance that works really well with the frosty glass body.
5. Make the Snowman’s Hat
Cut the snowman’s hat from a fleece of another fuzzy sock in the colour of your choice.
Place the leg opening of the sock over the top of the snowman’s head.
Determine placement and glue it in place with hot glue.
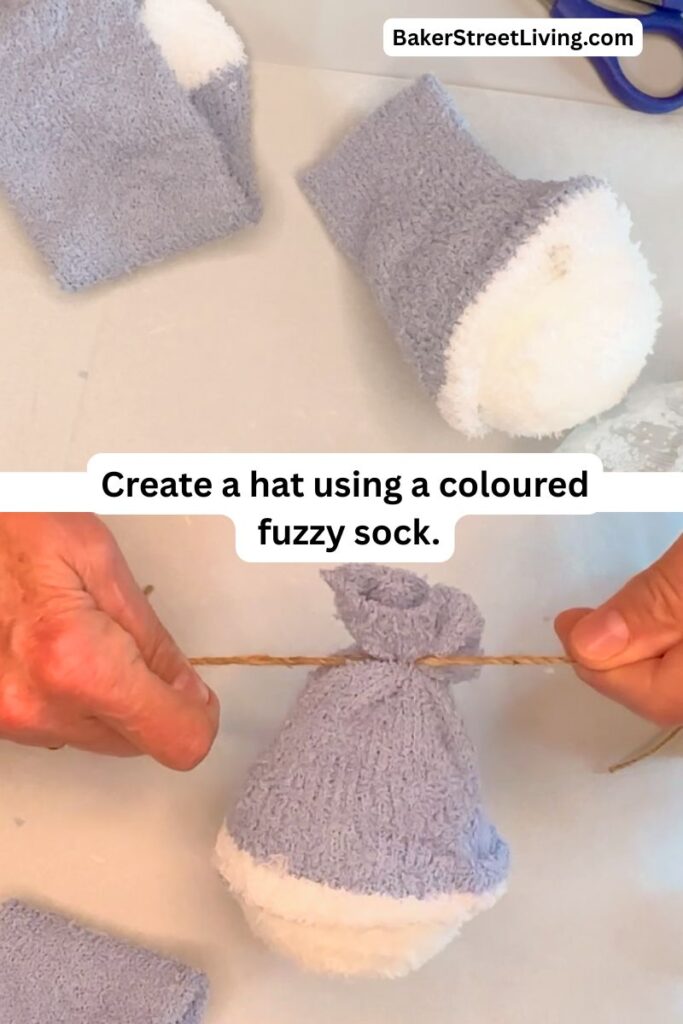
Fold up the bottom of the hat and glue in place to create a brim. (Optional)
If you’re making an extra tall hat, add a small amount of polyfill to the hat to make it stand up.
Gather the top of the hat/toque and tie it with twine or string.
Clip the ends to create a loose pom-pom look.
6. Create the Facial Features
Using Air Dry Foam Clay, roll tiny balls for the mouth and two larger ones for the eyes.
For the eyes, press the balls to flatten them.
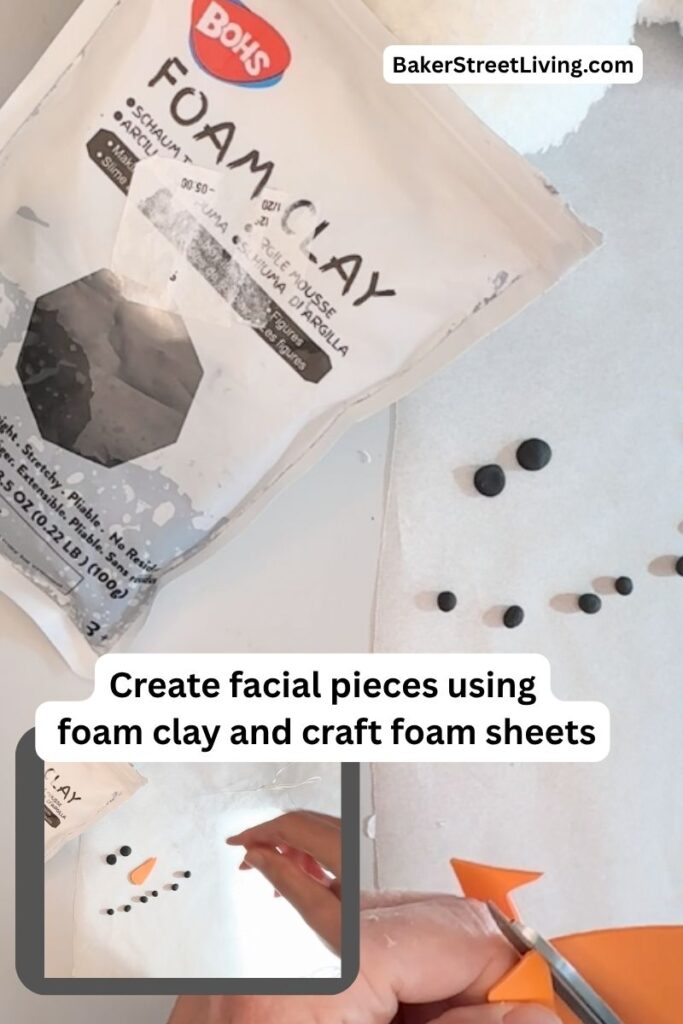
Cut a small carrot-shaped nose from an orange or2mm EVA craft foam sheet.
8. Add the Face
Using hot glue, adhere the eyes first, followed by the nose and then the small balls for the mouth.
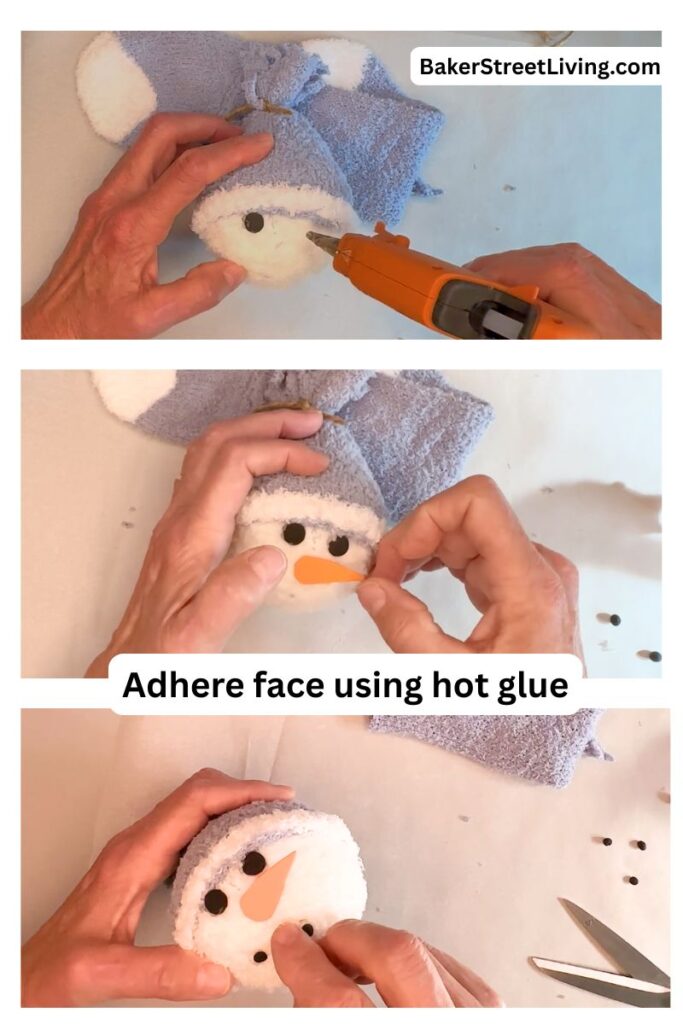
Allow the face to dry.
9. Add the Scarf
Cut one long strip from the sock (matching the hat) for the scarf and a shorter strip for the part of the scarf that hangs down.
Wrap it around the snowman’s neck and secure it to the base with a small amount of hot glue if necessary.
Cut several slits into both ends of the short piece for fringe.
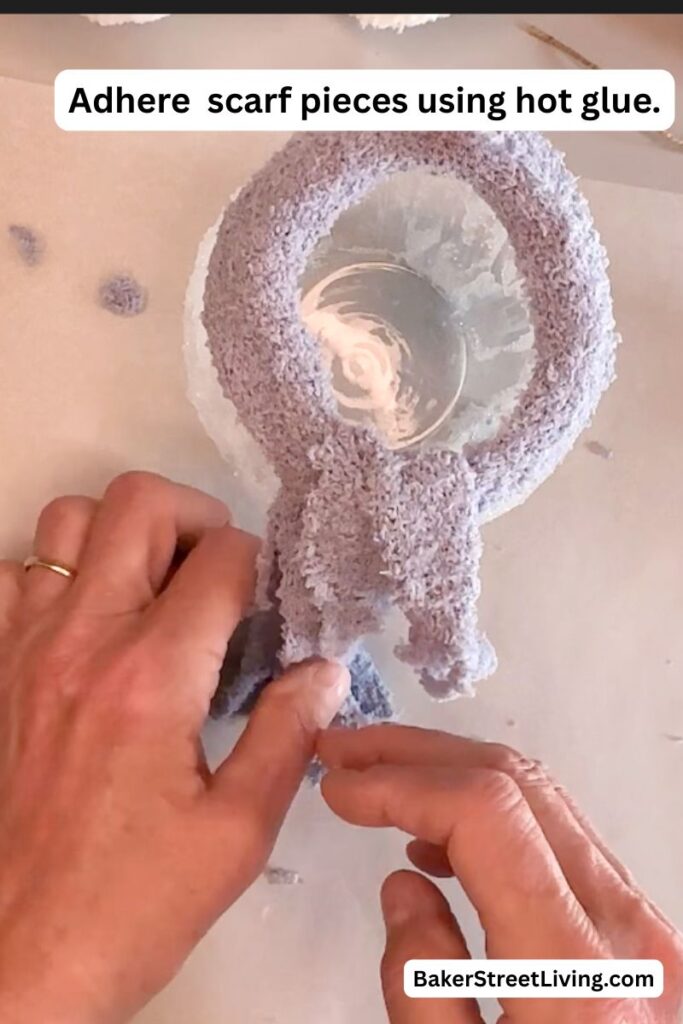
Glue the long scarf piece to the top edge of the glass base, placing the short piece under the long piece. Fold it over the top of the scarf to hang down.
Trim ends if necessary
For a festive finishing touch, add a small Christmas embellishment such as:
10. Embellish
- Mini pinecones
- Faux greenery
- Red berries
- Ribbon
- A small bell
- Snowflakes
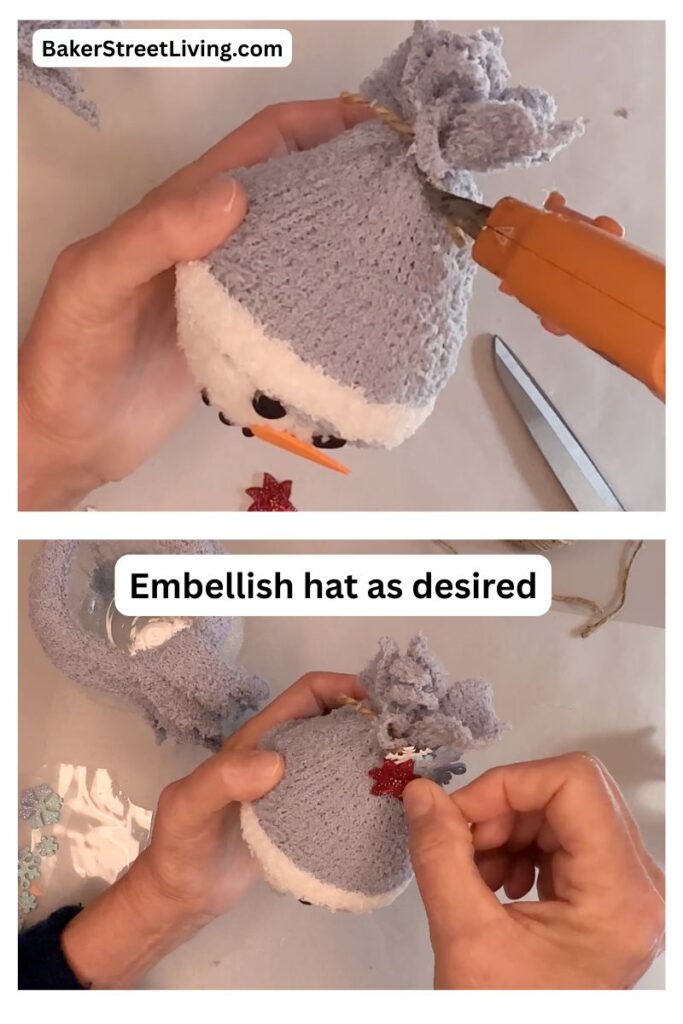
This is also a great place to add your own personal style.
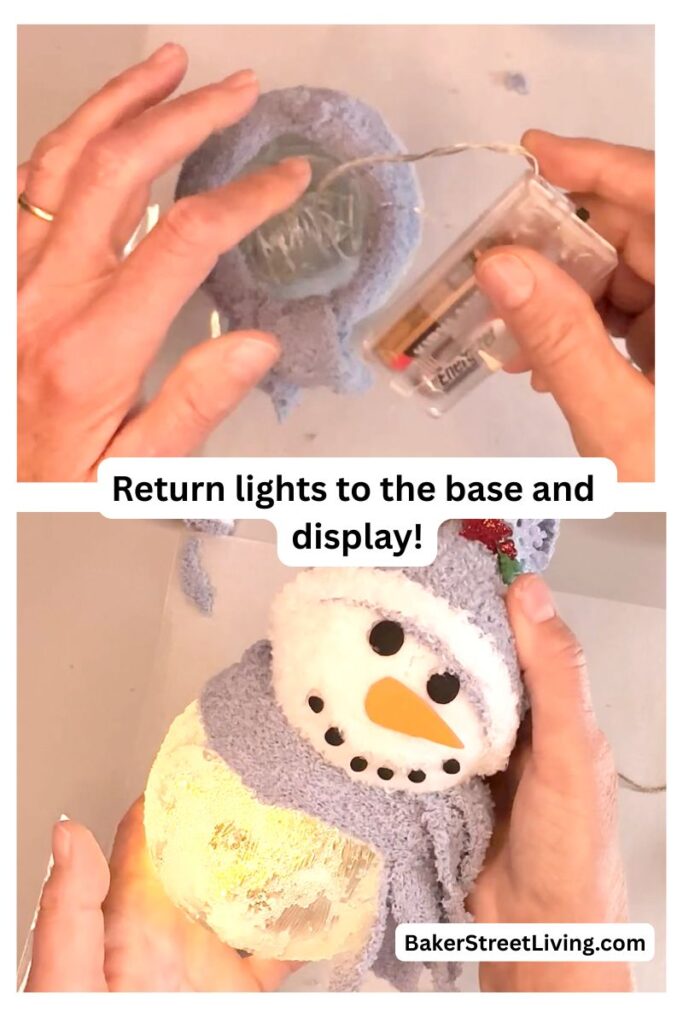
11. Return the lights to the base
Arrange the lights so they are distributed throughout the body rather than sitting in one pile at the bottom.
The lights will shine through the glass and bead gel, creating the snowman’s warm glow.
Tips and FAQs
How to add Colour to Cheeks
For a slightly pink cheek, use a very light pink pigment powder and a soft brush. Tap the excess off the brush and pounce it lightly on the face. (as in top post image)
Alternatively, you could use blush and a makeup brush, following the same method.
Don’t overdo the glass bead gel.
You want the glass bead gel to create sparkle without completely blocking the light.
For best results. apply a light coat and let it dry; test with the lights and add more as needed.
Give the bead gel at least 24 hours to dry.
Make the head proportional.
The Styrofoam ball should be large enough to look like a snowman’s head but not so large that it overwhelms the glass body.
The ball should be slightly larger than the hole of the globe vase.
Can I make the snowman without glass bead gel?
Yes, use any product that gives a frosted look, such as spray-on glass frosting. Paint on snowflakes with dimensional paint. Don’t overdo it! Less is more.
Alternatives to Fleece Fabric
Feel free to substitute the fleece for other craft fabrics or supplies you have on hand. Good options include felt, recycled sweater pieces or low-pile faux fur.


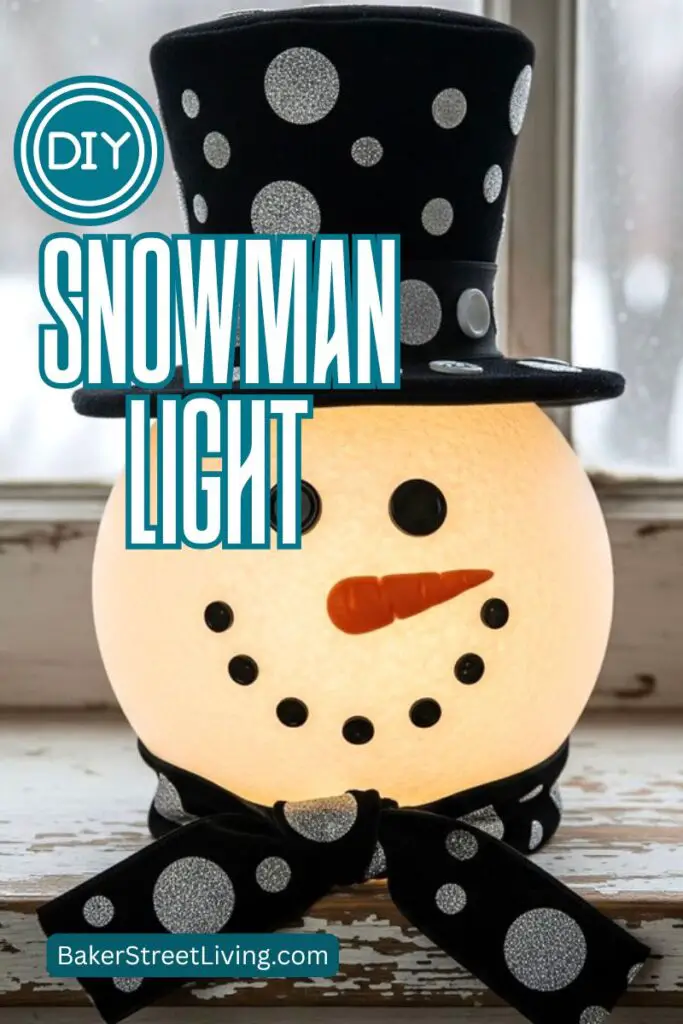
This DIY light up snowman is such a fun way to add a little extra sparkle and warmth to your Christmas decorating. The combination of the frosted glass bead gel, soft white LED lights and cozy fleece accessories gives this snowman a charming glow that looks beautiful on a mantel, shelf or holiday table. Best of all, you can easily change the colours and embellishments to create a snowman that fits your own Christmas style. Gather a few simple supplies and make your own glowing snowman to enjoy throughout the holiday season.

This website contains affiliate links. As an Amazon affiliate, I earn a small commission from qualifying purchases (at no cost to you).
